What Type of Paint to Use on Kitchen Walls: Ultimate Guide 2025
Kitchen walls take more abuse than almost any other surface in your home: they’re splattered with grease, steamed by boiling pots, wiped down multiple times a week, and exposed to constant humidity from dishwashers and stovetops. The right paint doesn’t just make your space look beautiful—it forms a protective barrier that resists stains, mold, and peeling, so your walls stay fresh for years without frequent repainting. With hundreds of paint options on the market, conflicting advice, and outdated recommendations floating around, it’s easy to waste money on a product that won’t hold up to your kitchen’s demands. You can also read our guide on what paint is good for kitchen walls.
This 2025 guide cuts through the noise to break down exactly what type of paint to use on kitchen walls, how to match sheen and formulation to your cooking habits and design style, and how to prep, apply, and maintain your paint job for maximum longevity. We’ll cover honest trade-offs, 2025-specific product innovations, and common mistakes to avoid so you can get a professional, long-lasting finish without the guesswork. You can also read our guide on what finish paint for kitchen walls.
How to Match Paint Sheen to Your Kitchen’s Daily Use
Paint sheen (the level of light reflection on the finished surface) is the single most important factor in how well your kitchen paint will hold up to daily use. Higher sheen levels create a harder, more moisture-resistant surface that’s easier to clean, while lower sheens offer a softer, more muted look but sacrifice durability. Use the comparison table below to match sheen to your kitchen’s traffic level:
| Sheen Level | Light Reflection | Durability | Cleanability | Best Kitchen Use Case |
|---|---|---|---|---|
| Matte | 0-5% (flat, no shine) | Low | Poor (scrubbing removes finish) | Low-traffic kitchens, guest bathrooms, pantry walls rarely touched |
| Eggshell | 5-10% (soft, subtle sheen) | Medium | Fair (gentle wiping only) | Kitchens with light cooking, no young kids, low grease output |
| Satin | 10-25% (soft glow, no glare) | High | Excellent (withstands regular scrubbing) | Most standard kitchens, high-traffic family homes, walls near cooktops |
| Semi-Gloss | 25-35% (noticeable shine) | Very High | Exceptional (resists grease, moisture, stains) | Backsplashes, walls near sinks, trim, cabinets |
| High-Gloss | 35%+ (mirror-like shine) | Highest | Outstanding (scrub-proof) | Accent walls, cabinet exteriors, trim (not recommended for large wall surfaces) |
In practice, most homeowners choose satin for main kitchen walls because it balances a warm, inviting aesthetic with the ability to wipe away tomato sauce or grease splatters without leaving marks. A common mistake is picking high-gloss for large wall surfaces: it will highlight every drywall mud line, nail hole, and unevenness in your walls, making flaws impossible to ignore. For most standard kitchens, satin is the sweet spot between style and function. You can also read our guide on how to clean kitchen grease off painted walls.
Paint Formulations Explained: Water-Based, Oil-Based, and Hybrid Options
Once you’ve chosen a sheen level, the next decision is paint formulation. In 2025, there are three primary options for kitchen walls, each with unique pros and cons:
Water-Based (Latex and Acrylic) Paints
Water-based paints are the most popular choice for kitchen walls in 2025, thanks to their low VOC content, fast drying time (1-2 hours between coats), and easy water-based cleanup. Standard latex paint is affordable and works well for low-traffic kitchens, while acrylic paint has extra binders that make it more flexible and moisture-resistant, ideal for high-humidity homes or kitchens with poor ventilation. Most modern water-based kitchen paints also include built-in mildewcides to prevent mold growth in damp conditions. You can also read our guide on how to fix wall tiles in kitchen.
The main trade-off of water-based paint is that it may not adhere well to existing oil-based primer or paint without a bonding primer, which can add extra cost and prep time. You can also read our guide on how to clean kitchen walls for painting.
Oil-Based (Alkyd) Paints
Oil-based paints form an extremely hard, durable finish that resists scrubbing, moisture, and grease better than almost any water-based option. They are a strong choice for kitchen trim, cabinets, or walls in coastal homes with extreme humidity. However, oil-based paints have significant downsides: they emit strong fumes during application, require 4-6 hours of drying time between coats, and need mineral spirits for cleanup. Many U.S. states also restrict residential use of oil-based paints due to high VOC emissions, so check local regulations before purchasing. If you are repainting over existing oil-based paint, you will need a bonding primer to ensure water-based paint adheres properly. You can also read our guide on decoration for on top of kitchen cabinets.
Hybrid (Water-Based Alkyd) Paints
Hybrid paints are a 2025 innovation that combines the low VOC, fast drying, and easy cleanup of water-based paint with the hard, durable, high-sheen finish of oil-based paint. They are ideal for kitchen cabinets, trim, and high-traffic wall surfaces, and perform as well as traditional oil-based paint without the strong fumes or long drying time. Popular 2025 options include Benjamin Moore Aura Grand Entrance and Sherwin-Williams ProClassic. The only trade-off is a higher price point than standard water-based paint, but the extended lifespan often makes them cost-effective in the long run. You can also read our guide on how to paint high walls above kitchen cabinets.
Must-Have Performance Features for Kitchen Walls
Regardless of sheen or formulation, all kitchen paints should include key performance features to stand up to the unique demands of the space:
Moisture and Grease Resistance
Kitchens regularly see humidity spikes of 60% or higher during cooking and dishwasher cycles, per U.S. Environmental Protection Agency indoor air quality guidelines. Paint with a built-in moisture barrier prevents peeling, bubbling, and water damage to drywall, while a grease-resistant non-porous surface stops cooking splatters from soaking into the wall and causing permanent yellowing or staining. You can also read our guide on stains on kitchen walls what to use.
Mold and Mildew Resistance
Mold can grow on painted kitchen walls within 24-48 hours of sustained moisture exposure, leading to health risks and unsightly stains. Look for paints that meet ASTM D3273 mold resistance standards, or include added mildewcides to block fungal growth. Zero-VOC paints often include these additives as a standard feature, making them a good choice for allergy sufferers. You can also read our guide on beige kitchen cabinets what color walls.
Scrub Resistance
Scrub resistance measures how many cleaning cycles a paint can withstand before showing wear or fading. For kitchen walls, look for paints rated for 500 or more scrub cycles, a standard set by the Paint Quality Institute. Higher scrub ratings mean your paint will stay looking new even with regular wiping down of grease and food splatters. Note that higher scrub ratings are almost always paired with higher sheen levels, so if you prioritize a matte look, you will need to sacrifice some washability. You can also read our guide on what colour walls goes with grey kitchen units.
Eco-Friendly and Low-Tox Paint Options for 2025
If you’re concerned about indoor air quality or your environmental impact, 2025 offers more eco-friendly kitchen paint options than ever before, with no sacrifice in performance:
Low-VOC and Zero-VOC Formulations
Volatile organic compounds (VOCs) are the chemicals in traditional paint that cause strong fumes, headaches, and respiratory irritation. Low-VOC paints have reduced VOC levels, while zero-VOC paints contain no measurable VOCs at all, making them ideal for kitchens with limited ventilation, homes with young children, or people with chemical sensitivities. Look for the EPA Safer Choice label to certify that the paint meets strict standards for human and environmental health. Note that zero-VOC paint still releases minor fumes during the first 2-3 hours of application, so keep windows open and fans running during painting. You can also read our guide on what colors are best for kitchen walls.
Non-Toxic and Natural Paint Options
For severe chemical sensitivities, natural paints made from clay, chalk, plant-based oils, and casein (milk protein) are a safe alternative to synthetic paints. These contain no petroleum-based chemicals, synthetic dyes, or added mildewcides, and are free of the allergens common in traditional paint. Look for certifications like Green Seal or Greenguard Gold, which test for thousands of toxic chemicals. The trade-off of natural paints is a more limited color range and the need for 3-4 coats for full coverage, compared to 2 coats for standard paint. You can also read our guide on best rug for kitchen sink area.
Sustainable Manufacturing Practices
Beyond the paint itself, choose brands that prioritize sustainability: many 2025 paint manufacturers use recycled packaging, run on renewable energy, and offer take-back or refill programs for leftover paint to reduce waste. Some hardware stores even offer refill stations for paint cans, cutting down on single-use plastic waste. You can also read our guide on oak kitchen cabinets what color walls.
Color Selection Tips to Complement Your Kitchen Design
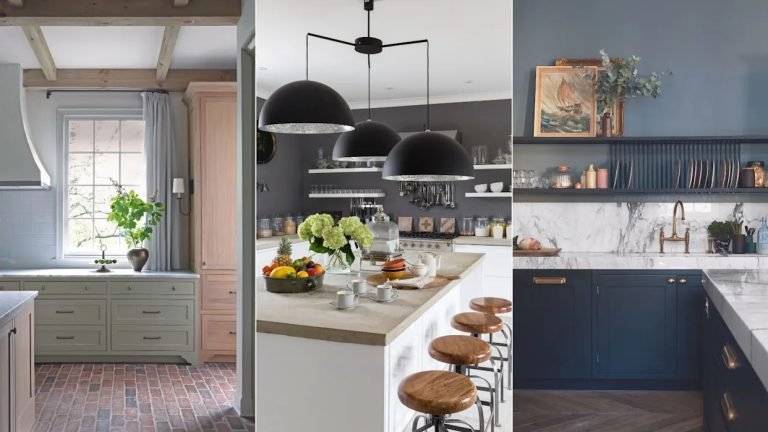
The right wall color will tie your kitchen together, make the space feel larger or cozier, and complement your existing cabinets, countertops, and decor:
Undertone Matching for a Cohesive Look
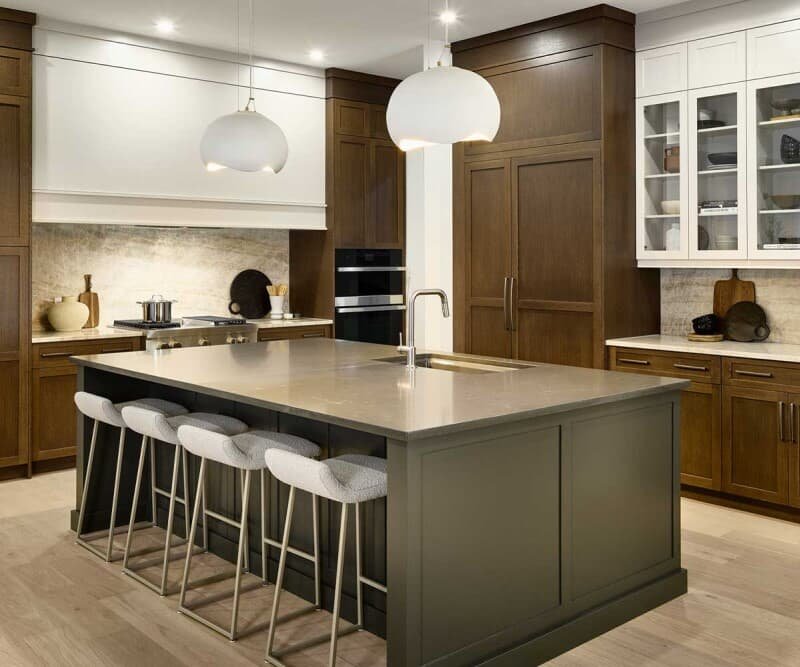
Every paint color has an undertone (warm, cool, or neutral) that needs to align with the undertones of your fixed kitchen features. For example, a cool gray wall will clash with warm oak cabinets, while a warm off-white will complement them seamlessly. For a warm, cozy farmhouse aesthetic, pair wall hues with dark brown cabinetry, or opt for soft sage green walls to complement matching wall shades to green cabinetry for a fresh, organic vibe. You can also read our guide on how to take off wall tiles in kitchen.
Color Tricks for Small or Dim Kitchens
Light, cool colors (soft white, pale blue, light gray) reflect more light, making small kitchens feel larger and more open. Use a monochromatic color scheme (same hue for walls and upper cabinets) to create a seamless, spacious look. For dim kitchens, avoid painting all four walls a dark color, which will close in the space; instead, use a dark accent wall behind the stove or sink to add depth without sacrificing brightness. You can also read our guide on what color walls go with dark grey kitchen cabinets.
Coordinating With Backsplashes and Countertops
Your wall color should complement, not compete with, your backsplash and countertops. For busy stone countertops with heavy veining (like marble or quartzite), choose a neutral wall color to avoid visual clutter. For solid-color countertops (like white quartz or black granite), you can add a soft accent color on an accent wall for visual interest. If you are working with coordinating paint with dark brown cabinetry, a light neutral wall will balance the dark tones and make the space feel brighter. You can also read our guide on how to remove a kitchen wall cabinet.
Step-by-Step Wall Prep for Long-Lasting Results
Skipping or rushing wall prep is the number one cause of premature kitchen paint failure, leading to peeling, bubbling, or staining within 1-2 years. Follow these steps for a finish that lasts 5+ years:
Degreasing and Cleaning
This is the most overlooked step in kitchen painting. Baked-on cooking grease on walls creates a non-porous barrier that prevents paint from adhering to drywall. Use a TSP substitute degreaser or a mixture of warm water and trisodium phosphate to scrub all wall surfaces, then rinse with clean water and let dry completely. For heavy grease buildup, refer to our guide to removing built-up grease from kitchen walls to avoid damaging drywall. A common mistake is using only soap and water, which does not cut through hardened cooking grease. You can also read our guide on light gray kitchen cabinets what color walls.
Repairing Damage and Sanding
Fill any holes, cracks, or peeling paint with spackling paste, let dry fully, then sand smooth with 120-grit sandpaper, followed by 220-grit sandpaper for a flawless finish. Lightly sand the entire wall surface with 220-grit sandpaper to create a rough "tooth" for the paint to grip, even if there is no visible damage. Skipping this sanding step is a common cause of poor paint adhesion and early peeling. You can also read our guide on what paint finish to use on kitchen walls.
Priming for Adhesion and Stain Blocking
Primer is non-negotiable for kitchen walls, especially if you are painting over a dark color, repairing water damage, or covering existing grease stains. Use a stain-blocking, moisture-resistant primer (like Zinsser Bulls Eye 1-2-3) to seal in any existing stains and prevent them from bleeding through your new paint. If you are switching from oil-based to water-based paint, use a bonding primer to ensure proper adhesion. Prepping greasy kitchen surfaces before painting with a degreaser first will make your primer and paint last twice as long. You can also read our guide on what colour walls for a white kitchen.
You will need the following tools and materials for prep and painting:
- TSP substitute degreaser or trisodium phosphate
- Mild dish soap and warm water
- Spackling paste and putty knife
- 120-grit and 220-grit sandpaper (or sanding sponge)
- Stain-blocking, moisture-resistant primer
- Synthetic roller covers (3/8" or 1/2" nap for satin/semi-gloss)
- Angled sash brush (2-2.5" wide)
- Painter’s tape
- Drop cloths or plastic sheeting
- Paint tray and liner
Pro Painting Techniques for a Flawless Finish
Even with the right paint and prep, your painting technique will make or break the final result:
Applying Thin, Even Coats
Always apply thin, even coats of paint rather than one thick coat. Thick coats take longer to dry, are more likely to drip or sag, and can crack over time as they cure. Let each coat dry completely (check the paint can for recommended dry time, usually 2-4 hours for water-based paint) before applying the next coat. Lightly sand with 220-grit sandpaper between coats to smooth any raised texture or roller marks. Two coats are usually sufficient for full coverage, but three may be needed when painting over a dark color or when using a light paint shade. You can also read our guide on satin flatware.
Tool Selection for Smooth Results
For satin and semi-gloss paint, use a 3/8" or 1/2" nap synthetic roller cover to avoid lap marks and leave a smooth, even finish. Use an angled sash brush to cut in around trim, cabinets, and edges before rolling large wall surfaces to ensure clean lines. A cheap, low-quality roller cover will leave lint and uneven texture, so invest in a mid-range option for the best results. You can also read our guide on what color kitchen cabinets go with gray walls.
Drying and Curing Best Practices
“Dry to touch” (when paint no longer feels sticky to the finger) is not the same as fully cured. Water-based paint reaches full durability and stain resistance after 30 days of curing, while oil-based paint cures in 7 days. Avoid cleaning walls, hanging items, or placing furniture against painted walls for at least 7 days after painting, even if the paint feels dry to the touch. Keep the kitchen well-ventilated during the curing process to prevent moisture from getting trapped in the paint, which can cause bubbling or peeling. You can also read our guide on how to clean oil grease from kitchen wall.
Maintaining Your Painted Kitchen Walls for 10+ Years
With proper care, a high-quality kitchen paint job can last 5-10 years before needing a full repaint. Follow these maintenance tips to extend its lifespan:
Safe Cleaning Practices
For satin and semi-gloss finishes, use a soft microfiber cloth dipped in warm, soapy water (mild dish soap works best) to wipe away grease and splatters. Avoid abrasive cleaners, scouring pads, or bleach, which can break down the paint’s protective layer and cause fading. For stubborn stains, make a paste of baking soda and water, apply gently with a cloth, then wipe clean. Always test any cleaning solution on a small, hidden area first to ensure it doesn’t damage the finish. For heavy grease buildup, refer to our guide to removing built-up grease from kitchen walls to avoid damaging the paint. You can also read our guide on piece place setting fiesta dinnerware.
Touch-Up Techniques for Chips and Scratches
Keep a small container of leftover paint (stored in a cool, dark place) for quick touch-ups of small chips or scratches. For tiny marks, use a small artist’s brush to apply paint exactly to the damaged area, then feather the edges with a dry brush to blend it seamlessly into the surrounding paint. If you don’t have leftover paint, take a small chip of the existing paint to a hardware store for professional color matching. Touch up small marks as soon as they appear to prevent them from expanding, and avoid needing a full repaint. You can also read our guide on tile designs for kitchen floors.
When to Repaint Your Kitchen Walls
Most kitchen walls need a full repaint every 3-5 years, depending on your cooking habits and ventilation. Signs it’s time to repaint: widespread peeling or cracking, discoloration that won’t come off with cleaning, or a dull, uneven finish. If you’re updating your kitchen’s style, repainting walls is the cheapest, most impactful change you can make. For coordinating paint with dark brown cabinetry, a fresh coat of light paint will make the dark cabinets pop without the cost of a full cabinet replacement. You can also read our guide on what color to paint kitchen walls with dark cabinets.
Common Kitchen Paint Mistakes to Avoid
Even experienced DIYers make these common errors that lead to premature paint failure:
- Skipping degreasing during prep: 90% of kitchen paint peeling is caused by grease buildup under the paint that prevents adhesion. Always use a dedicated degreaser to clean walls before prepping.
- Using the wrong sheen for your traffic level: Matte paint in a high-traffic family kitchen will show every smudge and scratch, and cannot be cleaned without damaging the finish. Stick to satin or higher for busy kitchens.
- Rushing drying and curing times: Hanging items or cleaning walls too soon after painting can cause dents, smudges, or poor adhesion. Wait at least 7 days before heavy use of the walls.
- Using cheap, low-quality paint: Budget paints have lower pigment and binder content, leading to poor coverage, faster fading, and less durability. Spending $10-$15 more per gallon on premium paint will save you money on repainting in the long run.
Frequently Asked Questions
What paint finish is best for kitchen walls?
Satin is the most versatile, all-purpose finish for most kitchen walls, as it balances a soft, warm aesthetic with excellent moisture, grease, and stain resistance. For walls near sinks, backsplashes, or trim, semi-gloss or high-gloss is ideal for its superior scrub-ability and moisture barrier. Matte is only recommended for low-traffic kitchens with minimal cooking, as it cannot withstand regular scrubbing. You can also read our guide on www yoursite com what height are kitchen wall.
Can I use oil-based paint in my kitchen?
Yes, oil-based (alkyd) paint is extremely durable and resistant to moisture and grease, making it a good choice for high-humidity kitchens or for painting cabinets and trim. However, it has strong fumes during application, requires 4-6 hours of drying time between coats, and needs mineral spirits for cleanup. Many U.S. states also restrict residential use of oil-based paints due to high VOC emissions, so check local regulations before purchasing. If you are applying oil-based paint over existing water-based paint, you will need a bonding primer to ensure proper adhesion. You can also read our guide on best felt pads for chair legs.
Is washable paint necessary for kitchens?
Yes, washable paint is highly recommended for all kitchen walls, as it is formulated to withstand regular scrubbing without losing its color or finish. Look for paints rated for 500 or more scrub cycles, which is the standard for high-traffic kitchen surfaces. Non-washable matte paints will stain permanently from grease splatters and cannot be cleaned without damaging the finish. You can also read our guide on best heat resistant oven mitts.
Should I use primer before painting kitchen walls?
Yes, primer is a non-negotiable step for kitchen wall painting. It improves paint adhesion, blocks stains from bleeding through your new paint, and creates a uniform base for better color coverage. For kitchens, use a stain-blocking, moisture-resistant primer to seal in any existing grease or water stains, and to prevent mold and mildew growth behind the paint. You can also read our guide on apron hanging in kitchen.
Conclusion
Choosing the right paint for your kitchen walls doesn’t have to be overwhelming. For most homeowners, a satin or semi-gloss water-based paint with built-in mildew and grease resistance offers the best balance of durability, easy maintenance, and aesthetic appeal. Prioritize zero-VOC or low-VOC formulations to protect your family’s indoor air quality, and always invest in proper wall prep to extend the lifespan of your paint job by 2-3 years. You can also read our guide on how to clean oil stains from kitchen walls.
If you’re still unsure which paint to choose, pick up sample pots of 2-3 shades to test on your wall for 24 hours, as paint color can look drastically different in your kitchen’s unique lighting. Ready to start your kitchen refresh? For step-by-step guidance on prepping and painting your kitchen walls, check out our full prep guide for greasy kitchen surfaces. You can also read our guide on grey kitchen units what colour walls.
 Satin semi-gloss white paint on a kitchen wall behind a stainless steel sink, showing moisture resistance and easy cleanability
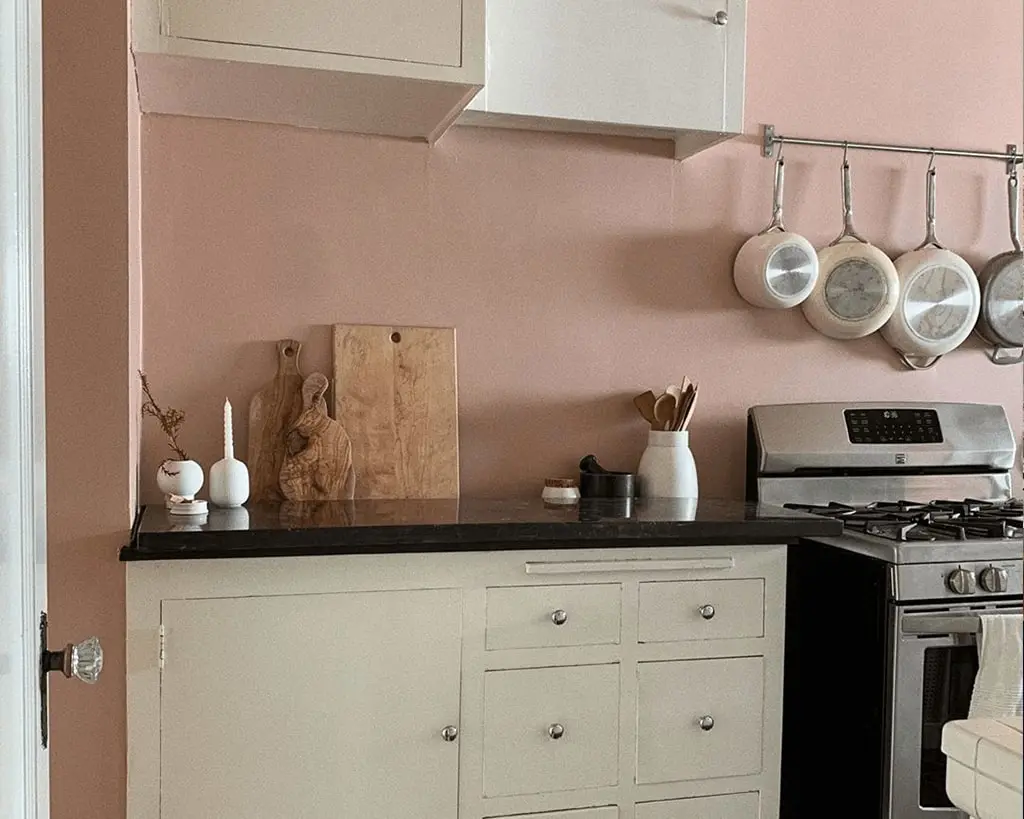 Side-by-side view of matte (left) and satin (right) paint finishes on kitchen walls, showing differences in sheen and light reflection
Common Kitchen Paint Mistakes to Avoid
Even experienced DIYers run into these preventable errors that cut kitchen paint lifespans short:
- Skipping the degreasing step: Over 90% of premature kitchen paint peeling stems from baked-on cooking grease left on walls during prep, which creates a non-porous barrier that prevents paint from bonding to drywall. Always use a TSP substitute or dedicated kitchen degreaser to scrub all wall surfaces before sanding or priming.
- Mismatching sheen to your lifestyle: Matte paint looks soft and modern, but it cannot withstand regular scrubbing in a busy family kitchen, and even gentle wiping will leave faint marks over time. Stick to satin or higher sheen for walls that see daily cooking, kids, or pets.
- Rushing drying and curing windows: Paint feels dry to the touch in 2-4 hours, but it takes 30 days to fully cure and reach maximum stain and moisture resistance. Hanging pots, leaning furniture, or wiping walls too soon can cause dents, smudges, or poor adhesion that leads to peeling later.
- Skipping primer to save time: Primer is non-negotiable for kitchen walls, as it blocks existing grease stains, water damage, and dark paint colors from bleeding through your new topcoat. A cheap $15 can of primer will save you from having to repaint an entire wall in 2 years due to stain bleed-through.
Frequently Asked Questions
What paint finish is best for kitchen walls?
Satin is the most versatile, all-purpose finish for most kitchen walls, as it balances a soft, warm aesthetic with excellent moisture, grease, and stain resistance. For walls near sinks, backsplashes, or trim, semi-gloss or high-gloss is ideal for its superior scrub-ability and moisture barrier. Matte is only recommended for low-traffic kitchens with minimal cooking, as it cannot withstand regular scrubbing without damaging the finish. You can also read our guide on how to protect wall behind kitchen sink.
Can I use oil-based paint in my kitchen?
Yes, oil-based (alkyd) paint is extremely durable and resistant to moisture and grease, making it a good choice for high-humidity kitchens or for painting cabinets and trim. However, it has strong fumes during application, requires 4-6 hours of drying time between coats, and needs mineral spirits for cleanup. Many U.S. states also restrict residential use of oil-based paints due to high VOC emissions, so check local regulations before purchasing. If you are applying oil-based paint over existing water-based paint, you will need a bonding primer to ensure proper adhesion. You can also read our guide on what color to paint kitchen walls with light grey cabinets.
Is washable paint necessary for kitchens?
Yes, washable paint is highly recommended for all kitchen walls, as it is formulated to withstand regular scrubbing without losing its color or finish. Look for paints rated for 500 or more scrub cycles, which is the standard for high-traffic kitchen surfaces. Non-washable matte paints will stain permanently from grease splatters and cannot be cleaned without damaging the finish. You can also read our guide on apron kitchen and bar.
Should I use primer before painting kitchen walls?
Yes, primer is a non-negotiable step for kitchen wall painting. It improves paint adhesion, blocks stains from bleeding through your new paint, and creates a uniform base for better color coverage. For kitchens, use a stain-blocking, moisture-resistant primer to seal in any existing grease or water stains, and to prevent mold and mildew growth behind the paint. You can also read our guide on how to paint wall tiles in kitchen.
Conclusion
Choosing the right paint for your kitchen walls doesn’t have to be overwhelming. For most homeowners, a satin or semi-gloss water-based paint with built-in mildew and grease resistance offers the best balance of durability, easy maintenance, and aesthetic appeal. Prioritize zero-VOC or low-VOC formulations to protect your family’s indoor air quality, and always invest in proper wall prep to extend the lifespan of your paint job by 2-3 years. You can also read our guide on black flatware dishwasher safe.
If you’re still unsure which paint to choose, pick up sample pots of 2-3 shades to test on your wall for 24 hours, as paint color can look drastically different in your kitchen’s unique lighting. Ready to start your kitchen refresh? For step-by-step guidance on prepping and painting your kitchen walls, check out our full prep guide for greasy kitchen surfaces. You can also read our guide on how to paint wall above kitchen cabinets.