How to Clean Kitchen Walls Grease: Easy Tips for a Spotless Shine
Grease buildup on kitchen walls is one of the most common—and most dreaded—household cleaning challenges, turning once-bright cooking spaces into sticky, dull surfaces in as little as a few weeks of regular cooking. Many homeowners avoid tackling this task out of fear of damaging paint, wallpaper, or tile, but the right methods make it fast, safe, and effective. This guide covers everything from the root causes of wall grease to natural and commercial cleaning solutions, material-specific tips, and long-term prevention strategies to keep your kitchen walls spotless for months at a time.
What Causes Stubborn Kitchen Wall Grease?
Grease doesn’t appear on kitchen walls out of nowhere: it’s a byproduct of everyday cooking that accumulates gradually until it becomes visible. Understanding these root causes helps you target high-grease zones and prevent future buildup. You can also read our guide on how to clean oil grease from kitchen wall.
Cooking Oil Splatters and Sprays
Frying, searing, and sautéing at high heat send tiny, superheated oil droplets flying up to 3 feet from the pan. These droplets cool instantly on contact with cooler wall surfaces, forming a sticky film that binds to dust and dirt within hours. Cooking sprays leave an especially waxy residue that locks grease to walls, making stains harder to remove over time. Walls within 2 feet of your stovetop are at the highest risk, but grease can travel up to 5 feet with heavy frying.
Steam and Smoke from High-Heat Cooking
Boiling, grilling, and broiling release steam and smoke loaded with fine oil particles. When these hot particles hit cooler walls, they condense and adhere, leaving a thin, invisible greasy layer that builds up over weeks or months. This type of grease is often harder to spot than splatters, so it can go untreated for longer. You can also read our guide on how to remove kitchen cabinets without damaging wall.
Poor Ventilation
Kitchens without adequate airflow trap grease particles in the air instead of venting them outside. Recirculating range hoods that just filter air (rather than venting it outdoors) are a major contributor to this problem, as they capture only large grease particles and release smaller, oil-laden air back into the kitchen.
Wall Proximity to Cooking Appliances
Walls directly behind the stove, above the sink, and around the microwave see the most consistent grease exposure. Even walls on the opposite side of the kitchen can accumulate light grease over time if ventilation is poor.
Type of Cooking Oil Used
Oils with low smoke points (like butter, olive oil, and unrefined coconut oil) break down faster at high heat, releasing more sticky grease particles than high-smoke-point oils (like avocado or grapeseed oil). Frequent use of low-smoke-point oils will lead to faster, thicker grease buildup on nearby walls.
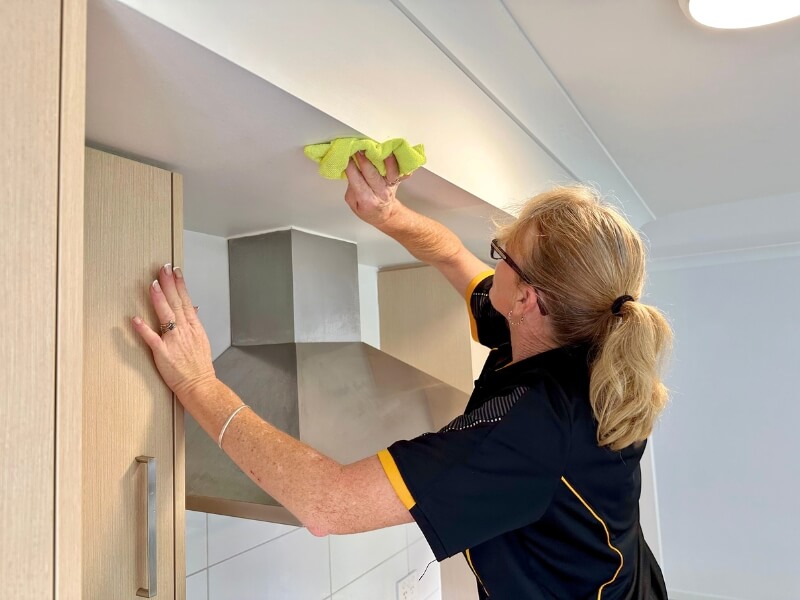
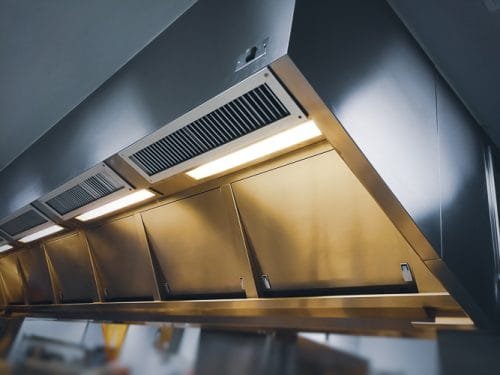
- Targeting high-grease zones like the area behind your range hood cuts down on stubborn buildup Credit: www.maid2match.com.au
Essential Supplies for Safe, Effective Grease Removal
Having the right tools on hand before you start cleaning will save you time, prevent wall damage, and make the process far less frustrating. Avoid abrasive scrubbers, steel wool, and harsh chemical cleaners like undiluted bleach, which can strip paint, etch tile, or damage wallpaper.
Natural Cleaning Solutions (Eco-Friendly and Surface-Safe)
These household ingredients are non-toxic, food-safe, and effective for light to moderate grease:
- White vinegar and water (1:1 ratio): Cuts through grease and disinfects, ideal for tile, semi-gloss paint, and laminate surfaces. Avoid on unsealed natural stone or grout, as vinegar’s acidity can cause etching.
- Baking soda paste (3 parts baking soda to 1 part warm water): A mild abrasive that lifts set-in grease from textured walls, grout lines, and stained surfaces.
- Lemon juice and water (½ cup lemon juice to 1 cup warm water): Cuts grease and whitens yellowed stains on light-colored paint, leaving a fresh, citrus scent.
- Castile soap solution (1 teaspoon castile soap per 2 cups warm water): Ultra-gentle, safe for flat/matte paint, vinyl wallpaper, and delicate surfaces.
Commercial Degreasers (For Heavy Buildup)
For grease that’s been accumulating for months, a commercial degreaser will cut through residue faster than natural solutions. Look for products certified under the FDA’s Safer Choice program, which are tested for safety on kitchen surfaces and free of harsh toxic chemicals. Avoid industrial-strength degreasers, which are formulated for garage floors and machinery and will damage household wall finishes.
Tools and Protective Gear
- Soft microfiber cloths (lint-free to avoid streaks)
- Soft-bristle scrub brush or detail brush for textured walls and grout
- Spray bottle for even cleaner application
- Drop cloth or old towels to protect floors and countertops
- Painter’s tape to protect trim and outlet covers
- Rubber gloves and a mask if using strong commercial cleaners
- Step stool for high wall sections
Pre-Clean Prep: Protect Your Walls and Surfaces
Skipping prep is the most common cause of wall damage during grease cleaning. These 5 steps will keep your surfaces safe and make cleaning faster:
- Clear the area: Move all furniture, appliances, and decor away from the walls to give you full access. If you can’t move large items like a refrigerator, cover them completely with plastic sheeting.
- Remove outlet covers and switch plates: Use a flathead screwdriver to take these off, and tape over the exposed outlets with painter’s tape to avoid water or cleaner getting inside.
- Dust the walls first: Use a dry microfiber cloth or soft brush to wipe away loose dust, crumbs, and debris. This prevents you from smearing dirt into the grease when you apply liquid cleaner, which can create permanent muddy stains.
- Test all cleaners: Apply a small amount of any cleaner you plan to use to a 2×2 inch hidden spot (like behind a cabinet or in a closet) and wait 10 minutes. Check for discoloration, peeling, or texture changes before proceeding.
- Protect surrounding surfaces: Lay drop cloths or old towels on the floor, and cover countertops, cabinets, and backsplashes with plastic sheeting to catch drips and splashes.
If you’re planning to repaint your kitchen after deep cleaning grease, make sure to follow our guide to prep for a fresh paint job to ensure paint adheres properly and lasts for years.
Natural Grease-Cleaning Solutions (Tested and Safe for Most Surfaces)
Natural cleaners are a great first line of defense for light to moderate grease, and they’re safe for most wall materials when used correctly. Always apply cleaner to a cloth or sponge first, rather than spraying directly on the wall, to avoid over-saturating drywall.
Vinegar and Water Mix
Spray the 1:1 vinegar solution onto a microfiber cloth (not directly on the wall) and wipe greasy areas in circular motions. Let it sit for 2-3 minutes to break down grease, then wipe clean with a damp cloth. This works especially well on tile and semi-gloss paint.
Baking Soda Paste
Apply the paste directly to stubborn grease spots using a soft cloth. Let it sit for 5-10 minutes to lift the grease, then scrub gently with a soft-bristle brush. Rinse with a damp cloth to remove any residual baking soda, which can leave a white film if left behind.
Lemon Juice Cleaner
Dab the lemon juice solution onto grease stains with a sponge, let it sit for 3 minutes, then wipe clean. The mild acidity in lemon juice breaks down grease and brightens yellowed stains on light-colored walls.
Castile Soap Solution
Dip a soft cloth into the diluted castile soap solution, wring it out until it’s barely damp, and dab greasy areas. This gentle formula is safe for flat paint and wallpaper, which can be damaged by harsher acids or abrasives.
How to Use Commercial Degreasers Without Damaging Walls
For heavy, set-in grease that natural cleaners can’t lift, a commercial degreaser is the most efficient option. Follow these steps to avoid damaging your walls:
- Choose a surface-safe product: Only use degreasers labeled for painted, tiled, or wallpapered surfaces. Avoid products with harsh solvents like acetone or toluene, which will dissolve paint and wallpaper adhesive.
- Apply correctly: Spray the degreaser onto a cloth or sponge, not directly on the wall, to avoid over-saturation. Apply it to greasy areas and let it sit for the time specified on the label (usually 1-5 minutes) to break down grease.
- Scrub gently: Use a soft-bristle brush to scrub tough spots, applying light pressure. Avoid aggressive scrubbing, which can scratch paint or tile.
- Rinse thoroughly: Wipe the area with a clean, damp cloth to remove all degreaser residue. Leftover residue will attract dirt and grease, leading to faster buildup in the future.
- Dry completely: Use a dry microfiber cloth to pat the wall dry, and let it air dry for at least 30 minutes before touching it again.
For set-in grease stains on painted walls, our guide to tackle set-in painted wall stains has targeted methods for avoiding paint damage.
Step-by-Step Grease Removal Process
Follow this simple workflow to clean your kitchen walls safely and effectively, no matter what cleaner you use:
- Dust and dry wipe: Start at the top of the wall and work your way down with a dry microfiber cloth to remove all loose dust and debris. For textured walls, use a soft-bristle brush to dislodge dust from crevices first.
- Apply cleaner: Dampen a cloth or sponge with your chosen cleaning solution, wringing out excess liquid so it’s barely damp. Apply the cleaner to greasy areas in 2×2 foot sections to avoid it drying before you can wipe it off.
- Scrub tough spots: For set-in grease, let the cleaner sit for 2-5 minutes to soften the residue, then scrub gently with a soft-bristle brush. Work in small sections to avoid missing spots.
- Rinse with clean water: Wipe each section with a cloth dampened with plain warm water to remove soap or degreaser residue. Use a fresh cloth, not the one you used to apply cleaner, to avoid spreading residue.
- Dry completely: Pat the wall dry with a clean microfiber cloth, and let it air dry fully before touching it again. This prevents water spots and mold growth on drywall.

- A damp microfiber cloth is ideal for light grease and routine wall wiping
How to Clean Grease Off Different Wall Materials
Not all wall materials can handle the same cleaning methods. Use these material-specific tips to avoid damage:
Painted Walls
For flat or matte paint, avoid liquid cleaners whenever possible. Blot fresh grease spots with a dry microfiber cloth first. If that doesn’t work, use a barely damp cloth with a tiny amount of castile soap solution, dabbing (not rubbing) the stain. For semi-gloss or satin paint, you can use a lightly damp sponge with dish soap, but always test in a hidden spot first. If you notice paint lifting, stop immediately and switch to a dry cleaning method. For extremely stubborn stains on painted walls, our guide to tackle set-in painted wall stains has targeted, paint-safe solutions.
Tiled Walls
Tile is far more durable than painted drywall, so you can use more aggressive cleaning methods without damage. Spray a 1:1 vinegar solution on the tiles and grout, let it sit for 5 minutes, then scrub with a soft-bristle brush. For stained grout, apply a baking soda paste, let it sit for 10 minutes, then scrub and rinse. To prevent future grease absorption, seal your grout every 6-12 months with a grout sealer. If you’re looking to refresh your kitchen tile, check out our guide to refresh tiled wall surfaces for a low-cost upgrade.
Wallpapered Walls
Wallpaper requires the gentlest care to avoid peeling or staining. Start by dusting the walls with a dry microfiber cloth or a vacuum with a brush attachment. For grease spots, dampen a cloth with warm soapy water, wring it out until it’s almost dry, and dab the stain gently—never rub, as this can damage the wallpaper adhesive. For vinyl-coated wallpaper, you can use a mild all-purpose cleaner, but always test in an inconspicuous spot first. If the wallpaper is old or uncoated, stick to dry cleaning methods only to avoid water damage.
Common Grease Cleaning Mistakes to Avoid
Even with the right supplies, these common errors can damage your walls or make grease worse:
- Using abrasive scrubbers: Steel wool, scouring pads, and stiff-bristle brushes scratch paint, remove wall finishes, and create rough spots where future grease will stick even faster. Stick to soft microfiber cloths and soft-bristle brushes only.
- Over-saturating drywall: Excess water seeps into drywall, causing swelling, mold growth, and paint peeling. Always wring out cloths and sponges until they’re barely damp, and avoid letting water pool on the wall.
- Mixing cleaning products: Combining bleach, vinegar, or ammonia creates toxic fumes that irritate your lungs, eyes, and skin. Stick to one cleaner at a time, and never mix products.
- Skipping the test patch: Even “safe” cleaners can react poorly with old paint, specialty finishes, or vintage wallpaper. Always test on a hidden 2×2 inch spot and wait 10 minutes to check for damage.
- Letting cleaner dry on the wall: Residue left behind attracts more dirt and grease, leading to faster buildup. Always rinse with a clean, damp cloth after cleaning, and dry the wall completely.
- Cleaning cold, hardened grease: Grease hardens when cool, making it far harder to remove. For stains that have been sitting for weeks, warm the area first with a hair dryer on low heat for 30 seconds to soften the grease before applying cleaner.
How to Prevent Future Kitchen Wall Grease Buildup
Consistent, small habits will cut down on deep cleaning sessions and keep your walls looking fresh for months:
Use a Splatter Guard While Cooking
A heat-resistant splatter guard placed over pans while frying or sautéing blocks most oil splatters from hitting your walls. They’re inexpensive, easy to clean, and work for all stovetop cooking methods.
Wipe Walls Weekly
Set a reminder to wipe down walls near the stovetop with a damp soapy cloth once a week. This removes fresh grease before it hardens and binds to dust, so you never have to tackle tough set-in stains.
Improve Kitchen Ventilation
Always turn on your range hood when cooking, and open a window if you don’t have a vent that exhausts to the outside. Proper ventilation carries grease particles out of the kitchen instead of letting them settle on walls. The EPA’s indoor air quality guidelines note that good ventilation also reduces harmful cooking fumes that can irritate your respiratory system.
Choose the Right Wall Finish
If you’re repainting your kitchen, opt for semi-gloss or satin paint in cooking zones. These finishes have a smooth, non-porous surface that repels grease and wipes clean easily, unlike flat or matte paint, which absorbs grease and is almost impossible to fully clean.
Keep Your Cooking Area Organized
Clutter around the stove traps grease and makes cleaning harder. Keep countertops clear of excess items, and wipe down the stove and surrounding walls immediately after cooking to prevent grease from spreading.
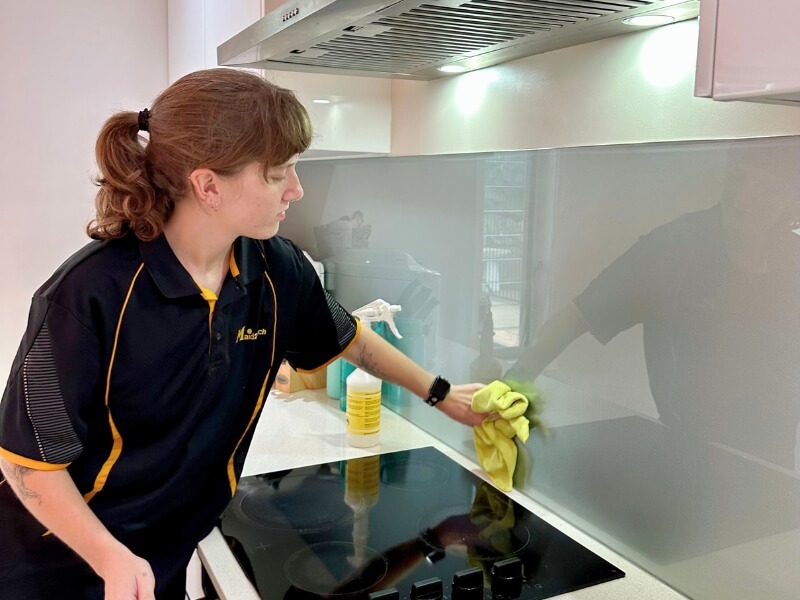
- Wiping walls immediately after cooking prevents grease from hardening into stubborn stains Credit: www.maid2match.com.au
Frequently Asked Questions
How do I remove grease from kitchen walls easily?
For light grease, a mix of warm water and dish soap works for most surfaces. For set-in stains, use a baking soda paste or diluted vinegar solution, letting it sit for 5-10 minutes before wiping. Always work from the top of the wall down to avoid drips settling on already-cleaned areas.
What household ingredients clean greasy kitchen walls?
The most effective natural options are white vinegar, baking soda, lemon juice, and castile soap. All are food-safe, non-toxic, and inexpensive. Avoid using undiluted vinegar on unsealed stone or grout, as it can cause etching over time.
Can I use commercial cleaners on kitchen wall grease?
Yes, but only use cleaners labeled safe for painted, tiled, or wallpapered surfaces. Look for EPA Safer Choice certified products, which are tested for safety on home surfaces. Always follow the product’s dwell time instructions—leaving cleaner on too long can damage paint or wallpaper.
How often should I clean kitchen walls to prevent grease?
For homes that cook daily, wipe down walls near the stovetop with a damp soapy cloth once a week, and do a full deep clean every 3-6 months. If you notice a faint greasy film, clean it immediately before it hardens and attracts dust.
Will cleaning kitchen wall grease damage my paint?
No, as long as you use the right cleaner for your paint type and avoid abrasive scrubbing. Always test any cleaner in a hidden spot first, and use barely damp cloths for flat/matte paint to avoid water damage.
How do I remove old, hardened grease from kitchen walls?
For grease that’s been building up for 6 months or more, apply a baking soda paste or commercial degreaser and let it sit for 10-15 minutes to soften the grease before scrubbing gently with a soft-bristle brush. For extremely stubborn stains, repeat the process 2-3 times.
Can I use a steam cleaner on greasy kitchen walls?
Yes, but only on sealed tile or semi-gloss paint. Steam can loosen grease quickly, but excess moisture can damage drywall, flat paint, or wallpaper. If you use a steam cleaner, keep the nozzle at least 6 inches from the wall and wipe the area dry immediately after.
Final Tips for a Long-Lasting Spotless Shine
Tackling greasy kitchen walls doesn’t have to be a daunting, paint-damaging chore. With the right supplies, a simple prep routine, and methods tailored to your wall material, you can restore your kitchen’s shine in an afternoon, no harsh chemicals required. Regular maintenance—like a quick weekly wipe-down of high-grease zones and consistent use of your range hood—will cut down on deep cleaning sessions and keep your walls looking fresh year-round. If you’re planning a full kitchen refresh after banishing grease, check out our guides to pair with green cabinetry and match warm brown cabinet finishes for a cohesive, inviting space that feels as good as it looks.