How to Clean Kitchen Walls for Painting: Easy Steps for Perfect Prep
Giving your kitchen walls a fresh coat of paint is one of the most cost-effective ways to transform the space, but skipping the critical prep step of thorough cleaning will leave you with peeling, bubbled paint within months. Kitchen walls face more daily abuse than any other room in the home: cooking grease, steam, food splatters, and airborne oils build up on surfaces, creating an invisible barrier that prevents paint from bonding to drywall or existing paint. This 2026 updated guide walks you through the exact, professional-grade steps to clean kitchen walls for painting, so you get a smooth, long-lasting finish that holds up to daily kitchen use. We’ll cover supply selection, stain treatment, damage repair, and final prep checks, with pro tips to avoid common DIY mistakes that waste time and money. Skipping this critical prep step is the most common cause of premature paint failure in kitchens, leading to costly touch-ups or even full repaints within a year, including professional kitchen painting costs if you need to hire a contractor to fix botched jobs. You can also read our guide on piece dinnerware set for.
Why Proper Wall Cleaning Is Non-Negotiable for Kitchen Paint Jobs
Kitchens are high-moisture, high-grease environments, so even walls that look visually clean have a hidden layer of cooking oil, smoke residue, and airborne grease that blocks paint adhesion. Paint applied over this residue won’t bond properly, leading to flaking, peeling, and uneven color within 6 to 12 months, per industry painting guidelines. Proper cleaning removes this barrier, ensures primer bonds fully to the wall, and extends the life of your paint job by 5+ years compared to skipping prep. It also helps you catch hidden issues like water damage, mold, or loose paint that need to be addressed before you start painting. You can also read our guide on best wine cooler refrigerators.
Gather Your Cleaning Supplies First
Having all tools and solutions on hand before you start saves time, prevents interruptions, and ensures you clean thoroughly without redoing work. Avoid last-minute trips to the hardware store by stocking these items ahead of time. You can also read our guide on how to decorate kitchen wall tiles.
Essential Tools
- Extendable microfiber duster (for high walls and crown molding without wobbly ladders)
- Two 2-gallon buckets (one for cleaning solution, one for rinse water to avoid re-depositing dirt)
- Soft cellulose sponges (avoid abrasive scouring pads that scratch drywall or existing paint)
- Soft-bristle scrub brush (for tough grease spots without damaging surfaces)
- Fine-grit sandpaper (120-150 grit for smoothing repairs and scuffing glossy old paint)
- Putty knife (for scraping loose paint and applying spackle)
- Vacuum with brush attachment (for removing dust from textured walls and corners)
- Tack cloths (for picking up fine sanding dust before painting)
- Painter’s tape (2-inch width for a tight seal on trim, cabinets, and fixtures)
- Canvas drop cloths (non-slip, reusable, better than plastic for catching drips)
- Stable step ladder with non-slip feet (for reaching upper walls safely)
Safe Cleaning Solutions for Kitchen Walls
- For everyday grime: warm water (not hot, which can damage drywall) mixed with 2-3 drops of oil-free mild dish soap. Avoid all-purpose cleaners with added fragrances, oils, or conditioners, as these leave a residue that blocks primer adhesion.
- For heavy grease buildup (near stovetops, range hoods): non-abrasive, kitchen-specific degreaser. Look for products labeled safe for painted drywall, and always test on an inconspicuous spot first to check for discoloration.
- For mold and mildew: undiluted white vinegar for mild growth, or a diluted bleach solution (1 cup bleach per 1 gallon of water) for persistent spots. Never mix vinegar and bleach, as this creates toxic chlorine gas.
Protective Gear
- Nitrile gloves (more resistant to harsh cleaners than latex)
- Safety goggles (for use with spray degreasers or bleach solutions to avoid eye irritation)
- Old long-sleeve clothing (to protect skin from splashes)
- Non-slip shoes (if working on a ladder to avoid falls)
Step 1: Remove Loose Surface Debris and Dust
Skipping this step turns accumulated dirt, cobwebs, and loose paint chips into mud when you wet the walls, leading to uneven surfaces and poor paint adhesion. Work top to bottom to avoid knocking dust onto already cleaned areas: first use the extendable duster to remove loose debris from upper walls, crown molding, and baseboards. Use the vacuum with a brush attachment for textured walls and corners, where dust accumulates in crevices. Gently scrape any peeling, flaking paint with a putty knife, taking care not to damage the underlying drywall. You can also read our guide on how to retile a kitchen wall.
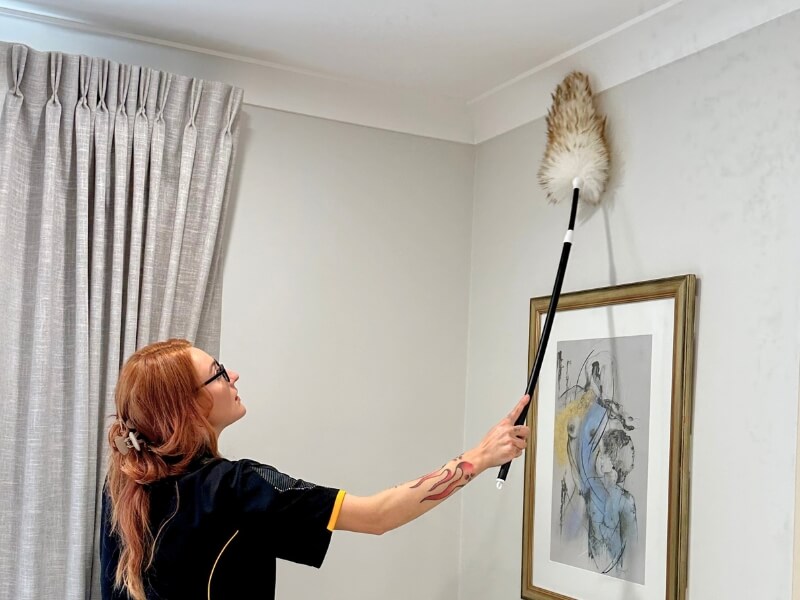 Dusting top to bottom first prevents dirt from falling onto already cleaned lower walls
Step 2: Treat Grease, Grime, and Stubborn Stains
Once loose debris is removed, tackle the built-up grime that accumulates from daily cooking. Work in small sections to avoid letting cleaning solution dry on the wall. You can also read our guide on how much to paint a kitchen walls and ceiling.
Cleaning Everyday Kitchen Grime
Mix warm water and a few drops of oil-free dish soap in one bucket, and fill the second with clean rinse water. Dip a soft sponge into the cleaning solution, wring it out until it’s damp, not soaking wet—excess water can cause drywall swelling and mold growth. Work in 3×3 foot sections, wiping the wall from top to bottom in gentle, circular motions. Rinse the sponge frequently in the clean water bucket to avoid spreading dirt. After scrubbing a section, wipe it with a clean, damp cloth to remove any soap residue, which can interfere with primer adhesion. A common DIY mistake is using too much water, which can lead to water damage and extended drying times. You can also read our guide on navy kitchen what colour walls.
Tackling Heavy Grease Buildup
For areas within 2 feet of the stovetop, range hood, or backsplash, dish soap alone won’t cut through built-up cooking oils. Spray a non-abrasive kitchen degreaser directly onto the greasy area, let it sit for 2-3 minutes to break down the oils (don’t let it dry on the wall, as this can leave a residue), then scrub gently with a soft-bristle brush. Wipe the area clean with a damp cloth, then follow up with a soap-and-water wipe and a final rinse with clean water to remove all degreaser residue. If you're also prepping wall tiles for a paint refresh, the same degreasing steps apply to glazed ceramic surfaces prepping wall tiles for paint. You can also read our guide on how to clean kitchen grease off painted walls.
Removing Mold and Mildew Spots
Kitchen walls near sinks, windows, or behind appliances are prone to mold and mildew growth from excess moisture. For mild growth, fill a spray bottle with undiluted white vinegar, spray the affected area, and let it sit for 10 minutes before scrubbing with a soft brush and wiping clean. For persistent mildew, mix 1 cup of bleach with 1 gallon of water, apply with a sponge, let sit for 5 minutes, then rinse thoroughly. Always wear gloves and goggles when working with bleach, and keep the room well-ventilated by opening windows and running exhaust fans. If mold covers more than 10 square feet of wall space, the U.S. Environmental Protection Agency recommends consulting a licensed remediation specialist to avoid spreading spores EPA mold remediation guidelines. You can also read our guide on how to remove kitchen tiles from wall.
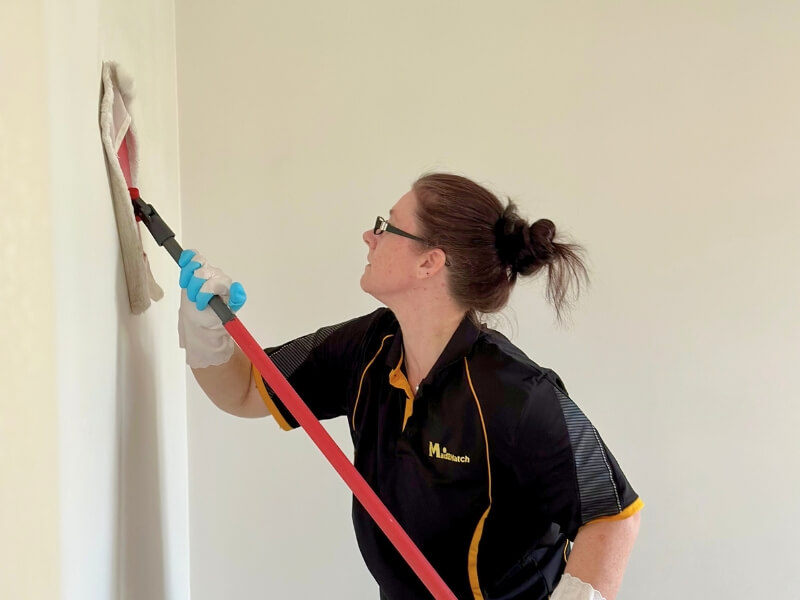 Damp mopping removes embedded grease and dirt that wiping alone misses
Step 3: Smooth Out Wall Imperfections
After cleaning, let walls air dry completely for 1-2 hours in a well-ventilated room. If humidity is above 60%, use a fan to speed drying, and wait up to 4 hours. Test the wall with the back of your hand: if it feels cool or damp, it’s not ready for the next steps. Once dry, address any surface imperfections to ensure a flawless paint finish. You can also read our guide on stains on kitchen walls what to use.
Fill Cracks, Holes, and Damage
Use a putty knife to scrape away any loose drywall, old paint, or debris around cracks, nail holes, or damage from removed fixtures. Apply a thin layer of quick-drying spackle with the putty knife, pressing firmly into the gap and slightly overfilling it (spackle shrinks as it dries). For deep holes, apply a second thin layer after the first dries completely (usually 30-60 minutes, per product instructions). If you've recently removed old kitchen tiles, wall repair after tile removal follows the exact same spackling process to fill gaps left by tile adhesive. You can also read our guide on how to clean kitchen walls grease.
Sand Surfaces Smooth
Once the spackle is fully dry, sand the repaired areas with 120-150 grit sandpaper until the surface is perfectly flush with the surrounding wall. If your existing paint has a glossy or semi-gloss finish, lightly scuff-sand the entire wall with a pole sander to create a rough texture that helps primer bond. Wipe away all sanding dust with a damp microfiber cloth, then follow up with a tack cloth to pick up any remaining fine particles. Avoid using overly coarse sandpaper, which can scratch the drywall surface and create visible bumps under the new paint. You can also read our guide on how to remove oil grease from kitchen walls.
Step 4: Final Prep Before Priming and Painting
These final checks ensure no last-minute issues ruin your paint job after all your cleaning and repair work.
Remove All Remaining Dust
Even a small amount of dust can cause paint to bubble or flake over time. Use the vacuum with a brush attachment to remove dust from the walls, baseboards, and floors. Wipe the entire wall surface with a tack cloth, paying special attention to corners, trim edges, and textured areas where dust accumulates. You can also read our guide on how to install kitchen cabinets on uneven walls.
Mask Off Non-Wall Surfaces
Protect your cabinets, countertops, appliances, and floors to avoid tedious cleanup later. Apply painter’s tape firmly along the edges where walls meet ceilings, cabinets, countertops, window frames, and light switch plates. For textured walls, use 2-inch wide painter’s tape to get a tight seal in crevices. Cover larger areas like floors and appliances with canvas drop cloths, tucking the edges under baseboards to prevent paint from seeping through. If you're also updating your sink area, our guide to removing wall-mounted kitchen faucets will help you take off old fixtures for a cleaner paint seal around the sink. You can also read our guide on best rug for kitchen sink area.
Do a Final Cleanliness Check
Run your hand over the entire wall surface: it should feel completely smooth, with no sticky residue, dust, or rough spots. If the wall feels tacky, wipe it down with a clean, damp cloth and let it dry fully before moving on. Check all painter’s tape to make sure it’s firmly adhered, with no gaps where paint could seep onto trim or cabinets. As leading paint brand Benjamin Moore notes, 90% of kitchen paint adhesion failures stem from inadequate surface prep, so this final check ensures your hard work pays off proper wall prep for painting. You can also read our guide on best dish cloths that dont smell.
 A clean, grease-free wall surface ensures primer bonds fully to drywall for a long-lasting finish
Frequently Asked Questions
How long do kitchen walls need to dry after cleaning before painting?
After the final rinse, let walls air dry for 1-2 hours in a well-ventilated room. If indoor humidity is above 60%, use a fan to speed drying, and wait up to 4 hours. Test the wall with the back of your hand: if it feels cool or damp, it’s not ready. Painting over damp walls causes bubbling, peeling, and mold growth under the paint. You can also read our guide on how to stop kitchen cabinet door from hitting wall.
What cleaning solutions are safe for kitchen walls?
For light everyday grime, warm water mixed with a few drops of oil-free dish soap is safe for all painted drywall and tile surfaces. For heavy grease, use a non-abrasive kitchen degreaser labeled safe for painted surfaces. For mold and mildew, diluted white vinegar (for mild growth) or a 1:10 bleach-to-water solution (for persistent spots) work well. Avoid all-purpose cleaners with added oils, fragrances, or conditioners, as these leave a residue that blocks primer adhesion. You can also read our guide on best cloth napkins for everyday use.
Do I need to remove all old paint before repainting kitchen walls?
No, you only need to remove peeling, flaking, or chipping paint. Scrape loose sections with a putty knife, then sand the edges smooth to blend with the surrounding wall. If the existing paint is intact and well-adhered, thorough cleaning and light scuff-sanding of glossy finishes are enough to help new paint bond. You can also read our guide on how to wash kitchen walls.
Can I use a magic eraser on kitchen walls before painting?
Yes, magic erasers work well for removing scuff marks and small, set-in grease spots, but test on an inconspicuous area first. Magic erasers are mildly abrasive, so rubbing too hard can remove glossy paint finishes or scratch textured drywall. You can also read our guide on how to clean sticky kitchen walls.
Do I need to prime kitchen walls after cleaning?
Yes, always prime kitchen walls after cleaning and prep, especially if you made repairs, are covering a dark paint color, or are painting over a glossy old finish. Primer seals the wall, blocks stains and grease from bleeding through the topcoat, and ensures even, long-lasting paint adhesion. For high-moisture kitchens, choose a moisture-resistant primer for extra protection. You can also read our guide on how to paint high walls above kitchen cabinets.
Conclusion
Thoroughly cleaning your kitchen walls before painting isn’t an optional extra—it’s the foundation of a smooth, long-lasting finish that will hold up to daily cooking, steam, and cleaning for years to come. By removing hidden grease, grime, mold, and surface imperfections, you eliminate the most common cause of paint failure, saving yourself the time, money, and hassle of repainting within a year. Follow these steps in order, take your time with each stage, and you’ll get a professional-looking result without the professional price tag. Once your prep work is done, you’re ready to pick a paint color and finish that fits your style: for inspiration, browse our guides to kitchen-friendly paint finishes and color pairings for green kitchen cabinets to create a cohesive, fresh space. For more DIY home improvement guides, from cabinet upgrades to backsplash installation, explore our full library of expert tips to tackle your next project with confidence. You can also read our guide on how to get rid of grease stains on kitchen walls.