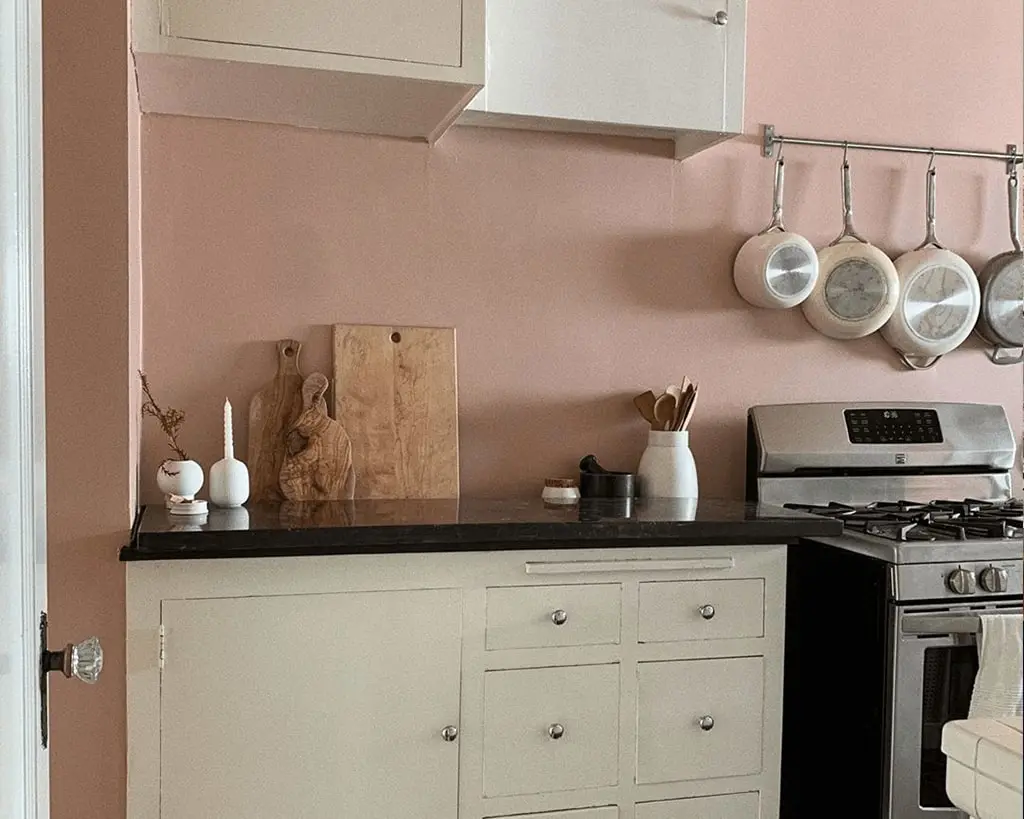
How to Paint Kitchen Walls: Expert Tips for a Stunning Makeover
Tired of greasy, scuffed kitchen walls that make your entire cooking space feel dated? Unlike other rooms in your home, kitchen walls take near-constant abuse from cooking splatters, steam, and daily foot traffic, so standard interior paint often peels, stains, or dulls within a year. Painting your kitchen walls is one of the highest-ROI, lowest-cost makeover projects you can tackle—no full renovation required—but a pro-level finish depends on choosing the right materials, prepping correctly, and using proven techniques to avoid streaks, drips, and uneven coverage. This guide walks you through every step of the process, with expert tips to help you achieve a stunning, long-lasting result, whether you’re a first-time DIYer or an experienced home painter.
Pre-Project Planning: Assess Your Space and Set a Realistic Timeline
Before you buy a single can of paint, take 30 minutes to assess your wall condition and set expectations for the project. Start by checking for existing mildew, peeling paint, and water damage from past leaks; fix any active leaks and replace water-damaged drywall before starting, as paint will not adhere to damp or compromised surfaces. If your home was built before 1978, test for lead paint using an EPA-certified kit before sanding or disturbing existing surfaces to avoid hazardous exposure. Most DIY kitchen paint jobs take 1–2 weekends to complete, accounting for drying time between coats and full curing before you can use the space normally. If you have wallpaper, remove it fully before starting, as paint will not adhere to wallpaper adhesive. If you’re planning to paint a tiled backsplash as part of the project, account for extra prep time to scuff the tile surface for better paint adhesion.
If you love hosting dinner parties and wine nights in your kitchen, you might also want to explore our top picks for beginner-friendly winemaking kits to keep on hand for guests.
Choosing the Right Paint for High-Traffic Kitchen Walls
The right paint for your kitchen is not the same as the paint you would use for a bedroom or living room. Kitchen walls need to resist moisture, grease, and frequent scrubbing, so material and finish selection are non-negotiable for a long-lasting result.
Paint Finishes Built to Last in Kitchens
Not all paint finishes are created equal for high-abuse kitchen spaces. Use this quick guide to pick the right option for your needs:
- Flat/Matte: No sheen, hides minor wall imperfections well, but is highly porous and absorbs grease and moisture, making it nearly impossible to clean without damaging the paint. Avoid for all kitchen spaces.
- Eggshell: Very subtle low-luster sheen, more wipeable than matte, and works for low-traffic kitchens with minimal cooking activity. Still prone to staining in high-splash areas.
- Satin: Soft, low-luster sheen that resists stains, moisture, and scrubbing. Hides minor wall imperfections well, making it the best all-around choice for most kitchens.
- Semi-Gloss: High-shine, extremely durable finish that repels water and grease almost entirely. Ideal for high-splash zones behind stovetops and sinks, though its high shine can highlight minor wall flaws.
- Gloss: Maximum shine and durability, but extremely prone to showing every wall imperfection. Rarely recommended for full kitchen walls, but can work for small accent areas or trim.
Modern acrylic latex paints have largely replaced oil-based formulas for most kitchen projects, as they have lower VOC content, faster drying times, and equal or better stain resistance; only use oil-based paint if you are repainting over existing oil-based coatings to ensure proper adhesion. The University of Minnesota Extension recommends satin or semi-gloss finishes for kitchen walls to balance durability and ease of cleaning. Learn more from their interior painting guide.
Selecting a Color That Complements Your Kitchen’s Design
Color choice impacts both the perceived size of the space and the overall mood of your kitchen. Light, cool tones (soft white, pale gray, light blue) reflect light, making small galley kitchens feel larger and brighter. Warm neutrals (warm beige, soft taupe, cream) add coziness without overwhelming the space, and pair well with most cabinet and countertop finishes. Bold accent walls behind ranges or sinks add personality without making the whole room feel closed in, especially in larger, open-concept kitchens.
Always test paint samples on your wall and view them in multiple lighting conditions: morning natural light, evening overhead lighting, and under-cabinet task lighting, as kitchen lighting often shifts color perception dramatically. If you have green kitchen cabinets, our guide to pairing wall colors with green cabinetry offers specific shade recommendations to avoid clashing. For brown cabinet finishes, matching wall tones to brown cabinets breaks down complementary palettes for every design style, from modern to farmhouse.
If you’re hosting more often after your makeover, pair your new space with homemade wine made using quality winemaking yeast for consistent, great-tasting results every time. Serve your batches in durable wine storage for homemade batches for a polished presentation, and complete your setup with our curated wine serving accessories for seamless entertaining. For frequent hosts who make large batches for gatherings, commercial-grade winemaking equipment can handle high-volume production with ease.
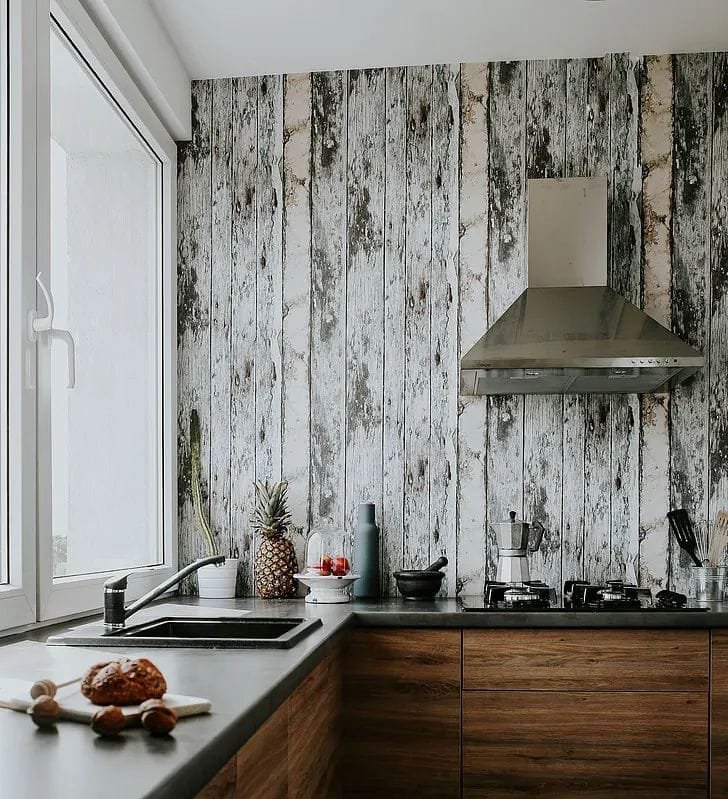
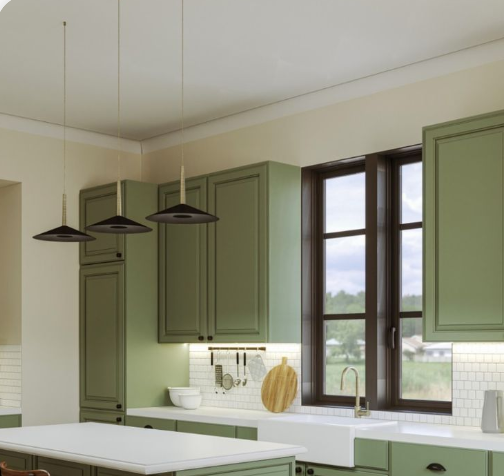 Freshly painted satin-finish walls paired with forest green cabinetry for a modern farmhouse look
Critical Wall Prep Steps That Ensure Paint Lasts for Years
Skipping or rushing wall prep is the most common cause of peeling, uneven paint in kitchens. Grease and grime create a barrier between the wall and paint, so thorough prep is non-negotiable for a long-lasting finish.
Deep Cleaning to Remove Embedded Kitchen Grease
Kitchen walls have invisible layers of grease, dust, and cooking residue that prevent paint from adhering properly. For light dirt, mix warm water and a mild dish soap, scrub with a sponge, rinse, and let dry completely. For heavy grease around stovetops and backsplashes, use a trisodium phosphate (TSP) solution (available at most hardware stores) to cut through built-up grime: mix 1/2 cup TSP with 1 gallon of warm water, scrub the surface, rinse thoroughly with clean water, and let dry for 24 hours. A common mistake DIYers make is skipping the TSP step for older kitchens, which leads to paint peeling within months of application.
Repairing Damage and Smoothing Uneven Surfaces
Inspect walls for nail holes, cracks, peeling paint, and water damage. Fill small holes and cracks with a lightweight spackle, applying it with a putty knife in a thin layer. For deeper damage, use a patching compound and sand smooth once dry. Sand all patched areas and rough spots with 120-grit sandpaper for smooth walls, or 80-grit for heavily textured surfaces, then wipe away all dust with a tack cloth to ensure primer and paint adhere evenly. If you have water stains from past leaks, apply a stain-blocking primer to the affected area first to prevent the stain from bleeding through your new paint.
Priming for Better Adhesion and Coverage
Priming creates a uniform base for your paint, helps it stick to the wall, and blocks stains from showing through. You do not need to prime if you are using a high-quality paint-and-primer combo and are painting over a similarly colored, well-adhered existing paint. However, prime if you are covering a dark color with a light one, repainting over patched areas, or working with glossy existing paint. Use a stain-blocking primer for water stains or mildew, and apply it evenly with a roller for large areas and an angled brush for edges. Let the primer dry fully (2–4 hours for acrylic primers, depending on humidity) before applying your first coat of paint.
 Prepped kitchen wall tiles primed and ready for a fresh coat of paint
Essential Tools for a Professional Finish (No Skimping Allowed)
Investing in the right tools will save you time, reduce frustration, and help you achieve a smooth, professional finish. Skip the cheap, low-quality supplies, as they will leave lap marks, shed fibers, and make cleanup a hassle.
Must-Have Tools for Your Kitchen Paint Project
- 2.5-inch angled sash brush
- 9-inch paint roller with appropriate nap length for your wall texture
- High-quality synthetic roller covers
- Blue painter's tape (avoid standard masking tape, which leaves residue)
- Canvas drop cloths
- 4-foot (or taller) step ladder
- TSP or heavy-duty degreaser
- 120-grit sandpaper and tack cloth
- Stain-blocking primer (if needed)
- Paint tray with disposable liners
Brushes and Rollers
Use a 2.5-inch angled sash brush for cutting in edges around trim, ceilings, and cabinets: the angled tip gives you precise control for clean lines. For large wall areas, choose a roller with the correct nap length: 3/8-inch nap for smooth drywall, 1/2-inch nap for lightly textured walls, and 3/4-inch nap for heavily textured surfaces. Always opt for a high-quality synthetic roller cover; cheap foam rollers shed fibers that stick to wet paint, and low-pile covers leave lap marks. For acrylic latex paint, use synthetic bristle brushes; natural bristle brushes are only necessary for oil-based paint.
Painter's Tape and Protection Materials
Always use blue painter's tape, not standard masking tape, which leaves behind a sticky residue that can damage cured paint and wall finishes. Apply tape firmly with a putty knife to seal the edge against the wall or trim, preventing paint from seeping underneath. For floor and countertop protection, skip slippery plastic drop cloths and opt for canvas drop cloths, which stay in place, absorb paint splatters, and can be reused for future projects.
Ladders and Supplemental Equipment
A 4-foot step ladder is sufficient for most standard 8-foot kitchen ceilings; opt for a 6-foot ladder if you have higher ceilings or upper cabinets to paint around. Wear a painting hat or cap to catch drips from the ceiling or overhead surfaces, and keep a damp microfiber cloth nearby for quick touch-ups of small splatters before they dry. Disposable paint tray liners make cleanup fast and let you switch between colors without scrubbing the tray between coats.
 Properly applied painter's tape creates crisp, clean edges between walls and cabinetry
Pro Painting Techniques for Flawless, Streak-Free Results
Painting is not just about slapping color on walls—using the right techniques will help you avoid streaks, drips, and uneven coverage for a pro-level finish.
Cutting In Edges for Crisp, Clean Lines
The "cut-in then roll" method is the most reliable way to avoid messy edges: first, use your angled sash brush to paint a 2–3 inch border along ceilings, trim, cabinets, and outlets, working in 3-foot sections. Then, roll the main wall area while the cut-in paint is still wet to blend the two seamlessly, avoiding hard lines. Use a light hand with the brush to avoid thick buildup that will show through the final coat; if you make a mistake, wipe it up with a damp cloth immediately before it dries.
Rolling Walls Without Lap Marks or Drips
Load your roller evenly by rolling it back and forth in the paint tray, then roll off excess paint on the tray's ridged surface to avoid drips. Work in 3-foot wide sections, applying paint in a "W" or "M" pattern, then fill in the section without lifting the roller to spread the paint evenly. Overlap each new section by 1 inch with the previous one to avoid visible lines. Maintain a "wet edge" by working quickly enough that the paint you’re applying is still wet when you overlap it with the previous section; this is the key to avoiding lap marks. Don’t press hard on the roller—let the nap do the work to avoid pushing paint into the wall surface.
Applying Multiple Coats for Even, Uniform Color
One coat of paint is almost never enough for kitchen walls, especially if you are covering a dark existing color or applying a bold new shade. Plan for at least two full coats, waiting 2–4 hours between coats for acrylic latex paint (longer in high humidity). After the first coat dries, hold a flashlight parallel to the wall to spot thin patches or uneven coverage that is hard to see with overhead lighting. A third coat may be necessary for dark colors like navy, black, or deep red, or if the first two coats have visible inconsistencies. Wait at least 24 hours after the final coat before hanging decor or placing items on countertops to avoid smudging.
Common Costly Mistakes to Avoid
Even small errors can ruin your kitchen paint job and cost you time and money to fix. Avoid these common pitfalls for a flawless finish:
- Skipping deep cleaning and surface prep: Even a thin layer of kitchen grease will prevent paint from adhering to the wall, leading to peeling, flaking, and uneven color within months. Don’t skip the TSP cleaning step for older kitchens, and always sand patched areas smooth before priming to avoid bumpy, uneven finishes.
- Using the wrong paint finish: Flat and matte paints are not designed for kitchen walls: their porous surface absorbs grease splatters, making them impossible to clean without stripping the paint. Stick to satin or semi-gloss finishes for all kitchen walls, and reserve semi-gloss for high-splash areas behind stovetops and sinks for maximum durability.
- Ignoring ventilation and drying times: Painting in a closed, unventilated kitchen traps fumes, slows drying time, and can cause paint to bubble or cure unevenly. Open windows, use box fans to cross-ventilate the space, and avoid painting on humid days when possible. Never apply a second coat before the first is fully dry to the touch, as this will cause peeling and texture inconsistencies.
- Rushing tape removal: Peeling off painter's tape too early will pull up wet paint, ruining your clean edges; waiting too long (24+ hours after the final coat) makes the tape hard to remove and can chip cured paint. The ideal time to remove tape is when the paint is dry to the touch but not fully cured, usually 1–2 hours after the final coat. Pull the tape back on itself at a 45-degree angle for the cleanest removal, and score along the edge with a utility knife if paint has seeped underneath.
Finishing Touches and Long-Term Wall Maintenance
The final steps of your paint job will ensure your walls look sharp and stay fresh for years to come.
Removing Tape and Cleaning Up Properly
Once you’ve removed the tape, inspect edges for any paint bleed or uneven lines, and touch up with a small brush if needed. Clean brushes and rollers immediately after use: wash acrylic latex paint tools with warm, soapy water, and use mineral spirits for oil-based paint. Store leftover paint in a sealed container in a cool, dry place, labeled with the room and date, for easy touch-ups of scuffs or stains later.
Maintaining Painted Kitchen Walls for Years
To keep your kitchen walls looking fresh, wipe up grease splatters and food stains as soon as they happen with a damp microfiber cloth. Avoid abrasive scouring pads, bleach, or harsh chemical cleaners, which can scratch or dull satin and semi-gloss finishes. For routine cleaning, mix warm water with a mild dish soap, and test any cleaner on a small, hidden area first. Touch up small scuffs with leftover paint within 1–2 years to avoid larger repairs later, and repaint the full wall every 3–7 years, depending on traffic and cooking frequency, to keep the finish looking vibrant.
Frequently Asked Questions
What is the best paint finish for kitchen walls?
Satin finish is the best all-around choice for most kitchens, as it balances durability, stain resistance, and a soft, low-luster sheen that hides minor wall imperfections. Semi-gloss is ideal for high-splash areas behind stovetops and sinks, as it repels water and grease almost entirely and can be scrubbed repeatedly without damage.
How long do I have to wait to use my kitchen after painting?
For acrylic latex paint, wait at least 4 hours before hanging decor or placing items on countertops, and wait 24 hours before cooking or generating steam in the kitchen to avoid damaging the cured finish. Full curing takes 7–14 days, so avoid harsh cleaning or scrubbing during this time.
Can I paint kitchen walls without removing cabinets?
Yes, you can paint around existing cabinets without removing them. Use high-quality blue painter's tape to seal the edges between cabinets and walls, and cut in carefully with an angled brush to avoid paint splatters. For a completely seamless finish, you can remove cabinet doors and paint the walls first, then reattach the doors once the paint is fully cured.
Do I need to prime kitchen walls before painting?
Priming is required if you are covering a dark color with a light one, repainting over patched areas, or working with glossy existing paint. If you are using a high-quality paint-and-primer combo and painting over a similarly colored, well-adhered existing finish, you can skip priming, though it is still recommended for high-moisture kitchen areas to ensure long-lasting adhesion.
How do I fix paint that has seeped under painter's tape?
If paint bleeds under the tape, wait until it is fully dry, then score along the edge of the tape with a sharp utility knife, then peel the tape back slowly to remove the excess paint. Touch up the area with a small brush once the wall is clean.
Final Thoughts
Painting your kitchen walls is a simple, high-impact project that can transform your space without the cost and hassle of a full renovation. By choosing the right finish for your kitchen’s traffic level, prepping surfaces thoroughly to avoid peeling, and using proven painting techniques to avoid streaks and lap marks, you can achieve a professional, stunning finish that lasts for years. Don’t skip the small steps—like deep degreasing and proper tape removal—that make the difference between a DIY job and a pro-level result. If you’re planning a full kitchen refresh alongside your wall paint, our guide to removing outdated kitchen faucets will help you update your hardware seamlessly for a cohesive, polished look.