How to Clean Kitchen Tiles on Wall: Easy Tips for a Sparkling Shine
Kitchen wall tiles take a beating every day: grease splatters from stovetop cooking, steam from boiling pots, food spills, and even hard water residue from cleaning can leave them looking dull, stained, and grimy. Even if the rest of your kitchen is spotless, dirty wall tiles can make the entire space feel unkempt. The good news? You don’t need harsh chemicals or hours of scrubbing to restore their shine. This guide covers tested, tile-type-specific methods, easy stain removal tricks, and long-term maintenance tips to keep your kitchen walls looking fresh for years, without damaging delicate finishes or grout.
 Bright, well-maintained ceramic wall tiles elevate a kitchen's overall aesthetic.
Image source: www.marthastewart.com
Bright, well-maintained ceramic wall tiles elevate a kitchen's overall aesthetic.
Image source: www.marthastewart.com
First, Understand Your Kitchen Wall Tile Type
The right cleaning method depends entirely on what your tiles are made of. Using the wrong product can etch natural stone, discolor colored grout, or scratch delicate finishes, so identifying your tile type is the first step to safe, effective cleaning. For more on this, see our guide on how to regrout kitchen wall tiles easy steps.
Ceramic & Porcelain Tiles
The most common kitchen wall tile option, ceramic and porcelain are non-porous, durable, and resistant to most stains and scratches. They hold up well to mild acidic cleaners (like diluted vinegar) and gentle scrubbing, making them low-maintenance for most households. Glazed porcelain is even more stain-resistant than unglazed ceramic, so it’s a great choice for high-splatter areas like behind the stovetop.
Natural Stone Tiles (Marble, Travertine, Slate)
Natural stone adds luxury to a kitchen, but it’s porous and far more delicate than ceramic or porcelain. Acidic cleaners (including vinegar, lemon juice, and many commercial tile cleaners) will etch the surface, leaving permanent dull spots. Always use pH-neutral, stone-specific cleaners for these tiles, and avoid abrasive scrubbers that can scratch the finish. For more on this, see our guide on how to clean kitchen wall tiles easily.
Glass Tiles
Glass wall tiles are non-porous and resistant to stains, but they show soap scum and water spots more easily than other materials. Use a mild detergent or vinegar-water solution for regular cleaning, and dry thoroughly with a microfiber cloth to avoid streaks. Avoid abrasive cleaners, which can scratch the glass surface.
Essential Cleaning Supplies & Tools
Having the right products on hand cuts down on cleaning time and prevents accidental damage to your tiles and grout. Skip harsh, unlabeled all-purpose cleaners, and opt for products formulated for your specific tile type. For more on this, see our guide on how to clean ceramic wall tiles in kitchen.
Safe Cleaning Solutions
- pH-neutral tile cleaner: The safest all-around option for all tile types, including natural stone. Look for products labeled "safe for stone" if you have marble, travertine, or slate.
- Mild dish soap and warm water: Perfect for daily wipe-downs and light grease on ceramic, porcelain, and glass tiles.
- White vinegar and water (1:1 ratio): A low-cost, eco-friendly option for ceramic, porcelain, and glass tiles only (never use on natural stone). Great for cutting through grease and hard water stains.
- Baking soda: A gentle abrasive that lifts stains from grout and tile surfaces without scratching. Mix with water to make a paste for targeted stain treatment.
- Hydrogen peroxide (3%): A non-toxic alternative to bleach for killing mold and mildew in grout lines, safe for all tile types when diluted with equal parts water.
Must-Have Tools
- Soft-bristle scrub brush or old toothbrush: Reaches grout lines without scratching tile or eroding grout.
- Microfiber cloths: Lint-free and absorbent, perfect for wiping, rinsing, and drying without leaving streaks.
- Angled grout brush: Gets deep into grout lines to lift embedded dirt and stains more effectively than a standard toothbrush.
- Spray bottle: Applies liquid cleaners evenly without over-saturating surfaces.
- Plastic sheeting or painter's tape: Protects countertops, cabinets, and fixtures from cleaning solution drips.
- Steam cleaner (optional): A chemical-free option for deep cleaning ceramic and porcelain tiles; avoid using on natural stone or unsealed grout.
Products & Tools to Avoid
Steel wool, abrasive scrub pads, and stiff wire brushes will scratch tile surfaces and erode grout over time. Skip acidic cleaners (undiluted vinegar, lemon juice, toilet bowl cleaner) on natural stone, and never use bleach on colored grout, as it will cause permanent discoloration. For households with pets or children, avoid cleaners with harsh fumes or toxic ingredients; the EPA's Safer Choice guidelines list certified, low-irritant products that work effectively for kitchen cleaning.
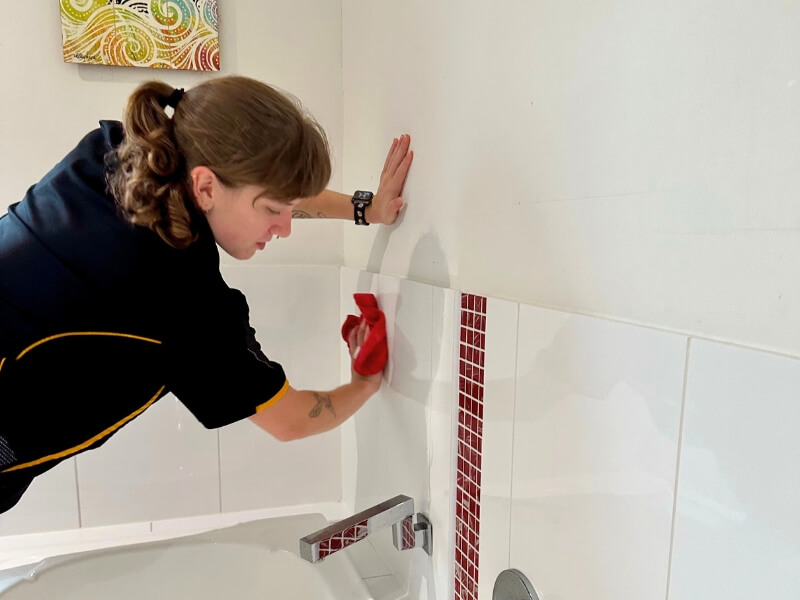 Pre-spraying cleaner loosens grease and grime before scrubbing for easier removal.
Image source: www.maid2match.com.au
Pre-spraying cleaner loosens grease and grime before scrubbing for easier removal.
Image source: www.maid2match.com.au
Pre-Cleaning Prep: Protect Your Kitchen & Surfaces
Skipping prep steps often leads to missed dirt, accidental damage to surrounding surfaces, or leftover cleaning residue that attracts more grime later. These 10 minutes of prep will make the actual cleaning process faster and more effective. For more on this, see our guide on how to clean grease off kitchen wall tiles.
Clear & Dust the Surface
Start by removing all loose items from the tiled wall: magnets, photos, spice racks, and hanging utensils. Wipe down the tiles with a dry microfiber cloth or soft brush to remove loose dust, crumbs, and debris. If you skip this step, you’ll end up spreading dirt around when you apply liquid cleaner, creating muddy streaks instead of a clean surface.
Test Cleaner in an Inconspicuous Spot
Before applying any cleaner to the full wall, test it on a small, hidden area (like behind the refrigerator or under a lower cabinet) to check for discoloration or damage. Wait 5 minutes, then wipe the area clean. If the tile or grout looks unchanged, the cleaner is safe to use on the full surface. This is especially important for vintage tiles, colored grout, or natural stone finishes. For more on this, see our guide on how to make kitchen wall tiles shine.
Protect Surrounding Areas
Lay down old towels or plastic sheeting on countertops, floors, and any appliances near the tiled wall to catch drips. Use painter's tape to secure the sheeting if you’re working on a vertical wall. If you have a wall-mounted kitchen faucet, cover it with plastic wrap to avoid damage to its finish; proper prepping around wall-mounted fixtures prevents costly repairs later. Remove outlet covers on the tiled wall and clean them separately to avoid getting cleaning solution in the electrical components.
Step-by-Step Cleaning Process for a Sparkling Finish
Follow this process for consistent, streak-free results on every tile type, with no harsh scrubbing required.
Apply Cleaner with Proper Dwell Time
Spray or apply your chosen cleaner evenly across the tiled wall, paying extra attention to grout lines and areas behind the stovetop where grease builds up most. Let the cleaner sit for 3–5 minutes (10 minutes for baking soda paste or vinegar solution) to loosen dirt and grease. Resist the urge to scrub immediately—dwell time is the key to cutting through tough grime without excessive elbow grease.
Scrub Grout & Tile Surfaces Correctly
Use a soft-bristle scrub brush or toothbrush for grout lines, scrubbing in a back-and-forth motion along the lines to lift embedded dirt. For tile surfaces, use a non-abrasive sponge and gentle circular motions to avoid scratching. For stubborn stains, apply a thick baking soda paste directly to the spot, let sit for 10–15 minutes, then scrub lightly. A common mistake homeowners make is using a stiff wire brush on grout, which erodes the material over time and creates more gaps for dirt to settle.
Rinse Thoroughly to Avoid Residue
Wipe the tiles and grout with a clean, damp microfiber cloth or sponge to remove all traces of cleaner. Leftover cleaning residue will attract dirt and grease within days, leaving your tiles looking dull faster. For large walls, rinse your cloth frequently in clean, lukewarm water to avoid spreading residue back onto the tiles.
Dry for Streak-Free Results
Dry the entire surface with a clean, dry microfiber cloth, wiping in a circular motion to avoid water spots. This step is especially important for glossy tiles and glass tiles, which show streaks and water marks clearly. Once dry, step back and inspect for any missed spots—you can spot them easily against the dry, clean surface.
Tackling Tough Stains, Grout Discoloration & Mold
Regular cleaning handles everyday grime, but targeted treatments are needed for set-in stains, mold, and discolored grout.
Grease & Oil Splatters
For fresh grease splatters, wipe with warm, soapy water immediately before the grease hardens. For set-in stains, spray a degreaser or 1:1 dish soap and warm water solution onto the spot, let sit for 5 minutes, then scrub with a soft brush. Rinse thoroughly and dry to avoid leftover soap residue that attracts more grease.
Hard Water & Mineral Deposits
Hard water leaves white, chalky streaks on tiles and grout, especially near sinks or dishwashers. Spray undiluted white vinegar onto the affected area, let sit for 10 minutes, then scrub with a soft brush. Rinse well and dry to restore the tile's shine. For severe buildup, make a paste of baking soda and vinegar, apply to the stain, let sit for 15 minutes, then scrub and rinse.
Mold & Mildew in Grout Lines
Mold and mildew thrive in damp grout, especially in kitchens with poor ventilation. Spray a 1:1 mix of white vinegar and water onto the affected grout, let sit for 10 minutes, then scrub with an old toothbrush. For stubborn mold, spray 3% hydrogen peroxide (diluted with equal parts water) onto the grout, let sit for 10 minutes, then scrub and rinse. Avoid using bleach on colored grout, as it will cause permanent discoloration; if you must use bleach, dilute 1 part bleach with 10 parts water, use only on sealed white grout, and rinse thoroughly after 5 minutes.
Deeply Stained or Discolored Grout
If grout is permanently stained from years of grease and dirt, a baking soda paste may not be enough. Apply a grout brightener formulated for your grout type, let sit for the recommended time, then scrub and rinse. For long-term protection, seal your grout annually to prevent stains from penetrating the porous material in the future.
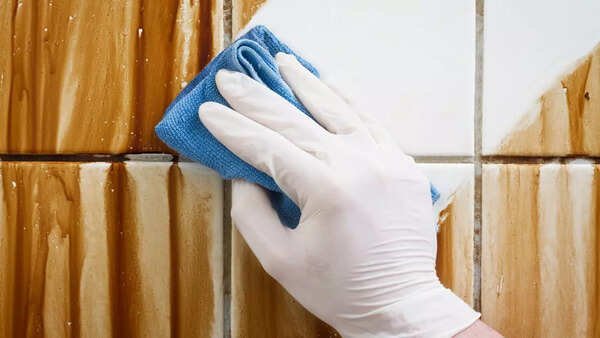
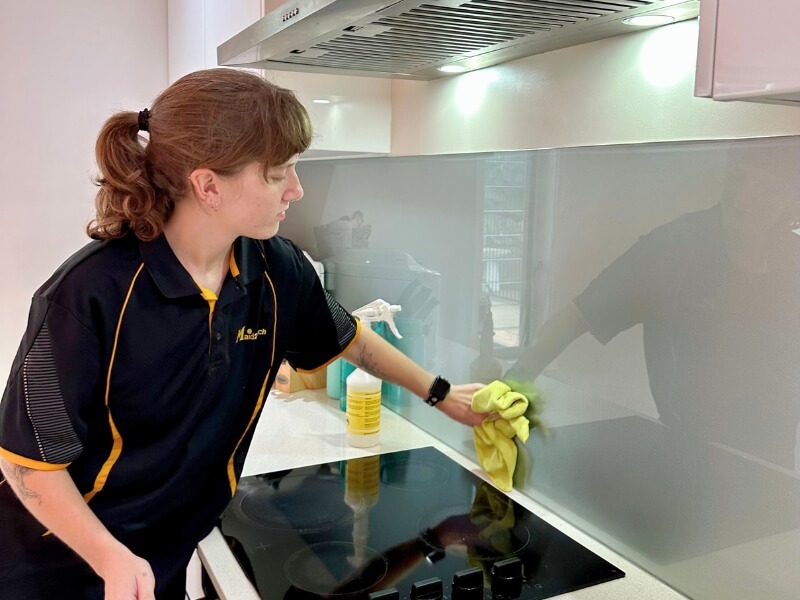 Wiping down tiles after cooking prevents grease from hardening and staining grout lines.
Image source: www.maid2match.com.au
Wiping down tiles after cooking prevents grease from hardening and staining grout lines.
Image source: www.maid2match.com.au
Long-Term Maintenance to Keep Tiles Looking New
Consistent, small cleaning habits prevent grime from building up and reduce the need for deep cleaning sessions. Follow this simple schedule to keep your tiles sparkling with minimal effort.
Weekly & Monthly Cleaning Schedule
- Daily: Wipe up any spills or splatters on the tiled wall as soon as they happen, especially behind the stovetop and near the sink.
- Weekly: Wipe down all tiled walls with warm, soapy water and a microfiber cloth to remove light grease and dust. Spot-clean any small stains before they set in.
- Monthly: Deep clean grout lines with a baking soda paste or pH-neutral grout cleaner, scrubbing gently with an angled grout brush.
- Annually: Apply a grout sealer to all grout lines to block moisture, dirt, and stains from penetrating the porous material.
Preventive Tips to Reduce Grime Buildup
- Run your kitchen exhaust fan while cooking to reduce steam and grease particles that settle on wall tiles.
- Install a metal or glass stove backsplash to catch splatters before they hit the tiled wall behind the stovetop.
- Avoid leaning sharp objects (like knife blocks or pot holders) against tiled walls, as they can scratch glazed tile surfaces.
- For kitchens with natural stone tiles, use placemats and trivets to avoid acidic food spills (like citrus or tomato sauce) from touching the stone surface.
Once your tiles are sparkling, you may want to refresh your kitchen's wall color to complement your cabinetry; our guide to complementing green cabinet setups has tested recommendations for shades that make both tiles and cabinets pop. For owners of brown kitchen cabinetry, our tips for pairing with brown cabinetry include neutral, warm tones that highlight your newly cleaned tiles without clashing with existing fixtures.
Frequently Asked Questions
How often should I clean kitchen wall tiles?
Wipe down tiles weekly to remove light grease and dust, and deep clean grout monthly to prevent discoloration. Spot-clean spills as soon as they happen to avoid set-in stains.
What is the best cleaner for kitchen wall tiles?
For ceramic, porcelain, and glass tiles, a 1:1 mix of white vinegar and water works well for regular cleaning. For natural stone tiles, use a pH-neutral, stone-specific cleaner to avoid etching the surface. Always test any cleaner in an inconspicuous spot first.
How do I remove set-in grease from kitchen tiles?
Spray a degreaser or warm dish soap solution onto the stain, let sit for 5 minutes to loosen the grease, then scrub with a soft-bristle brush. Rinse thoroughly and dry to avoid residue.
Can I use bleach on kitchen wall tiles?
Bleach is safe only for sealed white grout, never for colored grout or natural stone tiles. If using bleach, dilute 1 part bleach with 10 parts water, apply only to grout, let sit for no more than 5 minutes, then rinse thoroughly and ventilate the area well to avoid fume buildup.
Can I use vinegar on all kitchen wall tiles?
No. Avoid vinegar on natural stone tiles (marble, travertine, slate), as the acid will etch and dull the surface permanently. It is safe for ceramic, porcelain, and glass tiles.
Will a steam cleaner damage my kitchen wall tiles?
Steam cleaners are safe for glazed ceramic and porcelain tiles, but avoid using them on natural stone or unsealed grout. Excess moisture can seep into porous surfaces, causing water damage or mold growth behind the tiles.
Conclusion
Cleaning kitchen wall tiles doesn’t have to be a time-consuming, frustrating chore. By identifying your tile type, using the right supplies, and following a simple prep and cleaning process, you can restore your tiles’ sparkle without damaging delicate finishes or grout. Consistent, small maintenance habits—like wiping up splatters immediately and sealing grout annually—will keep your kitchen walls looking fresh for years, making the entire space feel cleaner and more inviting.
If you’ve refreshed your tiles and are considering updating your kitchen’s overall aesthetic, check out our guides to wall colors that pair with green or brown kitchen cabinets for a cohesive, polished look that highlights your hard work.