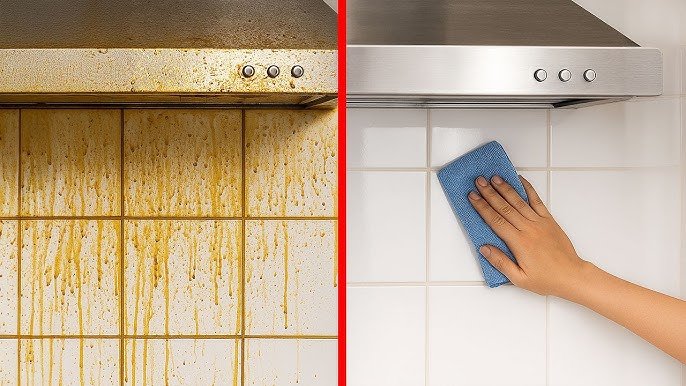
How to Remove Oil from Kitchen Wall: Easy and Effective Tips
Oil splatter and grease buildup on kitchen walls are one of the most common—and frustrating—kitchen upkeep challenges. Unlike dust or food spills, oil bonds to paint, drywall, and wallpaper, leaving dark, sticky stains that darken further as they attract airborne dirt. Left untreated, these stains can degrade wall finishes over time, leading to costly repaints. This guide walks you through tested, step-by-step methods to remove both fresh and set-in oil stains, tailored to your wall type, plus simple prevention tips to keep your kitchen walls spotless long-term.
Why Oil Stains Build Up on Kitchen Walls
Understanding why grease sticks to your walls helps you remove existing stains faster and prevent new ones from forming. The most common causes of kitchen wall oil buildup are:
Cooking Splatter and Grease Mist
When you fry, sear, or sauté at high heat, tiny oil droplets launch from pans, traveling up to 6 feet from the cooking surface. These droplets are too small to see at first, but they settle on nearby walls, cabinets, and even ceiling trim, forming a sticky film that grabs dust and grime over time. Stovetop splatter from tasks like frying bacon or cooking stir-fries is the most common source of wall grease. For more on this, see our guide on how to remove oil stains from kitchen wall.
Poor Ventilation
Kitchens without functional range hoods or adequate airflow trap airborne grease particles in the air. Instead of being vented outside, these particles settle on walls, especially above the stove and near cooking zones. Recirculating range hoods (which just filter air and push it back into the kitchen) are far less effective at removing grease mist than vented models.
Proximity to Cooking Areas
Walls within 2 feet of the stovetop, range hood, or deep fryer see the highest concentration of oil exposure. Cramped kitchen layouts with less than 12 inches of clearance between the stove and adjacent walls are especially prone to heavy splatter. For more on this, see our guide on how to remove oil stains from kitchen wall.
High-Fat Cooking Oils
Oils with low smoke points, like unrefined olive oil or coconut oil, break down into finer, stickier particles when heated than high-smoke-point oils like avocado or canola oil. Frequent use of low-smoke-point oils increases the rate of grease buildup on nearby surfaces.
Lack of Routine Cleaning
Fresh oil splatter is easy to wipe away, but if left for more than a few days, it hardens and bonds to wall finishes. Weekly light cleaning prevents this hardening, while ignoring small spots leads to large, stubborn stains that require harsh chemicals to remove. For more on this, see our guide on how to remove kitchen tiles from wall.
Wall Finish Susceptibility
Not all wall materials hold oil equally. Matte painted drywall absorbs grease quickly, making stains hard to remove without damaging the paint. Semi-gloss or satin paint repels oil better, making cleanup far simpler. Vinyl wallpaper can delaminate if exposed to too much moisture during cleaning, while ceramic tile and glass splash guards are almost completely grease-resistant.
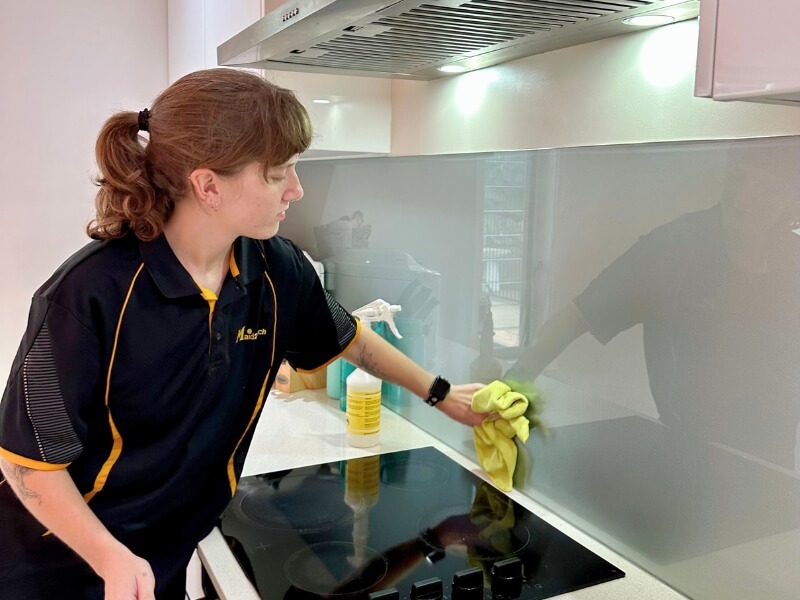 Wiping grease stains as soon as they appear prevents them from setting into wall finishes
Credit: www.maid2match.com.au
Wiping grease stains as soon as they appear prevents them from setting into wall finishes
Credit: www.maid2match.com.au
Pre-Cleaning Prep: Protect Your Walls and Gather Supplies
Skipping prep is the most common mistake people make when cleaning kitchen walls, leading to damaged paint, ruined floors, or incomplete stain removal. Follow these steps before you start scrubbing:
Step 1: Clear and Protect the Area
Remove all items from countertops and walls near the stain, including small appliances, decor, and spice jars. Lay down a drop cloth or old towels on the floor below the work area to catch drips of cleaner and grease. If you’re working near electrical outlets or light switches, turn off power to the circuit at your breaker box to avoid electrical hazards. For more on this, see our guide on how to clean oil grease from kitchen wall.
Step 2: Choose the Right Cleaner for Your Wall Finish
This is critical to avoid damage. For matte painted drywall, stick to mild, pH-neutral cleaners like diluted dish soap. For semi-gloss or satin paint, you can use slightly stronger degreasers like diluted vinegar. Never use abrasive cleaners (like scouring powder) on painted surfaces, as they will scratch the finish. For tile or glass, you can use commercial kitchen degreasers without worry.
Step 3: Test All Solutions First
Before applying any cleaner to a visible stain, test it on an inconspicuous spot (like behind a cabinet or in a corner) to check for discoloration, peeling, or paint damage. Wait 10 minutes, then wipe the test spot clean—if no damage appears, the cleaner is safe to use. For more on this, see our guide on how to remove tile backsplash from kitchen wall.
Step 4: Gather Essential Tools
You’ll need:
- Soft microfiber cloths or non-abrasive sponges (avoid steel wool or rough scrubbers, which scratch paint)
- A spray bottle for even cleaner application
- A soft-bristled brush (like a toothbrush or dish brush) for grout or textured surfaces
- Rubber gloves to protect your skin from irritants
- Clean water for rinsing
- Dry microfiber cloths for patting surfaces dry after cleaning
Easy, Effective Methods to Remove Fresh Oil Stains (Under 24 Hours Old)
Fresh stains are the easiest to remove, and you can almost always use gentle, non-toxic methods. These steps work for most wall finishes when tested first.
Dish Soap and Warm Water
Dish soap is formulated to break down grease bonds, making it the first line of defense for fresh splatter. Mix 1 teaspoon of mild, grease-cutting dish soap with 2 cups of warm water in a spray bottle or bowl. Dampen a microfiber cloth with the solution, then dab (don’t rub) the stain to lift the oil. Rinse the area with a clean damp cloth to remove soap residue, then pat dry with a clean towel. For very fresh splatter, this method often removes the stain entirely in one pass.
Baking Soda Paste
For slightly set fresh stains (6–12 hours old), baking soda’s mild abrasiveness lifts oil without damaging paint. Mix 3 parts baking soda with 1 part warm water to form a thick paste. Apply the paste directly to the stain, let it sit for 10–15 minutes, then gently rub in circular motions with a soft cloth. Wipe clean with warm water, then rinse and pat dry.
Lemon Juice and Salt
Citric acid in lemon juice cuts through grease, while fine salt acts as a gentle abrasive. Mix 2 tablespoons of lemon juice with 1 teaspoon of table salt to form a paste. Apply to the stain, let sit for 5 minutes, then wipe clean with a damp cloth. This method works especially well on semi-gloss paint, as it also deodorizes the area.

Methods for Stubborn, Set-In Oil Stains (Older Than 1 Week)
For stains that have hardened and bonded to the wall, you’ll need stronger solutions, but always follow the finish-specific guidelines above to avoid damage.
White Vinegar and Water Solution
White vinegar is a natural degreaser that breaks down hardened oil bonds. Mix equal parts distilled white vinegar and warm water in a spray bottle. Spray the stain, let it sit for 15 minutes (don’t let it dry, as this can damage matte paint), then scrub gently with a soft-bristled brush or non-abrasive sponge. Rinse thoroughly with clean water and pat dry. Note: Avoid using vinegar on unsealed grout or natural stone tile, as the acid can etch the surface.
Paint-Safe Commercial Degreaser
For heavy, dark stains that don’t respond to home remedies, use a commercial kitchen degreaser labeled safe for painted surfaces. Look for non-abrasive, low-VOC formulas to avoid strong fumes. Apply the degreaser according to the label instructions, let it sit for the recommended dwell time (usually 2–5 minutes), then scrub gently and rinse. For science-backed home cleaning guidance, always test commercial products on a hidden spot first.
Magic Eraser (For Durable Finishes Only)
Melamine foam erasers (sold under the brand name Magic Eraser) are mildly abrasive and can lift set-in grease from semi-gloss or satin paint, tile, and glass. Dampen the eraser with water, then gently rub the stain in circular motions. Rinse the area with clean water after use to remove any foam residue. Never use melamine erasers on matte paint, wallpaper, or wood finishes, as they will scratch or damage the surface. A common mistake is mixing cleaning products like vinegar and bleach, ammonia and vinegar, or degreaser and bleach, which can release toxic fumes and damage your walls—always use one cleaner at a time.
Cleaning Hard-to-Reach and Heavily Soiled Areas
Some grease buildup occurs in areas that are out of easy reach, or are so heavy that standard methods won’t work. These targeted approaches tackle those tricky spots.
Behind Range Hoods and Above Stoves
The area directly behind your range hood often accumulates thick, sticky grease that drips down onto the wall over time. For this area, use a soft-bristled brush to apply your chosen degreaser, working from the top of the stain down to avoid drips. For heavy buildup, let the degreaser sit for up to 10 minutes before scrubbing. If you’re also deep cleaning behind a wall-mounted faucet during your kitchen refresh, follow our guide to removing the fixture safely to access hidden grease behind the sink that’s impossible to reach with the fixture in place.
Textured or Popcorn Walls
Textured drywall and popcorn ceilings have tiny crevices that hold grease, making them harder to clean than smooth surfaces. Use a soft-bristled brush to work the cleaner into the texture, then blot the area with a damp cloth to lift the grease. Avoid rubbing, as this can damage the texture. For very heavy stains on textured walls, you may need to spot-prime and repaint the area after cleaning.
Grease on Wallpaper
Vinyl wallpaper can tolerate mild degreasers, but paper wallpaper is very sensitive to moisture. For vinyl wallpaper, use a 1:1 mix of dish soap and warm water, dabbing the stain with a soft cloth (don’t saturate the wallpaper, as this can cause peeling). For paper wallpaper, use a dry baking soda paste, applying it lightly and wiping off with a barely damp cloth to avoid water damage.
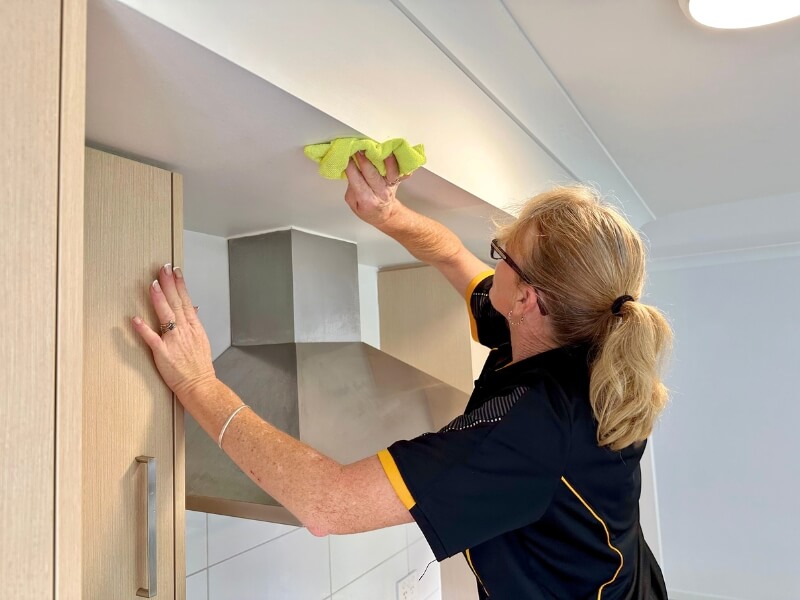 Heavy grease buildup behind range hoods often requires longer dwell time for cleaners to work
Credit: www.maid2match.com.au
Heavy grease buildup behind range hoods often requires longer dwell time for cleaners to work
Credit: www.maid2match.com.au
Pro Tips to Prevent Future Oil Buildup
Preventing grease stains is far easier than removing set-in buildup. These small changes will keep your kitchen walls clean with minimal effort:
Upgrade Your Ventilation
A vented range hood that exhausts grease-laden air outside your home is the single most effective way to reduce wall grease. If you have a recirculating hood, replace it with a vented model, or open a window while cooking to improve airflow. Clean your range hood filter monthly to keep it working efficiently.
Use Physical Barriers
Install a heat-resistant splash guard behind your stovetop to catch splatter before it hits the wall. Tempered glass, stainless steel, or acrylic splash guards are easy to wipe down after cooking, and they protect your paint from damage. For extra protection, use a splatter screen when frying greasy foods like bacon or burgers.
Adopt a Quick Wipe Routine
Wipe down the wall behind your stove and range hood with a damp microfiber cloth after every cooking session that produces splatter. This takes less than 30 seconds, and prevents fresh oil from hardening into stubborn stains. For kitchens with heavy cooking use, do a deeper wipe-down with diluted dish soap once a week.
Seal Painted Wall Surfaces
If you cook frequently, apply a clear, matte or satin sealant to your kitchen walls after painting. This creates a protective barrier that repels oil and moisture, making cleanup far easier. Be sure to use a low-VOC, paint-safe sealant to avoid strong fumes in your kitchen. If your walls are stained beyond repair after deep cleaning, opt for a satin or semi-gloss paint that repels future splatter, and select coordinating wall tones that match your cabinet style. For kitchens with green cabinetry, soft neutral coordinating wall tones help hide any residual stains between deep cleans. For warm brown cabinet kitchens, easy-to-clean wall shades in soft beige or cream pair seamlessly with your existing decor and hide splatter between washes.
Safety Precautions for Grease Cleaning
Grease cleaning products can pose health and safety risks if used incorrectly. Follow these guidelines to stay safe:
Ventilation and Protective Gear
Open windows and doors to let fresh air in while cleaning, especially when using commercial degreasers or vinegar. Wear rubber gloves to protect your skin from irritants, and use goggles if you’re working with spray cleaners to avoid eye splashes. If you have respiratory sensitivities, wear a N95 mask to avoid inhaling fumes or grease dust.
Safe Chemical Handling
Never mix different cleaning products, as combinations like vinegar and bleach can release toxic fumes. Use only the recommended amount of cleaner specified on the product label, and avoid saturating walls with excess solution to prevent paint damage or mold growth. Store all cleaning products out of reach of children and pets, and dispose of leftover solutions according to local hazardous waste guidelines.
Frequently Asked Questions
How long does it take to remove set-in oil stains from kitchen walls?
For fresh stains, removal takes 5–10 minutes. For set-in stains older than 1 week, you’ll need 15–30 minutes of dwell time for cleaners to break down the grease, plus 10 minutes of gentle scrubbing. Very heavy, months-old stains may require multiple cleaning sessions or spot repainting.
Can I use bleach to remove kitchen grease?
No. Bleach is a disinfectant and whitener, but it does not break down oil bonds. It can also discolor painted walls, damage wallpaper, and release toxic fumes if mixed with other cleaners. Stick to degreasers, dish soap, vinegar, or baking soda for grease removal.
Will oil stains come back after cleaning?
Only if you don’t address the root cause. If your range hood isn’t venting properly, or you don’t wipe down walls after cooking, fresh grease will accumulate and form new stains within weeks. Pair cleaning with the prevention tips above to keep stains from returning.
Are commercial degreasers safe for painted walls?
Yes, as long as you use a formula labeled safe for painted surfaces and follow the label instructions. Avoid heavy-duty industrial degreasers, as they can strip paint. Always test the product on a hidden spot first, and don’t let it sit on the wall longer than the recommended dwell time.
Can I remove oil stains from kitchen wallpaper?
It depends on the wallpaper type. Vinyl wallpaper can tolerate mild soap and water solutions, but paper wallpaper is very sensitive to moisture. For vinyl wallpaper, use a 1:1 mix of dish soap and warm water, dabbing the stain with a soft cloth (don’t saturate the wallpaper, as this can cause peeling). For paper wallpaper, use a dry baking soda paste, applying it lightly and wiping off with a barely damp cloth to avoid water damage.
Conclusion
Removing oil from kitchen walls doesn’t require harsh chemicals or expensive professional cleaning—you can tackle most stains with common household items and a little patience. The key is to act fast on fresh splatter, match your cleaning method to your wall finish, and test all solutions on a hidden spot first to avoid damage. For set-in stains, a combination of natural degreasers and gentle scrubbing will lift even the darkest grease without harming your paint.
To keep stains from coming back, prioritize proper ventilation, use a splash guard behind your stovetop, and wipe down walls after each cooking session. If your walls are stained beyond repair after deep cleaning, opt for a satin or semi-gloss paint that repels future grease, and select coordinating wall tones that work with your cabinet style. If you’re also tackling other kitchen grime during your deep clean, our guide to removing the fixture safely will help you clean behind hard-to-reach fixtures to eliminate hidden grease and grime.