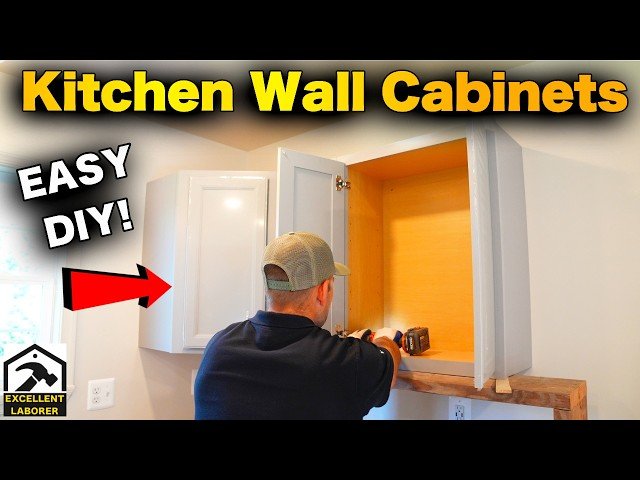
How to Attach Kitchen Wall Cabinets: Easy Steps for Perfect Installation
Installing wall cabinets is one of the most high-impact upgrades you can make to your kitchen, adding storage, boosting visual appeal, and increasing your home’s resale value. But improperly mounted cabinets are a leading cause of costly kitchen repairs, with sagging, misaligned units or damaged drywall often requiring professional fixes that cost hundreds of dollars.
Whether you’re a first-time DIYer or tackling a full kitchen refresh, this guide walks you through every step of the process with 2026 best practices, safety guidelines, and pro tips to avoid common mistakes. If you love hosting, pairing your new layout with curated wine making supplies lets you craft custom drinks to serve in your refreshed space.
Pre-Installation Planning: Avoid Costly Mistakes Before You Drill
Skipping pre-installation checks is the most common reason for cabinet installation failures. Taking 30 minutes to assess your space, plan your layout, and gather materials will save you hours of rework and prevent damage to your walls or cabinets.
Check Your Wall Type and Load Capacity
First, identify what your walls are made of: standard drywall over wood studs, plaster, concrete, or brick. This determines which fasteners you’ll need and how much weight your mounting system can support. Standard wall cabinets hold 20–50 pounds per linear foot, so if you plan to store heavy dishes, small appliances, or integrated lighting, you’ll need extra stud anchoring to handle the load.
If you’re installing new countertops, complete that work first to get an accurate measurement for your cabinet bottom height. Most countertops are 36 inches tall, so wall cabinet bottoms are typically installed 18 inches above the counter for easy access.
Map Cabinet Placement and Clear the Workspace
Map out your cabinet layout on paper first, accounting for obstructions like windows, outlets, vent hoods, and wall-mounted faucets. Measure each cabinet’s width, depth, and height to confirm they fit your allocated space, leaving a 1/8-inch gap between doors for smooth operation.
Clear all items from the wall, countertops, and floor within 3 feet of the installation area to avoid tripping hazards. Cover nearby appliances and flooring with drop cloths to protect them from dust and debris. If your installation area includes a wall-mounted faucet, remove it first to avoid damage during drilling and cabinet placement. Refer to our guide on removing a wall-mounted kitchen faucet for step-by-step instructions.
Essential Tools and Materials for a Secure Install
Having all your tools and materials ready before you start will eliminate interruptions and ensure you don’t cut corners on safety or stability. Investing in quality tools now will pay off in a flawless, long-lasting installation.
Core Tool Checklist
You’ll need the following tools for a standard installation:
- Stud finder (preferably with deep-scan mode for plaster or lath walls)
- 4-foot spirit level or laser level for long, straight reference lines
- Cordless drill with driver and drill bit sets
- Tape measure and carpenter’s square for precise marking
- Bar clamps or cabinet clamps to hold units in place
- Adjustable step ladder rated for your weight (always follow OSHA ladder safety guidelines when working at height to avoid falls, the leading cause of DIY home renovation injuries)
- Safety glasses and work gloves
- Caulk gun and paintable silicone caulk for sealing gaps
Fastener Selection Guide
Fasteners are the most critical component of a secure cabinet installation, as they transfer the full weight of the cabinets and their contents to the wall studs. Using the wrong fasteners is a common mistake that leads to sagging or sudden cabinet failure. Refer to the guide below to choose the right option for your wall type:
| Fastener Type | Best Use | Minimum Length | Load Capacity Notes |
|---|---|---|---|
| #8 or #10 corrosion-resistant wood screw | Wood studs (standard 2×4 framing) | 2.5 inches (1.5 inches of penetration into the stud) | Supports up to 100 lbs per screw, per Cabinet Manufacturers Association (CMA) standards |
| Sleeve-type masonry anchor | Concrete, brick, or block walls | 2 inches | Supports 30–50 lbs per anchor; use multiple anchors for heavy cabinet loads |
| Toggle bolt | Hollow drywall with no accessible studs | 3 inches | Supports 10–15 lbs per bolt; only suitable for very light cabinet loads |
| Heavy-duty cabinet mounting bracket | Cabinets with integrated lighting, stone countertops, or loads over 200 lbs per unit | N/A | Distributes weight across 2–3 studs for maximum support |
For load capacity requirements specific to your cabinet weight, refer to the Cabinet Manufacturers Association’s installation standards for manufacturer-recommended fastening practices. Avoid drywall screws, as their brittle composition makes them prone to breaking under heavy, sustained load.
Marking Precise Placement Lines
Accurate wall markings are the foundation of a level, aligned cabinet run. Rushing this step leads to uneven cabinets, misaligned doors, and visible gaps between units.
Establish Level Reference Lines
Start by marking a horizontal line on the wall where the bottom edge of your cabinets will sit. Use a 4-foot spirit level or laser level to ensure the line is perfectly straight across the entire installation area. For runs longer than 10 feet, a laser level is far more accurate than a traditional string line, as it eliminates sag from the string’s weight.
Mark the top edge of the cabinets as a second reference line, using the cabinet’s height to calculate the distance between the two lines. Double-check both lines with your level at multiple points to catch any wall dips or bumps that could throw off your alignment.
 A spirit level is the most reliable tool for confirming both horizontal and vertical cabinet alignment before fastening.
Image source: This Old House
A spirit level is the most reliable tool for confirming both horizontal and vertical cabinet alignment before fastening.
Image source: This Old House
Locate and Mark All Wall Studs
Use a stud finder to locate all wall studs in your installation area, marking their center points with a pencil. Standard stud spacing is 16 or 24 inches on center, but always confirm with your stud finder, as older homes may have irregular spacing.
Mark the stud locations on your wall, and also transfer the marks to the back of each cabinet so you know exactly where to drill pilot holes. For plaster walls, mark the stud edges as well to avoid cracking the plaster when drilling.
Mounting Cabinets Safely and Securely
This is the most physically demanding part of the installation, but with the right technique, you can mount cabinets safely and securely in a single day.
Lifting and Positioning Tips for Solo or Two-Person Teams
Wall cabinets are heavier than they appear: a standard 30-inch cabinet loaded with dishes can weigh 50–75 pounds. If you’re working alone, use a cabinet jack or temporary ledger board (a 1×4 board secured to your bottom reference line) to rest the cabinet on while you fasten it, eliminating the need to hold it up for extended periods.
For two-person teams, one person can hold the cabinet in place while the other drives screws. Always use a sturdy, OSHA-rated step ladder to reach mounting height, and never stand on the cabinet itself or an unstable surface.
Fastening to Studs for Maximum Support
Align the cabinet’s back panel with your reference lines, then drive screws through the cabinet’s mounting holes directly into the marked stud centers. For most cabinets, use 2.5-inch #8 or #10 wood screws, ensuring at least 1.5 inches of the screw penetrates the stud for a secure hold.
In practice, most DIYers make the mistake of driving screws only into the top and bottom of the cabinet, which leaves the middle unsupported and prone to sagging over time. Add a screw through the middle mounting hole for cabinets longer than 30 inches to distribute weight evenly. If you’re working with hollow drywall and cannot locate a stud, use toggle bolts as a temporary fix for very light loads, but add a 1×4 mounting board secured to adjacent studs to avoid long-term damage.
Verify Level and Alignment With Adjacent Units
After securing the first cabinet, use a spirit level to check both horizontal (side-to-side) and vertical (up-and-down) alignment. Even a 1-degree tilt will cause cabinet doors to swing open or close improperly over time. Adjust the cabinet by loosening screws slightly and repositioning as needed, then re-tighten fully.
For runs of multiple cabinets, check alignment with the adjacent unit as you install each one to ensure a seamless, gap-free look. Use thin plastic or wood shims behind the cabinet to fill gaps between the cabinet back and uneven walls, then trim the shims with a utility knife before caulking.
Joining Multiple Wall Cabinets for a Seamless Look
Joining cabinets side-by-side creates a unified, custom look, but requires careful alignment to avoid visible gaps or misaligned doors.
Clamping for Perfect Flush Alignment
Before fastening cabinets together, use bar clamps to pull the adjoining frames flush against each other. Place one clamp at the top and one at the bottom of the cabinet joint to apply even pressure and prevent twisting. Check the gap between the cabinet doors: the standard gap is 1/8 inch, so adjust the clamps if the gap is too wide or narrow.
 Bar clamps ensure adjoining cabinets sit flush with no gaps before permanent fastening.
Image source: Create Enjoy
Bar clamps ensure adjoining cabinets sit flush with no gaps before permanent fastening.
Image source: Create Enjoy
Fastening Cabinet Frames Together
Once the cabinets are clamped tightly, drill pilot holes through the face frames where they meet, then drive 1 ¼-inch trim-head screws through the holes to secure the frames together. Trim-head screws sit flush with the wood surface, so they don’t interfere with door hinges or drawer slides.
Check the alignment of the entire cabinet run after each screw to catch any shifts before they become permanent. For long runs, install a cleat (a horizontal 1×4 board) across the top of the cabinets, securing it to the wall studs, to add extra support and prevent sagging between studs.
Finishing Touches for a Professional Result
Small finishing steps are what separate a DIY installation from a professional one, and they ensure your cabinets function smoothly for years to come.
Install Doors and Hardware Correctly
Start by attaching cabinet hinges to the doors and cabinet frames, following the manufacturer’s instructions for screw placement. Most modern hinges have adjustable screws that let you tweak the door position up/down, in/out, and side-to-side to eliminate rubbing or uneven gaps.
Attach knobs or pulls to the doors and drawers, ensuring they are aligned evenly across the entire run. Use a template or measuring tape to space hardware consistently, typically 2–4 inches from the edge of the door for pulls, and centered for knobs.
Seal Gaps and Match Wall Finishes
Small gaps between the cabinets and wall, or between adjoining cabinets, can collect dust, grime, and moisture over time. Seal these gaps with paintable latex caulk for dry areas, or silicone caulk for areas near sinks, dishwashers, or other moisture sources. Smooth the caulk with a damp finger or caulk smoothing tool for a neat, finished line, then paint over it to match your wall color once dry.
For a cohesive look, choose a wall color that complements your cabinet finish. If you have green cabinetry, check our recommendations for coordinating wall colors for green cabinets to find the perfect match. For warm wood or brown cabinets, explore coordinating wall colors for brown cabinets to create a balanced, inviting space.
Troubleshooting Common Installation Issues
Even with careful planning, small issues can pop up during installation. These quick fixes will help you resolve problems without starting over.
Fix Sagging or Uneven Cabinets
If a cabinet sags slightly after installation, first check that all screws are fully tightened into the studs. If the sag persists, add an extra screw through the middle mounting hole into a nearby stud, or install a mounting bracket to distribute weight more evenly. Use thin wood or plastic shims behind the cabinet to level it, then trim the shims and seal the gap with caulk.
Correct Wall Irregularities Without Major Repair
If your wall has bumps, dips, or old wallpaper that prevents the cabinet from sitting flush, attach vertical 1×4 furring strips to the wall studs first to create a flat, even mounting surface. Secure the strips with 3-inch wood screws into the studs, then mount the cabinets to the furring strips as normal. This eliminates the need to mud or sand the wall before installation.
Repair Stripped Screw Holes
If a screw hole is stripped and the screw won’t hold, remove the screw and fill the hole with a small wooden dowel coated in wood glue. Let the glue dry completely (usually 1–2 hours), then trim the dowel flush with the wall, drill a new pilot hole, and re-secure the screw to the stud.
 Properly installed cabinets have even door gaps, sit flush against the wall, and have no sag over time.
Image source: Family Handyman
Properly installed cabinets have even door gaps, sit flush against the wall, and have no sag over time.
Image source: Family Handyman
Frequently Asked Questions
How do I measure for kitchen wall cabinets?
Start by measuring the width, height, and depth of the installation area, accounting for obstructions like windows, outlets, and vent hoods. Measure the height from the floor to the desired bottom of the cabinets (typically 18 inches above your countertop) to ensure they don’t interfere with upper cabinets or ceiling fixtures. Double-check all measurements before purchasing cabinets to avoid costly returns.
What tools do I need for cabinet installation?
Core tools include a stud finder, spirit level, cordless drill, tape measure, bar clamps, step ladder, safety glasses, and caulk gun. Optional tools that make the job easier include a laser level for long reference lines, a cabinet jack for solo installs, and a carpenter’s square for checking frame alignment.
Can one person install wall cabinets?
It is possible, but not recommended for heavy cabinet runs. If you’re working alone, use a cabinet jack or ledger board to hold the cabinet in place while you fasten it, and pre-drill all pilot holes before lifting the cabinet into position. Work from the center of the run outward to avoid misalignment.
How do I ensure cabinets are level?
Mark a level reference line on the wall before installing any cabinets, and check the level of each cabinet as you secure it. For runs of multiple cabinets, check the level across the entire run, not just individual units, to avoid a stepped appearance. Adjust with shims as needed before tightening all screws fully.
What size screws should I use to mount kitchen wall cabinets?
Use #8 or #10 corrosion-resistant wood screws, 2.5 inches long, for standard wood stud mounting. This length ensures 1.5 inches of penetration into the stud for a secure hold. Avoid drywall screws, as their brittle composition makes them prone to breaking under heavy, sustained load.
Do I need to mount wall cabinets to every stud?
For standard 24-inch stud spacing, mount each cabinet to at least two studs. For cabinets longer than 36 inches, use three studs to distribute weight and prevent sagging. If your studs are 16 inches on center, one stud may be sufficient for very light loads, but two studs per cabinet is recommended for long-term durability.
Final Tips for Long-Lasting Cabinet Installation
Once your cabinets are installed, avoid overloading them beyond their rated weight capacity to prevent sagging. Check the screws annually to ensure they are still tight, and re-caulk gaps as needed to prevent moisture damage. For added kitchen organization, specialized wine accessories can be stored in lower cabinets to keep your entertaining essentials close at hand.
With proper prep, the right fasteners, and careful alignment, you can install professional-grade wall cabinets in a single weekend, saving hundreds of dollars in professional installation costs and adding lasting value to your home.