
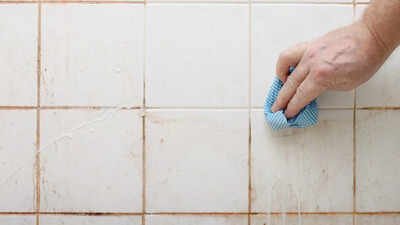
How to Clean Kitchen Wall Tiles Easily: Quick & Effective Tips
Your kitchen wall tiles take a beating every day: grease splatters from frying, tomato sauce splashes from weekend cooking, hard water spots near the sink, and grout that slowly yellows from moisture and daily messes. Over time, even the most beautiful tile can look dull and grimy, making your entire kitchen feel less inviting. The good news? You don’t need harsh chemical cleaners, expensive professional services, or hours of scrubbing to bring them back to life. With the right supplies, tile-specific techniques, and a simple maintenance routine, you can get sparkling, streak-free tiles in 10 minutes or less for quick cleanups, and restore even the dirtiest grout with minimal effort. This guide covers everything you need to know, from matching cleaners to your tile type to tackling stubborn, set-in stains, so you can keep your kitchen walls looking fresh with as little work as possible.
 Spraying a vinegar solution to cut through light grease on ceramic subway tiles
Understand Your Tile Type First
The single most important rule for cleaning kitchen wall tiles without damage is to match your cleaning method to your tile material. Using acidic cleaners on natural stone or abrasive pads on glossy finishes can cause permanent etching, scratching, or discoloration that’s impossible to fix without replacing the tile entirely. You can also read our guide on how to get rid of grease stains on kitchen walls.
Common Tile Types and Safe Cleaner Pairings
- Ceramic and porcelain (most common kitchen tiles): Durable, non-porous, and resistant to most cleaners. pH-neutral dish soap, vinegar solutions, and baking soda pastes are all safe for regular use.
- Natural stone (marble, travertine, slate, granite): Porous and easily etched by acidic substances. Never use vinegar, lemon, or harsh chemical cleaners. Opt for a pH-neutral stone cleaner specifically formulated for natural surfaces, and avoid abrasive scrub brushes that can scratch the finish.
- Glass tiles: Non-porous and resistant to most cleaners, but prone to water spots and streaks. Use a vinegar-water solution or a dedicated glass cleaner, and wipe dry with a lint-free microfiber cloth to avoid marks.
- Cement or encaustic tiles: Porous and prone to staining if unsealed. Use only mild soap and water for cleaning, and avoid acidic or abrasive products entirely. If your tiles are unsealed, test any cleaner on a hidden area first. If you’re unsure of your tile type, check the manufacturer’s documentation or test any new cleaner on a small, hidden spot behind an appliance or cabinet to ensure it doesn’t cause damage.
Essential Cleaning Supplies
You don’t need a cabinet full of specialty products to clean kitchen wall tiles effectively. Most of the best cleaners are already in your home, and the right tools will cut your scrubbing time in half while preventing damage to tile and grout. You can also read our guide on how to remove oil grease from kitchen walls.
Safe, Effective Cleaners for Every Tile Type
The University of Minnesota Extension recommends avoiding harsh chemical cleaners in kitchen spaces, as residues can transfer to food preparation surfaces; opt for pH-neutral or natural solutions whenever possible safe home cleaning guidance. Stick to these vetted options for safe, effective results:
- Distilled white vinegar and water (1:1 ratio): Ideal for glazed ceramic, porcelain, and glass tiles. The mild acidity cuts through light grease, hard water spots, and surface dirt without leaving residue. Never use on natural stone or unsealed grout.
- Baking soda: A mild abrasive that lifts stubborn stains, brightens grout, and deodorizes without scratching tile surfaces. Mix with a small amount of water to form a paste for spot-treating stains.
- Mild pH-neutral dish soap: Safe for all tile types, perfect for daily maintenance and light cleaning. Look for unscented, dye-free options to avoid leaving residue on tiles.
- Hydrogen peroxide (3% solution): A safe, non-toxic option for whitening discolored grout and killing mold spores. Test on a hidden spot first if you have colored grout, as it can cause mild bleaching.
- Commercial tile cleaner: For heavy buildup, choose a cleaner labeled safe for your specific tile type. Always test on a small area first, and avoid products with bleach, ammonia, or acidic ingredients unless specified as safe for your tile.
Tools That Cut Down on Scrubbing Time
The right tools will help you clean faster, avoid streaks, and protect your tile and grout from damage:
- Soft-bristle scrub brush or old toothbrush: Perfect for targeting grout lines and stubborn stains without scratching tile surfaces.
- Microfiber cloths (lint-free): The best option for wiping tiles dry, as they trap dirt and absorb water without leaving streaks or lint behind.
- Spray bottle: For even, mess-free application of liquid cleaners.
- Grout brush with a long handle: Reduces back strain when scrubbing low wall or floor grout lines.
- Soft sponge (non-abrasive): For gentle wiping of delicate tile surfaces like glass or polished stone. A common mistake many homeowners make is using abrasive scrub pads or steel wool on glossy tiles, which leaves tiny micro-scratches that trap dirt and make tiles look dull over time.
 Wiping cleaned tiles with a microfiber cloth to avoid streaks and water spots
Step-by-Step Prep for Streak-Free Results
Skipping prep is the top reason most people end up with streaks, residue, or damaged surrounding surfaces after cleaning their tiles. Taking 5 minutes to prepare before you start scrubbing will make the entire cleaning process faster and more effective. You can also read our guide on how much does it cost to tile a kitchen wall.
Clear and Protect the Area
Start by removing any objects leaning against or attached to the tiled wall: spice racks, utensil holders, small appliances, and wall decor. If you have a wall-mounted kitchen faucet near the tiled area, temporarily remove it using these faucet removal steps to get full access to the tiles behind it and avoid water damage to the fixture. Next, protect surrounding surfaces from splatters and cleaning solution:
- Cover countertops, painted walls, and nearby appliances with plastic sheeting or old towels, securing the edges with painter’s tape to prevent slipping.
- Cover electrical outlets and light switches with plastic outlet covers (never tape over outlets, as this is a fire hazard).
- If you’re worried about splatters damaging painted walls, these non-damaging wall cleaning methods work for touch-ups after tile cleaning is complete.
Remove Surface Loose Debris
Before applying any liquid cleaners, remove all loose dust, crumbs, and debris from the tile surface and grout lines:
- Use a soft-bristle brush or a dry microfiber cloth to wipe down the entire tiled area, paying extra attention to corners and grout lines where dust and crumbs collect.
- For textured tiles or hard-to-reach areas, use a handheld vacuum with a soft brush attachment to suck up loose debris without scratching the tile surface. Avoid using a wet cloth at this stage, as it will spread dirt around and create muddy residue that’s harder to remove later. You can also read our guide on how much to open up kitchen wall.
Quick Cleaning Methods for Daily Maintenance
For light grime, fresh spills, and regular upkeep, these quick methods take 10 minutes or less and require no specialized equipment.
Vinegar and Water Solution for Ceramic/Porcelain Tiles
This is the go-to method for most kitchen tiles, as it cuts through light grease and hard water spots without leaving residue:
- Mix equal parts distilled white vinegar and warm water in a spray bottle.
- Spray the solution generously onto the tiled wall, avoiding grout lines if they are unsealed.
- Let the solution sit for 3 to 5 minutes to break down dirt and grease — do not let it dry, as this can leave streaks.
- Wipe the tiles down with a soft microfiber cloth or non-abrasive sponge in circular motions.
- Rinse the tiles with a clean damp cloth to remove any remaining vinegar residue, then dry thoroughly with a second clean microfiber cloth to avoid water spots. In practice, distilled vinegar works better than standard white vinegar for homes with hard water, as it leaves less mineral residue that can cause streaks.
Mild Soap and Water for All Tile Types
If you have natural stone, unsealed grout, or prefer to avoid vinegar entirely, this method is safe for every tile material:
- Mix 1 to 2 drops of mild, pH-neutral dish soap with 2 cups of warm water.
- Dampen a soft microfiber cloth in the solution, wringing out excess water so the cloth is damp, not soaking wet.
- Wipe down the entire tiled area, paying extra attention to areas near the stove and sink where splatters are most common.
- Rinse the tiles with a clean damp cloth to remove soap residue, then dry thoroughly with a dry microfiber cloth.
Spot-Treating Fresh Spills Immediately
The easiest way to keep kitchen wall tiles clean is to address spills as soon as they happen:
- For greasy or sauce spills, blot up excess liquid with a paper towel, then wipe the area with a damp soapy cloth.
- For acidic spills like tomato sauce or lemon juice, rinse the area with cool water first to neutralize the acid, then wipe with soapy water to avoid staining.
- For hard water spots near the sink, spray with a vinegar solution, let sit for 1 minute, then wipe dry. Always rinse tiles thoroughly after cleaning to remove any cleaner residue, per FDA food safety guidance for kitchen surfaces FDA kitchen sanitation standards. You can also read our guide on best dish towels for drying dishes.
Baking Soda Paste for Stubborn Stains
For set-in grease, food stains, or light grout discoloration, baking soda paste is a gentle abrasive that lifts stains without damaging tile:
- Mix 3 parts baking soda with 1 part warm water to form a thick paste.
- Apply the paste directly to the stained area, covering it completely.
- Let the paste sit for 10 to 15 minutes to lift the stain — do not let it dry fully, as this can make it harder to remove.
- Scrub the area gently with a soft-bristle brush or damp sponge in circular motions.
- Rinse the area thoroughly with warm water to remove all baking soda residue, then dry with a clean microfiber cloth.
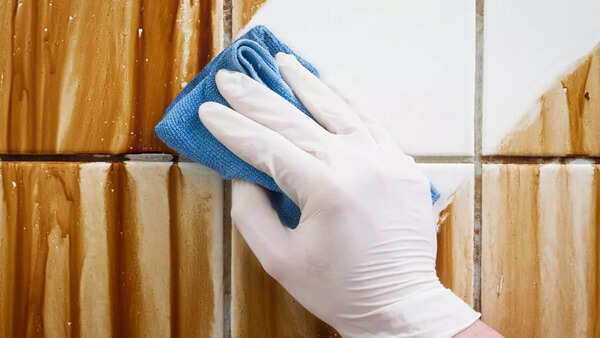 Applying baking soda paste to stained grout lines for deep cleaning
Deep Cleaning Techniques for Stubborn Grime
Quick cleaning methods work for daily upkeep, but for built-up grease, dark grout, and set-in stains that have accumulated over months or years, you’ll need deep cleaning techniques to restore your tiles to their original shine. These methods take a bit more time but require no harsh chemicals or professional help. You can also read our guide on how to clean kitchen grease off painted walls.
Tackling Stained Grout Lines
Grout is the most porous part of your tiled wall, so it absorbs grease, moisture, and dirt far faster than tile itself, leading to dark, discolored lines that make even clean tiles look dirty. For light grout stains:
- Apply a baking soda and water paste to the grout lines, covering them completely.
- Spray the paste with a vinegar solution — it will fizz slightly, which helps lift dirt from the porous grout.
- Let the mixture sit for 10 minutes, then scrub the grout lines vigorously with a soft-bristle grout brush or old toothbrush.
- Rinse thoroughly with warm water, then dry with a microfiber cloth. For white or light-colored grout with heavy discoloration, mix 1 part 3% hydrogen peroxide with 1 part baking soda to form a paste, apply to the grout, let sit for 15 minutes, then scrub and rinse. Always test hydrogen peroxide on a hidden grout spot first, as it can cause mild bleaching on colored grout.
Steam Cleaning for Chemical-Free Sanitation
Steam cleaning is the most effective chemical-free method for killing bacteria, mold, and mildew on tile and grout, while lifting built-up grease and dirt:
- Use a handheld or upright steam cleaner with an adjustable temperature setting, set to at least 200°F (93°C) to kill 99% of common kitchen bacteria.
- Hold the steam nozzle 6 to 8 inches away from the tile surface, moving slowly along grout lines and tile surfaces to let the hot steam loosen dirt.
- Avoid holding the nozzle in one spot for more than 2 seconds, as excess heat can crack ceramic tiles or damage grout.
- After steaming, wipe the tiles down with a clean microfiber cloth to remove loosened grime and excess moisture. If you don’t own a steam cleaner, most home improvement stores offer affordable same-day rentals for $15 to $30, making this a cost-effective option for twice-yearly deep cleans. You can also read our guide on how to decorate my kitchen walls.
Removing Set-In Grease and Food Stains
For grease buildup that’s accumulated over months of cooking, or dried-on food stains that won’t lift with basic cleaners:
- Apply a thick layer of baking soda paste directly to the stained area.
- Cover the paste with a damp cloth to keep it from drying out, and let it sit for 30 minutes to 1 hour for heavy buildup.
- Scrub the area with a soft-bristle brush, then rinse thoroughly with warm soapy water.
- For extra-stubborn grease, spray the area with a vinegar solution after scrubbing, let sit for 5 minutes, then rinse and dry. For regular grease buildup between deep cleans, these kitchen wall grease removal tips will help you tackle grime before it sets in. For long-standing, caked-on grease that won’t lift with home methods, these set-in oil stain removal tips will tackle even the oldest, most stubborn buildup. You can also read our guide on apron hanging in kitchen.
Long-Term Maintenance to Keep Tiles Looking New
The best way to avoid time-consuming deep cleaning is to build simple, low-effort maintenance habits into your regular kitchen routine. Small, consistent efforts will keep your tiles shiny and your grout stain-free for years. You can also read our guide on best drying towels for dishes.
Daily and Weekly Quick Routines
- After every cooking session: Wipe down tiled walls with a damp microfiber cloth to remove fresh grease splatters and food residue before it has time to set. This 2-minute step will cut down on deep cleaning time by 70% in most households.
- Weekly 5-minute wipe-down: Use a mild soap and water solution to wipe all tiled surfaces, paying extra attention to the area around the stove and sink. Dry thoroughly with a clean cloth to avoid water spots.
- Weekly grout brush: Spend 2 minutes scrubbing grout lines with a soft toothbrush and baking soda paste to prevent dark discoloration from building up. Wiping spills immediately also prevents sticky residue from forming, which you can clear easily with these sticky kitchen wall cleaning tricks. You can also read our guide on best dish cloths for washing dishes.
Preventing Mold and Mildew Growth
Moisture and warmth near kitchen sinks and stoves create the perfect environment for mold and mildew to grow on grout and tile surfaces. Follow these tips to keep your tiles mold-free:
- Run your kitchen exhaust fan or open a window for at least 10 minutes after cooking to reduce humidity levels.
- Wipe down tiled walls with a 1:1 vinegar and water solution once a month to kill mold spores before they can take hold.
- Fix any leaky faucets or pipes near tiled walls immediately to avoid excess moisture buildup.
- If you live in a particularly humid climate, use a dehumidifier in your kitchen to keep moisture levels below 50%, which prevents mold growth. For grout that’s already showing signs of mildew, apply a baking soda and hydrogen peroxide paste, let sit for 15 minutes, scrub, then rinse thoroughly. Avoid using chlorine bleach on grout regularly, as it can cause the grout to break down and become brittle over time. You can also read our guide on how to clean kitchen walls grease.
Troubleshooting Common Tile and Grout Issues
Even with regular maintenance, kitchen wall tiles can develop common issues from daily wear and tear. These simple fixes will address problems without damaging your tile or grout. You can also read our guide on how to fix wall tiles in kitchen.
Removing Dark, Discolored Grout
If your grout has turned yellow or brown from grease, mold, or hard water, start with the baking soda and vinegar scrub outlined above. For grout that’s still discolored after multiple deep cleans, apply a commercial grout whitener labeled safe for your grout type, following the manufacturer’s instructions carefully. For long-term prevention, follow these full grout restoration steps to seal your grout once a year with a penetrating grout sealer to prevent stains from soaking into the porous surface. You can also read our guide on how to clean kitchen walls for painting.
Fixing Scratch Marks on Glossy Tiles
Small scratches on glossy ceramic or porcelain tiles can make your entire wall look dull. For minor scratches:
- Rub a small amount of non-abrasive tile polish or a dab of non-gel toothpaste onto the scratch with a soft cloth.
- Buff the area in circular motions for 1 to 2 minutes until the scratch fades.
- Wipe away excess polish with a clean damp cloth, then dry thoroughly. For deep scratches that penetrate the tile surface, you’ll need to replace the affected tile to avoid water damage to the wall behind it. You can also read our guide on how to regrout kitchen wall tiles easy steps for a fresh look.
Eliminating Hard Water Spots
Hard water leaves cloudy, white mineral deposits on tile and grout, especially near sinks and faucets. To remove them:
- Spray the affected area with a 1:1 vinegar and warm water solution.
- Let the solution sit for 5 minutes to break down the mineral deposits.
- Wipe the area with a soft microfiber cloth, then rinse with clean water and dry thoroughly. For extremely hard water areas, use a commercial lime scale remover labeled safe for tile, and consider installing a water softener to prevent future buildup. You can also read our guide on floor and decor kitchen tile.
Frequently Asked Questions
How often should I clean kitchen wall tiles?
For most households, a quick 2 to 3 minute wipe-down of kitchen wall tiles 2 to 3 times per week will prevent grease and grime buildup. Deep clean tiles and grout every 1 to 2 months, or more often if you cook daily with large amounts of oil, sauce, or acidic ingredients. Wiping up spills immediately will also reduce the need for frequent deep cleaning and extend the life of your grout by 2 to 3 years. You can also read our guide on kitchen tools in spanish.
What is the best cleaner for kitchen wall tiles?
The best cleaner depends on your tile type: a 1:1 vinegar and water solution works for glazed ceramic, porcelain, and glass tiles, while mild pH-neutral dish soap is safe for all tile types, including natural stone. Always avoid harsh chemical cleaners, abrasive scrub pads, and acidic solutions on natural stone or unsealed grout, as these can cause permanent damage. You can also read our guide on kitchen wall decorating ideas do it yourself.
How do I remove stubborn stains from kitchen tiles?
For most stubborn stains, apply a baking soda and water paste to the affected area, let sit for 10 to 15 minutes, then scrub gently with a soft-bristle brush and rinse thoroughly. For set-in grease, let the paste sit for 1 hour covered with a damp cloth before scrubbing. For mold or mildew stains, use a hydrogen peroxide and baking soda paste, testing on a hidden spot first if you have colored grout. You can also read our guide on what can i use to clean grease off kitchen walls.
Can I use bleach to clean kitchen wall tiles?
Diluted bleach can be used occasionally to kill mold and mildew on white grout, but it should not be used as a regular cleaner. Bleach can discolor colored grout, break down grout over time, and leave harsh residues that can transfer to food preparation surfaces. Always ventilate the area well when using bleach, and rinse tiles thoroughly afterward. You can also read our guide on how to repair kitchen wall after removing tile.
Can I use a magic eraser on kitchen wall tiles?
Magic erasers are made from melamine foam, which is a mild abrasive. They can be used safely on glazed ceramic and porcelain tiles for spot-treating stubborn stains, but avoid using them on natural stone, glass, or polished tile finishes, as they can cause scratching. Always test on a hidden spot first, and avoid scrubbing too hard, as this can wear down the tile’s glossy finish over time. You can also read our guide on best way to keep fermenter warm.
Cleaning kitchen wall tiles doesn’t have to be a time-consuming, labor-intensive chore. By matching your cleaning method to your tile type, using simple, non-toxic supplies, and building small maintenance habits into your routine, you can keep your tiles looking shiny and new with minimal effort. Once your tiles are sparkling, you might consider updating your wall color to complement the space — check out these kitchen wall color pairings for a cohesive look, or these options for brown cabinet kitchens for a warm, timeless vibe. Remember to address spills immediately, deep clean grout every 1 to 2 months, and seal grout annually to prevent staining and extend the life of your tiled walls. Bookmark this guide for your weekly kitchen routine, and explore our other kitchen maintenance tips to keep every surface in your home looking its best with minimal effort. You can also read our guide on tile top outdoor dining table.






One Comment