How to Install Kitchen Cabinets on Concrete Walls: Easy Steps Guide
Installing kitchen cabinets on concrete walls is a practical, durable solution for basements, garages, modern industrial builds, and rental properties where drywall mounting isn’t viable. Unlike wood studs, solid concrete provides unmatched weight support, but it requires specific tools, preparation, and fastening techniques to avoid wobbly cabinets, cracked walls, or failed mounts over time. Many DIYers make critical errors early on—like using drywall anchors or skipping wall prep—that lead to costly repairs down the line. This guide breaks down the process into clear, actionable steps, with pro tips from professional contractors to ensure your cabinets stay level, secure, and functional for decades. If you’re pairing this upgrade with a full aesthetic refresh, complementary wall paint shades will tie your new cabinetry to the rest of the space.
Tools and Materials You’ll Need
Skipping prep on your tool and material list is the fastest way to delay your project. Concrete drilling requires specialized equipment, and using the wrong fasteners will lead to failed mounts even if your installation technique is perfect. Gather everything before you start to avoid unnecessary trips to the hardware store.
Essential Tools
- 1/2-inch hammer drill with adjustable torque and speed settings (standard drill drivers will not penetrate concrete)
- Carbide-tipped masonry drill bits sized to match your chosen anchors
- Multi-sensor concrete stud finder (detects rebar, pipes, and voids in concrete, not just metal)
- 4-foot spirit level and/or laser level for long, accurate runs
- Tape measure with a locking mechanism
- Impact driver for driving screws without stripping heads
- Chalk line for marking long horizontal and vertical layout lines
- Wire brush or compressed air can for cleaning drill holes
- Caulk smoothing tool for finishing gaps
Required Materials
- Concrete anchors (sleeve, wedge, or Tapcon screw style, rated for your cabinet weight)
- Heavy-duty stainless steel or galvanized cabinet screws (resistant to moisture, ideal for basements or garages)
- Composite or PVC shims (non-rotting, better than wood for damp concrete environments)
- 1/2-inch plywood furring strips (optional, for extremely uneven concrete walls)
- 100% silicone caulk (water and mold resistant, for sealing gaps)
- Cabinet mounting rails (if your cabinets use a hanging rail system, standard for most upper cabinets)
- 1/8-inch spacer blocks (for aligning multiple cabinets in a row)
Safety Gear
Concrete drilling releases respirable crystalline silica, a hazardous substance regulated by the Occupational Safety and Health Administration (OSHA) for construction work. Always wear:
- NIOSH-approved N95 respirator or better to avoid inhaling fine concrete dust
- Safety goggles with a sealed fit to keep dust out of your eyes
- Work gloves to protect hands from sharp concrete edges and drill vibration
- Ear protection for loud hammer drill operation
- Knee pads if you’re working on lower cabinet installations
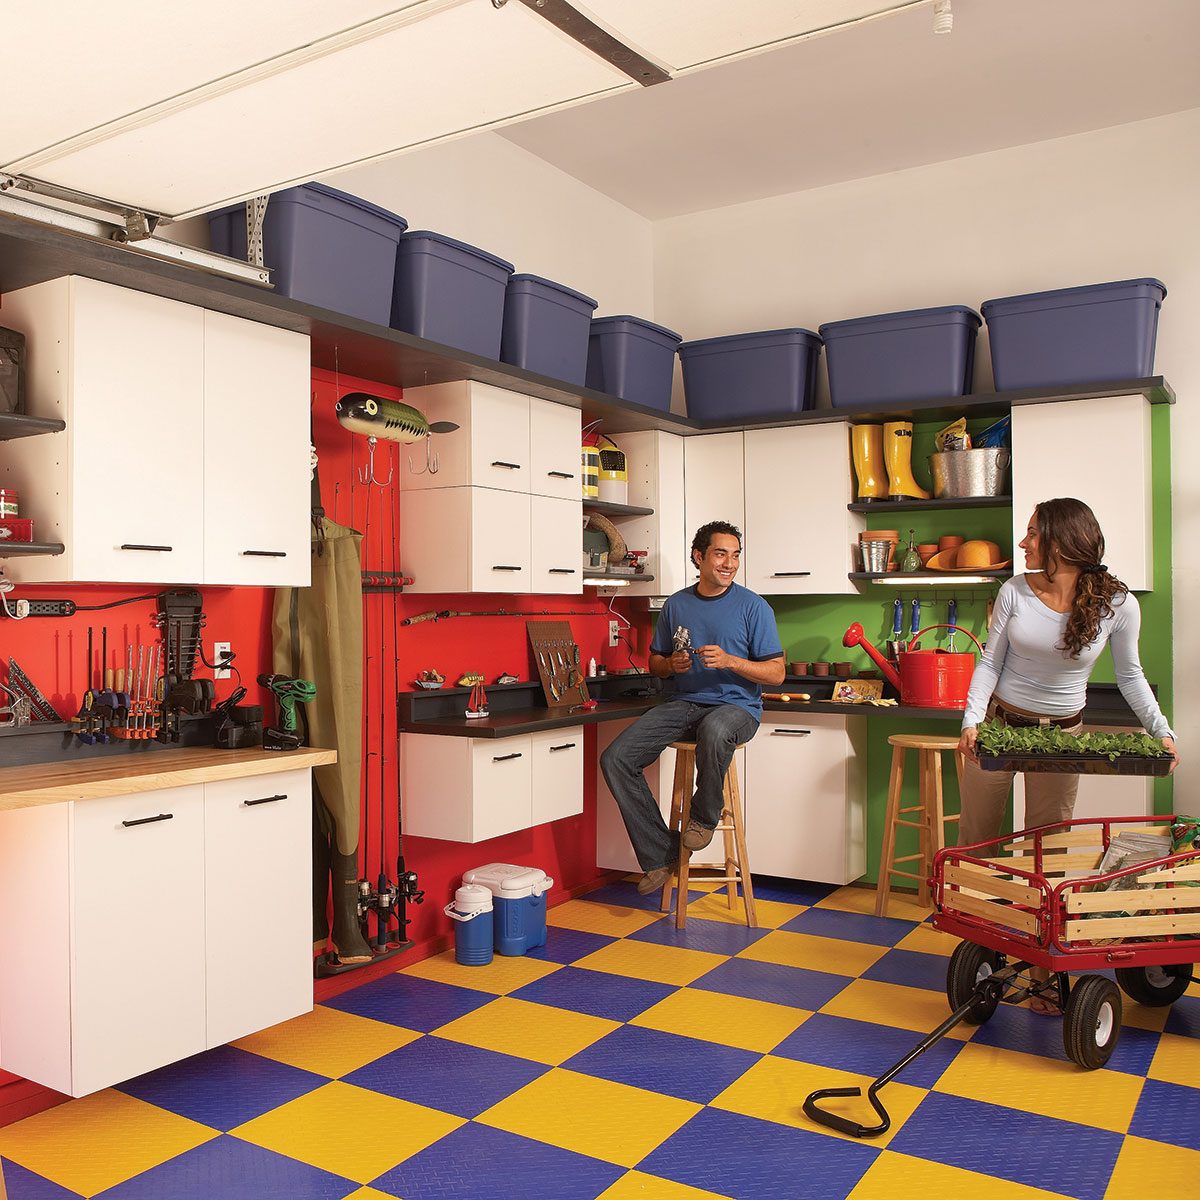 Example of a sturdy concrete-mounted cabinet system, ideal for basements or garages
Credit: www.familyhandyman.com
Example of a sturdy concrete-mounted cabinet system, ideal for basements or garages
Credit: www.familyhandyman.com
Preparing Your Concrete Wall for Installation
A well-prepped wall is the difference between cabinets that stay level for 20 years and ones that shift or pull away after a few months. This step takes 30 to 60 minutes, but it eliminates almost all common installation errors.
Cleaning and Degreasing the Surface
Even small amounts of dust, grease, or old adhesive will prevent fasteners from gripping concrete properly. Start by sweeping the entire mounting area with a stiff-bristle broom to remove loose debris. For greasy surfaces (common in garages or older kitchens), scrub the wall with a trisodium phosphate (TSP) solution diluted per package instructions, then wipe with a clean damp cloth. Let the wall dry completely for at least 2 hours before moving on—moisture trapped behind cabinets will cause mold and fasteners to corrode over time.
Checking for Wall Flatness and Voids
Concrete walls often have dips, bumps, or hollow voids from pouring inconsistencies that can cause cabinets to sit crooked or anchors to fail. Run a 4-foot straightedge across the entire mounting area, and mark any dips deeper than 1/8 inch or bumps that will prevent the cabinet back from sitting flush. For small dips, fill them with a concrete patching compound and let it cure fully per package instructions before proceeding. If you notice large hollow spots when tapping the wall with a hammer, mark those areas to avoid drilling anchors there.
Marking Cabinet Layout and Mounting Points
Start by measuring the height of your upper cabinet mounting rail (usually 54 to 60 inches from the floor for standard upper cabinets) and snap a chalk line across the entire wall at that height to ensure all cabinets sit on a perfectly level plane. Mark the vertical edges of each cabinet location with a pencil, double-checking measurements against your cabinet specs. For lower cabinets, mark the top of the cabinet frame height, usually 34.5 inches from the floor, to align with standard countertop heights.
Locating Rebar, Pipes, and Electrical Obstacles
A common costly mistake is drilling into rebar, water pipes, or electrical conduit hidden inside the concrete. Run your multi-sensor stud finder slowly across the entire mounting area, marking all detected metal, water lines, and electrical runs with a pencil. If you need to drill near a marked obstacle, shift your anchor location 2 to 3 inches to the side to avoid damage—never try to drill through rebar, as it will dull your drill bit and weaken the anchor’s grip.
Selecting Anchors and Drilling Pilot Holes
The right anchor for your concrete wall depends on the weight of your cabinets and the thickness of your concrete. Using an underrated anchor is the leading cause of cabinet pull-out failures, so always err on the side of overengineering for safety.
Choosing the Right Concrete Anchors
Anchor weight ratings are based on ICC testing standards for concrete fastening, so always select anchors with a capacity at least 1.5x the total weight of your loaded cabinets to account for dynamic loads like slamming doors or pulled shelves. Use this quick reference to pick the right style for your project:
| Anchor Type | Weight Capacity Per Anchor | Best Use Case | Installation Note |
|---|---|---|---|
| Wedge Anchor | Up to 200 lbs | Heavy solid wood cabinets, commercial-grade installs | Requires a hole drilled exactly to the anchor’s specified diameter; highest pull-out strength |
| Sleeve Anchor | Up to 150 lbs | Standard kitchen cabinet installs on 4+ inch concrete | Easy to install, works well for most residential projects |
| Tapcon Concrete Screw | Up to 100 lbs | Lightweight cabinets, adjustable installs | No separate anchor needed; can be removed and reinstalled if you need to adjust cabinet position |
| Drop-In Anchor | Up to 120 lbs | Removable cabinet installations (e.g., rental properties) | Requires a setting tool; can be taken out later without damaging the concrete |
For most residential kitchen cabinet installs on standard 4-inch poured concrete, 1/2-inch sleeve anchors are the best balance of strength and ease of use.
Drilling Accurate Pilot Holes
Pilot holes that are too small, too shallow, or clogged with dust will cause anchors to fail. Set your hammer drill to the highest torque setting, and use a carbide-tipped masonry bit sized exactly to your anchor’s specifications. Drill straight into the concrete, applying steady pressure—don’t force the bit, as this can cause it to overheat and break. Drill to a depth 1/2 inch deeper than the length of your anchor to ensure it sits fully inside the concrete. After drilling, remove all dust from the hole with a wire brush or compressed air; even small amounts of dust will prevent the anchor from expanding properly. If you hit rebar while drilling, stop immediately, move your mark 2 inches to the side, and redrill—never try to drill through rebar.
 Video tutorial demonstrating proper pilot hole drilling for concrete anchors
Credit: www.youtube.com
Video tutorial demonstrating proper pilot hole drilling for concrete anchors
Credit: www.youtube.com
Mounting Your Cabinets Securely
This is the most critical phase of the project, as proper mounting ensures your cabinets stay level and secure for decades. Rushing this step is the most common cause of misaligned doors and wobbly cabinets.
Setting Up a Temporary Support Ledger
Trying to hold heavy cabinets against the wall while drilling and fastening is difficult and dangerous, especially for upper cabinets. Build a temporary 2×4 ledger screwed directly into the concrete at the exact height of your cabinet mounting rail, spanning the entire length of your cabinet run. Rest the cabinets on this ledger while you work, so you have both hands free to drill and drive screws. Remove the ledger once all cabinets are securely fastened.
Lifting and Positioning Cabinets
For upper cabinets, have a helper lift the cabinet onto the ledger, sliding it into place against the wall marks. For lower cabinets, set them in their final position on the floor first, then shim the bottom to the correct height before securing to the wall. Check that cabinet doors and drawers have full clearance to open without hitting adjacent cabinets, countertops, or appliances before drilling any holes.
Securing Cabinets to the Wall
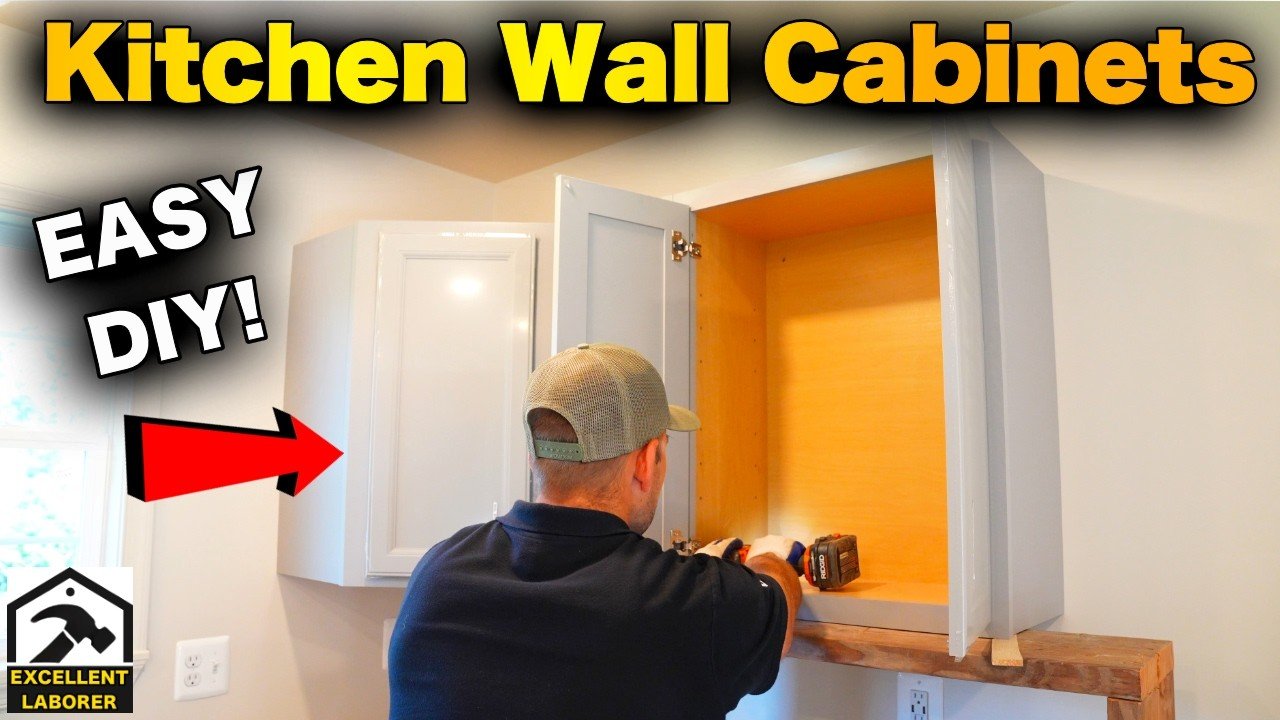
Start by drilling pilot holes through the cabinet’s mounting rail into the pre-drilled wall holes, then insert your chosen anchors, tapping them gently with a hammer until they are flush with the concrete. Drive screws through the mounting rail into the anchors, tightening each screw just enough to hold the cabinet in place—don’t fully tighten all screws until you’ve confirmed the cabinet is level. For cabinets wider than 30 inches, use at least 3 anchors per cabinet to distribute weight evenly and prevent sagging. A common mistake is over-tightening screws, which can warp the cabinet back or strip the anchor; tighten until the cabinet is snug against the wall with no movement, then stop. In practice, a 1/2-inch sleeve anchor is sufficient for 90% of standard residential kitchen cabinet installations on solid 4-inch concrete.
Ensuring Level and Alignment
Place a 4-foot level across the front of the cabinet to check for horizontal and vertical evenness. For long runs of cabinets, a laser level is far more accurate than a small spirit level, as it eliminates human error across multiple units. If the cabinet is not level, tap composite shims between the back of the mounting rail and the wall to adjust the height. Check the gap between the cabinet front and adjacent cabinets or walls—standard gaps are 1/8 inch for a seamless look. Once the cabinet is perfectly level and aligned, fully tighten all mounting screws. Always test anchor hold by pulling on it firmly before attaching the cabinet, to avoid a wobbly install mid-project.
Aligning Multiple Cabinets in a Row
For runs of 3 or more cabinets, alignment is just as important as individual leveling. After securing the first cabinet, place a 1/8-inch spacer block between it and the next cabinet, then position the second cabinet and check that its front face is flush with the first using a straightedge. Secure the second cabinet, then repeat the process for all subsequent units. Check the entire run for consistent gaps and flush fronts before moving to finishing steps—small misalignments at this stage will be very noticeable once doors are installed.
Finishing Touches for a Polished Install
These final steps protect your work, improve the cabinet’s appearance, and ensure long-term durability.
Sealing Gaps and Edges
Inspect the gap between the cabinet back and the concrete wall, as well as any gaps between adjacent cabinets. Apply a thin bead of 100% silicone caulk to all gaps, smoothing it with a caulk smoothing tool or wet finger for a clean, professional finish. Silicone is flexible and water-resistant, so it will expand and contract with temperature changes without cracking, preventing moisture, dust, and pests from entering the wall cavity. Let the caulk cure for 24 hours before using the cabinets.
Installing Cabinet Doors and Hardware
Before attaching handles or knobs, adjust the hinge screws on each cabinet door to ensure they sit flush and close evenly. Use a template to mark handle or knob placement, so all hardware is aligned consistently across the entire cabinet run. Tighten all hardware screws firmly, but avoid over-tightening, which can strip the wood or crack cabinet doors. Test each door and drawer to ensure smooth opening and closing before moving on.
Adding Toe Kicks
Most base kitchen cabinets include a removable toe kick—the panel that covers the gap between the cabinet bottom and the floor. Attach the toe kick to the bottom of the cabinet frame with small finish screws or construction adhesive, ensuring it sits flush with the front of the cabinet for a seamless look. If your toe kick is adjustable, set it to the standard 3-inch height for comfortable foot clearance when standing at the counter.
Cleaning Up After Installation
Concrete dust contains fine silica particles that can damage flooring and air filters if left to settle. Use a HEPA vacuum to clean up all drill dust and debris, then wipe down all cabinet surfaces with a damp microfiber cloth to remove fingerprints and smudges. Dispose of concrete dust in a sealed bag, per local waste regulations, to avoid releasing silica into the air.
 Properly aligned wall cabinets with consistent spacing for a polished finish
Credit: www.reddit.com
Properly aligned wall cabinets with consistent spacing for a polished finish
Credit: www.reddit.com
Troubleshooting Common Installation Issues
Even with careful prep, small issues can pop up during installation. These quick fixes will save you time and avoid costly mistakes.
Fixing Uneven Wall Surfaces
If you notice dips or bumps after installing cabinets, don’t try to force the cabinet to sit flush—this will warp the cabinet back over time. Remove the cabinet, fill the gap with concrete patching compound, let it cure, then reinstall. For minor gaps between the cabinet and wall, add an extra layer of composite shims behind the mounting rail before re-securing.
Securing Heavy Cabinets Safely
If you’re installing heavy solid wood cabinets or storing heavy dishware and small appliances, use wedge anchors instead of sleeve anchors for maximum pull-out strength. Always have two people lift and position heavy cabinets to avoid injury or damage to the cabinets or wall. For cabinets over 36 inches wide, add a third mounting point in the center of the rail for extra support.
Repairing Loose or Failing Anchors
If an anchor feels loose when you test it by pulling on the cabinet, remove the screw and anchor, clean out the hole, and fill it with a two-part epoxy concrete repair compound. Let the epoxy cure for 24 hours, then drill a new pilot hole 2 inches away from the original hole and install a new, larger anchor. Never reuse a loose anchor, as its grip will be compromised.
Correcting Misaligned Cabinet Doors
If doors don’t close properly after installation, this is almost always caused by misalignment of the cabinet itself, not the hinges. First, check that the cabinet is fully level and flush with adjacent cabinets, then adjust the hinge screws to align the door. If the door still sticks, add a thin shim behind the hinge plate to adjust the spacing.
Frequently Asked Questions
How deep do you need to drill into concrete for cabinet anchors?
Drill to a depth 1/2 inch deeper than the length of your anchor. For standard 2-inch sleeve anchors, this means drilling a 2.5-inch deep hole to ensure the anchor sits fully inside the concrete for maximum grip.
Do you need to use a hammer drill for concrete cabinet installation?
Yes. A standard drill driver does not have the impact force needed to penetrate concrete, and will burn out or break bits quickly. A hammer drill delivers the rotational and impact force required to drill clean, accurate pilot holes in concrete.
Can you remove concrete anchors after installing cabinets?
Tapcon concrete screws and drop-in anchors can be removed if you need to adjust cabinet position or take down cabinets for a renovation. Wedge and sleeve anchors are permanent, as they expand to grip the concrete, so only use these if you plan to keep the cabinets in place long-term.
How much weight can concrete anchors hold for kitchen cabinets?
Anchor weight capacity varies by type and concrete thickness, but standard 1/2-inch sleeve anchors in 4-inch cured concrete hold up to 150 lbs per anchor. Always select anchors with a total capacity 1.5x the weight of your fully loaded cabinets to account for dynamic stress.
Do you need to seal the gap between cabinets and concrete walls?
Yes. Sealing gaps with silicone caulk prevents moisture, dust, and pests from entering the wall cavity, and reduces drafts in basements or garages. It also creates a clean, finished look for your installation.
Can you install cabinets on a concrete block wall?
Yes, but concrete block (CMU) walls have hollow cores, so you need to drill into the solid web of the block, not the hollow core, for anchors to grip. Use a multi-sensor stud finder to locate the solid sections of the block before drilling.
Conclusion
Installing kitchen cabinets on concrete walls is a high-impact DIY project that eliminates the worry of wall damage from moisture or heavy loads, making it ideal for basements, garages, and modern builds. By following these steps—prepping the wall thoroughly, selecting the right anchors for your load, and taking the time to align each cabinet carefully—you’ll avoid the most common installation pitfalls and end up with a secure, professional-looking result that lasts for decades.
If you’re tackling a full kitchen refresh after your cabinet install, check out our guides to complementary wall paint shades for green cabinetry, warm neutral wall tones for brown cabinetry, and step-by-step instructions for removing a wall-mounted kitchen faucet if you’re updating your fixtures at the same time. For hosts looking to elevate their new space, dedicated wine storage accessories can be integrated into lower cabinet runs for easy access during gatherings, and at-home winemaking setups make a unique, functional addition to any renovated kitchen.