How to Clean Grease off Painted Kitchen Walls: Easy & Effective Tips
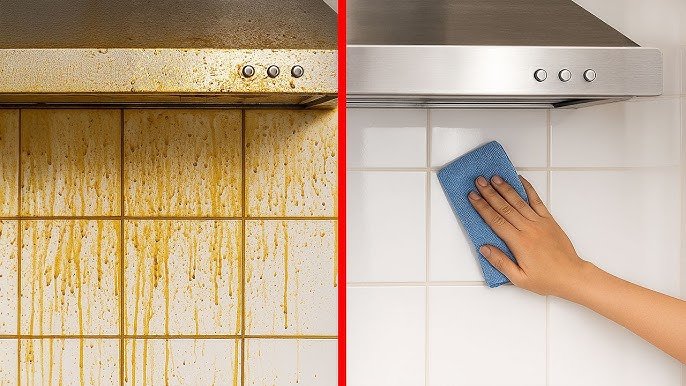
Sticky, yellowish grease patches above your stove, splotches on the wall behind your sink, and that dull, grimy film on your kitchen backsplash are more than just an eyesore—they’re a sign that your cooking space needs a deep, paint-safe clean. Many homeowners avoid tackling grease on painted walls out of fear of scrubbing away the finish or leaving water damage, but the process is far simpler (and safer for your paint) than you might think. This guide covers tested, step-by-step methods to lift even set-in grease without harming your wall’s paint, plus practical prevention tips to keep your kitchen looking fresh long-term. Whether you’re prepping for a dinner party or just tired of looking at grimy walls, these easy, effective tips will restore your space in no time.
Why Grease Builds Up on Painted Kitchen Walls
Grease accumulation on painted kitchen walls isn’t a sign of poor cleaning habits—it’s an inevitable byproduct of regular cooking. Understanding where the grease comes from and why it sticks to painted surfaces will help you remove it more effectively and prevent future buildup. Cooking releases tiny airborne grease particles that settle on nearby surfaces, as noted in the EPA's indoor air quality guidelines for cooking. These particles combine with splatter, hand contact, and steam to create the sticky, hard-to-remove film most homeowners recognize.
Common Sources of Kitchen Grease
Most kitchen grease comes from a mix of predictable cooking activities and small daily habits:
- Hot oil and fat released during frying, sautéing, or searing, which vaporize and travel through the air
- Steam from boiling, simmering, or using a slow cooker that carries microscopic grease droplets to wall surfaces
- Splatters from flipping food, stirring pots, or pouring grease that land on walls within 2-3 feet of the stove
- Residue from greasy hands touching walls, light switches, or cabinet handles while cooking
- Smoke from grilling, broiling, or burnt food that carries grease particles that settle on cool wall surfaces
Why Painted Surfaces Trap Grease More Than Other Materials
Unlike smooth, non-porous surfaces like tile, glass, or stainless steel, most interior painted walls have a slightly textured, porous finish—even matte and satin paints have microscopic pores that trap grease particles. Warm kitchen air keeps grease in a semi-liquid state for longer, allowing it to seep into these pores instead of beading up and wiping away easily. Light-colored paints (white, cream, and pastel shades) show grease stains 2-3x more clearly than dark paints, making the problem seem more severe even when the same amount of grease is present. Without regular cleaning, this grease builds up into a tough, sticky film that is far harder to remove than fresh splatters.
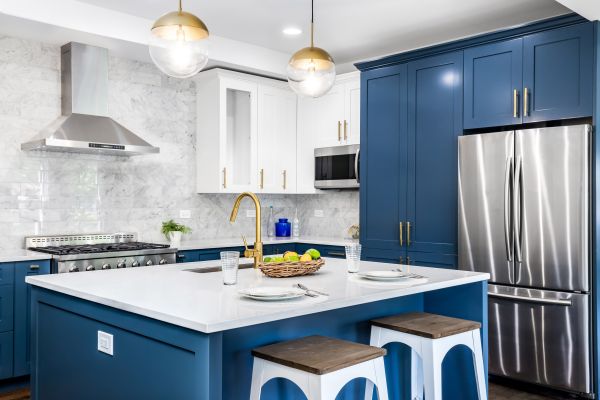 Light-colored painted walls above cooking areas show grease stains 2-3x more clearly than dark paint.
Credit: www.houselogic.com
Light-colored painted walls above cooking areas show grease stains 2-3x more clearly than dark paint.
Credit: www.houselogic.com
Pre-Cleaning Safety & Prep
Taking a few minutes to prep before you start cleaning will protect your paint from damage, keep you safe from harsh cleaner fumes, and make the whole process faster and less messy.
Protect Your Paint From Damage
The #1 cause of paint damage during grease cleaning is oversaturation: soaking the wall with water or cleaner seeps into drywall, loosens the paint's binder, and causes peeling or bubbling. Always wring out your cloth or sponge until it is barely damp, not dripping, before wiping the wall. Before using any new cleaner, spot-test it in an inconspicuous area (like behind a cabinet or light switch) and wait 5 minutes to check for discoloration or peeling—this is especially important for vintage oil-based paint (common in homes built before 1978) or specialty matte finishes, which can be more sensitive to cleaning products. Avoid using abrasive scrubbers, steel wool, or scouring pads, as these will scratch and dull even durable paint finishes. If you have a wall-mounted kitchen faucet that’s prone to splashing grease and water onto your walls, you may need to remove it occasionally to clean behind it—our faucet removal guide makes the process quick and damage-free.
Personal Safety Gear
Wear rubber dish gloves to protect your skin from harsh cleaners and grease residue, and use safety goggles if you are working with spray cleaners or baking soda paste to avoid splashes in your eyes. Avoid touching your face or eyes while cleaning, and keep a clean towel nearby to wipe up any accidental spills immediately.
Proper Ventilation Steps
Open windows and doors to create cross-ventilation, and turn on your range hood or exhaust fan to pull fumes and grease particles out of the kitchen. If you don’t have a working range hood, place a fan in the window facing outward to exhaust air. Never use strong chemical cleaners in a closed, unventilated space, as fumes can cause respiratory irritation. For guidance on paint-safe cleaning products, the University of Minnesota Extension recommends mild, non-abrasive solutions for all interior painted surfaces.
Best Cleaning Solutions for Painted Kitchen Walls
The right cleaning solution will break down grease without stripping or discoloring your paint. Avoid harsh products like bleach, ammonia, undiluted vinegar, or abrasive all-purpose cleaners, as these can degrade paint binders and leave permanent stains. Below are the safest, most effective options for all paint types:
Gentle Homemade Cleaners (Safe for All Paint Types)
These affordable, non-toxic options work for most light to moderate grease buildup:
- Mild dish soap solution: Mix 1 teaspoon of fragrance-free, dye-free mild dish soap (like Dawn Free & Clear) with 2 cups of warm water. This is the safest option for all paint types, including flat/matte finishes, and works well for daily spot cleaning.
- White vinegar solution: Mix equal parts white vinegar and warm water in a spray bottle. The mild acidity cuts through grease and deodorizes without harsh chemicals. This is safe for most modern latex and water-based paints, but test first on vintage oil-based paint or specialty matte finishes, as vinegar can occasionally dull the sheen.
- Baking soda paste: Combine 2 parts baking soda with 1 part warm water to form a thick paste. This mildly abrasive paste lifts set-in grease without scratching paint, but only use it for small spot treatments—avoid rubbing it over large areas, as prolonged abrasion can wear down paint over time.
- Lemon juice and soap mix: Mix 1 tablespoon of fresh lemon juice, 1 teaspoon of mild dish soap, and 2 cups of warm water. The citric acid breaks down grease while leaving a fresh, clean scent, making it ideal for kitchens with lingering cooking odors.
Commercial Cleaners for Stubborn, Set-In Stains
For grease that has built up over weeks or months, a paint-safe commercial cleaner can save time and effort. Look for products explicitly labeled "safe for painted walls" or "non-abrasive" and avoid any with bleach, ammonia, or citrus oil additives, which can degrade latex paint. Always follow the product instructions and spot-test first in a hidden area. For heavy grease, a degreaser labeled for household use (like Zep Heavy-Duty Degreaser, diluted per the label instructions) works well, but rinse thoroughly with a damp cloth after use to avoid residue.
Step-by-Step Grease Removal (No Paint Damage)
Follow these steps to remove even the toughest grease stains without harming your wall’s paint finish:
- Dry dust the surface first: Use a soft microfiber cloth, a soft-bristled brush, or a handheld vacuum with a brush attachment to remove loose dust, crumbs, and surface grease from the wall. Skipping this step will push dirt around when you wet clean, leading to streaks and uneven results.
- Spot test your cleaner: Dab a small amount of your chosen cleaning solution on an inconspicuous area (like behind a light switch or inside a cabinet) and wait 5 minutes. If no discoloration, peeling, or bubbling occurs, the cleaner is safe to use. A common mistake is skipping this step, which can lead to permanent bleached patches on light-colored walls.
- Apply cleaner to greasy areas: Dip a soft microfiber cloth or non-abrasive sponge into your cleaning solution, wring it out until it is barely damp, and wipe greasy spots using gentle, circular motions. Work from the top of the stain downward to avoid drips and streaks, and avoid rubbing too hard, as aggressive scrubbing can wear down paint over time.
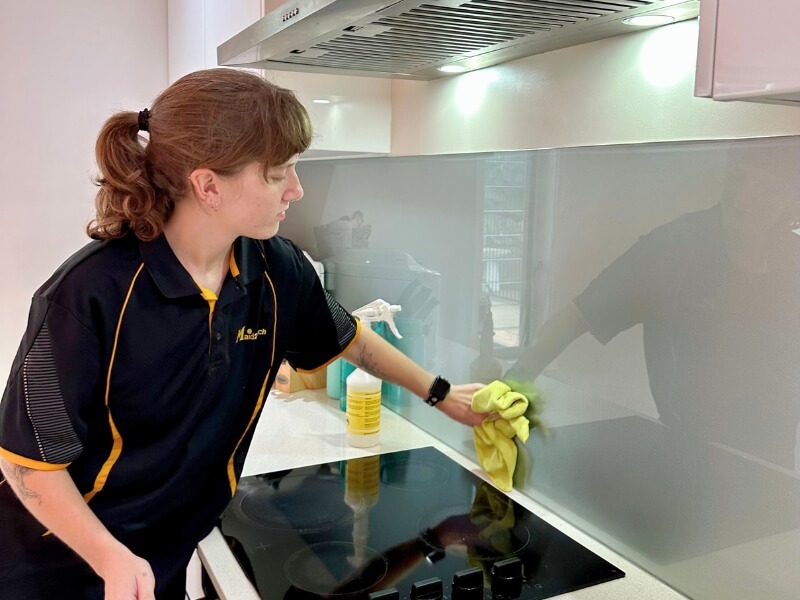 Always use a soft, barely damp cloth when wiping grease off painted walls to avoid water damage.
Credit: www.maid2match.com.au
Always use a soft, barely damp cloth when wiping grease off painted walls to avoid water damage.
Credit: www.maid2match.com.au
- Treat stubborn, set-in grease: For stains that have been present for a week or longer, apply a small amount of baking soda paste directly to the spot and let it sit for 10-15 minutes (do not let it dry completely, as this will make it harder to remove). Gently rub the area with a clean, soft-bristled toothbrush in circular motions, then wipe away the paste with a damp cloth.
- Rinse and dry thoroughly: Wipe the cleaned area with a cloth dipped in plain cool water to remove any cleaner or baking soda residue, which can cause streaking if left to dry. Pat the wall dry immediately with a clean, dry microfiber towel, and let it air dry for 30 minutes before touching it again to avoid smudging.
For high walls that are out of reach, a soft microfiber flat mop with an extendable handle lets you clean safely without stretching or damaging the paint.
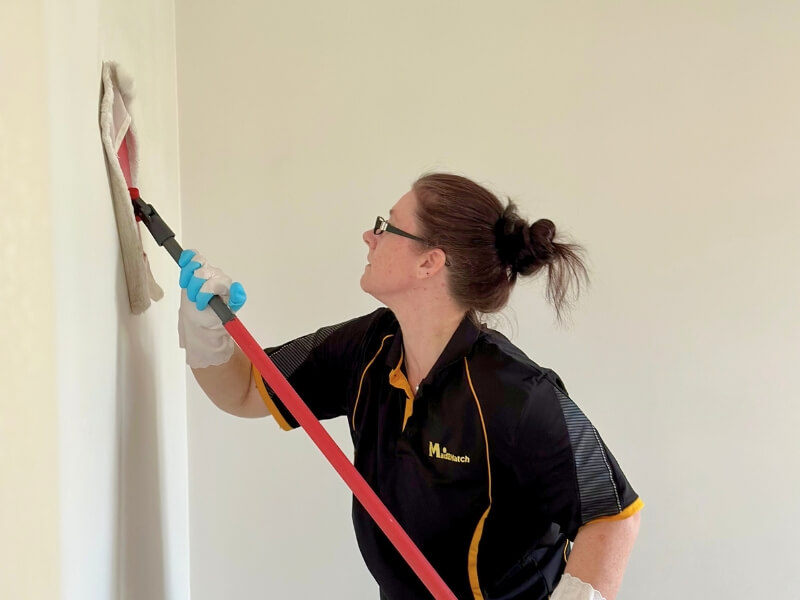 A soft microfiber flat mop lets you clean high walls without stretching or damaging paint.
Credit: www.maid2match.com.au
A soft microfiber flat mop lets you clean high walls without stretching or damaging paint.
Credit: www.maid2match.com.au
Troubleshooting Common Cleaning Issues
Even with careful cleaning, you may run into minor issues. Here’s how to fix them without causing further damage:
Fixing Peeling or Faded Paint
If you notice paint bubbling, flaking, or fading during cleaning, stop scrubbing immediately and blot the area dry with a clean towel. Let the wall fully dry for 24 hours, then lightly sand the peeling area with fine-grit sandpaper, apply a thin layer of matching primer, and touch up with matching paint. To avoid this issue in the future, always use a barely damp cloth and avoid abrasive scrubbers on delicate paint finishes.
Removing Lingering Grease Odors
If a greasy smell persists after cleaning, it means grease has seeped deep into the wall’s pores. Wipe the area with a 1:1 white vinegar and water solution to neutralize odors, then place a small open bowl of baking soda on the counter near the wall for 24 hours to absorb residual grease smells. For persistent odors, you can also leave a small bowl of white vinegar on the counter overnight—it will absorb odors without leaving a strong vinegar scent once aired out.
Treating Old, Yellowed Stains
For set-in yellowed stains on white or light-colored walls that don’t respond to gentle cleaning, a melamine foam (magic eraser) can lift discoloration, but use it with extreme caution. Test it in an inconspicuous area first, use very gentle pressure, and only rub the stained spot—abrasive scrubbing can dull matte or flat paint finishes. If the stain is older than 6 months, you may need to spot-touch up the area with matching paint after cleaning to fully restore the wall’s appearance.
How to Prevent Future Grease Buildup
Preventing grease buildup is far easier than removing set-in stains. Incorporate these small habits into your kitchen routine to keep walls looking fresh for months:
Daily Spot-Cleaning Habits
Keep a pack of paint-safe disinfectant wipes or a small bowl of warm soapy water next to your stove. After every cooking session, wipe down the wall behind the stove, above the sink, and any other areas where splatter may have landed. This 30-second habit prevents grease from hardening and seeping into paint pores, eliminating the need for deep cleaning later.
Install Physical Splash Barriers
Add a stainless steel, tempered glass, or washable acrylic splash guard behind your stove and countertops. These barriers catch 90% of grease splatters before they reach your painted walls, and they’re easy to wipe down with soap and water after cooking. Many splash guards come in decorative finishes that match kitchen hardware, so they blend seamlessly with your decor.
Upgrade Your Kitchen Ventilation
A high-quality range hood that vents to the outside (not just recirculating air) is the single most effective tool for reducing airborne grease particles. Clean your range hood’s grease filter monthly to maintain its effectiveness—per the EPA's indoor air quality guidelines, a clean, properly vented range hood captures up to 90% of airborne grease and cooking fumes. If you don’t have a range hood, use a window fan facing outward while cooking to exhaust greasy air from the kitchen.
Choose Grease-Resistant Paint for Future Projects
If you’re repainting your kitchen in the future, opt for a satin, semi-gloss, or eggshell finish with a mildew-resistant additive. These finishes are more durable than flat/matte paint, repel grease better, and are easier to wipe clean without damaging the finish. If you’re pairing new paint with updated cabinetry, our guides to pairing wall colors with green cabinets and coordinating shades for brown cabinetry will help you create a cohesive, on-trend look.
Frequently Asked Questions
How often should I clean grease off my painted kitchen walls?
Spot-clean greasy smudges as soon as you notice them, ideally within 24 hours of cooking, to prevent stains from setting in. Do a full wipe-down of high-grease areas (behind the stove, above the sink) every 2-4 weeks to maintain the paint's finish and avoid buildup.
Can I use a magic eraser on painted kitchen walls?
Yes, but only with extreme caution. Melamine foam is mildly abrasive, so it can dull matte or flat paint finishes if you rub too hard. Always test on an inconspicuous spot first, use gentle pressure, and only use it for small, set-in stains. Avoid using it on satin or semi-gloss paint, as it can leave visible scratches.
Will vinegar damage my painted kitchen walls?
No, for most modern latex and water-based interior paints, a 1:1 white vinegar and water solution is completely safe. However, if you have vintage oil-based paint (common in homes built before 1978) or a specialty matte finish, test the solution in a hidden area first, as vinegar can occasionally dull the sheen of these paint types.
What should I avoid when cleaning grease off painted walls?
Never use abrasive scrubbers (like steel wool or scouring pads), bleach, ammonia-based cleaners, or undiluted vinegar, as these can strip paint, cause discoloration, or damage the paint's binder. Avoid oversaturating the wall with water, as excess moisture can seep into drywall and cause paint to peel or mold growth behind the wall.
Can I remove old, set-in grease stains without repainting?
Yes, in most cases. For stains that have been on the wall for 6 months or less, a baking soda paste left to sit for 15 minutes followed by gentle scrubbing will lift most of the discoloration. For stains older than 6 months, you may need to use a specialized paint-safe stain remover, or spot-touch up the area with matching paint after cleaning.
Conclusion
Cleaning grease off painted kitchen walls doesn’t require harsh chemicals, backbreaking scrubbing, or risk of damaging your paint. By using gentle, paint-safe cleaners, following a simple step-by-step process, and implementing small prevention habits, you can keep your kitchen walls looking fresh and bright for years to come. The key is to act quickly on fresh splatters and avoid oversaturating your walls with water or harsh products. If you’re dealing with a wall-mounted faucet that’s splashing grease and water onto your walls, our step-by-step faucet removal instructions make it easy to clean behind the fixture without damage. Once your walls are spotless, you’ll be ready to enjoy a cleaner, more inviting kitchen space for cooking, entertaining, and everyday use. If you’re planning a dinner party to show off your refreshed kitchen, our guide to starting home winemaking as a novice walks you through crafting your own wine to serve guests, no experience required. You can source all the gear you need from vetted online winemaking retailers that cater to home brewers of all skill levels.