How to Get Grease off Kitchen Walls: Easy & Effective Tips
Staring at sticky, discolored splotches on the wall behind your stove is a universal frustration for home cooks. Grease from frying, searing, and everyday cooking doesn’t just make your kitchen look dingy—it can also trap dust, harbor bacteria, and damage paint or wallpaper over time if left unaddressed. The good news is you don’t need harsh chemicals or professional cleaning services to restore your walls to their original condition. This guide covers easy, effective, wall-safe methods to remove even the most stubborn grease buildup, plus simple habits to stop it from coming back. All recommendations are tested for use on common kitchen wall surfaces, including painted drywall, tile, and vinyl wallpaper.
What Causes Kitchen Wall Grease Buildup?
Understanding why grease sticks to your walls helps you choose the right cleaning method and prevent future messes. Grease accumulation is rarely caused by one single factor—it’s usually a combination of cooking habits, wall finish, and ventilation that leads to stubborn, hard-to-remove stains. For more on this, see our guide on how do you get grease off kitchen walls.
Common Grease Sources in the Kitchen
Most kitchen wall grease comes from aerosolized oil released during high-heat cooking, like frying bacon, searing meat, or stir-frying. Even low-heat tasks like simmering tomato sauce for hours release tiny grease particles that stay suspended in the air, then settle on cool wall surfaces. Splatters from flipping food, pouring oil, or cooking greasy items in toaster ovens also contribute to buildup, especially on walls directly behind stoves and cooktops. Undersized range hoods that don’t vent to the outside recirculate grease back into the kitchen instead of removing it, accelerating how quickly stains form.
Why Grease Sticks to Wall Surfaces
Grease is hydrophobic, meaning it repels water and seeps into the microscopic pores of most wall finishes instead of beading up and wiping away easily. Flat and matte paint finishes have far more porous surfaces than satin or semi-gloss, making them much more prone to permanent grease stains. Kitchen humidity from boiling water or running the dishwasher mixes with fresh grease to form a sticky film that traps dust and dirt, darkening stains and making them harder to remove over time. This is why walls often feel sticky even after a quick wipe with water—the grease layer is mixed with dust and baked onto the surface.
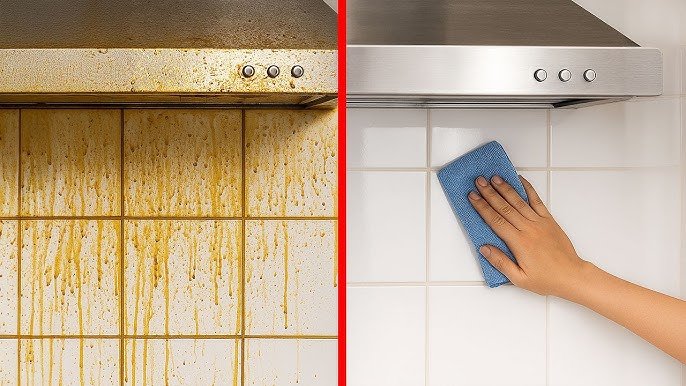
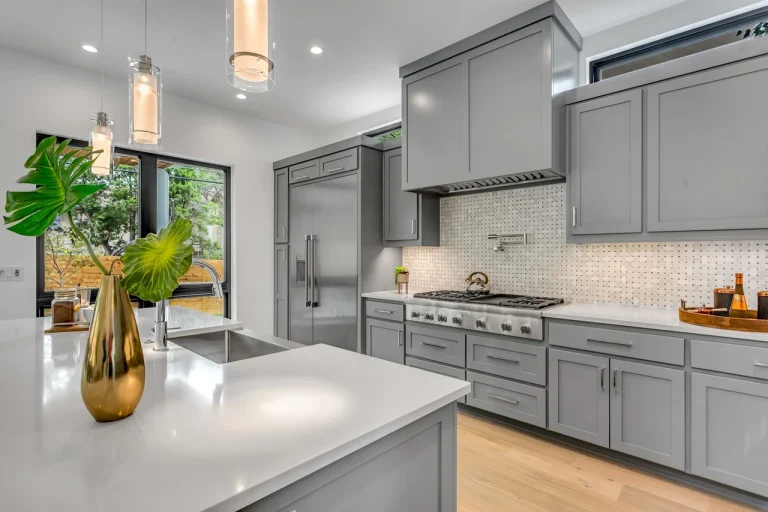
 Grease buildup is most concentrated on walls directly behind cooking surfaces, where splatters and aerosolized oil settle most heavily.
Credit: www.realhomes.com
Grease buildup is most concentrated on walls directly behind cooking surfaces, where splatters and aerosolized oil settle most heavily.
Credit: www.realhomes.com
Tools and Supplies You’ll Need
Having the right supplies on hand before you start cleaning will save you time, prevent wall damage, and make the process far more effective. Avoid abrasive tools that can scratch paint, and opt for gentle, non-toxic options whenever possible.
Cleaning Supplies for Every Wall Type
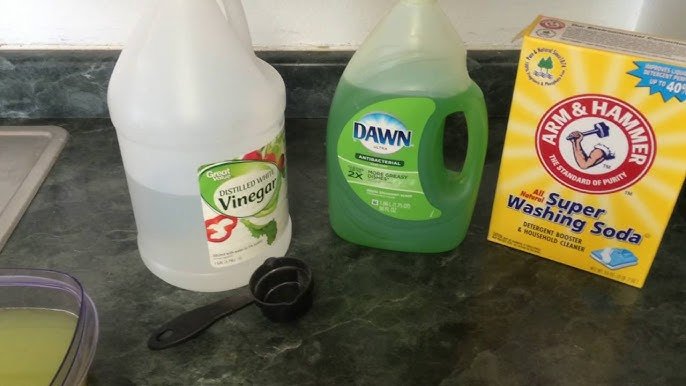
- Warm water: Loosens surface-level grease for light cleaning; mix with dish soap for extra cutting power
- White distilled vinegar: Cuts through light to moderate grease and deodorizes walls; safe for most painted surfaces and tile
- Baking soda: Gentle abrasive that lifts set-in grease without scratching; ideal for textured walls
- Mild dish soap (e.g., Dawn): Formulated to break down cooking oils; works on fresh splatters in seconds
- Soft microfiber cloths: Lift grease without leaving lint; use for final drying to avoid water spots
- Non-abrasive soft-bristled brush: Reaches into textured wall grooves and grout lines on tile backsplashes
- Spray bottle: Applies cleaning solution evenly to avoid over-saturating walls
- Drop cloth or old towels: Protects floors and countertops from drips
Safety and Surface Protection Gear
- Rubber gloves: Protect skin from irritation by degreasers and vinegar
- Protective eyewear: Prevents splashes from getting into eyes when spraying solutions
- Painter’s tape: Secures protective sheeting and seals electrical outlets to keep moisture out
- Ventilation: Open windows or run your range hood while cleaning to avoid inhaling fumes from commercial products
Pre-Cleaning Preparation Steps
Skipping preparation can turn a simple grease removal job into a messy, time-consuming chore. Taking 5 minutes to set up your workspace will protect your kitchen’s surfaces and ensure you don’t miss any greasy spots.
Clear and Protect the Area
Start by removing all items from the wall area, including wall art, magnets, spice racks, and outlet covers. If grease has built up near electrical outlets, turn off power to the circuit at your breaker box before removing covers to avoid shock risk. Move lightweight appliances like toaster ovens or coffee makers away from the wall to give you full access to the greasy surface. This step prevents you from missing spots while cleaning and avoids getting cleaning solution on your belongings.
Lay drop cloths or old towels along the floor and countertops below the greasy area to catch drips. Use painter’s tape to secure protective sheeting to countertops and cabinets if you’re using strong commercial degreasers. Wrap wall-mounted faucets, light switches, and outlet covers in plastic bags to keep moisture and cleaning solution out of their internal components, which can cause corrosion or leaks over time. If you do need to swap a wall-mounted faucet later after exposure to harsh cleaners, this small step will save you extra repair work.
DIY and Commercial Grease-Cleaning Solutions
Most light to moderate grease buildup can be removed with inexpensive household ingredients, while heavy, set-in stains may require a commercial degreaser. Always test any solution on a small, hidden area of the wall first to check for discoloration or damage.
All-Purpose Vinegar Solution
Mix equal parts white distilled vinegar and warm water in a spray bottle for a gentle, non-toxic cleaner that cuts through light to moderate grease. This solution is safe for painted drywall, tile, and vinyl wallpaper, but avoid using it on natural stone accents (like marble or granite backsplashes) as vinegar can etch the surface over time. Spray the solution directly onto the greasy area, let it sit for 2-3 minutes to break down the oil, then wipe with a soft microfiber cloth. For extra grease-cutting power, add 1 teaspoon of mild dish soap to the mix, which helps lift oily residue without leaving a film.
Abrasive Baking Soda Paste
For textured walls or set-in stains, mix 3 parts baking soda with 1 part warm water to form a thick paste. Baking soda is a mild abrasive that lifts grease without scratching paint or wallpaper, making it ideal for orange peel or knockdown wall finishes. Apply the paste to the greasy area with a soft sponge, let it sit for 10 minutes to loosen grime, then scrub gently in circular motions with a soft-bristled brush. Rinse with a damp cloth and dry immediately to avoid water spots. Baking soda also deodorizes walls, eliminating any lingering cooked-on food smells.
Strengthened Dish Soap Mix
For everyday grease splatters, a mix of 1 tablespoon mild dish soap and 2 cups warm water is often all you need. Dish soap is formulated to break down cooking oils, so it works quickly on fresh splatters before they have time to harden. Apply the solution with a damp cloth (not a spray bottle, to avoid over-wetting) and wipe in circular motions. This mix is safe for all painted wall types and leaves no harsh residue.
Heavy-Duty Commercial Degreasers
For grease that’s been baked onto walls for months, or buildup in commercial kitchens, choose a degreaser labeled safe for painted surfaces and follow the manufacturer’s instructions exactly. Avoid acetone-based degreasers unless your walls are unsealed concrete, as acetone will melt most interior paints. Apply the degreaser with a sponge or spray bottle, let it sit for the recommended time (usually 1-5 minutes), then wipe clean with a damp cloth. Always test commercial degreasers on a small, hidden area of the wall first to check for discoloration or paint damage. For guidance on selecting non-toxic cleaners that won’t harm your family or pets, refer to EPA guidelines for safe home cleaning products to avoid harsh, corrosive ingredients.
Step-by-Step Grease Removal Process
Breaking the cleaning process into clear, manageable steps will help you avoid damaging your walls and get better results. The key is to work gently, avoid over-wetting surfaces, and rinse thoroughly to prevent residue from attracting new grease.
Apply the Cleaner Correctly
Never pour cleaning solution directly onto drywall, as excess moisture can cause the material to swell, peel, or develop mold behind the paint. Instead, spray or dab the solution onto a soft cloth first, then apply it to the greasy area, or use a spray bottle held 12 inches from the wall to avoid over-saturation. Let the cleaner sit for 2-10 minutes depending on the severity of the grease: light splatters only need 2 minutes, while baked-on buildup needs up to 10 minutes to break down fully. If the wall starts to feel overly wet, wipe away excess solution with a dry cloth before scrubbing.
Scrub Without Damaging Surfaces
Use a soft sponge, microfiber cloth, or soft-bristled detail brush to scrub the greasy area in small, circular motions, working from the bottom of the stain upward to avoid drips running down onto clean sections of the wall. For textured walls, use the soft-bristled brush to work cleaner into the grooves without damaging the finish. A common mistake homeowners make is using abrasive tools like steel wool or stiff-bristled brushes to scrub stubborn stains faster—this will scratch paint and leave permanent marks. If the grease isn’t lifting after 30 seconds of gentle scrubbing, reapply the cleaner and let it sit for another 2-3 minutes before trying again; increasing pressure will only damage the wall surface.
Rinse and Dry for Streak-Free Results
After scrubbing, wipe the area with a clean, damp cloth that’s been wrung out thoroughly to remove all leftover cleaner and grease residue. Leftover soap or degreaser will attract new grease and dust over time, leading to faster re-buildup. Dry the wall immediately with a clean, dry microfiber cloth to prevent water spots, then inspect the area in natural light to ensure no residue remains. If you see streaks, wipe the area again with a cloth dampened with plain water, then dry.
 Steam is a chemical-free option for breaking down set-in grease on painted walls and tile backsplashes.
Credit: www.youtube.com
Steam is a chemical-free option for breaking down set-in grease on painted walls and tile backsplashes.
Credit: www.youtube.com
How to Remove Set-In, Stubborn Grease Stains
For grease that’s been on your walls for months or has penetrated the paint layer, standard cleaning methods may not be enough. These targeted techniques will lift deep-seated stains without damaging your walls.
Steam Cleaning for Deep-Seated Grease
For set-in stains that won’t respond to manual scrubbing, a handheld steam cleaner is a chemical-free, wall-safe option. The high heat from the steam breaks down the oily residue and loosens it from porous paint or wallpaper. Hold the steam cleaner 6-8 inches from the wall (holding it closer can damage paint or cause wallpaper to peel) and move slowly in small sections. Wipe the loosened grease away with a clean microfiber cloth as you go. For extra power, spray a light coat of your vinegar solution on the wall before steaming to help lift the grease faster.
Spot-Testing for Paint and Wallpaper Safety
Before using any cleaning method on a visible area, test it on a small, hidden spot (like behind a cabinet or light switch plate) to check for damage. This is especially important for vintage wallpaper, which can have water-soluble adhesives that peel when exposed to moisture, and for matte or flat paint, which can be easily discolored by harsh cleaners. If the test spot shows no fading, peeling, or discoloration after 24 hours, the cleaner is safe to use on the rest of the wall.
When to Stop Scrubbing and Spot-Prime
If a stain remains after 2-3 rounds of cleaning, don’t scrub harder—this will only damage the paint and make the stain more noticeable. Instead, let the wall dry completely, then sand the area lightly with fine-grit sandpaper to smooth out any rough spots. Apply a small amount of stain-blocking primer to the affected area, let it dry, then repaint with a matching color to cover the stain completely. This is far more effective than repeated scrubbing for set-in grease that has penetrated the paint layer.
Prevent Future Grease Buildup Long-Term
Small, consistent habits will drastically reduce how often you need to deep clean your kitchen walls, and keep them looking fresh with minimal effort. The best prevention strategies are low-lift and easy to incorporate into your regular cooking routine.
Add a Simple Post-Cooking Wipe-Down Routine
The easiest way to prevent grease from hardening on your walls is to wipe them down with a damp microfiber cloth immediately after any cooking session that involves frying, searing, or stir-frying. Fresh grease is easy to remove with just warm water, and this 30-second routine prevents it from seeping into paint pores and hardening into stubborn stains. For added convenience, keep a small spray bottle of your vinegar solution under your kitchen sink for quick touch-ups.
Install Splash Guards and Upgrade Ventilation
Silicone splash guards installed on the wall behind your stove catch grease splatters before they hit your walls, and they’re easy to wipe down after cooking. For better long-term results, upgrade your range hood to a model that vents to the outside (instead of just recirculating air) and run the fan for 10-15 minutes after you finish cooking to remove lingering grease particles from the air. Clean your range hood filter monthly— a clogged filter can’t trap grease, so more ends up settling on your walls.
Choose the Right Wall Finish for Your Cooking Habits
If you’re repainting your kitchen, opt for a satin or semi-gloss paint finish instead of flat or matte. These finishes have a slight sheen that repels grease and moisture, making splatters easy to wipe away before they stain. For a cohesive look, choose a shade that works with brown kitchen cabinets to hide minor splatters between deep cleans, or a light neutral that matches green kitchen cabinets for a fresh, low-maintenance aesthetic.
When to Hire a Professional Cleaning Service
DIY cleaning methods work for most light to moderate grease buildup, but there are cases where professional help is the best option to avoid damaging your walls. Professional kitchen cleaners have industrial-grade degreasers and specialized tools that can remove grease without harming delicate finishes.
Signs of Severe, Irreversible Grease Damage
Call a specialist if you notice persistent sticky residue even after 3 rounds of cleaning, discoloration or peeling paint that indicates grease has penetrated the wall surface, or a musty odor that signals mold growth in the grease-filled wall cavity. If you have vintage wallpaper, custom mural walls, or historic paint finishes, professional cleaners have the specialized tools and solutions to remove grease without causing irreversible damage. If you notice a musty odor along with greasy residue, that’s a sign of mold growth in the wall cavity, which requires immediate attention per University of Illinois Extension’s kitchen sanitation recommendations.
What to Look for in a Kitchen Cleaning Specialist
When hiring a professional, look for a company that specializes in residential kitchen restoration, as they will have experience with painted drywall, tile, and wallpaper. Ask about the cleaning products they use—opt for services that offer non-toxic, eco-friendly options if you have kids, pets, or respiratory sensitivities. Request a written estimate before work begins, and ask if they provide a guarantee for stain removal to avoid surprise costs.
Frequently Asked Questions
How can I remove grease from kitchen walls naturally?
For light grease, mix equal parts white vinegar and warm water, spray onto the wall, let sit 3 minutes, then wipe with a soft cloth. For set-in stains, use a baking soda paste: mix 3 parts baking soda with 1 part water, apply to the stain, let sit 10 minutes, then scrub gently and rinse. Both methods are non-toxic and safe for most painted walls and tile.
What common household items clean grease off kitchen walls?
Dish soap, white vinegar, baking soda, and warm water are all effective for removing kitchen wall grease. Dish soap cuts through fresh oil splatters, vinegar breaks down light buildup, and baking soda lifts set-in stains without scratching surfaces.
Is it safe to use bleach for kitchen wall grease?
Diluted bleach can kill mold in greasy buildup, but it will discolor most interior paints and damage wallpaper adhesives. Only use bleach if you have mold growth in the grease, and always dilute it with 10 parts water, test on a hidden spot first, and rinse the wall thoroughly after use. For routine grease removal, stick to vinegar, dish soap, or baking soda to avoid damage.
How often should I clean grease off kitchen walls?
Wipe down walls with a damp microfiber cloth after any cooking session that involves frying, searing, or high-heat cooking to prevent fresh grease from hardening. Do a deep clean with soapy water or vinegar solution once a week for most homes, or every 3-4 days if you cook frequently.
Can I use a magic eraser on greasy kitchen walls?
Yes, melamine foam (magic eraser) works well for light to moderate grease on painted drywall and tile, as it acts as a mild abrasive to lift stuck-on grime. Avoid using it on glossy paint, as it can micro-scratch the finish, and never use it on wallpaper, as it will damage the surface. Always test in a hidden spot first.
Why does grease come back so quickly after I clean my kitchen walls?
Grease re-buildup is almost always caused by poor ventilation. If your range hood doesn’t vent to the outside or its filter is clogged, grease particles stay in the air and settle back onto walls within hours of cleaning. Upgrading to a vented range hood and cleaning the filter monthly will drastically reduce how often you need to deep clean your walls.
Final Thoughts
Removing grease from kitchen walls doesn’t have to be a time-consuming, damaging chore. With the right gentle cleaners, proper preparation, and a simple post-cooking wipe-down routine, you can keep your walls looking fresh for years without harsh chemicals or professional help. For severe set-in stains, spot-priming and repainting is a far more effective solution than aggressive scrubbing that damages your paint. If you’re tackling other kitchen maintenance tasks this season, check out our guides to replacing a wall-mounted faucet and choosing wall colors that pair perfectly with your cabinetry for a low-fuss, beautiful space.