How Do You Get Grease off Kitchen Walls: Easy, Effective Tips
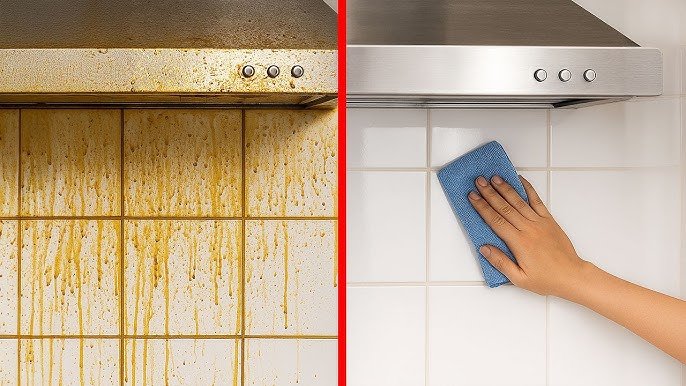
Grease splatters on kitchen walls are more than just an eyesore—they create a sticky surface that traps dust, allergens, and grime, making your kitchen feel dull and unhygienic. If you’ve ever scrubbed a greasy spot with all-purpose cleaner only to watch the stain reappear a week later, you’re not alone: aerosolized grease particles from high-heat cooking bond to wall surfaces quickly, and standard cleaners aren’t formulated to break down oily residues. This guide covers tested, wall-safe methods for every type of stain and surface, from fresh splatters on painted drywall to set-in grease on tile and wallpaper. No harsh chemicals, no paint damage, just simple steps to get your kitchen walls sparkling clean in no time.
 Credit: www.youtube.com
A vinegar solution is one of the most effective gentle cleaners for medium-set grease stains.
Credit: www.youtube.com
A vinegar solution is one of the most effective gentle cleaners for medium-set grease stains.
What Causes Grease Buildup on Kitchen Walls?
Common Kitchen Grease Sources
Grease buildup starts with tiny aerosolized fat particles released during high-heat cooking. When you fry, sauté, broil, or even use a toaster oven near an exterior wall, hot oil vaporizes and floats through the air, settling on nearby surfaces. Even high-quality range hoods fail to capture all of these particles, especially during long cooking sessions or when the hood filter is clogged. Other common sources include splatters from deep fryers, grease released from grilled meats, and residue from cooking with butter or oil above its smoke point.
How Grease Damages Wall Surfaces
Left untreated, grease does more than make walls look dirty. The oily film acts as a binder for dust, pollen, and cooking allergens, creating a sticky surface that gets dirtier faster. Over time, grease can break down the binders in latex paint, leading to discoloration, chipping, or peeling. On wallpaper, grease can cause seams to lift and paper to bubble, while on unsealed tile or grout, it can seep into porous surfaces and cause permanent staining. You’ll often notice a greasy, tacky texture on walls within 2 feet of your stove before visible stains appear—this is a sign you need to clean before the grease sets in.
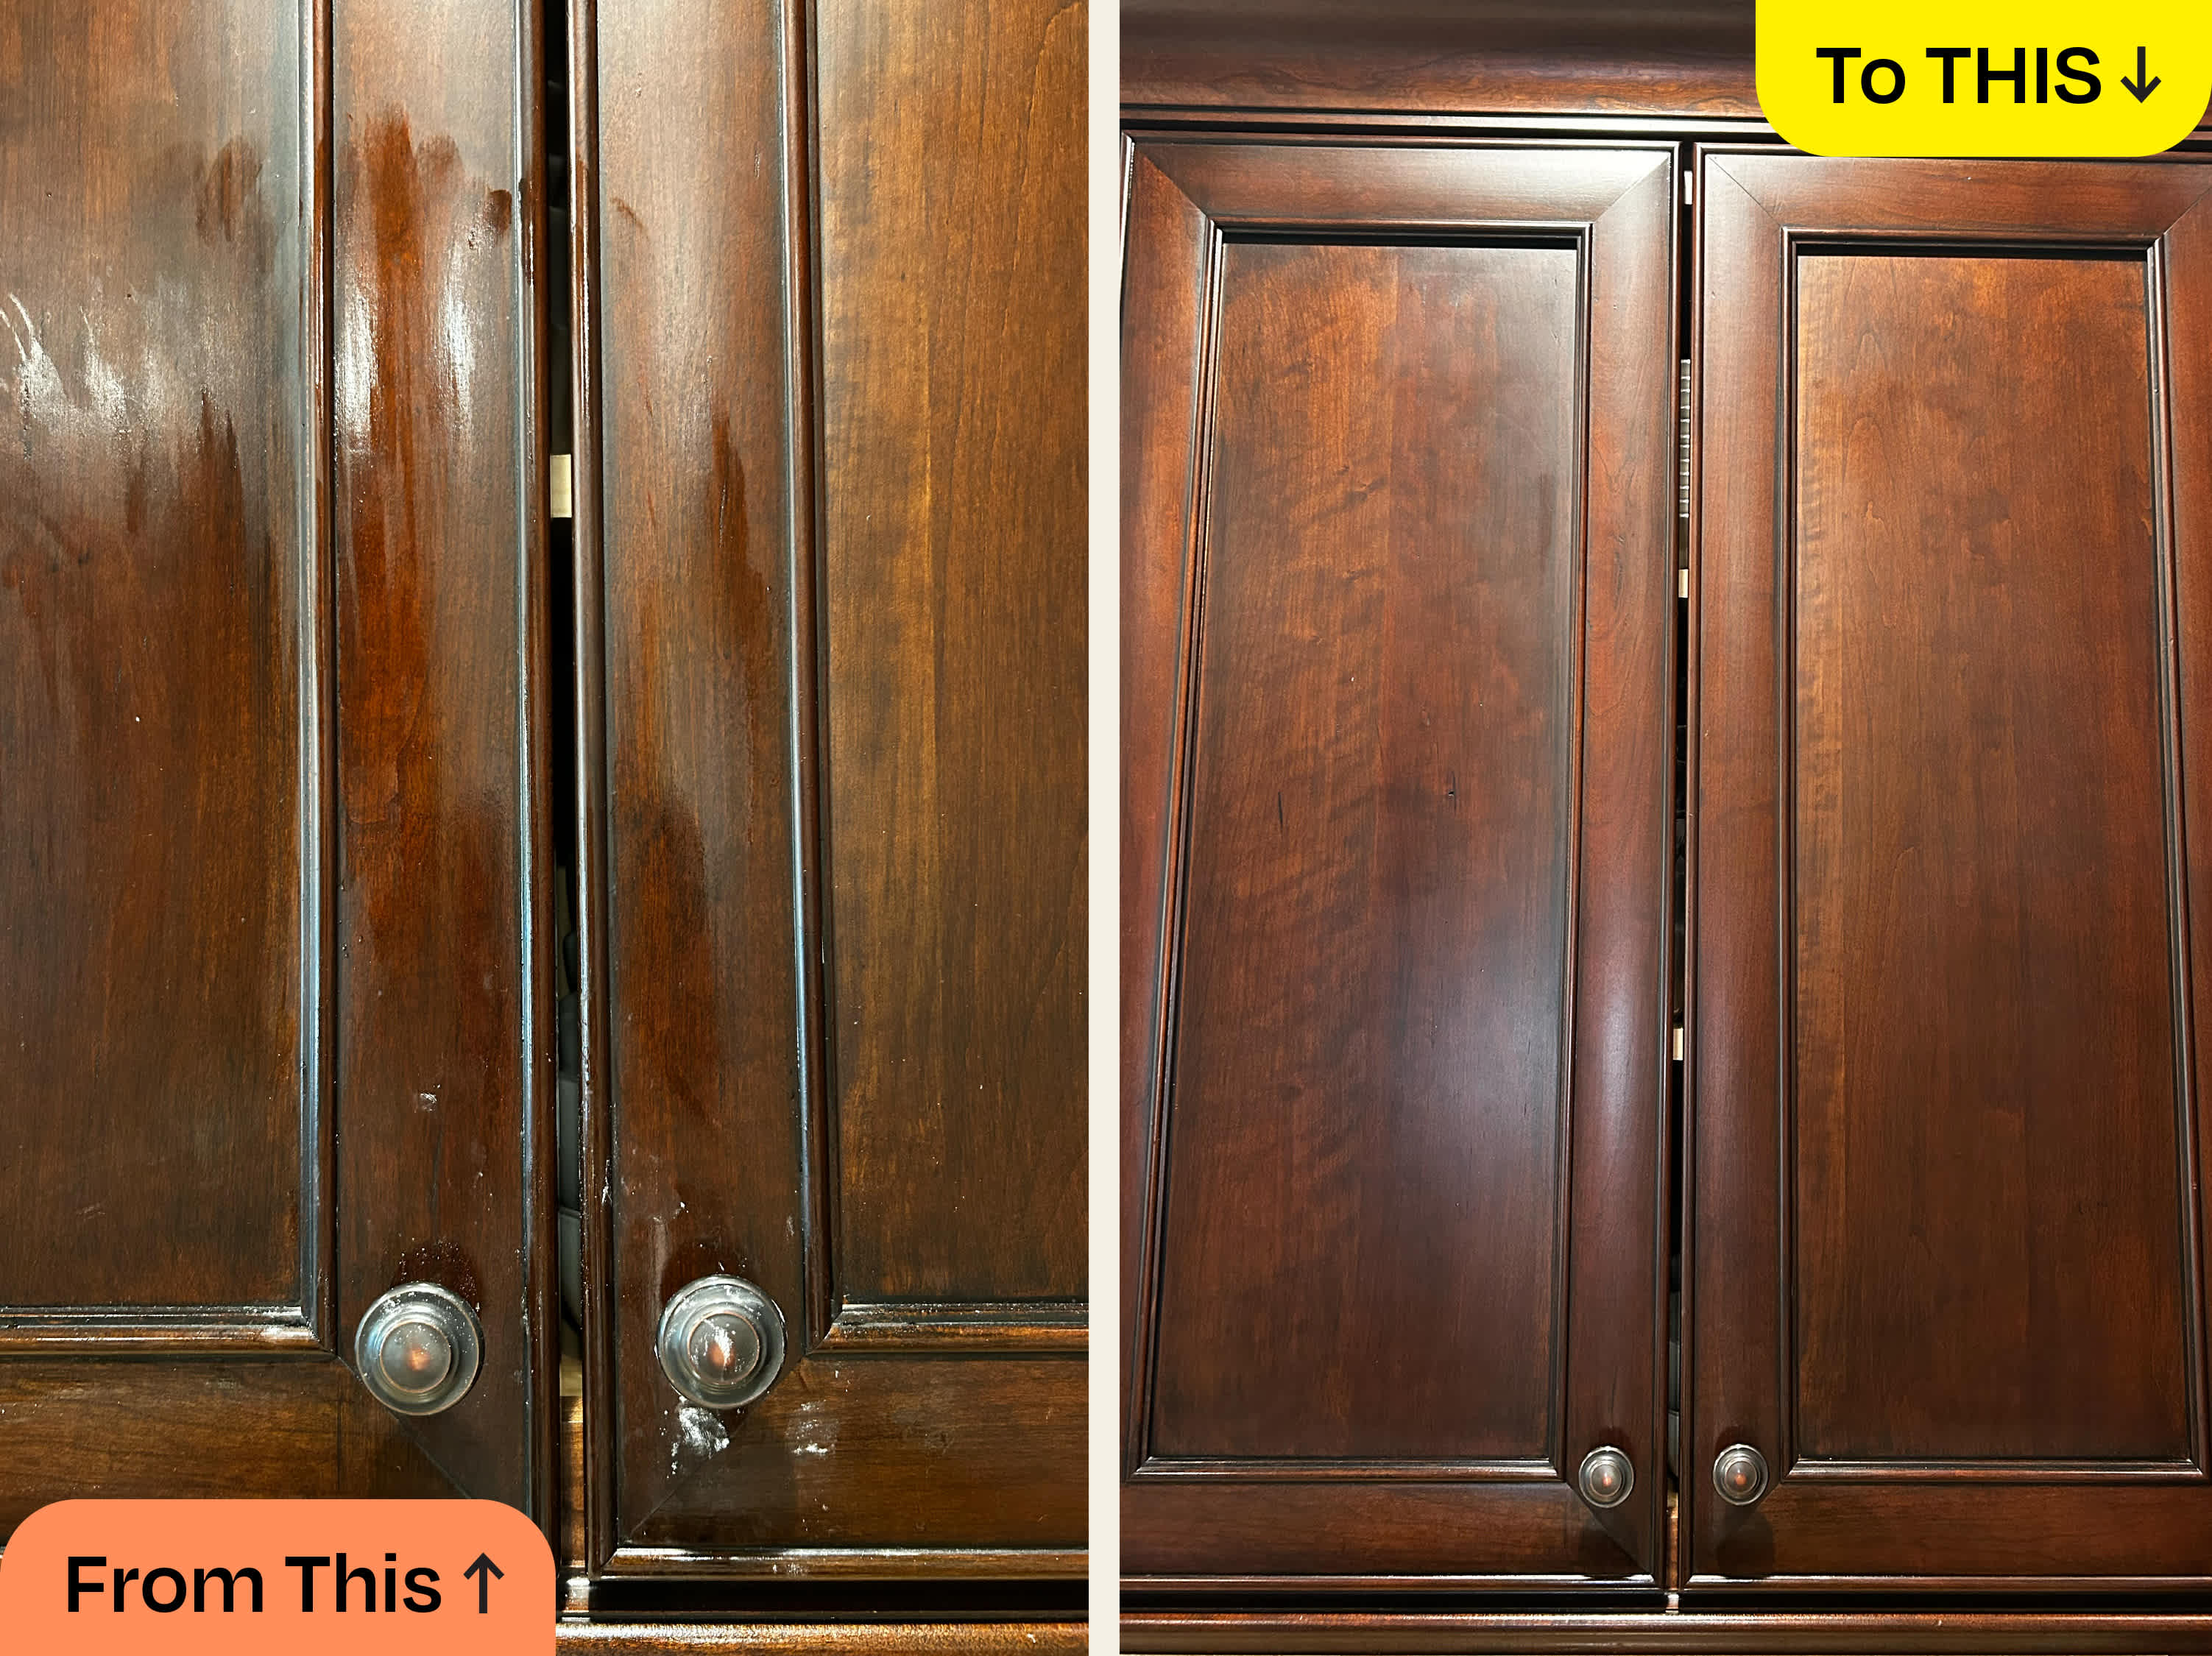 Credit: www.thekitchn.com
Grease accumulates fastest on walls and surfaces within 2 feet of your cooking area.
Credit: www.thekitchn.com
Grease accumulates fastest on walls and surfaces within 2 feet of your cooking area.
Supplies You’ll Need for Safe, Effective Cleaning
Using the right supplies prevents damage to your walls and cuts down on scrubbing time. All the methods below use common household items, no specialized equipment required.
Non-Toxic Cleaning Ingredients
For most wall types, these gentle, grease-cutting ingredients work as well as commercial products:
- Degreasing dish soap (standard blue dish soap works for light grease)
- White distilled vinegar (avoid colored vinegar, which can stain light walls)
- Unscented baking soda (no added fragrances or cleaning agents that may leave residue)
- Fresh lemon juice (bottled lemon juice often contains added sugars that can leave sticky spots)
- Rubbing alcohol (for extra-tough stains on non-porous surfaces like tile or sealed wood)
Essential Tools
- Soft cellulose sponge (avoid abrasive scouring pads, which scratch paint)
- Lint-free microfiber cloths (prevent streaks and lint residue)
- Spray bottle (for even application of liquid cleaners)
- Soft-bristle brush (for scrubbing grout lines or textured walls)
- Rubber gloves (protect skin from cleaning agents)
- Old towels or plastic sheeting (to protect floors and countertops from drips)
- Painter's tape (to mask off trim and fixtures if needed)
Pre-Cleaning Prep Step: Spot Test First
Before applying any cleaner to a visible area, test it on an inconspicuous spot, such as behind a cabinet or near the ceiling. Dab a small amount of the solution on the wall, let it sit for 5 minutes, then wipe it away. Check for discoloration, paint chipping, or texture changes. If the wall reacts negatively, skip that cleaner and opt for a gentler option. For guidance on safe, non-toxic kitchen cleaning practices that won’t damage your walls or expose your family to harsh chemicals, refer to University of Minnesota Extension’s safe kitchen cleaning recommendations.
Step-by-Step Methods to Remove Kitchen Wall Grease
We’ve ordered these methods from gentlest to toughest, so you can start with the least abrasive option first to avoid damaging your walls.
Method 1: Dish Soap and Warm Water (for fresh, light grease)
This method works for splatters that are less than a week old and haven’t hardened:
- Mix 1 cup of warm water with 1 teaspoon of degreasing dish soap in a small bowl.
- Dampen a microfiber cloth with the solution, wringing out excess liquid so the cloth is damp, not dripping (soaking wet cloths can cause water damage to drywall).
- Wipe greasy spots in gentle, circular motions, starting from the top of the stain to avoid streaks.
- Rinse the cloth frequently in clean warm water to avoid spreading grease around.
- Wipe the area with a clean, damp cloth to remove soap residue, then dry immediately with a dry microfiber cloth.
Method 2: White Vinegar Solution (for medium, set-in grease)
Vinegar’s mild acidity breaks down grease bonds without damaging most wall surfaces:
- Mix equal parts white distilled vinegar and warm water in a spray bottle.
- Spray the solution directly onto the greasy area, taking care not to oversaturate the wall (especially important for wallpaper or unsealed drywall).
- Let the solution sit for 5-10 minutes to break down the grease—do not let it dry completely, as this can leave a residue.
- Wipe the area with a damp microfiber cloth, using gentle pressure.
- For extra-stubborn spots, sprinkle a small amount of baking soda on the damp area before wiping for added mild abrasion.
- Rinse with clean water and dry thoroughly. Note: Avoid vinegar on natural stone tile like marble or travertine, as it can etch the surface.
Method 3: Baking Soda Paste (for stubborn, thick grease)
Baking soda is a gentle abrasive that lifts hardened grease without scratching paint or tile:
- Mix 3 parts unscented baking soda with 1 part warm water to form a thick paste. Add a drop of dish soap for extra grease-cutting power if needed.
- Apply the paste directly to the grease stain with a soft brush or cloth.
- Let it sit for 10-15 minutes. If the paste starts to dry out, mist it lightly with water to keep it active.
- Gently scrub the area with a soft-bristle brush or non-abrasive sponge, using circular motions.
- Wipe away all paste residue with a damp cloth, rinse with clean water, and dry the wall completely. Common mistake: Using too much baking soda, which can leave a white, powdery residue if not rinsed thoroughly.
Method 4: Paint-Safe Commercial Degreaser (for heavy, long-term buildup)
For grease that has been building up for months and doesn’t respond to homemade solutions, use a commercial degreaser formulated for walls:
- Choose a product labeled "paint-safe" or "wallpaper-safe" for your specific wall type. Avoid harsh degreasers like oven cleaner, which can strip paint or damage wallpaper.
- Test the product on an inconspicuous area first to check for discoloration.
- Apply the degreaser to a clean cloth (do not spray directly on the wall to avoid overspray) and dab it onto the stain.
- Let it sit for the time recommended on the label (usually 1-5 minutes—do not let it dry).
- Wipe clean with a damp cloth, rinse with clean water, and dry thoroughly.
 Credit: www.youtube.com
Baking soda paste lifts thick grease without scratching painted wall surfaces.
Credit: www.youtube.com
Baking soda paste lifts thick grease without scratching painted wall surfaces.
How to Tackle Stubborn, Long-Set Grease Stains Without Damaging Walls
If grease has been sitting on your walls for months, it may have seeped into porous paint or drywall, requiring a more careful approach.
Avoid These Common Cleaning Mistakes
- Don’t use abrasive tools like steel wool, scouring pads, or stiff-bristle brushes, which can scratch paint and leave permanent marks.
- Don’t scrub immediately after applying cleaner: letting the solution sit for 5-15 minutes to break down grease cuts down on scrubbing time by 50% and reduces the risk of paint damage.
- Don’t oversaturate the wall with liquid, especially on drywall or wallpaper, as excess moisture can cause mold growth behind the surface or peel wallpaper seams.
- Don’t mix different cleaning products (e.g., vinegar and bleach), which can create toxic fumes.
Special Tips for Textured Walls and Wallpaper
For orange peel, knockdown, or other textured painted walls, use a soft-bristle brush to work cleaner into the grooves of the texture without damaging the finish. For wallpaper, use a barely damp cloth instead of a spray bottle to avoid getting water behind the paper, and test any cleaner on a hidden seam first to ensure it doesn’t discolor the pattern. If grease has seeped into porous wallpaper, you may need to use a wallpaper-safe degreaser or replace the affected section.
Prevent Future Grease Buildup for Long-Lasting Clean Walls
The easiest way to deal with kitchen wall grease is to stop it from building up in the first place. These simple habits cut down on cleaning time by 70% in most homes.
Optimize Your Kitchen Ventilation
Airborne grease particles are the main cause of wall buildup, so capturing them at the source is key. Use your range hood every time you cook, even for low-heat tasks like simmering soup, and keep it running for 5-10 minutes after you finish cooking to clear remaining particles from the air. If you don’t have a range hood, open a window and use a portable fan to blow grease particles away from your walls. Clean your range hood filters monthly—clogged filters can’t capture grease, so particles will settle on your walls instead. If you’re doing a full kitchen overhaul to cut down on future grease buildup, swapping out an old, splashing faucet for a low-flow model can reduce water and grease splatters on nearby walls. Our guide to upgrading your kitchen fixtures walks you through removing a wall-mounted faucet safely.
Stick to a Simple Weekly Maintenance Routine
Spend 5-10 minutes wiping down your kitchen walls once a week with a damp cloth and a drop of dish soap to remove fresh grease before it hardens. Spot-clean splatters immediately after cooking—don’t let them sit and bond to the wall surface. If you regularly host dinner parties paired with homemade wine, frequent stovetop cooking can lead to faster grease accumulation on your kitchen walls. For anyone crafting homemade wine at home to pair with your meals, regular wall maintenance is key to keeping your kitchen looking its best. For new home brewers looking to stock up on supplies for regular entertaining, entry-level home wine making kits make it easy to batch your own wine for weekend gatherings, so sticking to a weekly 10-minute wall wipe-down will prevent tough grease from building up between deep cleans.
Upgrade High-Traffic Kitchen Surfaces
If you do a lot of high-heat cooking, consider installing a washable backsplash (stainless steel, glass, or tile) behind your stove and countertops. These surfaces are far easier to wipe clean than painted drywall, and they prevent grease from seeping into your walls entirely. When installing a new backsplash or repainting your kitchen walls after a deep clean, pairing your new finish with a cabinet color that complements your space can elevate the whole room. Check out our guide to complementary wall colors for green cabinetry or coordinating paint shades for brown cabinets for cohesive, stylish results.
When to Call a Professional Cleaning Service
If you’ve tried the methods above and grease stains remain dark, sticky, or accompanied by peeling paint, it may be time to call in a professional.
Signs Your Grease Stains Need Expert Help
- Grease has seeped into the paint or drywall, leaving a dark, persistent stain that doesn’t fade after 2-3 rounds of cleaning.
- Paint is peeling, bubbling, or chipping around greasy areas, indicating the grease has damaged the wall material beneath the surface.
- You notice a persistent greasy odor even after cleaning, which means grease has soaked into porous surfaces.
- The stained area is large (more than 10 square feet) and would take hours to scrub by hand.
What to Expect from a Professional Kitchen Cleaning
Professional cleaners use industrial-strength, wall-safe degreasers and steam cleaning tools to lift deep-set grease without damaging paint or wallpaper. They can also assess whether your walls need spot-priming or repainting after cleaning, and advise on ventilation upgrades to prevent future buildup. A professional kitchen wall cleaning typically takes 1-2 hours for a standard space, and costs far less than repainting entire walls damaged by long-term grease exposure.
Frequently Asked Questions
How long does it take to remove grease from kitchen walls?
For fresh, light grease, cleaning takes 5-10 minutes. For set-in or stubborn stains, you may need to repeat your chosen cleaning method 2-3 times, with 10-15 minutes of dwell time per application, for a total of 30-45 minutes. Professional cleaning for heavy buildup typically takes 1-2 hours for a standard kitchen wall area.
Can I use bleach to remove grease from kitchen walls?
No. Bleach is a disinfectant, not a degreaser, and it can discolor painted walls, damage wallpaper, and strip protective sealants from tile or grout. Stick to degreasing agents like dish soap, vinegar, or paint-safe commercial degreasers for best results.
Will cleaning grease damage my wall paint or wallpaper?
Not if you use gentle cleaning methods: soft cloths or sponges, non-abrasive cleaners, and avoid excessive moisture. Always test any cleaner on an inconspicuous area first, and never use steel wool, scouring pads, or harsh chemicals like oven cleaner, which can strip paint or cause wallpaper to peel.
How do I remove grease from kitchen walls without leaving streaks?
Use lint-free microfiber cloths instead of paper towels (which leave lint), wring out cleaning cloths thoroughly so they are damp, not soaking wet, and dry the wall immediately after wiping with a clean dry microfiber cloth. Avoid using too much cleaning solution, which can leave residue.
What should I do if grease stains come back after cleaning?
Recurring grease stains usually mean grease has seeped into porous drywall or paint. First, try a second round of cleaning with a stronger solution (like undiluted white vinegar for non-porous surfaces). If stains persist, you may need to spot-prime and repaint the affected area with a paint that has a built-in primer, or install a washable backsplash over the area to prevent future buildup.
Conclusion
Grease buildup on kitchen walls is a common nuisance, but it’s easy to tackle with the right tools and techniques, no harsh chemicals or expensive professional services required. For fresh splatters, a simple dish soap and warm water solution does the trick in minutes, while set-in grease responds well to vinegar or baking soda paste. Always prioritize gentle cleaning methods to avoid damaging your paint or wallpaper, and stick to a weekly wipe-down routine to stop grease from hardening in the first place.
If you’re planning a full kitchen refresh after deep cleaning your walls, we’ve got guides to help you complete the space: check out our tips for complementary wall colors for green cabinetry, coordinating paint shades for brown cabinets, and how to remove a wall mounted kitchen faucet to upgrade your fixtures and reduce future splashes.