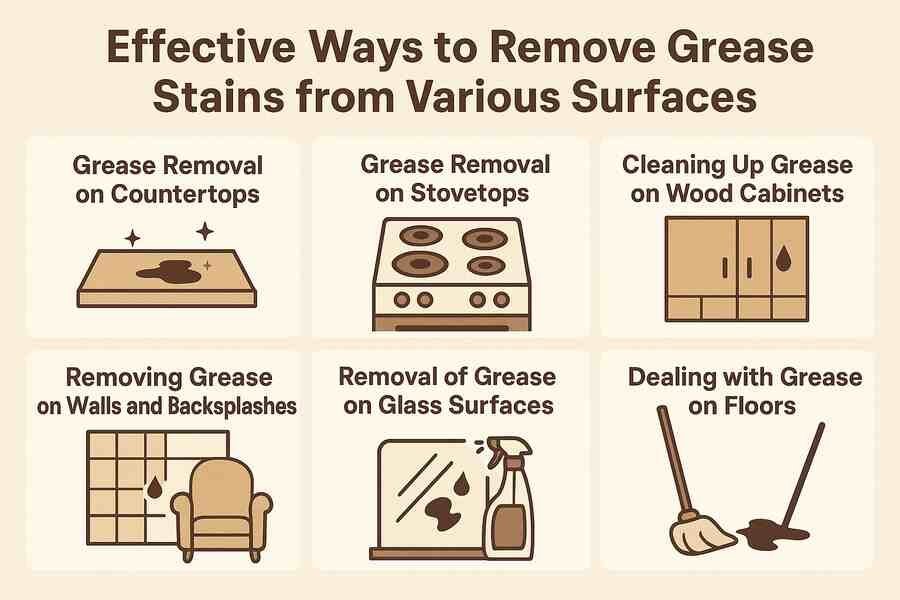
How Do You Remove Grease Buildup from Kitchen Walls: Easy & Effective Tips
Grease buildup on kitchen walls is one of the most common, frustrating cleaning challenges for home cooks. It doesn’t just make your space look dingy: sticky grease traps dust, food particles, and bacteria, can degrade paint or wallpaper over time, and even attract pests like cockroaches and ants if left unaddressed. The good news is you don’t need harsh chemicals or hours of scrubbing to restore your walls, as long as you use the right method for your wall type and act quickly on fresh splatters. This guide covers everything from the root causes of grease buildup to step-by-step removal techniques, natural and commercial cleaning solutions, and simple prevention habits to keep your walls spotless long-term.
What Causes Kitchen Wall Grease Buildup
Grease doesn’t appear out of nowhere: it builds up gradually from daily cooking activities, and understanding the source helps you target cleaning and prevention efforts effectively. For more on this, see our guide on how to remove grease from walls in kitchen.
Common Kitchen Grease Sources
The primary culprit is aerosolized grease released when you fry, sauté, sear, or cook with fatty ingredients like bacon, steak, or oily sauces. When oil heats past its smoke point, it vaporizes, mixes with steam and cooking smoke, and condenses on cooler wall surfaces, especially within 2 feet of your stovetop. Without a functioning range hood or open window, these tiny grease droplets settle on nearby surfaces within minutes of cooking, building up into a sticky layer that traps dust and food particles. Other common sources include:
- Grease splatters from flipping foods or stirring hot pans
- Residue from greasy takeout containers or packaged foods stored near walls
- Touching walls with greasy hands after handling food or cookware
- Grease tracked in from other areas of the home on clothing or towels
Why Grease Clings to Walls
Grease is hydrophobic (water-repelling) and sticky by nature, so it bonds easily to both porous surfaces like unsealed brick or matte paint and smooth surfaces like tile or gloss paint. Heat from cooking softens grease, making it more likely to stick, while moisture from steam helps it spread into tiny cracks in paint, grout, or wallpaper. Over time, layers of grease mix with dust and dirt to form a hard, grimy film that is far harder to remove than fresh splatters.
 Grease splatters near cooking surfaces are the most common source of wall buildup
Safety Precautions for Grease Cleaning
Even mild cleaning products can cause irritation or damage if used incorrectly, so take these steps to protect yourself and your kitchen before you start scrubbing. For more on this, see our guide on how to remove oil grease from kitchen walls.
Protective Gear to Wear
- Wear nitrile or rubber gloves to avoid skin irritation from cleaners and grease
- Use safety goggles if spraying cleaning solutions overhead or near your face
- Wear an old apron or long sleeves to protect clothing from stains
- Use a N95 mask if working with strong commercial degreasers in a poorly ventilated space
Safe Handling and Ventilation
- Open windows and turn on your range hood or exhaust fan to remove fumes
- Never mix cleaning products: combining bleach with vinegar, ammonia, or degreasers releases toxic chlorine gas that can cause serious respiratory harm
- Keep cleaning supplies away from food prep surfaces and out of reach of children and pets
- Test any new cleaner on a small, hidden area of your wall (behind a cabinet or outlet cover) first to check for discoloration or damage
For guidance on choosing low-toxicity, effective cleaning products, the U.S. Environmental Protection Agency’s Safer Choice program certifies products that meet strict safety and performance standards for household use.
Essential Tools and Cleaning Solutions
Having the right supplies on hand before you start will cut down on cleaning time and reduce the risk of wall damage.
Must-Have Tools
- Soft-bristled scrub brush or non-abrasive sponge for scrubbing grout and textured surfaces
- Microfiber cloths for wiping, rinsing, and streak-free drying
- Plastic putty knife for scraping off thick, dried grease without scratching surfaces
- Spray bottle for even application of cleaning solutions
- Drop cloths or old towels to protect your floors from drips and splatters
Cleaning Agents for Every Need
Choose a cleaner based on how severe your grease buildup is and what type of wall you’re working on:
- Mild daily cleaners: Warm water mixed with a few drops of dish soap (a surfactant designed to break down oils) works for light, fresh grease on all wall types.
- Natural heavy-duty options: White vinegar, baking soda, and lemon juice cut through moderate buildup without harsh chemicals, and are safe for most painted and tiled surfaces.
- Commercial degreasers: Formulated with strong solvents to dissolve baked-on, set-in grease, these are best for tile, stone, and grease-resistant painted walls, but always check the label for surface compatibility.
Step-by-Step Grease Removal for Every Wall Type
A one-size-fits-all approach will damage delicate surfaces like wallpaper or matte paint, so tailor your method to your wall finish:
Painted Drywall
Most modern latex and acrylic paints are semi-gloss or satin finishes in kitchens, which resist grease better than flat paint, but can still be damaged by excess water or abrasive scrubbing.
- Dust the wall first with a dry microfiber cloth to remove loose dirt and grease particles.
- Spray a mix of warm water and dish soap onto the wall (don’t soak it) and let sit for 2-3 minutes to break down grease.
- Scrub gently with a soft sponge in circular motions, rinsing the sponge frequently.
- Wipe the area with a clean, damp cloth to remove soap residue, then dry immediately with a dry microfiber cloth.
Ceramic Tile and Grout
Tile and grout are non-porous, so they can handle stronger cleaners and more aggressive scrubbing.
- Spray a commercial degreaser or vinegar solution directly onto the greasy areas, letting it sit for 5 minutes to loosen stuck-on grime.
- Use a stiff-bristled brush (an old toothbrush works great for grout lines) to scrub away grease.
- Rinse thoroughly with warm water and dry with a clean cloth to prevent water spots.
Wallpaper
Most wallpaper is coated to resist moisture, but harsh cleaners and excess water can discolor or peel the material.
- Test a small hidden area first with a mixture of warm water and a drop of dish soap to confirm it won’t damage the print.
- Dampen a soft cloth with the solution (never spray wallpaper directly) and gently dab at grease spots, don’t scrub.
- Wipe with a clean, barely damp cloth to remove residue, then pat dry with a soft towel.
Brick and Stone Accent Walls
Porous stone and brick absorb grease easily, so you’ll need a gentle abrasive to lift set-in stains without damaging the surface.
- Make a thick paste of baking soda and warm water, and spread it over greasy areas.
- Let the paste sit for 10-15 minutes to absorb grease.
- Scrub gently with a soft-bristled brush, then rinse with a damp cloth and pat dry.
 Use a soft sponge and circular motions to avoid scratching painted wall finishes
Natural Grease-Cutting Remedies
If you prefer to avoid harsh chemicals, these common household ingredients are just as effective for most grease buildup, and safe for use around food and children.
Vinegar and Baking Soda
White vinegar’s acidity breaks down grease molecules, while baking soda acts as a gentle abrasive to scrub away stuck-on residue.
- Sprinkle a thin layer of baking soda directly onto dry greasy spots.
- Spray or dab white vinegar over the baking soda until it fizzes.
- Let the mixture sit for 3-5 minutes, then wipe away with a damp cloth and rinse with clean water. Pro tip: Avoid letting the mixture dry on the wall, as it can leave a light residue. Keep a spray bottle of water handy to rinse the area as you work.
Lemon Juice
The citric acid in lemon juice cuts through grease and leaves a fresh, clean scent, making it ideal for light splatters and quick touch-ups.
- Soak a clean cloth or sponge in undiluted lemon juice, or spray it directly onto the greasy area.
- Let it sit for 2-3 minutes, then wipe clean with a damp cloth. Note: Lemon juice can bleach dark or vibrant paint if left on for too long, so test it on a hidden spot first and don’t let it sit for more than 5 minutes.
Castile Soap Solutions
For a gentle, all-purpose cleaner that works on all wall types, mix 1 tablespoon of liquid castile soap with 2 cups of warm water. Spray or wipe the solution onto greasy areas, let sit for 2 minutes, then rinse with a clean damp cloth. This is ideal for weekly maintenance cleaning to prevent buildup from forming in the first place.
Commercial Degreasers: When to Use Them
For baked-on, months-old grease that natural remedies can’t lift, a commercial degreaser will save you time and effort. These products contain surfactants and solvents designed to dissolve tough oily residue quickly.
Types of Kitchen Degreasers
- Citrus-based degreasers: Made with natural citrus oils, these are low-toxicity, have a pleasant scent, and work well for moderate buildup on most surfaces.
- Solvent-based degreasers: Powerful enough for heavy, baked-on grease on tile and stone, but require strong ventilation and should not be used on painted or porous surfaces.
- Water-based degreasers: Easy to rinse, low-odor, and safe for most painted walls and wallpaper, ideal for regular deep cleans.
How to Choose a Safe, Effective Product
Look for degreasers with the EPA Safer Choice label to ensure they’re free of harmful toxins and safe for household use. Always check the product label for surface compatibility, and avoid abrasive degreasers on painted or finished walls, as they can scratch or strip the finish.
How to Prevent Future Grease Buildup
The easiest way to remove grease is to stop it from building up in the first place. These simple habits will cut down on your cleaning time drastically.
Daily and Weekly Cleaning Habits
- Wipe down walls within 10 feet of your stovetop with a damp microfiber cloth after every cooking session to remove fresh splatters before they harden.
- Do a full wipe-down with a mild dish soap solution once a week to remove light grease before it builds up.
- Avoid leaning greasy pans, utensils, or towels against walls, as they transfer grease directly to the surface.
Upgrade Your Kitchen Ventilation
A high-quality range hood is the single most effective tool for preventing grease buildup: it pulls aerosolized grease particles out of the air before they can settle on walls. If you don’t have a range hood, open windows during and after cooking to create cross-ventilation, and run your exhaust fan for 10-15 minutes after you finish cooking to clear residual grease from the air. Regular wall cleaning also reduces the risk of bacterial growth, per University of Minnesota Extension food safety guidelines, which recommend wiping down kitchen surfaces weekly to minimize grease and food residue buildup.
Simple Splatter Prevention Tips
- Use a splatter guard when frying or cooking with hot oil to contain grease droplets.
- Clean your range hood filter monthly: a clogged filter can’t pull grease out of the air effectively, leading to more buildup on walls and cabinets.
Once you’ve eliminated grease buildup, you may want to update your wall color to complement your cabinetry. Our guides to wall colors for green kitchen cabinets and wall colors for brown kitchen cabinets walk you through picking a durable, easy-to-clean finish that matches your style.
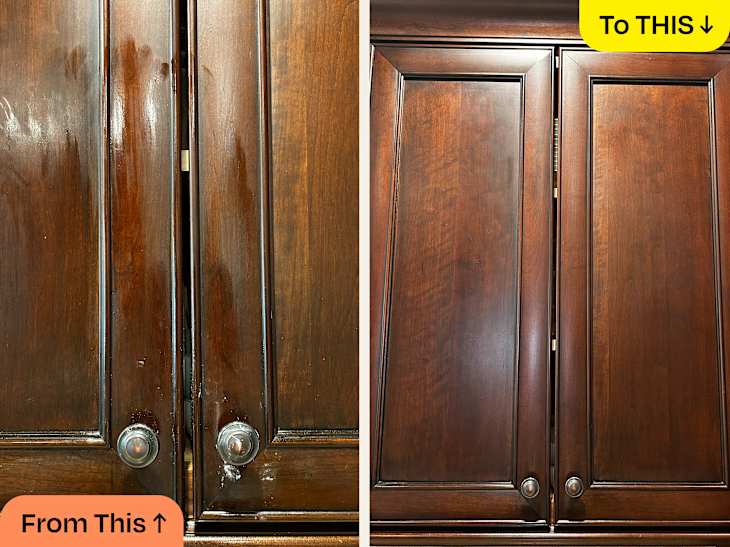
Troubleshooting Stubborn, Set-In Grease Stains
Even with regular cleaning, some grease stains can become set-in over months or years. Use these tips to tackle them without damaging your walls:
When to Repeat Cleaning
If grease remains after the first cleaning session, let the wall dry fully, then repeat the process. For set-in stains, make a thick paste of baking soda and water, spread it over the stain, and let it sit for 15 minutes before scrubbing. This gives the baking soda time to absorb the grease before you scrub it away.
Avoiding Wall Damage During Scrubbing
A common mistake homeowners make is using abrasive scrub pads or steel wool on painted walls, which can scratch the finish and make future grease buildup worse. Stick to soft sponges and non-abrasive brushes, and avoid soaking porous surfaces like drywall or unsealed brick, as excess water can cause peeling, mold growth, or water damage behind the wall.
When to Repaint or Reseal
If grease has caused paint to peel, flake, or leave permanent stains that won’t lift with cleaning, you’ll need to repaint the affected area. For tile grout that’s stained with grease, a grout sealer will prevent future stains from penetrating the porous material. When scrubbing near your sink or stove, take care not to damage mounted hardware. If you need to remove a wall-mounted faucet for a deeper clean, follow our step-by-step guide to removing wall-mounted kitchen faucets to avoid scratching finishes or damaging plumbing.
Frequently Asked Questions
How can I remove old, baked-on grease from kitchen walls?
For set-in grease, start with a baking soda paste: mix 3 parts baking soda with 1 part warm water to make a thick spread, apply it to the stain, and let it sit for 15 minutes before scrubbing with a soft brush. For extremely stubborn stains on tile or stone, use a citrus-based commercial degreaser, following the product’s instructions for dwell time.
What natural cleaners work best for kitchen grease?
White vinegar, baking soda, lemon juice, and castile soap are the most effective natural options. Vinegar and baking soda work together to break down and lift grease, while lemon juice’s citric acid cuts through light splatters and leaves a fresh scent. Avoid using undiluted vinegar on natural stone surfaces like marble, as its acidity can etch the stone.
How often should I clean my kitchen walls to prevent grease buildup?
Wipe down walls within 10 feet of your stovetop with a damp cloth after every cooking session to remove fresh splatters. Do a full deep clean with a mild soap solution once a month, and a heavy-duty degreaser treatment every 3-6 months if you cook frequently.
Can grease buildup damage my kitchen wall paint?
Yes, over time grease can break down paint binders, causing peeling, discoloration, and permanent staining. Matte and flat paint finishes are especially vulnerable, as they absorb grease easily. If you’re repainting a kitchen wall, opt for a semi-gloss or satin finish, which repels grease and is much easier to clean.
Can I use bleach to clean grease off kitchen walls?
No, bleach is not effective at breaking down oily grease residues, and can cause serious damage to wall surfaces. It can discolor painted walls, dissolve wallpaper adhesive, and release toxic fumes when mixed with other common cleaners like vinegar or ammonia. Stick to grease-cutting surfactants, vinegar, or commercial degreasers for safe, effective results.
Will commercial degreaser damage my wall paint?
Most modern latex and acrylic paints are resistant to mild degreasers, but oil-based paints and flat/matte finishes are more prone to damage. Always test any cleaner on a small, hidden area (like behind a cabinet) first, and avoid soaking porous wall surfaces to prevent water damage or paint peeling.
Final Tips for a Grease-Free Kitchen
Grease buildup on kitchen walls is a normal part of cooking, but it doesn’t have to be a constant battle. By tailoring your cleaning method to your wall type, using the right tools and solutions, and building small prevention habits into your cooking routine, you can keep your walls spotless without harsh chemicals or hours of scrubbing. For best results, tackle fresh splatters as soon as they happen, maintain your range hood to reduce airborne grease, and do a light weekly wipe-down to stop buildup before it hardens.