How to Lay Kitchen Wall Tiles: Easy Steps for Stunning Results
A dated, cracked, or boring kitchen backsplash can drag down the entire look of your space—but you don’t need to hire a professional contractor to fix it. Laying kitchen wall tiles is a high-impact DIY project that even first-time tilers can tackle for stunning, professional-looking results, as long as you follow proven, up-to-date best practices. Many DIYers rush through prep or skip critical steps like using backer board in wet areas, leading to peeling tiles, cracked grout, and wasted money. This updated 2026 guide walks you through every step of the process, from choosing the right materials to sealing your finished work, with practical tips to avoid the most common pitfalls. Whether you’re installing classic subway tile or a bold herringbone pattern, you’ll learn how to get a flawless finish that lasts for years.
Tools and Materials You’ll Actually Need
Having the right supplies on hand before you start will cut down on project time and prevent avoidable mistakes. Skip cheap, no-name tools that will dull or break mid-project—invest in mid-range options that will hold up for future tiling jobs. For more on this, see our guide on how to regrout kitchen wall tiles easy steps.
Essential Tools
- Wet saw or manual tile cutter: A wet saw is ideal for precise straight cuts on porcelain or glass tile, and reduces silica dust when used with water. Manual cutters work for small-format ceramic tile and simple straight cuts.
- Notched trowel: Choose a size matching your tile dimensions—1/4-inch square notch for tiles under 6 inches, 1/2-inch square notch for large-format tiles 13 inches or larger. A worn trowel with smoothed ridges will spread adhesive unevenly, so replace it if the edges are dull.
- Spirit or laser level: A 4-foot spirit level works for small walls; a laser level saves time on large backsplashes by projecting straight reference lines across the entire surface.
- Rubber grout float: Look for a float with a soft rubber edge to avoid scratching tile surfaces.
- Tile spacers: Match spacer size to your desired grout line width—1/8-inch for tight, modern looks, 1/4-inch for traditional installations.
- Tile leveling system: Required for large-format tiles over 15 inches on any side to prevent lippage (uneven tile edges) during curing.
- Safety gear: NIOSH-approved respirator, cut-resistant gloves, and safety glasses for cutting tile and mixing adhesive.
Tile Selection: Pick the Right Material for Your Kitchen
Not all tile is created equal—choosing the right type for your kitchen’s traffic level and style will ensure your installation lasts for years. Use this quick reference to narrow down your options:
| Tile Type | Pros | Cons | Best For |
|---|---|---|---|
| Glazed ceramic | Affordable, wide range of colors/patterns, easy to cut | Less durable than porcelain, can chip if impacted | Low-traffic backsplashes, budget-friendly renovations |
| Porcelain | Dense, stain/heat/moisture resistant, low maintenance | Harder to cut, higher price point | High-traffic areas, behind sinks and stoves |
| Glass | Reflects light to brighten dark kitchens, modern aesthetic, easy to clean | Shows water spots and fingerprints, can scratch easily | Accent strips, modern or minimalist kitchen designs |
| Natural stone (marble, travertine) | Unique, high-end look, adds resale value | Porous, requires regular sealing, can etch with acidic foods | Low-moisture areas, luxury renovations |
If you’re pairing your new tile with green kitchen cabinetry, our guide to coordinating wall paint colors will help you nail a cohesive, balanced palette. For kitchens with warm brown wood cabinets, complementary wall hues can make your new tile pop without clashing with existing finishes.
Adhesives and Grout: What to Buy
The right adhesive and grout are just as important as the tile itself for long-term performance:
- Adhesive: Ready-mix tile adhesive is convenient for small DIY projects with small-format tiles, but it’s not suitable for large-format tiles over 15 inches on any side, as it can’t support the weight long-term. For most kitchen installations, use a latex-modified thin-set adhesive, which offers stronger bond strength and flexibility to handle minor wall movement.
- Grout: Cementitious grout is affordable and easy to work with for beginners, but it requires annual sealing to prevent stains. Epoxy grout is stain-resistant, mold-resistant, and never needs sealing, making it ideal for kitchen backsplashes, but it has a shorter working time and is harder to clean off tile surfaces during installation.
Preparing Your Wall for a Flawless Bond
Skipping or rushing wall prep is the number one cause of failed DIY tile installations. A well-prepped surface ensures adhesive bonds properly, tiles stay level, and your backsplash lasts for decades without peeling or cracking. For more on this, see our guide on how to lay wall tiles in kitchen.
Step 1: Clear and Clean the Surface
Start by removing all outlet covers, cabinet hardware, and wall-mounted fixtures from the work area. If your kitchen has a wall-mounted faucet, remove any wall-mounted fixtures like faucets to avoid damage and ensure a tight fit around the base. Scrub the wall with warm soapy water and a kitchen degreaser to remove built-up grease, food splatters, and dust—even small amounts of grease will prevent adhesive from sticking. For glossy painted walls, sand lightly to create a rough surface for adhesion, and wipe away all dust with a damp cloth before moving on.
Step 2: Repair Cracks and Imperfections
Inspect the wall for cracks, holes, or dents, and fill them with a fast-setting patching compound. Sand the patched area smooth once dry, and wipe away excess dust. For walls with major damage or uneven surfaces, install a 1/4-inch cement backer board over the existing drywall—this is especially critical for areas behind sinks and stoves, where moisture exposure is high. For industry-standard guidance on wall prep and installation, the Tile Council of North America recommends using cement backer board or a waterproof membrane in all wet kitchen areas to prevent water intrusion. TCNA Installation Best Practices outlines full requirements for different tile types and layouts. For more on this, see our guide on how to do kitchen wall tiles.
Step 3: Prime and Mark Your Guidelines
Apply a tile-specific bonding primer to the entire wall surface to improve adhesive grip, especially on porous surfaces like unprimed drywall or patched areas. Once the primer is dry, use a laser level or spirit level to draw a vertical reference line along the center of the wall, and horizontal lines every 4-6 inches to guide tile placement. These lines will keep your rows straight and prevent crooked installation as you work upwards.
Planning Your Tile Layout to Avoid Waste and Mistakes
A few minutes of layout planning before you pick up a tile cutter will save you hours of frustration and wasted materials. This step is especially important for patterned layouts like herringbone or diagonal designs, which require extra cutting and alignment work. For more on this, see our guide on how to remove kitchen tiles from wall.
Find the Center Point and Draw Reference Lines
Measure the full width of the wall and mark the exact center point with a pencil. Draw a straight vertical line through this point using your level—this is your starting line for tile placement, and it ensures your layout is symmetrical on both sides of the wall. If you’re tiling only a section of the wall (like a backsplash behind a countertop), measure from the countertop edge up to the top of the tiling area to get your center point for that space.
Dry Layout: Test Before You Commit
Lay out your tiles on the floor or a large piece of cardboard without adhesive to test the layout. This lets you see how the pattern will look, identify any awkward small cuts at the edges, and adjust the starting point if needed to avoid sliver-thin tile pieces at the ends of rows. For straight grid layouts, plan for 5% extra tile to account for cutting waste; for diagonal or herringbone patterns, buy 10-15% extra, as these layouts produce far more scrap pieces. For more on this, see our guide on how to clean kitchen wall tiles easily.
Adjust for Outlets, Cabinets, and Corners
Measure the space around outlets, light switches, cabinet edges, and corners during your dry layout. Mark where you’ll need to cut tiles to fit these areas, and plan to use full tiles in the most visible parts of the backsplash (like the center of the wall) to create a balanced look. If you’re unsure how to take off a wall-mounted faucet without scratching the surrounding tile or cabinet, our step-by-step guide walks you through the process safely.
Applying Adhesive for a Long-Lasting Bond
Proper adhesive application is the foundation of a successful tile installation—rushing this step or using too much adhesive at once will lead to tiles shifting, cracking, or popping off the wall later.
Mixing and Testing Adhesive
If using thin-set adhesive, mix it with clean water in a bucket according to the manufacturer’s instructions, stirring until it reaches a smooth, peanut-butter consistency—thick enough to hold its shape on a trowel, but not so thick it’s hard to spread. A quick consistency test: scoop adhesive onto your notched trowel, hold it upside down for 10 seconds, and check if it stays in place without dripping. If it runs, add more powder; if it’s lumpy, add small amounts of water and mix thoroughly. Ready-mix adhesive is pre-mixed and ready to use straight from the bucket, but only use it for small-format tile projects.
Spreading Techniques for a Strong Bond
Work in 2×2 foot sections to avoid letting adhesive dry out before you set tiles. Hold your notched trowel at a 45-degree angle to spread a thin, even layer of adhesive on the wall, then comb it with the trowel’s notched edge to create uniform ridges. For large-format tiles, apply a thin layer of adhesive to the back of the tile (called back-buttering) in addition to the wall to ensure full coverage and eliminate air pockets. In practice, most DIYers underestimate how much adhesive dries out in warm, dry kitchens—working in small sections ensures you never have to scrape off dried adhesive to set a tile.
Setting Tiles Precisely
Once adhesive is spread, you’ll need to work quickly and carefully to set tiles before the adhesive skins over. This step determines the overall look and durability of your installation.
Placement and Alignment
Press each tile firmly into the adhesive ridges, wiggling it slightly to push out air pockets and ensure full contact with the adhesive. Align the tile with your reference lines and the edges of adjacent tiles, checking for level with a spirit level every 3-4 rows. A common mistake is using 1/8-inch spacers for a 1/4-inch grout line, which leads to uneven joints that look unprofessional; always match spacer size to your desired grout width before starting.
Checking for Lippage
After setting 4-6 tiles, place a straightedge across the top edges to check for lippage (when one tile sits higher than its neighbors). Adjust any uneven tiles immediately before the adhesive sets. For large-format tiles, use a tile leveling system to keep all edges flush as the adhesive cures.
Cutting Tiles for Edges and Fixtures
Measure and mark cut lines with a pencil before cutting. For straight cuts, use a wet saw with a diamond blade for clean, precise edges; for curved or irregular cuts around outlets, use tile nippers to shape the tile gradually. When cutting tiles near electrical outlets, turn off power to the circuit at your breaker box first to avoid shock. Smooth rough cut edges with a rubbing stone to prevent chipping and make grouting easier.
Grouting for a Professional, Stain-Resistant Finish
Grout fills the gaps between tiles, locks them in place, and prevents water and dirt from seeping behind the tile. Proper grouting will make your installation look polished and extend its lifespan.
Choosing Grout Color and Type
Grout color can dramatically change the look of your backsplash: matching grout to your tile creates a seamless, subtle look, while contrasting grout highlights the tile pattern and hides dirt better. For kitchen installations, epoxy grout is the best choice for high-splash areas behind sinks, as it never needs sealing and resists mold and stains. Cementitious grout is more affordable and easier for beginners to work with, but it requires sealing after curing to prevent water damage.
Applying and Cleaning Grout
Wait 24-72 hours after setting tiles (per your adhesive manufacturer’s instructions) before grouting to ensure the adhesive is fully cured. Mix grout according to package directions, then use a rubber grout float held at a 45-degree angle to press grout firmly into the joints, working in 3×3 foot sections. Hold the float at a 90-degree angle to scrape excess grout off the tile surface, moving diagonally across the tiles to avoid pulling grout out of the joints. Wait 10-15 minutes for the grout to set slightly, then wipe the tile surface with a damp (not soaking wet) sponge, rinsing the sponge frequently to avoid smearing grout. Over-wiping grout will wash cement out of the joints, leading to cracking and water damage over time.
Curing and Sealing
Let grout cure fully for 24-72 hours before exposing it to water or steam. For cementitious grout, apply a penetrating grout sealer once cured to repel stains and moisture—reapply sealer every 6-12 months for best results. Epoxy grout does not require sealing.
Finishing Touches and Long-Term Maintenance
The final steps of your installation will protect your work and keep your backsplash looking new for years.
Caulking Perimeter Edges
Apply 100% silicone caulk along the seam where the tile meets your countertop and cabinet edges. Silicone is flexible and water-resistant, unlike acrylic caulk, which will crack and peel over time. Smooth the caulk with a wet finger for a clean, professional finish, and let it cure for 24 hours before using the space.
Post-Installation Cure Time
Wait at least 72 hours after grouting before using the kitchen area, and avoid exposing the backsplash to direct water or steam for 7 days if possible. This allows the adhesive and grout to reach full strength.
Routine Maintenance
Wipe spills as soon as they happen to prevent stains, especially on unsealed cementitious grout or matte-finish tile. Clean the backsplash weekly with a mild dish soap and warm water, avoiding abrasive cleaners that can scratch tile surfaces. Inspect grout lines annually for cracks or discoloration, and touch up with grout repair kits as needed to prevent water intrusion.
Common DIY Kitchen Tiling Mistakes to Avoid
Even experienced DIYers run into these avoidable errors:
- Skipping backer board in wet areas: Drywall alone will absorb moisture and rot behind sinks, leading to tile failure and mold growth.
- Rushing adhesive cure time: Grouting before thin-set is fully cured (usually 24 hours) will loosen tiles and cause grout to crack within months.
- Not checking for lippage: Failing to ensure all tiles are level with their neighbors will create an uneven, unprofessional finish that’s impossible to fix after grouting.
- Using too much water when cleaning grout: Over-wiping grout will wash cement out of the joints, leading to cracking and water damage over time.
- Forgetting to caulk perimeter edges: Skipping silicone caulk where tile meets countertops and cabinets will let water seep behind the tile, causing mold and rot.
- Cutting tiles without safety gear: When cutting tiles with a wet saw or angle grinder, you’ll be exposed to crystalline silica dust, a known respiratory hazard. Follow OSHA’s silica safety guidelines by wearing a NIOSH-approved respirator, working in a well-ventilated area, and using water to suppress dust during cuts.
Frequently Asked Questions
How do I prepare the wall for kitchen tiles?
Start by clearing all items from the wall, then scrub away grease, dust, and old adhesive with warm soapy water and a degreaser for kitchen surfaces. If the wall is painted, sand it lightly to create a rough surface for adhesive to grip, and degloss any glossy finishes. Fill cracks and holes with a fast-setting patching compound, sand smooth once dry, and wipe away all dust before applying a tile-specific primer. For areas behind sinks or stoves, install a cement backer board first to prevent water damage.
What tools are needed to lay kitchen wall tiles?
Core tools include a wet saw or manual tile cutter for precise cuts, a notched trowel sized for your tile, a spirit level or laser level for alignment, rubber tile spacers, a rubber grout float, a damp sponge, a pencil for marking, protective gloves, and a NIOSH-approved respirator for cutting tiles. For large-format tiles, you’ll also need a tile leveling system to prevent lippage.
How long does it take to install kitchen wall tiles?
For a standard 30-square-foot kitchen backsplash, expect 4-6 hours of active work for prep, adhesive application, tile setting, and grouting. You’ll need to wait 24 hours for thin-set adhesive to cure before grouting, and another 24-72 hours for grout to fully cure before using the space. Complex layouts like herringbone or diagonal patterns will add 2-4 hours to the timeline due to extra cutting and alignment work.
Can I lay tiles over painted kitchen walls?
Yes, as long as the paint is fully cured (at least 6 months old), clean, dry, and lightly sanded to remove gloss. Apply a bonding primer designed for tile installation to improve adhesion, and avoid tiling over peeling, chipped, or wallpaper-covered walls, as these will not hold tile long-term.
Do I need to seal ceramic or porcelain wall tiles?
Glazed ceramic and porcelain tiles are non-porous and do not require sealing. Unglazed porcelain, natural stone, and matte-finish tiles may benefit from a penetrating sealer to prevent stains, especially in high-splash areas behind sinks. Always test sealer on a scrap tile first to ensure it doesn’t alter the tile’s color or finish.
Conclusion
Laying kitchen wall tiles is one of the most rewarding DIY projects you can take on for your home: it costs a fraction of a professional installation, adds significant resale value, and lets you customize your space to match your style. By taking the time to prep your wall properly, plan your layout, and follow cure times for adhesive and grout, you’ll avoid the most common mistakes that lead to peeling tiles and stained grout. Don’t be discouraged if your first cut isn’t perfect—small imperfections are barely noticeable once the grout is applied, and the final result will still look far better than a dated, damaged backsplash. If you’re still refining your kitchen’s overall design, check out our guides to coordinating wall paint colors for green and brown kitchen cabinets to tie your new tile into the rest of your space for a fully cohesive look.
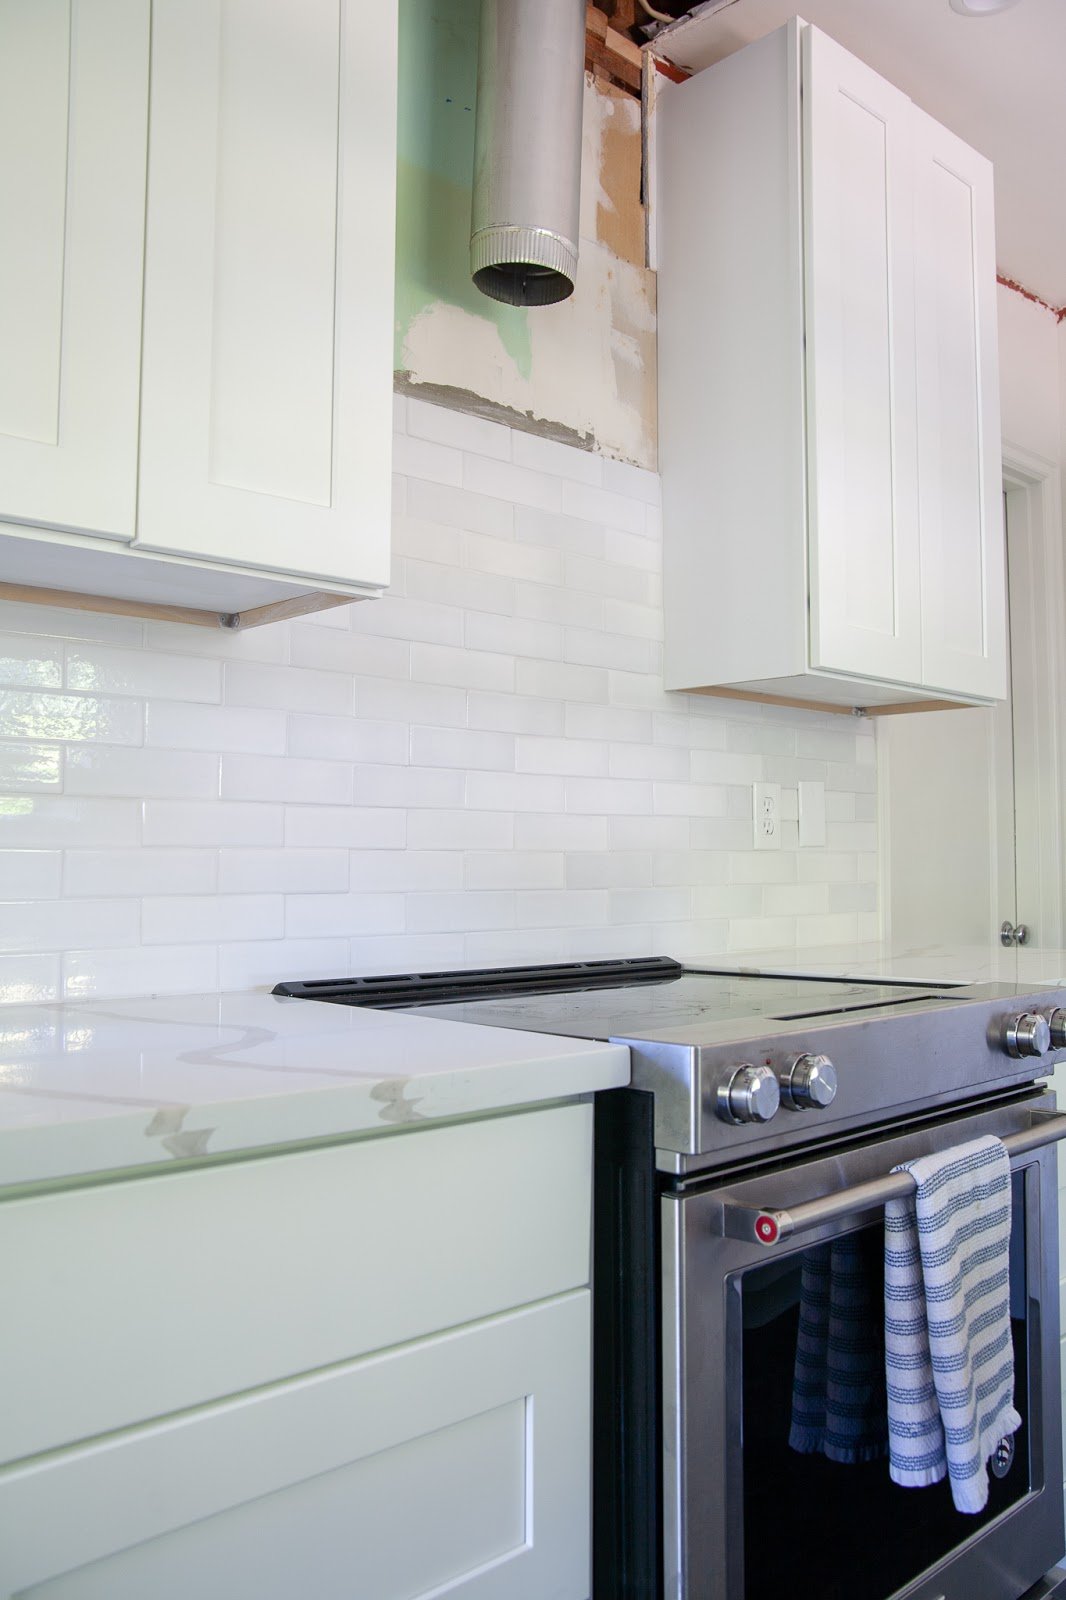
 A classic mosaic subway tile backsplash with light gray grout, installed as part of a kitchen wall refresh.
Credit: www.create-enjoy.com
A classic mosaic subway tile backsplash with light gray grout, installed as part of a kitchen wall refresh.
Credit: www.create-enjoy.com
 A straight herringbone tile layout adds visual interest to a kitchen backsplash, with precise cuts around cabinet edges.
Credit: www.create-enjoy.com
A straight herringbone tile layout adds visual interest to a kitchen backsplash, with precise cuts around cabinet edges.
Credit: www.create-enjoy.com
 Sealed grout lines on a finished mosaic backsplash resist stains and moisture for long-lasting performance.
Credit: www.create-enjoy.com Ready to tackle your kitchen backsplash? Grab your tools, follow this guide, and transform your kitchen with a beautiful, long-lasting backsplash you installed yourself.
Sealed grout lines on a finished mosaic backsplash resist stains and moisture for long-lasting performance.
Credit: www.create-enjoy.com Ready to tackle your kitchen backsplash? Grab your tools, follow this guide, and transform your kitchen with a beautiful, long-lasting backsplash you installed yourself.