How to Replace a Wall Mount Kitchen Faucet: Easy Step-by-Step Guide
Wall-mount kitchen faucets are a common feature in 1970s–1990s homes, commercial-style kitchens, and utility spaces, prized for their space-saving design and easy access for filling tall pots. Over time, though, these fixtures can develop leaks, corrode, or simply look outdated, making a replacement a high-impact, low-cost DIY upgrade for your kitchen. Unlike deck-mounted faucets that sit on the sink rim, wall-mount models have supply lines running through the wall cavity, so proper prep and precise installation are critical to avoid hidden water damage. This guide walks you through every step of the process, from gathering tools to testing for leaks, with practical tips to help you avoid common mistakes and get a professional-grade result.
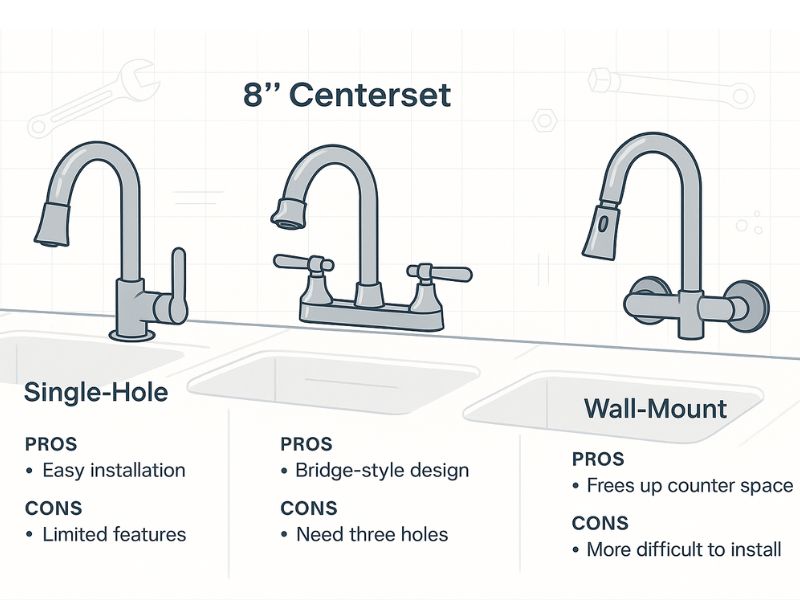 Wall-mount faucets are available in a range of finishes to match any kitchen aesthetic
Pre-Project Prep: Tools, Materials, and Safety First
Skipping prep is the number one cause of frustrating, time-consuming faucet replacements. Gathering all supplies and confirming safety protocols before you start will cut your project time in half and reduce the risk of damage to your plumbing or walls. For more on this, see our guide on how to install a wall mount kitchen faucet.
Essential Tools
You likely already own most of these, but a few specialized tools make the job far easier:
- Adjustable wrench (for tightening/loosening supply line nuts)
- Basin wrench (for reaching tight mounting nuts behind the wall or under the sink)
- Pipe wrench (for gripping corroded old pipes or mounting brackets)
- Flathead and Phillips screwdriver set (for removing set screws and mounting hardware)
- PTFE (plumber’s) tape (for creating watertight seals on threaded connections)
- Flashlight (for inspecting dark wall cavities and hard-to-see mounting points)
- Bucket, towels, and a small wet/dry vac (for catching spills and drying minor leaks)
- Putty knife and rubbing alcohol (for removing old sealant)
A common mistake first-time DIYers make is attempting to remove corroded mounting nuts without penetrating oil — a 10-minute soak with a product like PB Blaster will save you from stripped threads and broken hardware. If you’re new to faucet teardowns, our detailed removal walkthrough walks through handling corroded hardware and hard-to-reach mounting nuts for a smooth teardown.
Required Materials
In addition to your new wall-mount faucet, pick up these supplies before starting:
- Flexible stainless steel supply lines (replace old solid copper or corroded lines to avoid future leaks; solid copper lines common in older homes are prone to corrosion at connection points)
- 100% silicone caulk (for sealing the faucet base to the wall; avoid plumber’s putty for porous surfaces like unsealed drywall or tile)
- Replacement angle stop valves (if your existing under-sink shutoff valves are old, leaky, or hard to turn)
- Spackle and sandpaper (for patching small wall holes or damage from the old faucet)
Critical Safety Checks
- Turn off power to any under-sink outlets, garbage disposals, or dishwashers to avoid electric shock.
- Lay down a drop cloth or old towels on the floor under the work area to protect flooring from water damage.
- Confirm your new faucet is compatible with your wall thickness (most standard models fit 1/2" to 1" thick walls; thicker commercial walls may require an extension mounting kit, included with most heavy-duty faucet models).
Step 1: Shut Off Water and Drain Existing Lines
Failing to fully shut off your water supply is the fastest way to cause a messy, costly flood. Take extra time to confirm all water is cut off before disconnecting any pipes. For more on this, see our guide on how to replace a wall mounted kitchen faucet.
Locate and Close Shutoff Valves
Most kitchens have dedicated angle stop valves under the sink that control hot and cold water flow to the faucet. Turn both valves clockwise as far as they will go by hand — avoid using pliers unless the valve is stuck, as this can damage the valve handle and cause leaks. If your existing valves are corroded or won’t fully close, shut off the main water supply to your home instead.
Drain Residual Water
Once the valves are closed, open the wall-mount faucet fully to drain any water left in the lines. For extra protection, open the lowest faucet in your home (usually a basement utility sink or exterior spigot) to drain the entire plumbing system, which reduces the amount of water that will spill out when you disconnect the supply lines. For more on this, see our guide on how to remove a wall mounted kitchen faucet.
Confirm Valves Are Fully Closed
Wipe the area under the sink with a dry cloth, then wait 5 minutes. If you see any drips from the valves or supply lines, the valve is not fully sealed — tighten it further or shut off the main supply. For industry-standard guidance on safe DIY plumbing repairs, refer to the University of Minnesota Extension’s home plumbing best practices guide.
Step 2: Remove the Old Wall Mount Faucet
Take your time with this step to avoid damaging the wall or existing plumbing. A methodical approach will make installing the new unit far easier.
Disconnect Supply Lines
Place your bucket and towels under the supply line connections before loosening any nuts. Use an adjustable wrench to loosen the compression nuts connecting the supply lines to the wall shutoff valves, then disconnect the lines from the bottom of the old faucet. If the nuts are stuck, apply penetrating oil and let it sit 10–15 minutes before forcing them — this will prevent cracking brass fittings. Take a photo of the existing hookup before disconnecting anything, so you can match the configuration for your new faucet.
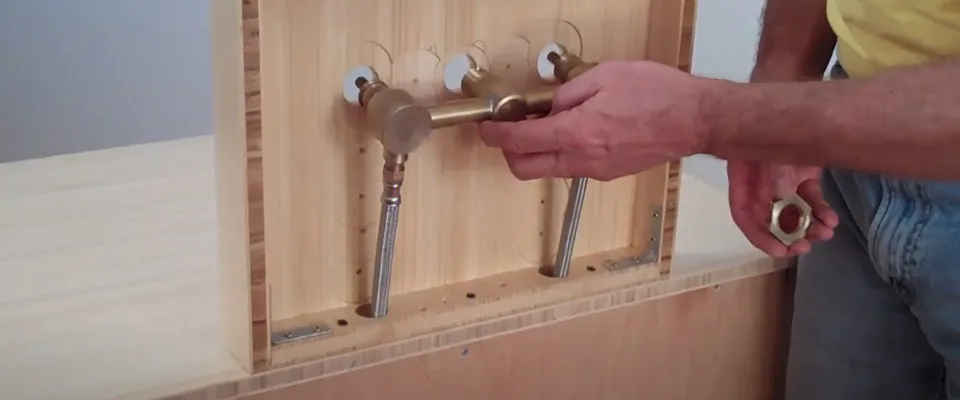
 This walkthrough demonstrates how to loosen stuck mounting hardware on older units
Remove Mounting Hardware
Most wall-mount faucets are held in place by a large threaded mounting nut behind the wall or a bracket screwed into the wall studs, accessible from under the sink. Use a basin wrench to loosen the nut, or a screwdriver to remove the bracket screws. If the hardware is rusted shut, apply more penetrating oil and let it sit before attempting to turn it again — forcing it will break the nut or strip the threads in the wall. Once the hardware is removed, gently pull the faucet away from the wall to avoid scratching the finish or damaging the surrounding surface.
Clear Old Sealant and Debris
Use a putty knife to scrape off all old plumber’s putty or silicone caulk from the wall and the back of the old faucet’s escutcheon (decorative plate). Wipe the mounting area with rubbing alcohol to remove grease and dust, so the new faucet has a clean, flat surface to seal against.
Step 3: Inspect and Repair the Mounting Surface
Skipping this step is a common cause of post-installation leaks and wobbling faucets. Even if the wall looks fine at first glance, hidden damage can compromise your new fixture’s stability.
Check for Water Damage
Inspect the wall cavity behind the old faucet for signs of long-term leaks: soft or stained drywall, mold, or rotted wood. If you find damage, cut out all affected material and let the cavity air dry completely for 24–48 hours (use a fan to speed up drying if needed) before proceeding. Installing a new faucet over damp, moldy drywall will lead to ongoing water damage and poor air quality in your kitchen.
Repair Minor Wall Issues
Small nail holes or cracks in drywall can be patched with spackle and sanded smooth once dry. Cracked ceramic tile around the mounting area can be replaced with a matching piece, but avoid trying to patch large holes in tile — instead, install a thin wooden mounting board screwed into the adjacent wall studs to provide a stable, even surface for the new faucet.
Verify Stud Support
Use a stud finder to confirm the faucet’s mounting area is anchored to a wall stud. If the existing mounting holes fall between studs, screw a 1×4 or 1×6 wooden board into the nearest studs to create a solid backing for the faucet, which will prevent wobbling and reduce stress on the supply line connections over time.
Step 4: Install the New Wall Mount Faucet
With the wall prepped and old hardware removed, installation is straightforward if you take care to align the fixture correctly before securing it.
Position the Faucet and Test Alignment
Hold the new faucet up to the mounting holes to check alignment with your supply lines and sink basin. The spout should extend 5–7 inches over the sink rim to avoid splashing when you turn on the water, and handles should sit 6–10 inches above the rim for easy access. Have a helper hold the faucet in place while you work, especially if you’re installing a heavy cast iron model.
Secure Mounting Hardware
Slide the faucet’s mounting nut or bracket into place, then hand-tighten it as far as it will go. Use a wrench to tighten the hardware an additional 1/4 to 1/2 turn — over-tightening will crack the faucet housing or strip the threads in the wall, so aim for firm, even pressure rather than maximum force. Give the faucet a gentle wiggle to confirm it is fully secured and does not shift.
Seal the Escutcheon (If Applicable)
If your faucet includes a decorative escutcheon plate, apply a thin, even bead of 100% silicone caulk to the back of the plate. Press it firmly against the wall, then wipe away any excess caulk with a damp cloth. Let the caulk cure for 24 hours before turning on the water supply, to ensure a watertight seal behind the plate.
Step 5: Connect Water Supply Lines
Properly sealed supply line connections are the key to avoiding leaks behind your walls. Follow these steps to get a tight, durable fit.
Prepare Supply Line Connections
If you’re using new flexible supply lines, wrap 2–3 full wraps of PTFE tape clockwise around the male threads of each line’s compression fitting to create a watertight seal. Do not reuse old tape from the previous installation, as it will not seal properly. If your new faucet uses different fittings than your existing lines, use the adapter rings included in the faucet kit to match the connection size.
Attach Lines to the Faucet
Screw each supply line onto the corresponding inlet on the bottom of the faucet (hot to the left, cold to the right, per standard US plumbing codes). Hand-tighten the compression nut first, then use an adjustable wrench to tighten it an additional 1/4 turn — over-tightening will strip the plastic or brass threads on the faucet inlet and cause leaks.
Connect Lines to Wall Shutoff Valves
Attach the other end of each supply line to the matching shutoff valve under the sink, again hand-tightening first before using a wrench for a final snug fit. If your existing shutoff valves are corroded, replace them with standard 1/2" angle stop valves before connecting the lines to avoid future leaks.
Step 6: Test for Leaks and Adjust Function
Even a small, slow leak can cause thousands of dollars in water damage to your walls and cabinets over time, so don’t skip this step.
Slowly Restore Water Pressure
Turn on the main water supply (or the under-sink shutoff valves) slowly to avoid a sudden pressure spike that could loosen new fittings. Open both the hot and cold valves fully, then turn on the faucet to let water run through the lines for 30 seconds to clear any debris from the installation.
Check All Connection Points
Use a dry paper towel to wipe around each supply line connection, the faucet base, and the shutoff valves. Any wet spots indicate a leak that needs to be tightened. Let the water run for 10–15 minutes to check for slow leaks that only appear under sustained pressure.
Test Faucet Function
Turn both handles on and off to confirm smooth operation, and check that the spout does not wobble. If you installed a pull-down or pull-out spout, extend and retract it several times to make sure the hose does not kink or catch on the wall. If you notice a slow drip even after tightening all connections, the faucet’s internal cartridge may be faulty — most replacement cartridges cost under $20 and can be swapped without removing the entire fixture.
Long-Term Maintenance Tips for Wall Mount Faucets
Proper maintenance will extend your faucet’s lifespan by 5–10 years and keep it looking like new:
- Wipe the faucet down with a soft cloth and mild soap weekly to remove grease and water spots. Avoid harsh abrasive cleaners, which can damage the finish.
- Inspect supply lines and connections for leaks or corrosion every 6 months, and replace supply lines every 5–7 years even if they appear intact, as old rubber washers degrade over time and can burst unexpectedly.
- If you live in a hard water area, soak a cloth in white vinegar and wrap it around the faucet spout and handles for 30 minutes once a month to dissolve mineral deposits that cause low water pressure and clogs. Rinse thoroughly after cleaning.
- Apply a small amount of plumber’s grease to handle joints and O-rings once a year to keep movement smooth and prevent squeaks.
 Wall-mount faucets are also popular in utility and commercial kitchen spaces for their durability and easy access
Frequently Asked Questions
How long does it take to replace a wall mount kitchen faucet?
For DIYers with basic plumbing experience, the full process takes 1.5 to 2.5 hours, including prep, removal, installation, and leak testing. First-time DIYers may take up to 3 hours, especially if old hardware is corroded or minor wall repairs are needed.
Do I need to shut off the main water supply, or can I use the under-sink valves?
If your under-sink shutoff valves are in good working condition (no leaks when turned, easy to grip), you can use those to isolate the faucet. If the valves are old, corroded, or won’t fully close, shut off the main water supply to your home to avoid unexpected flooding.
Can I replace a wall mount faucet without cutting into the wall?
In most cases, yes. Wall-mount faucets are designed to install through existing 1/2" to 1" thick wall cavities, and mounting hardware is accessible from under the sink or through an access panel. You only need to cut into the wall if old mounting brackets are rusted shut or hidden behind finished drywall with no access point.
Why is my new wall mount faucet leaking at the base?
This is almost always caused by leftover old sealant or an uneven mounting surface. Turn off the water, remove the faucet, scrape off all old residue, and re-seal the base with a thin bead of silicone caulk. If the leak persists, check that the mounting nut is tightened evenly — overtightening one side can warp the faucet base and create gaps for water to seep through.
What should I do if I find hidden water damage behind the old faucet?
Pause the installation immediately and let the affected area dry completely for 24–48 hours. Patch any damaged drywall, and treat any mold with a mold-killing solution before proceeding. If the damage is extensive, call a licensed plumber to assess the wall cavity before installing your new fixture to avoid ongoing structural issues.
Final Thoughts
Replacing a wall-mount kitchen faucet is a manageable DIY project that can save you $150–$300 in professional labor costs, while fixing leaks and updating your kitchen’s look. If you run into issues like corroded hardware that won’t budge or hidden water damage behind the wall, don’t hesitate to call a licensed plumber — a 1-hour service call is far cheaper than repairing widespread water damage to your walls, cabinets, or flooring.
If you’re completing a full kitchen refresh alongside this faucet swap, our wall color pairing guide for green cabinets can help you pick a cohesive shade that complements modern metallic finishes, while our complementary wall paint picks for brown cabinetry can help tie the whole space together for a warm, updated look. Replacing a leaky unit also cuts your household water waste significantly, as even slow drips add up to thousands of gallons of wasted water per year, per EPA WaterSense guidelines.