How to Design a One-Wall Kitchen: Ultimate Space-Saving Guide
If you’re tired of navigating a cramped galley kitchen, wasting corner cabinet space, or blowing your remodel budget on a layout that doesn’t fit your small home, a one-wall kitchen is the space-saving solution you’ve been looking for. Aligning all core cooking, prep, and storage zones along a single linear wall, this layout frees up 30-40% of floor space compared to U-shaped or L-shaped designs, making it perfect for studio apartments, accessory dwelling units (ADUs), tiny homes, and open-plan living areas where you want to define the kitchen zone without blocking traffic flow. According to 2025 data from the National Association of Home Builders, one-wall kitchens are now the most requested layout for new builds under 1,000 square feet, and for good reason: they’re affordable, low-maintenance, and easy to design even if you have no professional design experience. This ultimate 2026 guide walks you through every step of designing a functional, stylish one-wall kitchen, from pre-planning your layout to choosing finishes and avoiding costly common mistakes.
What Is a One-Wall Kitchen (and Who Is It Best For?)
A one-wall kitchen is a linear layout where all core kitchen components—including the refrigerator, sink, stove/oven, cabinetry, and countertop—are installed along a single wall, with no parallel counters or islands. Unlike a galley kitchen, which has two parallel runs of cabinetry, a one-wall layout leaves the opposite side of the room completely open for dining, living, or walkway space.
This design is ideal for:
- Studio apartments and micro-homes with limited square footage
- Accessory dwelling units (ADUs) and basement guest suites
- Open-plan living areas where you want to separate the kitchen zone without blocking flow
- Secondary kitchens in larger homes (e.g., a basement bar kitchen or a parent suite kitchenette)
Per National Kitchen and Bath Association (NKBA) guidelines, one-wall kitchens require as little as 6 linear feet of wall space, making them feasible for rooms as narrow as 7 feet wide National Kitchen and Bath Association.
Key Benefits of a One-Wall Kitchen Layout
Unmatched Space Efficiency
The biggest advantage of a one-wall kitchen is its ability to maximize every inch of available floor space. By eliminating parallel counter runs and corner cabinets (which are often hard to access and waste storage space), you free up 30-40% of the room’s footprint for other uses. For small households, this means you can fit a full dining set, a small living area, or even a home office nook in the same room as the kitchen, no expansion required. The open layout also makes the room feel larger and more airy, even if the total square footage is very small.
Lower Remodel and Build Costs
One-wall kitchens are significantly more affordable to install than L-shaped, U-shaped, or galley layouts, for three key reasons:
- They require 15-25% less cabinetry and countertop material, cutting material costs
- Reduced plumbing and electrical runs (only one wall needs to be roughed in for water, gas, and power) lower labor costs by an average of 20%, per 2025 HomeAdvisor remodel data
- There’s no need for custom corner cabinet builds or expensive island supports
For DIY remodelers, the simplified layout is also much easier to install, reducing the risk of costly mistakes during construction.
Streamlined, Low-Fatigue Workflow
When designed correctly, a one-wall kitchen follows the classic "kitchen work triangle" principle, which connects the three most-used zones: the refrigerator (storage), sink (cleanup), and stove (cooking). With all three points aligned along a single wall, you’ll take 20% fewer steps during meal prep than you would in a galley kitchen, per NKBA research. There’s no dodging around island legs or navigating tight corners, which makes the layout ideal for people with mobility limitations, parents cooking with young kids, or anyone who wants to reduce fatigue during long cooking sessions. For evidence-based small kitchen design guidance, the University of Minnesota Extension recommends prioritizing the work triangle to eliminate unnecessary backtracking University of Minnesota Extension.
 Credit: www.reddit.com
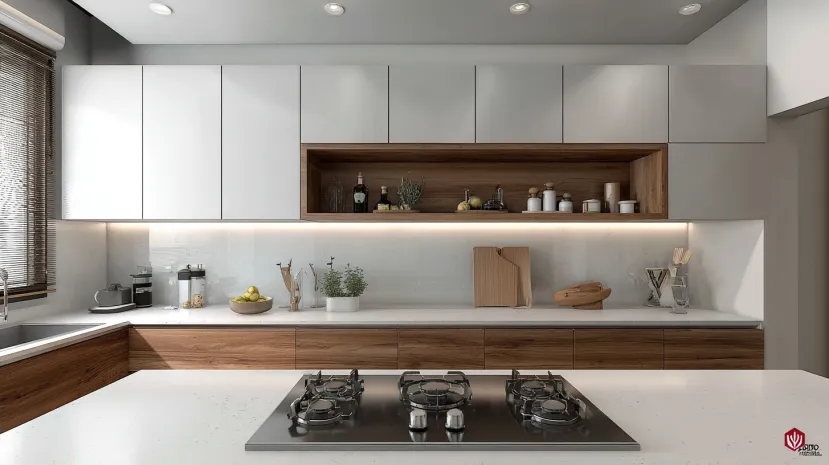
This layout uses floor-to-ceiling upper cabinets and open shelving to maximize storage without cluttering the narrow space.
Credit: www.reddit.com
This layout uses floor-to-ceiling upper cabinets and open shelving to maximize storage without cluttering the narrow space.
Pre-Planning: 5 Steps to Get Your Layout Right
Proper pre-planning is the difference between a functional one-wall kitchen and a cramped, frustrating space. Follow these five steps to avoid costly mistakes:
Step 1: Confirm Wall Suitability and Take Accurate Measurements
Not every wall will work for a one-wall kitchen. First, measure the total linear wall space available, subtracting 4-6 inches for end caps, trim, and clearance between appliances and walls. For a bare-bones layout with a sink, stove, and refrigerator, you need a minimum of 6 linear feet; for a full setup with a dishwasher, pantry storage, and extra counter space, plan for 10-12 linear feet.
Next, note all existing obstructions: electrical outlets, light switches, plumbing stacks, window sills, door swings, and window overhangs. A common mistake is forgetting to account for window trim or sills that eat into usable counter space, leaving you with too little room for food prep. Prioritize walls with natural light: placing your prep zone directly under a window reduces glare on countertops while cooking, a top 2026 design trend. If you’re repainting the wall, pair your new cabinet finish with a complementary shade: for inspiration, check out wall color pairings for green kitchen cabinets and coordinating shades for brown cabinet setups to make the space feel cohesive.
Step 2: Map the Kitchen Work Triangle First
Before you pick out cabinets or appliances, sketch out your work triangle to ensure a logical flow. The NKBA recommends that the total distance between your refrigerator, sink, and stove be between 12 and 26 feet, with no single leg of the triangle longer than 9 feet. This ensures you won’t have to walk more than a few steps between tasks.
For optimal workflow:
- Place the refrigerator at one end of the wall for easy access to ingredients
- Position the sink in the center of the run for balanced access to both the stove and fridge
- Place the stove/oven at the opposite end from the fridge
Leave at least 18 inches of counter space between the sink and stove for hot pans and prep work, and at least 12 inches of counter next to the sink for loading and unloading the dishwasher.
Step 3: Plan for Clearances and Code Compliance
All one-wall kitchens must meet minimum clearance requirements for safety and accessibility, per the International Residential Code (IRC):
- Leave at least 36 inches of clear floor space in front of the kitchen wall for unobstructed movement
- If the kitchen is adjacent to a dining area, walkway, or high-traffic zone, bump that clearance to 42 inches for easier access
- All electrical outlets within 4 feet of the sink must be GFCI-protected to prevent shock
- Electric ovens and cooktops require a dedicated 240V outlet; gas cooktops need a dedicated gas line
Skipping these requirements can lead to failed home inspections, safety hazards, and costly renovations later.
Step 4: List Your Storage Needs Up Front
Before finalizing your cabinet layout, make a list of every item you need to store: cookware, small appliances (toasters, blenders, coffee makers), pantry goods, cleaning supplies, and specialty items like baking equipment or hobby gear. This will help you decide how many upper vs. lower cabinets you need, and if you require pull-out storage, open shelving, or built-in organizers. In practice, most home cooks underestimate their storage needs by 20-30%, so it’s always better to overplan for storage than to run out of space after moving in.
Step 5: Sketch a Scaled Layout (or Use a Free Design Tool)
Use a free online tool like the NKBA’s kitchen planner or SketchUp Free to create a scaled drawing of your layout. Mark all fixed elements (windows, doors, plumbing) first, then add appliances and cabinetry to scale. This will help you visualize clearances, avoid measurement errors, and adjust your layout before you buy any materials. For DIY remodelers, this step can save hundreds of dollars in wasted materials and labor.
Smart Storage Solutions for One-Wall Kitchens
Storage is the make-or-break factor for a functional one-wall kitchen: with no extra cabinets or pantries to rely on, every inch of your single wall run needs to work hard. Use these proven strategies to maximize storage without cluttering your space:
Maximize Vertical Space
Floor-to-ceiling upper cabinets add 30-50% more storage than standard 30-inch upper cabinets, with no extra floor footprint. Reserve the lowest upper cabinet shelves for daily cookware and dishes, and use the highest shelves for seasonal or bulk goods that you only access a few times a year. For base cabinets, install soft-close roll-out shelves: these pull out fully so you don’t have to dig for items in the back of deep cabinets, and can hold up to 50 pounds of pots, pans, and pantry goods. If you have deep base cabinets, add a lazy Susan or pull-out pantry drawer to eliminate wasted corner space.
Mix Open and Hidden Storage
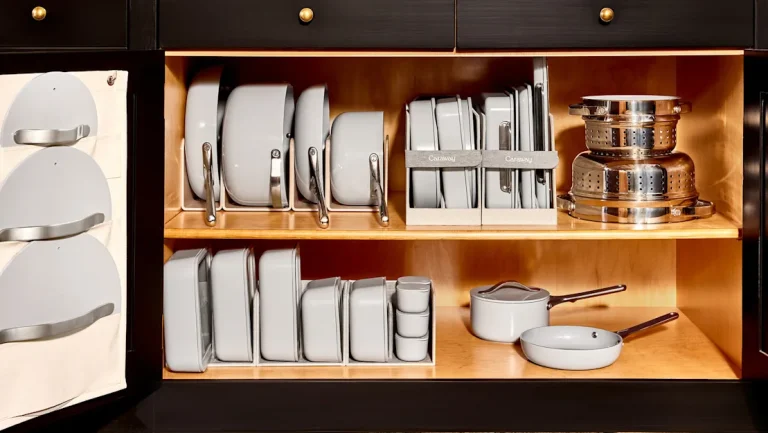
Open shelving adds airiness to the layout and lets you display decorative dishes, glassware, or potted herbs, but limit yourself to 1-2 open shelves per wall to avoid visual clutter. For hidden storage, use cabinet door-mounted racks for cutting boards, pot lids, and spice jars, and install a tilt-out trash and recycling bin in your base cabinet run to hide waste bins without sacrificing floor space. If you have hobby supplies like home wine making tools or baking equipment, store them in a dedicated lower cabinet drawer to keep countertops clear.
Use Multi-Functional Storage Accessories
Small, low-cost accessories can double your storage capacity without taking up extra space:
- Install a magnetic knife strip on the wall above the sink to free up counter space and keep knives out of reach of children
- Use drawer dividers to separate utensils, measuring spoons, and small tools so nothing gets lost
- Add a narrow floating shelf above the sink for dish soap, sponges, and hand soap, keeping frequently used items within reach but off your main work surface
Appliance Placement for Maximum Efficiency
Since every inch of your one-wall kitchen is visible, choosing the right appliances and placing them strategically is key to a seamless, functional layout.
Prioritize Compact, Space-Saving Models
For a full one-wall kitchen, stick to compact, slimline appliances that fit flush with your countertops to avoid a cluttered look:
- Choose a counter-depth refrigerator that’s 24-30 inches wide, so it doesn’t jut out past the counter line and disrupt the linear flow
- Opt for an 18-inch slim dishwasher instead of a standard 24-inch model to save 6 inches of counter space
- Select a slide-in range that fits flush with your countertops, rather than a freestanding model with a bulky back control panel
2026 design trends favor integrated appliances that match your cabinet finish for a built-in, almost invisible look. If you don’t use a microwave daily, store it in a cabinet instead of keeping it on the counter to free up prep space.
Follow the Work Triangle for Appliance Placement
Stick to the work triangle guidelines outlined earlier to minimize steps during meal prep:
- Place the refrigerator at one end of the wall for quick access to ingredients when you walk into the kitchen
- Position the sink in the center of the run for balanced access to both the stove and fridge
- Install the stove/oven at the opposite end from the refrigerator
Place the dishwasher within 3 feet of the sink to reduce water line length and make loading and unloading easier. If you’re installing a range hood, mount it 24-30 inches above the cooktop for optimal ventilation, per NKBA standards.
Add Built-Ins for a Seamless Look
Built-in appliances eliminate counter clutter and create a uniform, streamlined appearance. Consider installing a wall oven or steam oven at one end of the run to free up counter space, or a cooktop with a downdraft ventilation system to eliminate the need for a bulky overhead range hood. If you’re upgrading to a pull-down faucet for easier sink cleanup, follow this step-by-step faucet removal guide to avoid damaging your cabinetry or plumbing during installation.
Countertop and Workspace Design Tips
Your countertop is the most used part of your one-wall kitchen, so choosing the right material and optimizing the space is critical for a functional layout.
Choose Durable, Low-Maintenance Materials
For a one-wall kitchen, prioritize materials that resist stains, scratches, and heat, since all food prep happens on this single run of counter:
- Quartz is the most popular 2026 choice for small kitchens: it’s non-porous, requires no sealing, and comes in solid colors or marble-look patterns that make the space feel larger. The only downside is its higher price point.
- Butcher block adds warm, natural texture and is budget-friendly, but requires regular oiling to prevent water damage and scratches from heavy pots.
- High-pressure laminate (HPL) with a matte finish is scratch-resistant, budget-friendly, and available in hundreds of patterns from solid neutrals to stone-look designs, making it ideal for renters or DIY remodelers.
Avoid porous materials like unsealed marble if you do a lot of baking or cooking with acidic ingredients, as they will stain permanently.
Add Extra Prep Space Without Expanding the Footprint
If your wall space is limited, these small additions will give you extra prep room without cluttering the floor:
- Install a pull-out cutting board that slides out from under your countertop for extra space when chopping vegetables or rolling dough
- Add a fold-down breakfast bar to the end of your counter run for 2-3 feet of casual seating, which tucks away completely when not in use
- Install a magnetic strip above the sink for knives and a pegboard next to the stove for pots, pans, and utensils, keeping these items off your counter but within easy reach
Optimize the Sink Zone
The sink is the most used part of any kitchen, so prioritize space and functionality around it. Choose a single-bowl sink that’s at least 27 inches wide to fit large pots and pans, or a 50/50 double-bowl sink if you prefer to separate produce from dirty dishes. Install a pull-down faucet with a sprayer for easier cleaning of large items, and add a slim dish rack that fits over one side of the sink to dry dishes without cluttering the main counter surface.
Lighting and Ventilation for Small One-Wall Kitchens
Good lighting and ventilation are non-negotiable for a comfortable, functional one-wall kitchen, especially if the space is part of an open-plan living area.
Layer Your Lighting for Function and Ambiance
Relying on a single overhead light will leave dark corners and make the space feel cramped. Instead, layer three types of lighting:
- Ambient lighting: A recessed ceiling light or slim pendant light centered over the middle of the kitchen wall provides overall illumination without taking up counter space
- Task lighting: LED strip lights installed under upper cabinets cast bright, direct light on countertops for safe chopping and cooking, and use 75% less energy than traditional under-cabinet lights
- Accent lighting: A small LED strip installed above the backsplash highlights your design choices and adds warm ambiance for evening entertaining
2026 design trends include smart LED lights that let you adjust the color temperature from bright cool white for meal prep to warm yellow for late-night snacks, all controlled via a smartphone app.
Prioritize Effective Ventilation
Cooking odors, grease, and humidity will spread quickly across open-plan spaces if you don’t have proper ventilation. Install a range hood with a CFM (cubic feet per minute) rating matched to your cooktop size: for a 30-inch electric cooktop, a 300-400 CFM hood is sufficient; for a gas cooktop, bump that to 400-600 CFM to capture grease and fumes. Always vent the hood directly outside rather than using a recirculating model, which just filters air and sends it back into the room. If you don’t have existing ducting, a downdraft ventilation system installed in the cooktop is a low-profile alternative that doesn’t require ceiling modifications. Open a window while cooking if possible to improve air flow and reduce humidity on your cabinets and walls.
Style and Finishing Touches That Make a Big Impact
The right finishes will turn your functional one-wall kitchen into a stylish focal point, even in a small space.
Choose a Cohesive Color Palette
Light, neutral colors are the best choice for one-wall kitchens, as they reflect light and make the narrow space feel wider and taller. Opt for soft white, light gray, or pale beige for walls and upper cabinets to maximize brightness. If you want to add personality, use a bold backsplash or accent hardware (handles, faucets, light fixtures) in a contrasting color: matte black, brushed brass, and navy blue are popular 2026 choices. For a warm, cozy feel, pair light cabinets with a wood-look countertop or open wood shelves.
If you’re going for a bold look with green kitchen cabinets, pair them with warm white or soft cream walls to make the green tone pop without making the space feel dark — for more inspiration, check out wall color pairings for green kitchen cabinets. For warm, cozy one-wall kitchens with brown cabinetry, pale gray or soft yellow walls create a balanced, inviting look; explore coordinating shades for brown cabinet setups for tailored ideas.
Pick a Backsplash That Fits Your Style and Budget
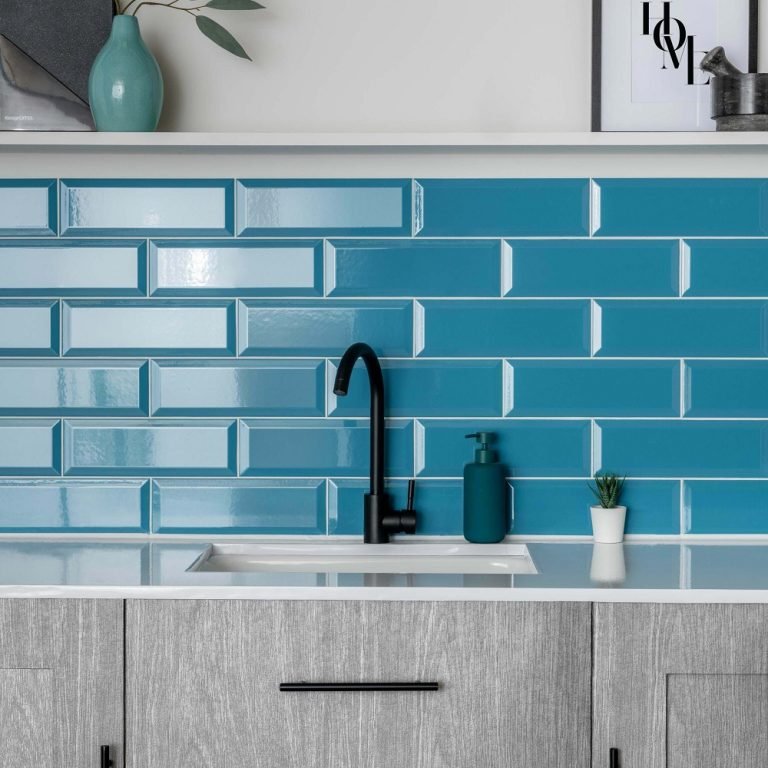
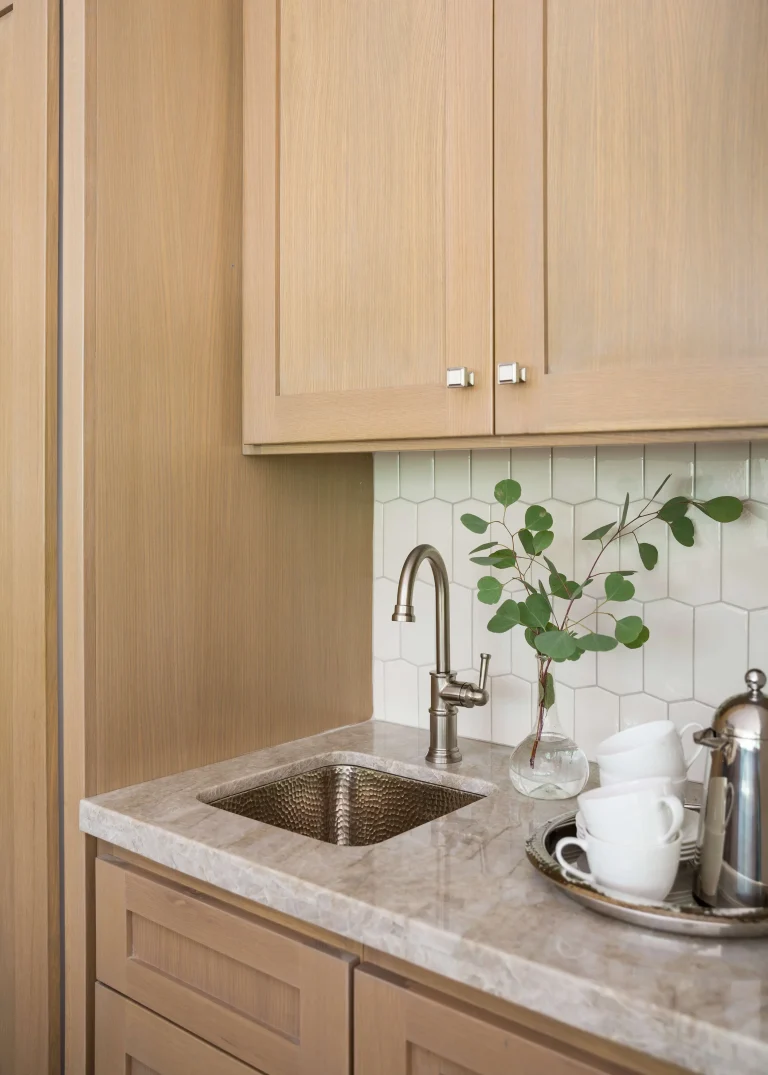
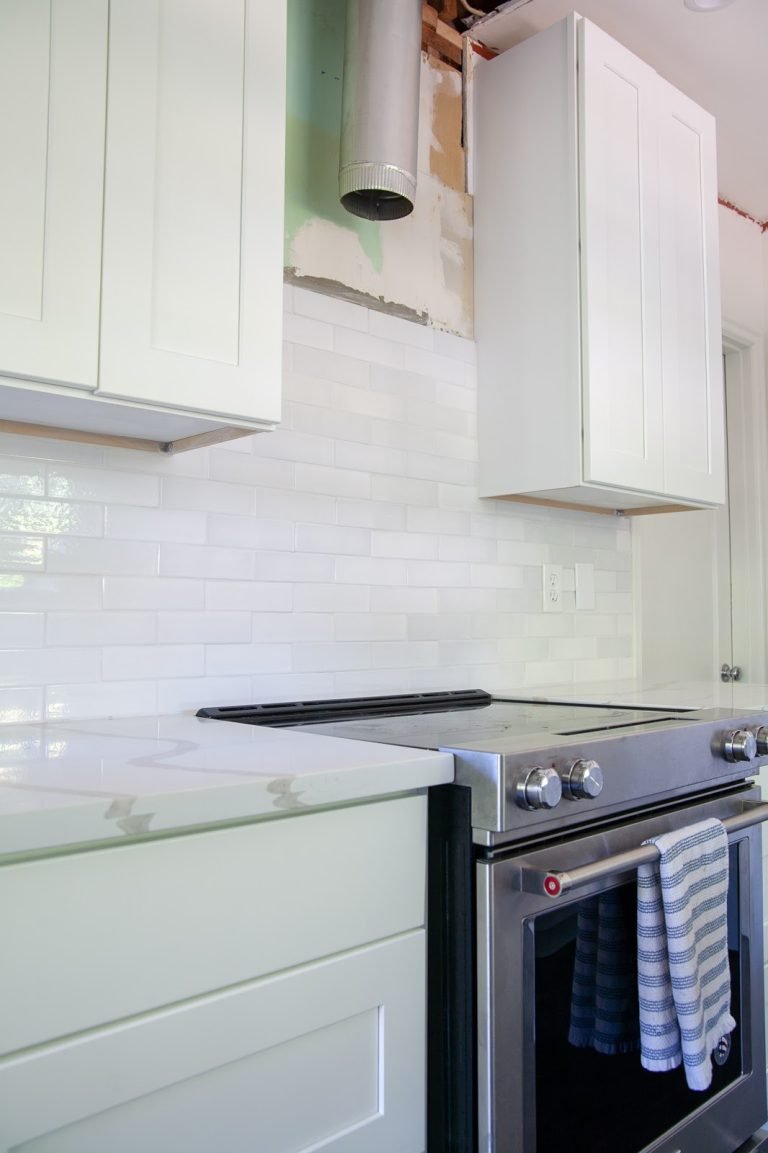
The backsplash is a small area that can make a big style impact, while also protecting your walls from cooking splashes. Classic white subway tile is timeless and easy to clean, but for a modern look, try elongated rectangle "metro" tiles or small hexagonal mosaics. If you’re renting or on a tight budget, peel-and-stick tile or vinyl backsplash panels are easy to install and remove without damaging walls, and come in hundreds of patterns from stone-look to bold geometric prints. For a high-end look, a slab stone or quartz backsplash that matches your countertop creates a seamless, elegant appearance with minimal grout lines to clean.
Keep Accessories Minimal and Functional
In a small one-wall kitchen, every accessory should serve a purpose. Limit open shelf decor to 2-3 items: a small potted herb, a set of matching canisters, or a few favorite mugs. Store all small appliances (toasters, blenders, coffee makers) in cabinets when not in use to keep countertops clear. If you have extra wall space, install a narrow floating shelf above the sink for dish soap and a sponge, keeping frequently used items within reach but out of the main work area.

Common Mistakes to Avoid When Designing a One-Wall Kitchen
Even small design errors can make a one-wall kitchen feel cramped and dysfunctional. Avoid these common pitfalls:
Overcrowding the Wall with Too Many Appliances
It’s tempting to pack every possible appliance into your one-wall kitchen, but this will create a cluttered, hard-to-use space. Stick to the essentials: refrigerator, sink, stove/oven, and dishwasher. If you don’t use a microwave daily, store it in a cabinet instead of keeping it on the counter. Avoid installing a second sink or wall oven unless you have 12+ linear feet of wall space—these additions will eat into your prep and storage area and disrupt the work triangle. If you enjoy hosting small gatherings, a compact beginner-friendly wine making kit can fit in a lower cabinet for weekend hobby sessions without taking up permanent counter space.
Ignoring Workflow and Clearance Requirements
Don’t place your stove and sink directly next to each other with no counter space in between: you need at least 18 inches of counter on either side of the stove for hot pans and prep work, and at least 12 inches of counter next to the sink for loading and unloading the dishwasher. Also, don’t forget to leave 36 inches of clear floor space in front of the kitchen wall for safe movement—if your kitchen is adjacent to a dining table or high-traffic walkway, bump that to 42 inches to avoid bumping into people while cooking.
Skimping on Ventilation and Lighting
Poor ventilation will cause cooking odors and grease to build up on your cabinets and walls, especially in open-plan spaces. Don’t install a low-CFM range hood that’s too small for your cooktop—it won’t capture fumes effectively. Similarly, poor lighting will make the small space feel dark and cramped. Don’t rely on a single overhead light: layer ambient, task, and accent lighting to make the kitchen feel bright and functional at all times of day.
Forgetting About Storage for Specialty Items
If you have hobby supplies (like home wine making tools, baking equipment, or pet food) that need storage, plan for dedicated space in your cabinet layout upfront. Don’t wait until after installation to realize you have no place to store large or bulky items—this will lead to cluttered countertops and a dysfunctional kitchen.

Frequently Asked Questions
What is the minimum wall length needed for a functional one-wall kitchen?
For a bare-bones layout with just a sink, stove, and refrigerator, you need a minimum of 6 linear feet of wall space. For a full setup with a dishwasher, pantry storage, and extra counter space, plan for 10-12 linear feet. This minimum assumes you’re using compact, space-saving appliances; if you opt for full-size models, you’ll need an extra 1-2 linear feet of wall space to avoid overcrowding. For renters who can’t modify the existing wall, a portable one-wall kitchen kit with a compact cooktop and sink is a temporary option that fits in as little as 4 linear feet of space.
Can a one-wall kitchen work for a family of four or more?
Yes, as long as you prioritize smart storage and workflow. Opt for floor-to-ceiling cabinets, pull-out pantry drawers, and a large enough sink and cooktop to handle multiple meals a day. The linear workflow is actually great for families, as it’s easy to supervise kids doing homework at a nearby dining table while you cook, and there are no tight corners for kids to bump into.
Are one-wall kitchens more affordable than other layouts?
Typically, yes. One-wall kitchens require 15-25% less cabinetry and countertop material than L-shaped or U-shaped layouts, and reduced plumbing and electrical runs cut labor costs by an average of 20%, per 2025 HomeAdvisor remodel data. You’ll also save money on appliances, as you can choose compact, budget-friendly models instead of full-size units.
How can I make my one-wall kitchen feel larger?
Use light, reflective colors for walls and cabinets, install under-cabinet lighting to brighten dark corners, and add a mirror on the opposite wall to bounce natural light around the space. Avoid heavy curtains or dark backsplashes that make the wall feel heavier, and keep countertops as clear as possible to open up the visual space.
Final Tips for a Successful One-Wall Kitchen Design
Designing a one-wall kitchen doesn’t mean sacrificing functionality for style — in fact, the linear layout often makes cooking and cleanup faster and more efficient than more complex layouts. By prioritizing the work triangle, maximizing vertical storage, choosing compact low-profile appliances, and layering your lighting, you can create a kitchen that feels open, inviting, and tailored to your daily routine, even in the smallest of spaces. Avoid common pitfalls like overcrowding the wall, skimping on ventilation, and ignoring clearance requirements to ensure your kitchen is safe, code-compliant, and enjoyable to use for years to come. Ready to start your project? Download our free one-wall kitchen planning checklist to map out your layout, storage needs, and appliance budget in 10 minutes flat, and explore our guides to wall color pairings for green and brown kitchen cabinets to complete your space’s look.