How to Fix Kitchen Wall Cabinets: Easy Steps for a Perfect Repair
Loose, wobbly kitchen wall cabinets are more than just an annoyance—they’re a safety hazard, and a door that falls off its hinges can damage your dishes, countertops, or even injure someone. The good news? Most common cabinet issues are simple, low-cost DIY fixes you can complete in an afternoon with basic tools, no professional carpentry experience required. Whether your doors are sagging, shelves are bowing, or the entire cabinet is pulling away from the wall, this step-by-step guide will walk you through a perfect repair that restores function and makes your cabinets look like new.
Assess All Damage Before Starting Repairs
Before you pick up a screwdriver, spend 10 minutes doing a full walkthrough of every wall cabinet to identify all issues. Jumping into repairs without a complete assessment can lead to missed problems, like hidden water damage, that will cause your fix to fail a few months later. For more on this, see our guide on how to regrout kitchen wall tiles easy steps.
Identify Common Cabinet Issues
Start by opening every cabinet door and inspecting both the interior and exterior for visible wear. Look for these red flags:
- Loose or stripped hinge screws on the door or cabinet frame
- Doors that gap by more than 1/8 inch when closed, or that won’t stay shut
- Sagging shelves that bow more than 1/4 inch under the weight of dishes
- Water stains, swelling, or soft spots in the wood (common near sinks, dishwashers, or leaky pipes)
- Peeling veneer on particleboard or laminate cabinets
- Gaps larger than 1/16 inch between the cabinet back and the wall, indicating loose mounting
If you notice mold, persistent musty odors, or widespread soft rot in the cabinet carcass (the main box structure), repair may not be a safe or cost-effective option—replacement is the better long-term choice.
Test Structural Integrity
Press firmly on the cabinet frame and shelves to check for wobbling or creaking, which signals loose joints or weakened wood. Test every shelf by placing a small weight (like a stack of plates) on it to check for sag. If the entire cabinet shifts when you press on it, the mounting to the wall is likely compromised, which will be your first repair priority.
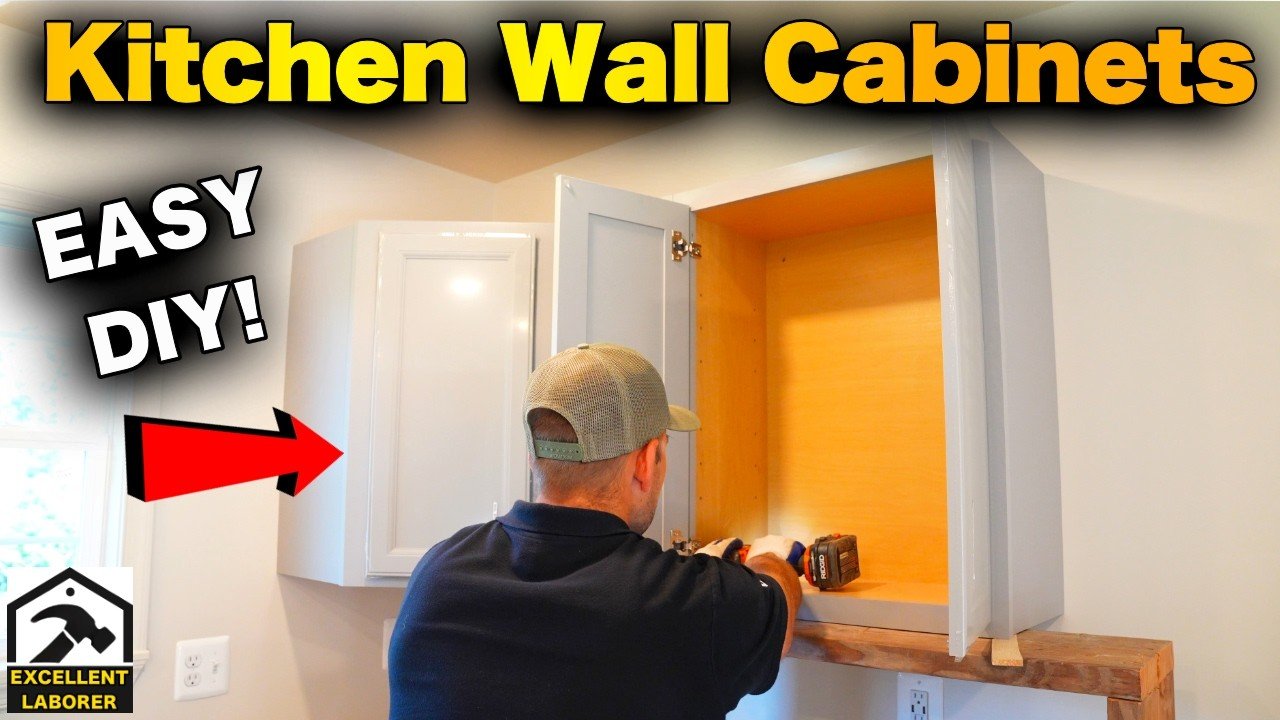
 This image shows common signs of loose cabinet mounting, including gaps between the cabinet and wall.
Image source: www.youtube.com
This image shows common signs of loose cabinet mounting, including gaps between the cabinet and wall.
Image source: www.youtube.com
Gather Your Tools and Materials
Having all your supplies ready before you start will cut down on frustration and avoid unnecessary trips to the hardware store. Most repairs only require basic tools you likely already own, plus a few inexpensive replacement parts if needed.
Essential Tools
You’ll need these tools for nearly every cabinet repair:
- Power drill with Phillips and flathead bits
- 4-foot level
- Stud finder
- Screwdriver set (Phillips and flathead)
- Putty knife
- Sandpaper (120-grit and 220-grit)
- Painter’s tape and permanent marker
- Safety glasses and work gloves
Replacement Parts and Supplies
Pick up these items based on the issues you identified during your assessment:
- Wood screws (1.5 inches for hinge hardware, 2.5–3 inches for wall mounting)
- Wood glue and toothpicks/dowels (for repairing stripped screw holes)
- Paintable or stainable wood filler (for cracks, holes, and veneer repairs)
- Replacement hinges (bring your old hinge to the store to match style and size—modern cabinets use concealed European hinges, while older models use surface-mounted butt hinges)
- Shelf supports or corner braces (for sagging shelves or loose frames)
- Silicone lubricant (for squeaky hinges)
 Adjusting concealed European hinges allows for precise door alignment without removing the cabinet from the wall.
Image source: www.create-enjoy.com
Adjusting concealed European hinges allows for precise door alignment without removing the cabinet from the wall.
Image source: www.create-enjoy.com
Remove Cabinet Doors for Safe Access
Taking off the doors first gives you full access to hinges, frames, and mounting points, and reduces the risk of dropping heavy doors or scratching finishes. This step takes 10–15 minutes and makes all subsequent repairs faster and safer.
Detach Hinges Without Damage
First, empty the cabinet completely to reduce the door’s weight. For modern cabinets with concealed European hinges, press the quick-release clip on the hinge arm attached to the door to pop the door off the mounting plate, no screwdriver needed. For traditional surface-mounted hinges, support the full weight of the door with one hand while you unscrew the hinge from the cabinet frame first, then unscrew the hinge from the door side to avoid sudden drops. If hinges are rusted or bent, replace them rather than attempting to bend them back into place, as damaged hinges will not hold alignment long-term.
Label Parts for Easy Reinstallation
Before setting parts aside, label every component to avoid confusion later:
- Apply painter’s tape to the inside edge of each door and the corresponding cabinet opening, marking both with the same number/letter.
- Place hinge screws and hardware in a small labeled ziplock bag for each door.
- Take a quick photo of each door in its original position with your phone, so you have a reference for alignment when reinstalling.
Set doors on a soft blanket or cardboard in a safe area to avoid scratching the finish.
Fix the Most Common Cabinet Problems
Most wall cabinet issues fall into three categories: hinge/door problems, surface damage, and structural/mounting issues. Address each in order, starting with the most critical safety concern (loose mounting) if needed.
Tighten Loose Hinges and Fix Sagging Doors
Sagging or wobbly doors are the most common cabinet complaint, and almost always stem from loose hinge screws or misaligned hinges.
- First, tighten all hinge screws on both the door and cabinet frame with a Phillips screwdriver, taking care not to over-tighten and strip the screw holes.
- If the screw hole in the cabinet frame is stripped (common with particleboard cabinets), remove the screw, dab a small amount of wood glue on a wooden toothpick or 1/4-inch dowel, insert it into the hole, let it dry for 30 minutes, then trim the excess with a utility knife. Drill a new pilot hole and reinsert the screw for a secure hold.
- For modern European hinges, adjust the door alignment using the three small screws on the hinge arm: turn the vertical screw clockwise to raise the door, counterclockwise to lower it; turn the horizontal screw to move the door left or right; turn the depth screw to adjust how far the door sits out from the frame. Make small 1/4-turn adjustments and check the gap between the door and frame between each turn.
- If the hinge itself is bent or broken, replace it with an identical model.
A common mistake homeowners make is using short drywall screws to mount cabinet hinges, which only grip the face panel of the cabinet and will loosen quickly. Always use screws long enough to bite into the internal framing of the cabinet box for a secure hold. In practice, 90% of sagging door issues are fixed by simply tightening or adjusting the existing hinges, no replacement parts required.
Repair Scratches, Cracks, and Water Damage
Small surface damage is easy to fix, and addressing it early prevents more extensive (and expensive) repairs later.
- For minor scratches on stained wood cabinets, use a furniture repair marker that matches your cabinet’s finish, rub it into the scratch, and wipe off excess for an almost invisible fix.
- For deeper cracks, holes, or peeling veneer: first clean the damaged area with a degreaser to remove kitchen grease and dirt (grease prevents filler from sticking properly). Apply a wood filler with a putty knife, overfilling the hole slightly, and smooth it as much as possible. Let the filler dry fully (check the product instructions, usually 1–2 hours for small repairs), then sand first with 120-grit sandpaper, then 220-grit for a smooth finish.
- For stained cabinets, use a stainable filler and dab a small amount of matching wood stain on the repaired area to blend it with the surrounding grain. For painted cabinets, use a paintable filler, spot-prime the area with shellac-based primer, then paint with thin, even coats, sanding lightly between coats for a seamless finish.
- For lifting veneer, apply a small amount of wood glue under the lifted edge, press it down with a clean cloth, and weight it with a heavy book for 30 minutes until dry.
Reinforce Loose Frames and Wall Mounting
Loose mounting to the wall is the #1 cause of cabinet failure, and the most critical safety repair. If your cabinet is shifting or pulling away from the wall, follow these steps to reinforce it:
- Empty the cabinet completely, and disconnect any under-cabinet lighting or wiring (label wires with tape for easy reconnection later).
- Remove the cabinet from the wall by unscrewing the mounting screws on the back of the cabinet.
- Check the mounting points: if the screws were only gripping drywall, or the holes are stripped, you need to relocate the mounting points to align with wall studs. Use a stud finder to locate studs (standard stud spacing is 16 inches apart in most U.S. homes).
- Drill new 1/8-inch pilot holes through the cabinet’s top mounting rail into the center of each stud, then secure the cabinet with 2.5–3 inch wood screws that bite through the cabinet back, drywall, and into the stud for a secure hold.
- If you cannot align the mounting rail with studs, use heavy-duty toggle bolts rated for at least 50 lbs each, spaced 12 inches apart.
- Install L-shaped metal corner braces inside the cabinet where the side walls meet the back panel, screwing them into the frame with 1-inch screws to add rigidity and prevent flex when loading shelves.
- For sagging shelves longer than 24 inches, install a center support bracket under the shelf to prevent bowing under weight.
If you are uncomfortable working on a ladder or with power tools, hire a licensed handyman to handle mounting repairs—improper installation can lead to cabinet failure and injury.
Always mount wall cabinets directly into wall studs for secure, long-lasting support—per U of M Extension home maintenance guidance, studs can safely hold up to 100 lbs per linear foot when secured with proper length wood screws, making them the only reliable mounting point for heavy cabinet loads anchor.
 Proper mounting into wall studs with long wood screws is the most important step for preventing cabinet failure and sagging.
Image source: www.familyhandyman.com
Proper mounting into wall studs with long wood screws is the most important step for preventing cabinet failure and sagging.
Image source: www.familyhandyman.com
Reattach Doors and Fine-Tune Alignment
Once repairs are complete, reattaching the doors and adjusting their alignment will make your cabinets look professional and function smoothly.
Remount the Cabinet (If Removed)
If you removed the cabinet from the wall for mounting repairs, remount it first before reattaching doors. Place the cabinet against the wall in its original position, and use a 4-foot level to check that it is perfectly straight side to side and front to back. If it is not level, slide thin wood shims between the cabinet back and the wall to level it before tightening the mounting screws all the way.
Align Doors for Even Gaps
Use the reference photo you took earlier to align each door correctly. Start with the top row of doors and work your way down to avoid overlap issues. For European hinges, clip the hinge arm back onto the mounting plate, then use the adjustment screws to align the door: gaps between the door and cabinet frame, and between adjacent doors, should be even and no more than 1/8 inch all around. Make small adjustments, checking the gap after each turn of the screw. Once aligned, tighten the hinge mounting screws on the frame side to lock the position.
Test for Smooth Operation
Open and close each door 5–10 times to check for sticking, rubbing, or doors that pop open on their own. If hinges squeak, apply a single drop of silicone lubricant to the hinge pin—avoid WD-40, as it attracts dust and grime that will cause hinges to stick faster over time. Tighten any loose handle or knob screws to finish.
Add Finishing Touches for a Like-New Look
Small finishing steps will make your repaired cabinets look flawless and extend the life of your repair work.
Blend Repaired Surfaces
If you filled cracks or holes, blend the repaired area with the surrounding finish: for stained wood, dab a small amount of matching wood stain on the filler, then seal with a thin layer of polyurethane to match the cabinet’s sheen. For painted cabinets, spot-prime the repaired area with shellac-based primer (it blocks stains and adheres better than latex primer), then paint with thin, even coats, sanding lightly with 220-grit sandpaper between coats for a smooth finish. This is also a great time to swap out outdated hardware: new handles or knobs cost as little as $5 each and will make your cabinets look completely refreshed.
Clean and Protect Finished Cabinets
Wipe down all cabinet surfaces with a gentle cleaner: for wood or laminate cabinets, use a mixture of warm water and mild dish soap, avoiding abrasive cleaners that scratch finishes. Dry immediately with a soft cloth to prevent water spots and swelling. For extra protection on wood cabinets, apply a thin layer of furniture polish to restore shine and create a barrier against grease and moisture.
If you’re refreshing your cabinet finish, you may also want to update your wall paint to complement the new look—our guide to wall pairings for green kitchen cabinets has foolproof ideas for every style anchor. If you have warm brown cabinetry instead, we’ve rounded up the best wall pairings for brown kitchen cabinets to make your space feel cohesive anchor.
Prevent Future Damage With Simple Maintenance
A small amount of regular maintenance will keep your repaired cabinets in perfect condition for years, and avoid costly repairs down the line.
Bi-Annual Maintenance Checklist
Every 6 months, spend 10 minutes checking your cabinets for early signs of wear:
- Tighten all hinge and handle screws a quarter turn to prevent loosening from daily use.
- Check the cabinet mounting screws for tightness—if you notice any wobble, tighten them immediately before the screw holes get stripped.
- Wipe down all exterior surfaces to remove grease and dirt buildup that can damage finishes over time.
- Inspect the area around sinks and dishwashers for water damage, and wipe up spills immediately to prevent swelling or rot.
Avoid Common Installation and Use Mistakes
Many cabinet issues stem from avoidable errors during installation or daily use:
- Never mount cabinets only into drywall: drywall anchors can fail under the weight of heavy dishware, leading to sudden cabinet collapse. Always use wood screws long enough to bite into wall studs.
- Avoid overloading shelves: most wall cabinets are rated to hold 10–15 lbs per shelf. Distribute weight evenly, and place heavy items near the cabinet sides rather than the center of long shelves to prevent sag.
- If your cabinet is mounted near a sink, you may need to remove the wall-mounted kitchen faucet first to access the mounting points behind the cabinet—our step-by-step guide makes that process quick and mess-free anchor.
Frequently Asked Questions
How do I fix loose kitchen wall cabinets?
First, empty the cabinet and remove the doors to reduce weight. Tighten any loose mounting screws securing the cabinet to the wall. If the screw holes are stripped or the cabinet was not mounted into studs, drill new pilot holes aligned with wall studs and use 2.5–3 inch wood screws to secure it. Add L-shaped corner braces inside the cabinet frame for extra stability. If the cabinet carcass is warped or rotten, replacement is the safer long-term option.
What tools do I need to repair kitchen wall cabinets?
For most common repairs, you only need basic tools: a power drill with Phillips and flathead bits, a 4-foot level, a stud finder, a putty knife, sandpaper, wood glue, and wood filler. You only need replacement hinges, screws, or shelf supports if you have broken hardware or damaged wood.
How can I prevent kitchen wall cabinets from sagging?
Always mount cabinets directly into wall studs with 2.5+ inch wood screws, never just drywall anchors. Distribute weight evenly across shelves, and avoid storing heavy items on the ends of long shelves—place them near the cabinet sides or over added support brackets. Tighten hinge screws every 6 months to prevent doors from sagging over time.
When should I replace instead of fixing wall cabinets?
Replace your cabinets if the main carcass has widespread water damage or rot that compromises its structural integrity, if mounting points are completely stripped and cannot be reinforced, or if the total cost of repairs exceeds half the cost of new comparable cabinets. Minor issues like loose hinges, small scratches, or sagging doors are almost always worth repairing, as they typically cost less than $50 in parts and take under 2 hours to fix.
Can I repair water-damaged cabinet frames?
Small areas of water damage (less than 6 inches wide) can be repaired by scraping off loose material, sanding the area smooth, applying a wood hardener to strengthen the remaining fibers, then filling with wood filler and sanding to match the surrounding surface. Extensive water damage that causes the wood to crumble or warp requires full replacement of the affected cabinet section or the entire cabinet, as compromised wood cannot safely support heavy loads.
Conclusion
Fixing kitchen wall cabinets is a straightforward, low-cost project that eliminates safety hazards and restores your kitchen’s functionality and appearance. By taking the time to assess all damage, use the right tools, and follow proper mounting and alignment steps, you can complete a professional-quality repair in a single afternoon. Regular maintenance and avoiding common installation mistakes will keep your cabinets sturdy and looking great for years to come.
Ready to tackle your next kitchen project? If you need to replace a faulty faucet while you’re refreshing your space, our step-by-step guide to removing a wall-mounted kitchen faucet will help you get the job done quickly and avoid damage to your newly repaired cabinets anchor.