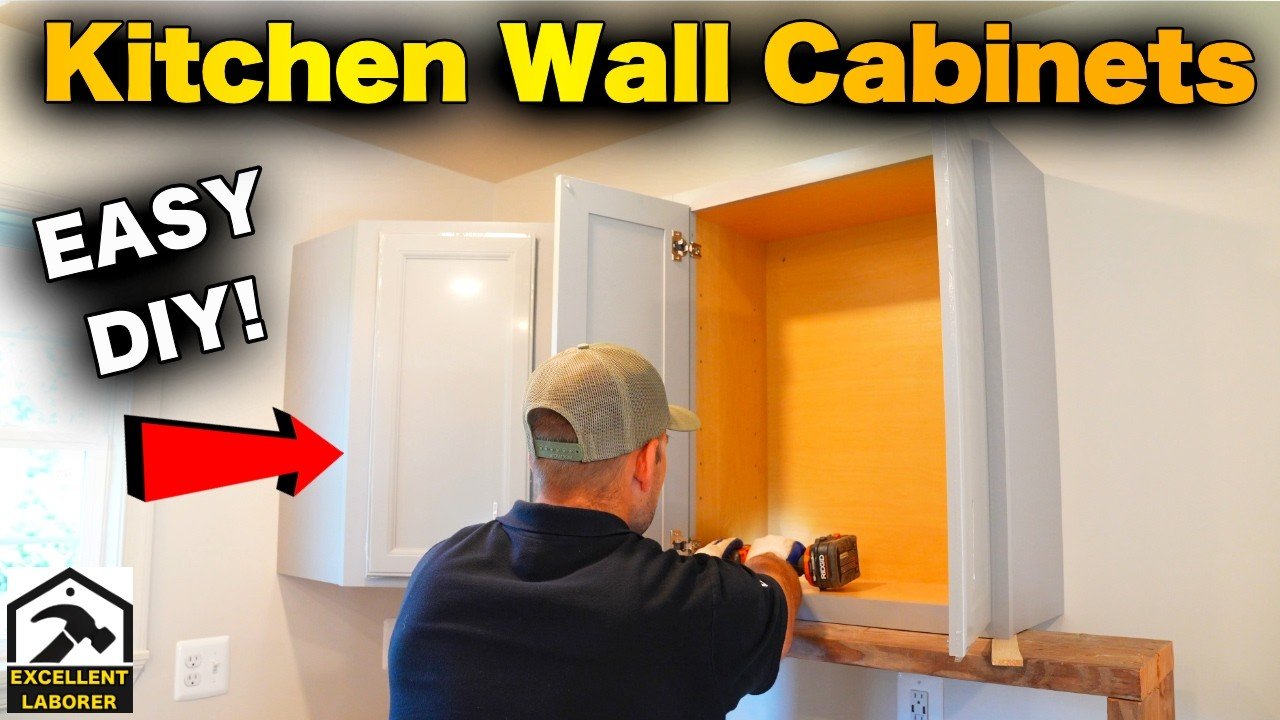
How to Secure Kitchen Cabinet to Wall: Easy & Safe Steps
Loose, unsecured kitchen cabinets are far more than a cosmetic nuisance — they’re a serious home safety hazard. The U.S. Consumer Product Safety Commission reports that furniture tip-overs send more than 30,000 people to the emergency room each year, and unanchored kitchen cabinets are a leading cause of these preventable incidents. Properly securing cabinets to the wall protects your family, prevents damage to your cabinetry and countertops, and ensures your kitchen stays functional for years to come.
This guide walks you through clear, beginner-friendly steps to fasten both upper wall cabinets and freestanding base cabinets securely, no professional experience required. We’ll cover critical pre-installation checks, tool and fastener selection, step-by-step mounting instructions, troubleshooting for common issues, and maintenance tips to keep your cabinets stable long-term.
 Professional-grade cabinet installation uses stud anchoring for long-term stability
Credit: www.familyhandyman.com
Professional-grade cabinet installation uses stud anchoring for long-term stability
Credit: www.familyhandyman.com
Pre-Installation Safety and Planning
Rushing into a cabinet installation without proper prep is the most common cause of wobbly cabinets, wall damage, and even injury. Spend 15–30 minutes on these pre-installation steps to set yourself up for success.
Check for Hidden Utilities
Before you drill a single hole, use an electronic stud finder with live wire detection (or a separate non-contact voltage tester) to scan the wall for electrical wires, plumbing, or gas lines behind the drywall. Mark the location of any utilities with painter’s tape to avoid drilling into them. If you’re mounting cabinets near a sink, stove, or dishwasher, pay extra attention to water lines and gas conduits that run vertically behind the wall.
If you’re also updating your kitchen fixtures before mounting cabinets, pre-installation fixture prep like removing an old wall-mounted faucet first will give you full, unobstructed access to the wall cavity. pre-installation fixture prep
Confirm Cabinet Weight and Mounting Requirements
Standard upper kitchen cabinets weigh 20–40 lbs empty, and hold an average of 50–75 lbs of dishes, cookware, and dry goods when full. Heavier custom cabinets or those made of solid wood may weigh 50+ lbs empty, requiring additional fasteners or wall stud backing for support. Check your cabinet manufacturer’s installation guidelines for specific weight limits and recommended mounting hardware.
Plan Placement and Aesthetic Coordination
Mark the desired height and position of your cabinets on the wall with a pencil, ensuring they align with your countertop height (if mounting base cabinets) or leave at least 18 inches of clearance above the counter for upper cabinets. Avoid placing cabinets directly over outlets, light switches, or vent covers unless you plan to modify those fixtures.
If you’re refreshing your kitchen’s look alongside this project, complementary wall palettes for green cabinetry can help create a cohesive, fresh space. complementary wall palettes For homes with warm wood-tone cabinets, matching wall finishes like soft cream or muted taupe pair seamlessly to enhance the cabinetry’s natural grain. matching wall finishes
Tools and Materials You’ll Need
Using the right tools and fasteners will cut down on installation time and ensure your cabinets stay secure for decades. Below is a full list of required supplies, with notes on their use.
Essential Tools
- Electronic stud finder (with live wire detection preferred)
- 4-foot bubble level
- Measuring tape
- Carpenter’s pencil
- Power drill with set of wood, masonry, and metal drill bits
- Phillips and flathead screwdriver bits
- Adjustable clamps (2–4, depending on cabinet size)
- Foam padding or painter’s tape (for surface protection)
- Safety goggles and work gloves
Hardware and Fasteners
- 2.5–3 inch stainless steel or coated wood screws (for stud mounting)
- Heavy-duty toggle bolts (for hollow drywall without stud access)
- Molly bolts (for lighter cabinets on thin drywall)
- Wood shims (1/8-inch and 1/4-inch thickness, for leveling)
- Fender washers (to distribute screw pressure on thin cabinet back panels)
- Wood backing board (1×4 or 2×4, for mounting cabinets between studs)
Fastener Selection by Wall Type
Use this table to choose the right fasteners for your home’s wall construction:
| Fastener Type | Best For | Minimum Load Rating (per fastener) |
|---|---|---|
| 2.5–3 inch wood screws | Mounting directly to wood studs | 75 lbs |
| Heavy-duty toggle bolts | Hollow drywall without stud access | 50 lbs |
| Molly bolts | Thin drywall, lightweight upper cabinets | 30 lbs |
| Masonry anchors | Concrete, brick, or plaster walls | 100 lbs |
Step 1: Locate Wall Studs and Mark Mounting Points
Wall studs are the wooden framing members behind your drywall that provide the solid support needed to hold heavy cabinets. Screwing directly into studs is the most secure mounting method, and avoids relying on drywall alone, which can pull out under weight.
Start by scanning the wall with your stud finder, moving slowly along the area where you plan to mount the cabinet. Mark the center of each stud with a carpenter’s pencil, then confirm each mark by drilling a small 1-inch test hole — if you hit solid wood, you’ve found a stud. Studs are typically spaced 16 or 24 inches apart on center in most residential builds, per standard building codes.
Once you’ve confirmed all stud locations, use your 4-foot level to draw a straight horizontal line across the wall at the height of the cabinet’s top mounting rail. Most factory-built upper cabinets have pre-drilled mounting holes spaced 16 inches apart to align with standard stud placement, but you may need to drill new pilot holes through the cabinet back if your studs fall outside these points.
If you can’t align your cabinet with existing studs, install a 1×4 or 2×4 wood backing board between the studs first: cut the board to the width of your cabinet, mount it securely to each stud with 3-inch wood screws, then attach the cabinet to the backing board. This is far safer than relying on drywall anchors alone for heavy cabinets.
Step 2: Prepare the Cabinet and Wall
Proper prep ensures your cabinet sits flush against the wall and avoids damage during installation.
First, remove all cabinet doors, shelves, and hardware to reduce the cabinet’s weight by 10–20 lbs and avoid accidental damage. Inspect the cabinet’s back panel for cracks, warping, or loose joints — if the back is damaged, reinforce it with a thin 1×2 wood strip along the top edge to prevent splitting when you drive screws.
Protect the cabinet’s finish by applying painter’s tape to the edges that will contact the wall, and place a thin foam pad between the cabinet and wall during installation to avoid scratches. Check the wall for high spots, bumps, or old paint buildup that would prevent the cabinet from sitting flush; sand down high spots or use a utility knife to scrape away excess paint. If your floor is uneven, use tapered shims under the cabinet base to level it before you attach it to the wall.
Step 3: Align and Level the Cabinet
A level, flush cabinet ensures doors open and close smoothly and avoids visible gaps between the cabinet and wall.
For long runs of multiple cabinets, clamp a straight 1×4 ledger board to the wall at the desired height, resting the bottom edge of all cabinets on the ledger to keep them aligned and level without a helper holding them. Place your 4-foot level across the top of the cabinet to check for front-to-back and side-to-side level; adjust with shims placed behind the cabinet back panel (not just under the base) to account for uneven wall surfaces. For cabinets longer than 4 feet, check level at multiple points along the top to avoid sag.
Once the cabinet is perfectly level, mark its position on the wall with a light pencil line along the top and sides, then remove the cabinet to drill pilot holes.
 A ledger board clamped to the wall keeps cabinets level while you fasten them
Credit: www.cabinetjoint.com
A ledger board clamped to the wall keeps cabinets level while you fasten them
Credit: www.cabinetjoint.com
Step 4: Fasten the Cabinet to the Wall
Drilling pilot holes and driving screws correctly will prevent splitting and ensure a secure, long-lasting mount.
Drill pilot holes through the cabinet’s back panel at each marked mounting point, using a drill bit 1/16 inch smaller than the shank of your mounting screws to avoid splitting the cabinet wood. If you’re mounting into plaster or masonry, use a masonry drill bit first to create a clean hole, then insert the appropriate anchor.
Position the cabinet back on the wall, aligning the pilot holes with the studs or anchors, then drive the screws in slowly with a drill or screwdriver. Stop tightening as soon as the cabinet is snug against the wall — over-tightening is a common mistake that warps thin cabinet back panels and causes doors to misalign over time. If the cabinet’s mounting hole is larger than the screw head, add a fender washer behind the screw head to distribute pressure and avoid cracking the cabinet material. For extra security on heavy cabinets (over 75 lbs when loaded), add a second screw per mounting point, spaced 1 inch above or below the first.
Step 5: Test Stability and Make Adjustments
Never assume your cabinet is secure until you’ve performed a thorough stability test.
First, grip the top edge of the cabinet and pull/push with 10–15 lbs of force (roughly the weight of a full stack of dinner plates) to check for movement. If the cabinet shifts at all, remove the relevant screw, add a thin shim behind the back panel at that point, and re-drive the screw. Test again until there is zero movement when you apply force.
Next, reattach cabinet doors and shelves, then open and close each door to check for rubbing or misalignment. If doors are out of line, adjust the hinge screws slightly, or add thin shims behind the hinge mounting plate to reposition the door. Finally, wipe away any excess pencil marks or sawdust from the installation.
 Properly mounted cabinets sit flush against the wall with no gaps or wobble
Credit: www.thisoldhouse.com
Properly mounted cabinets sit flush against the wall with no gaps or wobble
Credit: www.thisoldhouse.com
Special Cases for Non-Standard Walls and Cabinets
Not all homes have standard drywall over wood studs. Use these guidelines for specialty wall types and cabinet configurations:
Hollow Drywall Without Stud Access
If you cannot align your cabinet with wall studs, use heavy-duty toggle bolts rated for at least 50 lbs per fastener, spaced every 12–16 inches along the cabinet’s top rail. Never use small plastic drywall anchors for upper cabinets, as they are not rated to hold heavy loads and pose a serious tip-over risk.
Plaster or Lath Walls
For older homes with plaster or wood lath walls, use a masonry drill bit to penetrate the plaster and lath, then use anchors specifically designed for plaster to avoid cracking the wall surface. Toggle bolts work well for plaster as long as the anchor expands fully behind the lath.
Tile Walls
For kitchens with tiled walls, use a diamond-tipped drill bit to create a clean hole through the tile without cracking it, then anchor into the wood studs behind the tile. If no studs are accessible behind the tile, use heavy-duty tile anchors rated for the full weight of your loaded cabinet.
Heavy Base Cabinets
Freestanding base cabinets that are prone to tipping (especially in homes with young children) should be anchored to the wall with L-shaped mounting brackets. Screw one end of the bracket into the wall stud and the other into the back of the cabinet, spacing brackets every 24 inches along the cabinet’s back.
For detailed guidance on mounting heavy items to specialty wall surfaces, refer to Penn State Extension’s residential wall mounting best practices.
Common Installation Mistakes to Avoid
Even experienced DIYers run into these avoidable errors:
- Skipping stud confirmation: Tapping the wall to find studs is unreliable on plaster or lath walls; always use an electronic stud finder and confirm with a small test nail to avoid drilling into empty cavities.
- Over-tightening screws: This warps thin cabinet back panels, causes doors to misalign, and can strip screw holes over time. Tighten only until the cabinet is snug against the wall.
- Skipping shims for uneven walls: Even small gaps between the cabinet back and wall will cause the cabinet to wobble and doors to rub; always use shims behind the back panel to fill gaps before fastening.
- Incorrect clearance for upper cabinets: Leave at least 18 inches of space between the bottom of upper cabinets and the countertop to avoid hitting your head when working at the counter, and ensure there is enough clearance for range hoods or other overhead appliances.
- Skipping utility checks: Always scan for hidden wires, plumbing, and gas lines before drilling to avoid costly repairs and serious safety hazards.
Post-Installation Care and Maintenance
A properly installed cabinet will stay secure for decades with minimal upkeep. Check the mounting screws every 6–12 months to ensure they are still tight, especially in high-traffic kitchens where cabinets are opened and closed frequently. If you notice any wobble, tighten the screws slightly — don’t add extra force, as this can warp the cabinet back panel.
If you want to seal the gap between the cabinet and wall to prevent dust buildup, use a small bead of paintable caulk, but leave a 1/8-inch expansion gap at the bottom to allow for moisture movement and avoid water damage from kitchen splashes. Avoid overloading upper cabinets with more than 50 lbs of heavy items to reduce long-term stress on the mounting fasteners.
With your newly secure cabinets providing extra storage, you can keep at-home fermentation kits for dinner party wine easily accessible for future gatherings. at-home fermentation kits For frequent entertainers, custom vintages made with commercial-grade equipment can elevate your next dinner party, stored conveniently in your new secure cabinets. custom vintages
Frequently Asked Questions
How long does it take to secure a kitchen cabinet to the wall?
For a single standard 30-inch upper cabinet, the process takes 30–60 minutes for most DIYers, including prep, leveling, and fastening. A full run of 3–4 connected cabinets will take 2–3 hours total.
Do I need to remove cabinet doors before mounting?
Yes, removing doors, shelves, and hardware reduces the cabinet’s weight by 10–20 lbs, minimizes the risk of damage during installation, and makes it easier to access the back panel mounting points.
How do I find studs to secure kitchen cabinets?
Use an electronic stud finder to scan the wall, marking the center of each stud with a carpenter’s pencil. Confirm stud location by drilling a small 1-inch test hole — if you hit solid wood, you’ve found the stud. Studs are typically spaced 16 or 24 inches apart on center in most homes.
What tools are needed to secure kitchen cabinets?
You’ll need a power drill, appropriate drill bits, an electronic stud finder, a 4-foot bubble level, a measuring tape, a carpenter’s pencil, adjustable clamps, shims, painter’s tape, mounting screws, and any required wall anchors or toggle bolts. A helper is optional but recommended for larger cabinets.
What type of screws are best for kitchen cabinets?
Use 2.5–3 inch stainless steel or coated wood screws for mounting to wood studs. For heavy cabinets, use screws with a flat washer head to distribute pressure and avoid cracking the cabinet back panel. Never use drywall-only screws for cabinet mounting, as they are not rated for heavy loads.
Can I secure cabinets to drywall without studs?
You can mount lightweight upper cabinets (under 30 lbs when loaded) to drywall with heavy-duty toggle bolts, but this is not recommended for standard kitchen cabinets, which typically hold 50+ lbs of dishes and cookware when full. Always anchor heavy cabinets to wall studs or install a wood backing board between studs for safety.
Conclusion
Securing kitchen cabinets to the wall is a straightforward DIY project that delivers critical safety and long-term functionality for your kitchen. By taking the time to plan ahead, check for hidden utilities, locate studs accurately, level carefully, and test stability after installation, you can avoid common mistakes and ensure your cabinets stay firmly in place for years.
Unsecured cabinets are one of the most common causes of preventable kitchen injuries, so this small time investment pays off in peace of mind for you and your family. If you’re continuing your kitchen renovation after securing your cabinets, our guide to removing outdated fixtures can help you safely take out old wall-mounted faucets and hardware before your next project. removing outdated fixtures