How to Wall Tile Kitchen: Easy Steps for a Stunning Makeover
Tiling your kitchen walls is one of the highest-return, lowest-commitment upgrades you can tackle in 2026: it costs a fraction of a full cabinet replacement, adds immediate visual appeal, and is a beginner-friendly project you can complete in a single weekend with no prior experience. Whether you want a subtle, neutral backsplash to brighten a small kitchen or a bold geometric statement wall to add personality to a dated space, this guide walks you through every step of the process, from choosing the right tile for your kitchen’s workflow to sealing for long-lasting durability. We’ll highlight common beginner mistakes to avoid, share 2026 design trends to inform your choices, and break down costs so you can budget accurately before you start.
Step 1: Choose the Right Tiles for Your Kitchen’s Style and Workflow
The right tile does more than look good: it stands up to daily splashes, grease, and frequent cleaning, while complementing your cabinets, countertops, and overall design aesthetic. Start by assessing your kitchen’s workflow to prioritize performance where you need it most: high-splash zones around stoves, sinks, and prep areas call for durable, non-porous options, while lower wall sections can accommodate more delicate, decorative styles.
Match Tile Material to Your Daily Kitchen Use
Ceramic tiles are the most popular, budget-friendly option for kitchen walls, with endless color, pattern, and finish options to suit any design style. They have a PEI (Porcelain Enamel Institute) rating of 3 or 4 for most wall products, making them scratch-resistant enough for daily use. Porcelain tiles are a step up in durability, with a PEI rating of 4 or 5, and are denser and less porous than ceramic, making them ideal for high-moisture areas like behind a kitchen sink.
Glass tiles add a sleek, reflective finish that brightens dark kitchen corners, and are non-porous so they wipe clean in seconds. Natural stone tiles (marble, granite, slate) bring luxurious, organic texture, but they require regular sealing and can etch when exposed to acidic substances like lemon juice or vinegar, making them a poor choice for busy home cooks who don’t want regular upkeep.
 Mini metro subway tiles create a timeless, low-profile backsplash that works with both traditional and contemporary kitchen styles.
Image source: www.tilemountain.co.uk
For 2026 kitchen trends, large-format tiles (up to 24×48 inches) are surging in popularity for their seamless, grout-minimized look, while matte finishes are favored over glossy for their ability to hide water spots and fingerprints. If you’re updating your kitchen’s full palette, start by checking what color walls pair with green kitchen cabinets or what color walls work with brown kitchen cabinets to ensure your new tile complements your existing or planned cabinet finish.
Mini metro subway tiles create a timeless, low-profile backsplash that works with both traditional and contemporary kitchen styles.
Image source: www.tilemountain.co.uk
For 2026 kitchen trends, large-format tiles (up to 24×48 inches) are surging in popularity for their seamless, grout-minimized look, while matte finishes are favored over glossy for their ability to hide water spots and fingerprints. If you’re updating your kitchen’s full palette, start by checking what color walls pair with green kitchen cabinets or what color walls work with brown kitchen cabinets to ensure your new tile complements your existing or planned cabinet finish.
Pick Size and Color to Enhance Your Space
Tile size drastically changes the perception of your kitchen’s size and style. Large-format tiles (12 inches or larger on any side) create a seamless, modern look with minimal grout lines, making small kitchens feel more open and reducing the amount of grout you need to clean. Smaller mosaic tiles (1×2 inches or 2×2 inches) are ideal for accent walls, curved edges, or adding bold pattern, but require more grout and take longer to install.
Color choice is just as impactful as size: light, neutral tiles (white, cream, light gray) reflect light to brighten small or dim kitchens, while darker shades (navy, forest green, charcoal) hide stains and splatters better for busy households. If you want a bold look without overwhelming the space, consider a tile color that is 2-3 shades lighter or darker than your countertops for a cohesive, intentional palette.
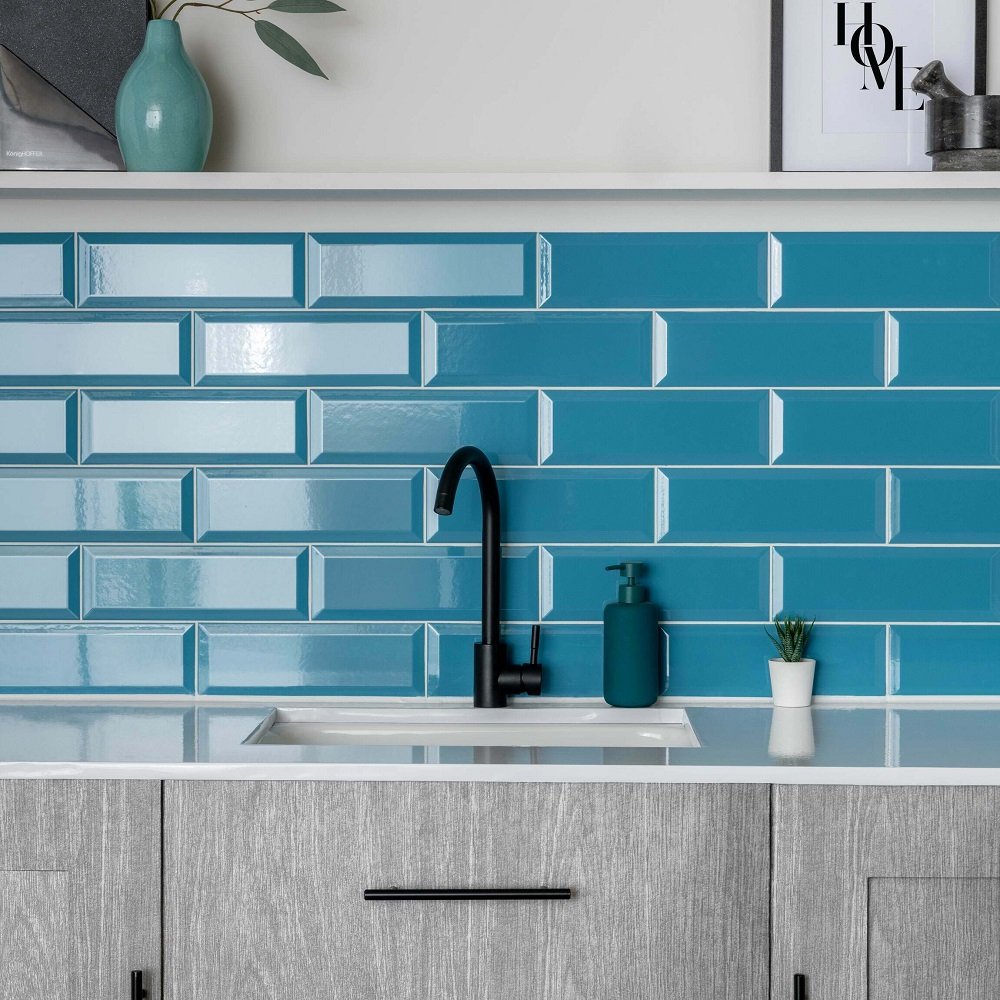
 A sleek blue geometric tile backsplash adds bold personality to a modern kitchen without overwhelming the space.
Image source: www.tilemountain.co.uk
Grout color is an often-overlooked detail that can make or break your tile’s look: monochromatic grout (matching or 1 shade lighter/darker than your tile) creates a seamless, modern finish, while contrasting grout (dark grout with light tile, or vice versa) adds a bold, retro or farmhouse feel. For high-traffic kitchens, gray grout is the most practical choice, as it hides dirt and stains far better than white or light-colored options.
A sleek blue geometric tile backsplash adds bold personality to a modern kitchen without overwhelming the space.
Image source: www.tilemountain.co.uk
Grout color is an often-overlooked detail that can make or break your tile’s look: monochromatic grout (matching or 1 shade lighter/darker than your tile) creates a seamless, modern finish, while contrasting grout (dark grout with light tile, or vice versa) adds a bold, retro or farmhouse feel. For high-traffic kitchens, gray grout is the most practical choice, as it hides dirt and stains far better than white or light-colored options.
 Soft sage green tiles paired with light grout add subtle warmth to a neutral kitchen palette.
Image source: www.tilemountain.co.uk
Soft sage green tiles paired with light grout add subtle warmth to a neutral kitchen palette.
Image source: www.tilemountain.co.uk
Prioritize Durability for High-Splash Zones
Kitchen walls face daily exposure to grease, heat, and moisture, so prioritize tiles with a PEI rating of 3 or higher for areas behind stoves and sinks. Glazed ceramic and porcelain tiles are the most low-maintenance options, as their sealed surface resists stains and wipes clean in seconds. Avoid unglazed or porous tiles in these zones unless you’re willing to reseal them every 6 months to prevent staining. For extra protection in high-moisture areas, choose a tile with a water absorption rate of less than 0.5%, which is standard for most porcelain wall tiles.
Step 2: Gather Tools and Materials (No Fancy Equipment Needed)
Having every supply on hand before you start eliminates mid-project hardware store trips and ensures you can work efficiently without pausing to wait for adhesive or grout to set. For a standard 30-square-foot kitchen backsplash, you can expect to spend $200 to $800 total, depending on your tile choice and tool quality.
Essential Tools for a Flawless Install
You don’t need professional-grade equipment to get a pro finish: most of the tools you need are affordable and available for rent at local hardware stores if you don’t want to purchase them outright. Your must-have list includes:
- A manual tile cutter for straight cuts on small tiles, or a wet saw for precise cuts on large-format or ceramic/porcelain tiles
- A 1/4-inch square-notch trowel for spreading adhesive evenly
- Rubber tile spacers (1/8-inch or 1/4-inch, depending on your desired grout line width)
- A 4-foot level and measuring tape for accurate layout
- A rubber grout float for pressing grout into joints
- A large mixing bucket, sponge, and clean cloths for cleanup
- A dust mask, safety goggles, and cut-resistant gloves for safety A common beginner mistake is skipping the level check every 3-4 tiles during installation, which leads to crooked rows and uneven lippage that’s impossible to fix once adhesive sets. Just like how you’d stock up on all necessary home wine making tools before starting a fermentation batch, having every tiling supply on hand before you begin cuts down on wasted time and hassle.
Adhesives and Grout: Pick the Right Formulation for Your Tile
Your adhesive and grout choice will make or break the longevity of your tile job. For most ceramic and porcelain wall tiles, a polymer-modified thinset mortar is the most durable, water-resistant option, especially for high-splash zones around sinks and stoves. If you’re tiling over a fully cured, primed drywall surface in a low-moisture area, a premixed mastic adhesive works for small, lightweight tiles, but avoid mastic for areas that see regular steam or water exposure. Grout options fall into three main categories: sanded grout for joints wider than 1/8 inch (ideal for most mosaic tiles), unsanded grout for narrow joints under 1/8 inch (perfect for polished marble or glass tiles that can scratch from sand), and epoxy grout for high-traffic kitchens (it’s stain-resistant, waterproof, and requires no sealing, but is more expensive and has a shorter working time). For heavy-use kitchens, epoxy grout offers the same long-term, low-maintenance performance you’d get from long-lasting fermentation vessels for aging wine, as it resists staining and mold far better than traditional cement grout.
Non-Negotiable Safety Gear
Tile cutting and adhesive mixing produce sharp shards and fine dust that can cause serious injury if you’re unprotected. Always wear ANSI-approved safety goggles to shield your eyes from flying tile fragments, cut-resistant gloves to avoid cuts from sharp tile edges, and an N95 dust mask when cutting tiles or mixing powdered adhesive or grout. For extended work sessions, add knee pads to reduce strain from kneeling on hard floors. The Occupational Safety and Health Administration (OSHA) requires this PPE for all DIY projects involving tile cutting or powder mixing to avoid long-term respiratory damage or eye injury: OSHA Construction PPE Guidance.
Step 3: Prep Your Wall for Long-Lasting Adhesion
A well-prepped wall is the foundation of a tile job that lasts 10+ years without tiles falling off or grout cracking. Skipping prep is the most common cause of DIY tile failure, so don’t rush this step.
Clean and Repair Surface Damage First
Start by removing all grease, food splatter, and dust from the wall using a degreasing kitchen cleaner and a damp sponge – soap and water alone won’t cut through built-up cooking grease that prevents adhesive from bonding. Patch any holes, cracks, or loose paint with a fast-setting drywall filler, then sand smooth with 120-grit sandpaper once dry. For glossy painted walls, scuff the entire surface with sandpaper to create a rough texture for adhesive to grip.
Measure and Mark Your Layout to Avoid Crooked Cuts
Use a measuring tape and 4-foot level to find the exact center of the wall, then snap two vertical and two horizontal chalk lines to create a grid for your tile layout. Starting from the center ensures cuts are even on both the left and right edges of the wall, so you don’t end up with a sliver of tile on one side and a full tile on the other. Mark all cuts for outlets, light switches, and cabinet edges with a pencil before you start laying tiles to avoid mistakes.
Install Backer Board or Primer for Uneven Walls
If your wall is uneven, damaged, or previously tiled, install a 1/4-inch cement backer board as a stable, moisture-resistant base. Secure the board to wall studs with corrosion-resistant screws, taping and mudding the seams with thin-set mortar to create a flat, seamless surface. For smooth, primed drywall, apply a coat of latex primer to improve adhesive bonding. To test if your wall is ready for tile, tape a small 2×2 inch piece of tile to the surface with your chosen adhesive, let it sit for 24 hours, then try to pull it off: if it comes off easily, you need to add backer board or a bonding primer. For full step-by-step guidance on proper wall prep, the University of Minnesota Extension’s home improvement guide outlines industry-standard practices for long-lasting tile adhesion: University of Minnesota Extension Tile Installation Guide.
Step 4: Cut and Lay Tiles Like a Pro
Precision is key to a professional-looking tile job: even cuts and even spacing will make even budget tiles look high-end, while uneven cuts or gaps will ruin even the most expensive tile choice.
Cut Tiles Precisely for Edges and Fixtures
Use a manual tile cutter for straight cuts on small ceramic or porcelain tiles: score the tile surface firmly with the cutter’s wheel, then snap the tile along the scored line for a clean edge. For curved cuts (around curved faucets or outlet boxes) or large-format tiles, use a wet saw, which cools the tile as it cuts to prevent cracking and delivers precise edges. For small, irregular adjustments, use tile nippers to carefully remove small amounts of material. Always wear safety goggles when cutting tiles to protect your eyes from sharp shards.
Apply Adhesive Correctly to Prevent Tiles From Slipping
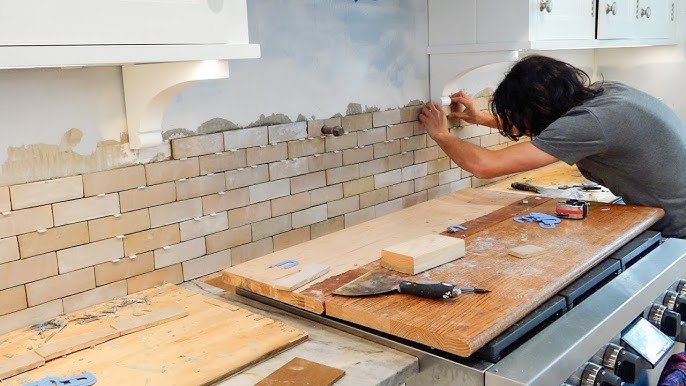
Use a 1/4-inch square-notch trowel to spread adhesive on a 2×2 foot section of wall at a time – spreading adhesive over the entire wall at once is a common beginner mistake that leads to the adhesive drying out before you can place tiles, causing them to slip or fall off mid-install. Hold the trowel at a 45-degree angle to create consistent, parallel grooves in the adhesive, which helps tiles bond evenly. Press each tile firmly into the adhesive, twisting slightly to ensure full contact, and scrape off excess adhesive from the tile edges immediately with a putty knife.
Place Tiles and Eliminate Lippage for a Seamless Look
Start laying tiles from the center of your chalk line grid, working outward to the edges. Place a tile spacer between each tile to maintain consistent grout lines, and check alignment with your level every 3-4 tiles to avoid crooked rows. For large-format tiles (over 12 inches on any side), use a tile leveling system to eliminate lippage (uneven height between adjacent tiles), a common issue that makes tile jobs look unprofessional. If you’re tiling around outlets or switches, turn off power to the area first and mark the cut lines carefully to avoid damaging electrical components.
Step 5: Grout and Seal for Stain and Moisture Resistance
Grout fills the gaps between tiles to lock them in place and prevent dirt and moisture from seeping behind the tile, while sealing protects porous grout (and tile, if needed) from stains and water damage.
Mix and Apply Grout Evenly
Mix your chosen grout with cool water according to the package instructions until it reaches a smooth, peanut butter-like consistency – adding too much water will cause shrinkage and cracking as it cures. Use a rubber grout float held at a 45-degree angle to press grout firmly into the joints, working diagonally across the tiles to avoid pulling grout out of the gaps as you go. Work in 3×3 foot sections to avoid the grout drying out before you can clean it.
Clean Excess Grout Without Damaging Joints
Wait 10 to 15 minutes for the grout to set slightly, then wipe the tile surface with a damp sponge in a circular motion to remove excess grout. Rinse the sponge frequently in clean water to avoid spreading grout haze back onto the tiles. After the initial wipe, wait 1 to 2 hours for the grout to haze over, then buff the tile surface with a soft, dry cloth to remove any remaining residue. For stubborn grout haze, use a commercial grout haze remover according to the product label.
Choose Grout Color and Seal for Longevity
Grout color drastically changes your tile’s final look: match it to your tile for a seamless, modern finish, or choose a contrasting shade for a bold, decorative effect. For the actual sealing step, wait 48 to 72 hours for the grout to fully cure before applying a penetrating grout sealer with a small applicator brush or bottle. Cover all grout lines thoroughly without over-applying, which can leave a sticky residue. Note that glazed ceramic and porcelain tiles do not need sealing, only porous natural stone tiles and unglazed tiles require sealing to prevent staining. Reapply grout sealer annually in high-splash kitchen zones to maintain water resistance.
Step 6: Add Finishing Touches for a Polished, Professional Look
These final steps protect your tile from water damage and give your installation a seamless, finished look that rivals a professional job.
Install Edge Trims and Caulk Gaps
Edge trims (also called tile edging) cover raw tile edges to prevent chipping and create a clean, finished border. Choose trims that match your tile’s material and color, and secure them with thin-set mortar before you grout the main tile surface. After grouting, apply 100% silicone caulk to the gap between the tile and your countertop, and between the tile and upper cabinets, to create a waterproof seal that prevents water from seeping behind the tile and causing mold or wall damage.
Clean Haze and Inspect for Imperfections
Once the grout is fully cured, inspect the entire tile surface for loose tiles, cracked grout, or uneven spots. Use a grout haze remover for any remaining residue on the tile surface, then wipe the entire wall with a mild, non-abrasive cleaner and a soft cloth. Let the wall dry completely before using the kitchen or exposing it to steam.
Maintain Your Tiled Wall for Years of Use
To keep your tile looking like new, clean it regularly with a mild dish soap and warm water, avoiding abrasive scrubbers or harsh chemical cleaners that can damage grout or tile finishes. Check grout lines for cracks or wear every 6 months, and reapply grout sealer annually in high-splash zones. If you notice a loose tile, remove the old adhesive and reattach it with new thinset as soon as possible to avoid further damage to surrounding tiles.
Frequently Asked Questions
How do I prepare the kitchen wall for tiling?
Start by removing all grease, food splatter, and dust from the wall using a degreasing kitchen cleaner and a damp sponge. Patch any holes, cracks, or loose paint with a fast-setting drywall filler, then sand smooth once dry. For glossy painted walls, scuff the surface with 120-grit sandpaper to help adhesive bond, then apply a coat of latex primer if recommended by your adhesive manufacturer. If your wall is uneven or previously tiled, install a 1/4-inch cement backer board as a stable, moisture-resistant base.
What tools are essential for wall tiling in kitchens?
At minimum, you’ll need a notched trowel (1/4-inch square notch for most wall tiles), a manual tile cutter or wet saw for cuts, rubber tile spacers, a 4-foot level, a measuring tape, a rubber grout float, a large sponge, and a mixing bucket. For large-format tiles (over 12 inches on any side), add a tile leveling system to avoid uneven lippage between tiles.
How do I choose the right tile adhesive for kitchen walls?
For most ceramic and porcelain wall tiles, a polymer-modified thinset mortar is the most durable, water-resistant option, especially for high-splash zones around sinks and stoves. If you’re tiling over a fully cured, primed drywall surface in a low-moisture area, a premixed mastic adhesive works for small, lightweight tiles, but avoid mastic for areas that see regular steam or water exposure. Always check the adhesive label for compatibility with your tile material and wall surface.
How long should I wait before grouting kitchen wall tiles?
Wait 24 to 48 hours after laying tiles before grouting, depending on your adhesive’s cure time (check the product label for exact timing). Adhesive must be fully set to prevent tiles from shifting when you apply grout pressure. If you’re using a rapid-setting thinset, you may be able to grout after 2 hours, but wait the full recommended time for the most stable results.
Conclusion
Tiling your kitchen walls is a rewarding DIY project that delivers a stunning, high-end look without the high-end price tag. By taking the time to choose the right tile for your kitchen’s workflow, prep your wall correctly, and follow proper laying and grouting techniques, you’ll avoid the most common beginner mistakes (like uneven lippage or adhesive failure) and enjoy a durable, beautiful backsplash for years to come. Remember to measure twice, cut once, work in small sections to avoid adhesive drying out, and seal grout annually for maximum longevity.
If you’re ready to keep the momentum going with your kitchen renovation, check out our guides to coordinating wall colors with your new tile and cabinet setup for a fully cohesive space, or our beginner’s guide to homemade wine making for a fun way to celebrate your completed project with a custom batch of wine.