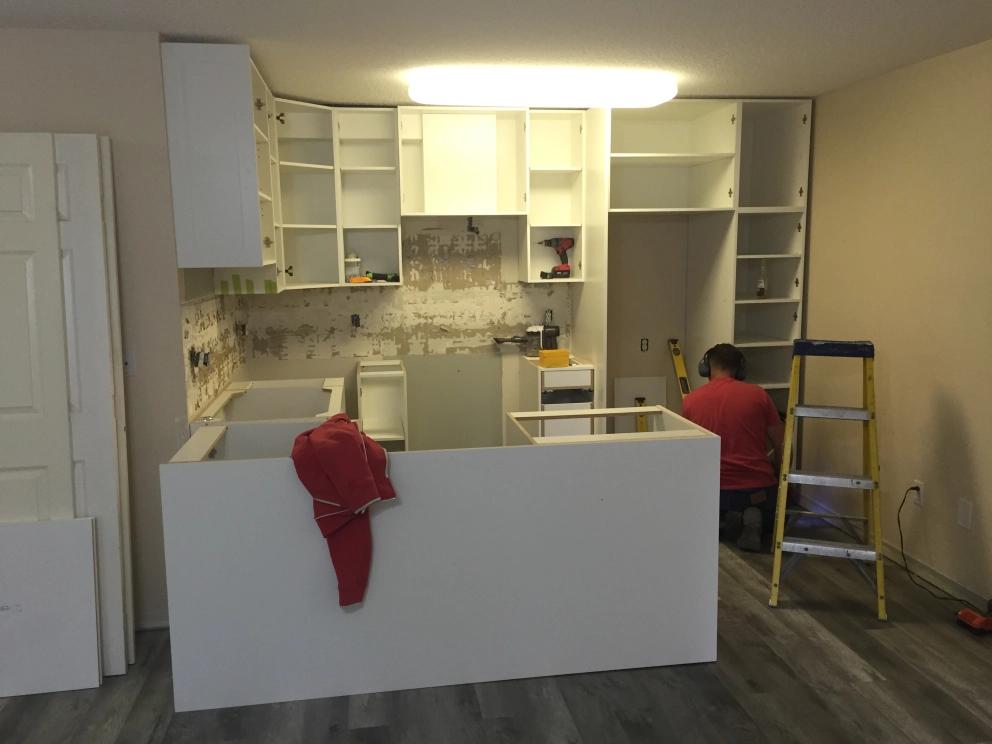
How to Remove Wall Cabinets Kitchen: Easy Step-by-Step Guide
Removing wall cabinets in your kitchen is a high-impact DIY project that doesn’t require professional experience—if you follow the right steps to avoid wall damage and injury. Whether you’re updating an outdated layout, creating an open-concept space, or preparing to install new custom cabinetry, this guide walks you through every part of the process, from prepping your kitchen to patching walls and disposing of old materials. The average upper kitchen cabinet weighs 30–50 lbs, but with proper technique and the right tools, you can complete the entire job in 2–4 hours without costly mistakes.
Why Proper Removal Technique Matters
Rushing the cabinet removal process often leads to expensive, avoidable repairs. Improper prying can tear large chunks of drywall, which costs $200–$400 to fix professionally if you’re not comfortable patching it yourself. Failing to check for hidden electrical or plumbing lines behind cabinets can lead to shocks, leaks, or even fire hazards. In practice, taking 30 extra minutes to carefully locate all fasteners and seal gaps between the cabinet and wall with a utility knife cuts post-removal repair time by 70% and reduces injury risk significantly.
Tools and Materials You’ll Need
Having all your supplies ready before you start eliminates frustrating mid-project trips to the hardware store and keeps the work moving smoothly.
Essential Tools
- Cordless drill with Phillips and square drive bits (most cabinet screws use one of these two drive types; keep a manual screwdriver on hand for stripped fasteners)
- 12-inch flexible pry bar with a rubber edge (avoid metal wrecking bars, which scratch and dent drywall)
- Electronic stud finder with live wire detection (scans for both studs and hidden electrical lines to prevent accidental damage)
- Retractable utility knife (for cutting caulk, painter’s tape, and old adhesive seals)
- 6-inch putty knife (for scraping residue and applying spackle)
- Flashlight or headlamp (for illuminating dark stud cavities and behind-cabinet spaces)
- Vacuum with a crevice tool (for quick cleanup of drywall dust and debris)
- Small labeled parts organizer (for storing screws, hinges, and shelf pins) A common mistake is using a hammer to pry cabinets loose, which cracks drywall and creates larger repair jobs. The flexible pry bar applies even pressure to separate cabinets from walls without damage.
Safety Gear
- ANSI-rated safety glasses (protects against falling drywall chips and dust)
- Cut-resistant work gloves (prevents splinters from old wood cabinets and sharp metal fasteners)
- N95 dust mask (old cabinets may harbor lead paint, mold, or years of accumulated dust, especially in homes built before 1978)
- Knee pads (you’ll be kneeling on hard floors for extended periods while working on lower cabinets)
- Non-slip closed-toe shoes (protects feet from dropped tools and heavy cabinet parts) If your cabinets are mounted above a 36-inch countertop, opt for a sturdy step stool with a handrail instead of a ladder for safer reach.
Optional Helpers
- Cabinet lift straps (for cabinets over 40 lbs, reduce back strain by 60% when lifting and moving)
- Laser level (to check if cabinets are level before removal, so you can identify and pry loose plastic shims hidden behind the back panel)
- Helper (even 10 minutes of assistance holding cabinets while you pry reduces risk of injury and wall damage)
- Drop cloths or old moving blankets (protect floors and countertops from scratches and dust)
 Example of standard upper wall cabinet installation, the type covered in this removal guide.
Image source: www.reddit.com
Example of standard upper wall cabinet installation, the type covered in this removal guide.
Image source: www.reddit.com
Pre-Removal Prep: Protect Your Kitchen and Yourself
Skipping prep steps is the fastest way to damage your kitchen or injure yourself during the project. Follow these steps to create a safe, organized work zone.
Clear the Work Area
Empty every cabinet, drawer, and countertop within 3 feet of the cabinets you’re removing. Take down small appliances, dishware, and decor to avoid breakage, and cover remaining surfaces with drop cloths or moving blankets secured with painter’s tape to prevent slipping. If you have a kitchen island, move it out of the work zone if possible to give yourself full range of motion.
Cut Power and Check for Utilities
Turn off the kitchen’s circuit breaker at your main electrical panel—not just the wall switch—to avoid accidental shocks while working near outlets or light fixtures mounted on or near cabinets. If your cabinets are adjacent to a sink or dishwasher, locate the shut-off valves for hot and cold water under the sink and turn them off to prevent leaks. Use your stud finder’s wire detection mode to scan for hidden electrical lines behind the cabinets before you start prying, a step many DIYers skip that can lead to expensive repairs. For official DIY safety guidelines for working with power tools and heavy materials, check the Occupational Safety and Health Administration's home project safety page.
Identify Cabinet Mounting Type
Most modern upper cabinets are mounted with screws through the back panel into wall studs, but older homes may use nails or construction adhesive. Run your hand along the top edge of the cabinet back panel: if you feel rigid, unyielding pressure, there’s likely adhesive holding the cabinet to the wall. Score the caulk or paint seal between the cabinet and wall all the way around the perimeter with your utility knife before prying to avoid peeling off large chunks of drywall.
Step-by-Step Cabinet Removal Process
Follow these steps in order to remove cabinets safely without damaging your walls or injuring yourself.
Step 1: Remove Cabinet Doors, Shelves, and Hardware
Start by removing all cabinet doors: open each door fully, support it with one hand, and use your drill or screwdriver to remove the hinge screws. Place doors on a flat, padded surface (like a moving blanket on the floor) to avoid scratching the finish. Next, remove adjustable shelves: lift each shelf slightly to free it from the shelf pins, then tilt it to pull it out of the cabinet. If you have fixed shelves screwed to the cabinet frame, unscrew them first. Collect all screws, hinges, shelf pins, and brackets in your small parts organizer, and label the container with the cabinet location (e.g., "above stove left") if you plan to reuse the hardware later. Tossing hardware is a common mistake that costs $50+ to replace if you decide to reinstall the cabinets later.
 Cabinet doors removed and stored safely to prevent scratches during renovation.
Image source: penniesforafortune.com
Cabinet doors removed and stored safely to prevent scratches during renovation.
Image source: penniesforafortune.com
Step 2: Locate and Remove All Fasteners
Open the cabinet (if you haven’t removed the back panel yet) and use your flashlight to inspect the interior back panel. Most mounting screws are placed 12–16 inches apart, driven through the back panel into wall studs. Use your drill to remove all visible screws, and set them aside in your organizer. If you have cabinets mounted with nails, use a pry bar to gently pull the nail head out, or use a cat’s paw nail puller for sunken nails. For cabinets held with construction adhesive, use your utility knife to score the seal between the cabinet and wall all the way around the perimeter, then use a putty knife to pry the adhesive loose in small sections. If you’re unsure about fasteners behind the cabinet back panel, carefully drill a small 1/4-inch hole in an inconspicuous spot (like the top corner) to check for additional screws or adhesive.
 Using a stud finder to mark cabinet mounting points behind drywall.
Image source: www.create-enjoy.com
Using a stud finder to mark cabinet mounting points behind drywall.
Image source: www.create-enjoy.com
Step 3: Safely Detach the Cabinet From the Wall
Once all fasteners are removed, have your helper stand on a sturdy step stool or ladder to hold the cabinet steady from the top, while you stand below to support the bottom. Gently pull the cabinet away from the wall 1–2 inches to check for any remaining fasteners or adhesive. If it’s stuck, use your flexible pry bar to gently tap the top and bottom edges of the cabinet back panel—never use excessive force, as this will tear drywall. Once loose, lift the cabinet straight off the wall and set it on a padded surface. For cabinets over 40 lbs, use cabinet lift straps to distribute the weight evenly and reduce strain on your back. If you see exposed electrical wires where the cabinet was mounted, turn off the power at the breaker and consult an electrician before proceeding with any wall work.
Repairing Wall Damage After Cabinet Removal
Even with careful removal, small holes and minor damage are normal. These repairs are quick to complete and will give you a smooth, even surface for painting or new cabinet installation.
Assess All Damage
First, inspect the entire wall area where the cabinets were mounted. Look for:
- Small nail or screw holes (1/8 to 1/4 inch in diameter)
- Tear damage from prying (1–2 inch cracks or missing drywall chunks)
- Areas where paint or drywall paper peeled off with the cabinet
- Uneven spots from old adhesive residue If your home was built before 1978, test for lead paint before sanding or scraping any damaged areas using a lead test kit available at most hardware stores.
Patch Holes and Cracks
For small screw or nail holes: apply a thin layer of spackle with your putty knife, pressing firmly into the hole. For holes larger than 1/2 inch: cut a piece of drywall patch (or use a self-adhesive mesh patch) to cover the hole, then apply spackle over the patch in thin layers, letting each layer dry for 1–2 hours before applying the next. For torn drywall edges: cut away any loose paper or drywall with your utility knife, then apply spackle to smooth the area. For adhesive residue: scrape off as much as possible with a putty knife, then use an adhesive remover (like Goo Gone) to clean the surface before patching. For detailed, university-vetted step-by-step drywall repair guidance, see the University of Minnesota Extension's drywall repair guide.
Sand and Prime the Repaired Area
Once all spackle is completely dry (wait 24 hours for best results), sand the repaired areas with 120-grit sandpaper, then finish with 220-grit sandpaper for a smooth, even surface that blends with the surrounding wall. Wipe away all dust with a damp cloth, then apply a thin coat of stain-blocking primer to the repaired areas to prevent tannins from bleeding through new paint. Let the primer dry fully before painting or installing new cabinets.
Post-Removal Next Steps
Once cabinets are removed and walls are patched, you have a blank canvas to redesign your kitchen to match your style. If you’re planning to repaint the exposed wall, our guides to complementary wall color palettes and coordinating wall tones for warm schemes can help you pick a finish that fits your kitchen’s aesthetic, whether you’re updating to a modern, neutral look or a bold, colorful scheme.
Full Kitchen Renovation Next Steps
If you’re completing a full kitchen update, you may also need to remove adjacent fixtures to get the layout you want. Our guide to removing adjacent plumbing fixtures walks you through safely taking down wall-mounted faucets without damaging plumbing lines. Once your renovation is complete, you’ll want to host a dinner party to show off your new space—if you enjoy homemade wine, check out our guides to beginner-friendly home winemaking setups and top-rated winemaking starter equipment to craft a custom vintage for your unveiling. For something with a fruit-forward twist, our fruit wine making kits are perfect for beginners, and you can pick up all the essential winemaking accessories for hosting you need to serve your creation in style.
Disposing of Old Cabinets and Debris
Proper disposal keeps your home safe and reduces waste. If your cabinets are in good condition, donate them to a local Habitat for Humanity ReStore or community thrift store—most accept cabinet donations for free, and you’ll get a tax receipt for your contribution. If the cabinets are damaged beyond reuse, check with your local waste management service: most offer bulk item pickup for a $10–$30 fee per cabinet, or you can drop them off at a local landfill for a lower per-item cost. Remove all hardware before disposal if you plan to recycle or donate it, and sweep thoroughly for small screws and drywall scraps to avoid injury.
Frequently Asked Questions
How long does it take to remove kitchen wall cabinets?
For a standard 10×10 kitchen with 4–6 upper cabinets, the full process (prep, removal, basic wall repair) takes 2–4 hours for a DIYer with basic tools. If you’re installing new cabinets immediately after, add 2–3 hours for alignment and mounting.
Can I remove wall cabinets without damaging drywall?
Yes, with proper technique: score all caulk and paint seals with a utility knife before prying, remove all fasteners before pulling the cabinet away, and use a flexible pry bar with even pressure. Even with careful work, small nail holes are normal, but these are easy to patch with spackle in 10 minutes.
Do I need to turn off electricity to remove wall cabinets?
Always turn off the kitchen’s circuit breaker at the main panel before starting, even if you don’t plan to touch electrical wiring. Many cabinets have outlets or light fixtures mounted on them, and stud finders that detect live wires can fail if there’s damaged wiring behind the wall.
Are upper kitchen cabinets always mounted to studs?
Almost all modern upper cabinets are mounted with screws driven directly into wall studs for support, as they can hold up to 50 lbs of weight when fully loaded. Older homes (pre-1970) may use nails or construction adhesive instead of screws, so inspect the back panel carefully before starting.
Can I remove wall cabinets myself, or do I need a professional?
If you have basic DIY skills and the tools listed above, you can safely remove wall cabinets yourself. Call a professional only if you suspect hidden electrical or plumbing damage behind the cabinets, or if the cabinets are extremely heavy (over 60 lbs each) and you don’t have a helper.
Conclusion
Removing wall cabinets in your kitchen is a manageable, cost-effective DIY project that gives you full control over your kitchen’s layout and design. The key to success is taking the time to prep your space, locate all fasteners, and use the right tools to avoid wall damage and injury. Even small repairs like patching nail holes are quick to complete, and you’ll have a blank canvas to build the kitchen of your dreams. If you found this guide helpful, share it with a friend tackling their own kitchen update, and check out our other DIY renovation guides for more tips to transform your home.