How to Prevent Kitchen Wall from Grease: Easy Tips That Work
Scrubbing caked-on, sticky grease off kitchen walls is one of the most tedious parts of home cooking. Not only is the mess unsightly, but set-in grease can permanently damage paint, leave behind stubborn odors, and even become a breeding ground for bacteria if left unaddressed for months. The good news? Preventing grease buildup is far easier than removing it once it’s hardened, and most of the most effective tips require no expensive renovations or specialized products. In this guide, we’ll share tested, practical strategies to keep your kitchen walls grease-free, no matter how often you fry, sauté, or grill at home.
 Fresh grease splatter on painted drywall, easiest to remove within 5 minutes of cooking.
Credit: www.amazon.com
Fresh grease splatter on painted drywall, easiest to remove within 5 minutes of cooking.
Credit: www.amazon.com
Why Kitchen Wall Grease Builds Up
When you cook with oil at high heat, the oil vaporizes, mixing with steam, smoke, and tiny food particles to form a sticky, invisible aerosol. This aerosol travels through the air and settles on cool, smooth surfaces like walls, especially within 2 feet of your stovetop, where it hardens into a greasy film over time. Grease buildup isn’t just a cosmetic issue: accumulated grease can trap dust and food particles, creating a breeding ground for bacteria and even attracting pests like cockroaches if left uncleaned for weeks. Understanding the root causes makes it easier to implement targeted prevention strategies that work for your cooking habits. For more on this, see our guide on how to clean oil grease from kitchen wall.
The Science of Cooking Grease on Walls
Unlike water-based splatters that bead up and wipe away easily, oil-based grease bonds to porous surfaces like drywall, plaster, and even matte paint within minutes of contact. The higher the cooking heat, the more oil vaporizes, increasing the volume of airborne grease particles. This is why kitchens that see daily frying or wok cooking tend to have far worse grease buildup than those used mostly for baking or light meal prep.
Common Habits That Accelerate Buildup
Frequent high-heat frying without a splatter guard, skipping the range hood during cooking, waiting more than 10 minutes to wipe up fresh splatters, and using flat/matte paint in kitchen zones all speed up grease accumulation. A common mistake many home cooks make is turning off their exhaust fan or range hood the second they finish cooking, when airborne grease particles are still settling on walls for 10-15 minutes after the heat is off.
Choose Grease-Resistant Wall Materials and Finishes
If you’re renovating your kitchen or repainting an existing space, choosing the right wall materials is the single most effective long-term strategy to prevent grease stains. The right finishes make wiping away splatters trivial, and can cut your deep cleaning time by 50% or more.
Paint Finishes Built for Kitchen Messes
Flat and matte paint finishes are porous, so they absorb grease quickly and are nearly impossible to clean without stripping the paint. For kitchen walls, opt for satin, semi-gloss, or eggshell finishes, which have a smooth, sealed surface that repels oil and wipes clean with a damp cloth. Look for paints rated ASTM D2486 for scrubbability, which means they can withstand 100+ cycles of scrubbing without fading or wearing down. If you love the look of matte paint, use it only on ceilings or walls more than 6 feet away from the stovetop, where splatter risk is minimal. Pair a high-quality scrubbable paint with a color scheme that matches your green cabinetry for a durable, attractive finish that holds up to daily cooking messes.
Backsplashes That Block Splatters
A properly installed backsplash blocks 80% of grease splatters before they ever reach your wall paint. For maximum protection, install a full-height backsplash that extends at least 6 inches above your stovetop and runs the full width of your counter. Ceramic, porcelain, and glass tiles are non-porous and wipe clean with a single pass of a damp cloth, making them ideal for high-splatter zones. Stainless steel backsplashes are even more durable, and won’t stain even from heavy, repeated grease exposure. For renters who can’t modify permanent walls, peel-and-stick vinyl or tile backsplashes offer the same protection without damaging existing paint.
Low-Maintenance Options for Renters
If you can’t paint or install permanent backsplashes, removable adhesive wall panels made of PVC or vinyl are a great temporary solution. These panels stick directly to painted drywall and peel off without leaving residue, and their smooth, non-porous surface wipes clean of grease in seconds. You can also use clear, food-safe wall protectant sprays (more on those later) to create a temporary barrier on existing walls without any permanent changes. If you have warm wood or brown kitchen cabinets, a neutral wall palette will hide minor grease splatters far better than bright white, reducing how often you need to break out the cleaning supplies.
Smart Ventilation to Capture Grease Before It Settles
Even with a perfect backsplash and paint finish, airborne grease particles will still settle on walls over time if you don’t have proper ventilation. Ventilation is the second line of defense against grease buildup, and it also improves your kitchen’s indoor air quality by removing smoke, odors, and harmful cooking pollutants.
Range Hood Selection and Proper Use
A vented range hood that exhausts air directly outside is the most effective ventilation tool for preventing wall grease, as it pulls airborne grease particles away from your cooking zone before they can settle. When shopping for a range hood, look for a CFM (cubic feet per minute) rating matched to your stove size: a 30-inch standard stove needs 100-150 CFM for most home cooking, while larger stovetops or frequent wok frying may require 200+ CFM to capture all airborne grease. According to U.S. Environmental Protection Agency indoor air quality guidance, vented range hoods that exhaust air directly outside are far more effective at removing airborne grease, smoke, and cooking pollutants than recirculating models, which only filter air and redistribute it back into your kitchen. A common mistake is turning off the hood the second you finish cooking; run it for 10-15 minutes post-cooking to capture residual grease particles still floating in the air. Clean the grease filter monthly with warm soapy water or a kitchen degreaser to maintain maximum airflow.
 Vented range hoods capture the majority of airborne grease particles when used correctly.
Credit: www.amazon.com
Vented range hoods capture the majority of airborne grease particles when used correctly.
Credit: www.amazon.com
Exhaust Fan Maintenance for Maximum Efficiency
If you don’t have space for a full range hood, a high-quality wall or ceiling exhaust fan is a good alternative. Choose a model with a CFM rating matched to your kitchen’s square footage (1 CFM per square foot of kitchen space is a good rule of thumb) to ensure it can move enough air to clear grease particles. Like range hoods, run exhaust fans 10 minutes before cooking to clear existing air, and 15 minutes after cooking to remove residual grease. Clean the fan’s grease filter monthly, and have ductwork professionally cleaned every 1-2 years if you have a vented system to remove accumulated grease that can become a fire hazard.
Natural Ventilation Hacks for No-Hood Kitchens
If your kitchen doesn’t have a range hood or exhaust fan, you can still reduce grease buildup with simple natural ventilation. Open windows on opposite sides of the kitchen to create cross-ventilation, which sweeps airborne grease particles outside faster than a single open window. On calm days, place a portable fan in a window facing outward to push greasy air outside. Even on cold winter days, cracking a window for 10-15 minutes after cooking will drastically reduce the amount of grease that settles on your walls.
Daily and Weekly Cleaning Habits That Prevent Stains
Even with the best materials and ventilation, small grease splatters will still happen during cooking. Consistent, low-effort cleaning habits stop these tiny splatters from hardening into stubborn, hard-to-remove stains.
Immediate Post-Cooking Wipe-Downs
The single most effective cleaning habit is wiping down your kitchen walls within 5 minutes of cooking, while grease is still warm and liquid. In practice, a soft microfiber cloth picks up fresh grease 3x faster than a paper towel, which just spreads the oil around. Keep a small microfiber cloth and a spray bottle of warm, soapy water right next to your stovetop for quick access, so you don’t have to trek to the sink mid-cook. Focus on the 2-foot zone around the stove and the area directly above it, where 90% of grease splatters land.
Safe, Effective Grease-Cutting Cleaners
Not all cleaners are safe for kitchen walls, especially painted drywall or wallpaper. For fresh grease, warm water mixed with a few drops of mild dish soap is usually enough to break down oil without damaging finishes. For set-in stains, a 1:1 mix of white vinegar and warm water works as a gentle degreaser that won’t discolor light paint. For heavy buildup, use a commercial kitchen degreaser labeled safe for painted surfaces, and avoid harsh abrasive cleaners that can scratch paint or backsplash grout. For safe, non-toxic grease-cutting solutions that won’t damage paint or grout, University of Minnesota Extension home cleaning guidance recommends a 1:1 mix of white vinegar and warm water for most kitchen wall surfaces, as it breaks down oil bonds without harsh chemicals. Always test any cleaner on a small, hidden area of your wall first to ensure it doesn’t cause discoloration.
Preventative Barrier Sprays for Extra Protection
For extra peace of mind, especially in kitchens that see heavy cooking, apply a food-safe wall protectant spray every 2-3 weeks. These clear, invisible sprays create a hydrophobic barrier on walls, backsplashes, and paint finishes that stops grease from bonding to surfaces, making splatters wipe away with a dry cloth. They’re especially useful for renters who can’t change their paint or backsplash, and for homes with young kids or pets, as they’re non-toxic once dry.
Proactive Cooking Adjustments to Cut Splatter
The best way to prevent wall grease is to stop it from flying off your pans in the first place. Small changes to your cooking routine can cut splatter by 70% or more, with no impact on your favorite recipes.
Simple Splatter Reduction Techniques
Start by patting all ingredients dry with a paper towel before cooking, as excess moisture is the main cause of oil splatter. Pour oil slowly down the side of the pan instead of directly into the center to avoid splashes, and never overcrowd your pan, as extra food releases water that causes grease to pop and splatter. If you do get a splatter, wipe it up immediately before it has time to harden.
Tools That Block Grease at the Source
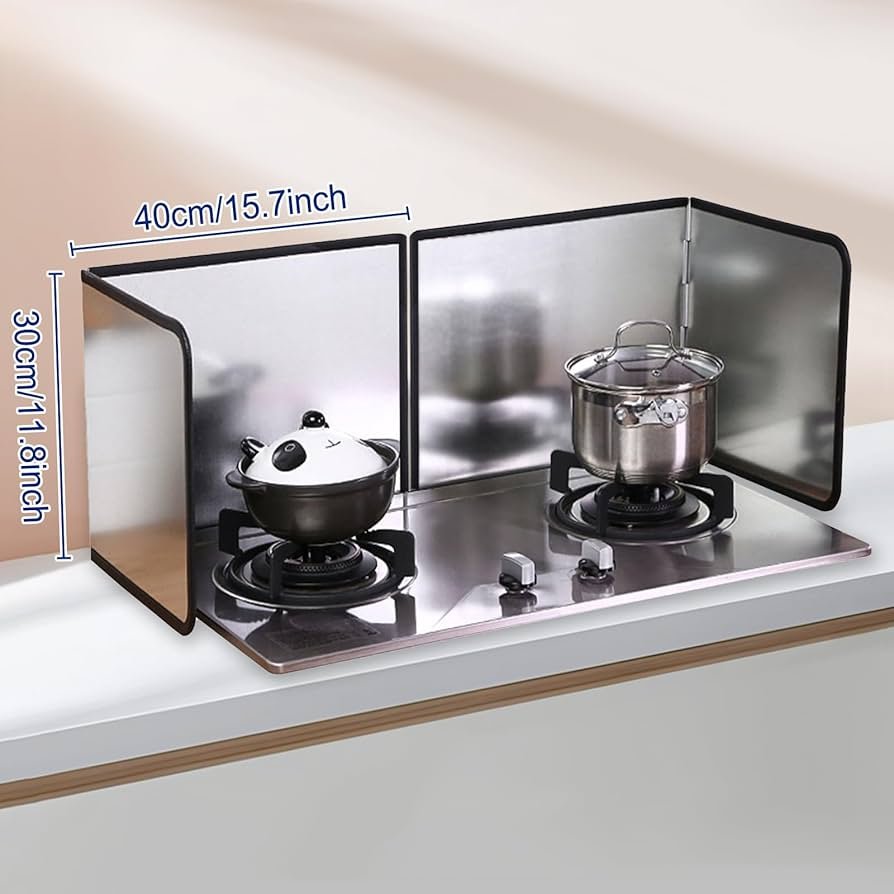
Always use a lid that fits your pan flush to trap steam and grease while cooking, especially when boiling, frying, or sautéing. For dishes that need to be uncovered (like stir-fries or searing meat), use a mesh splatter guard that fits over the top of your pan: these let steam escape to keep food crispy, while catching 90% of oil droplets before they can fly. Silicone splatter guards are ideal for oven use, as they’re heat-resistant up to 450°F and easy to wipe clean.
Heat Management to Reduce Vaporized Oil
Overheating oil past its smoke point is a major cause of excess airborne grease, as vaporized oil travels further through the air and settles on walls faster. Stick to medium heat for most cooking tasks, and heat oil slowly before adding food to avoid sudden temperature spikes. Different oils have different smoke points, so choose the right oil for your cooking task to minimize excess vapor:
| Cooking Oil | Smoke Point |
|---|---|
| Extra Virgin Olive Oil | 375°F (190°C) |
| Canola Oil | 400°F (204°C) |
| Avocado Oil | 520°F (271°C) |
| Butter | 300°F (149°C) |
If you see heavy smoke coming from your pan, lower the heat immediately to reduce grease production.
Long-Term Maintenance to Keep Walls Fresh
Even with the best prevention habits, small amounts of grease will accumulate over time. Regular maintenance catches buildup early before it causes permanent damage, and keeps your ventilation systems working effectively.
Early Spot Inspections
Once a month, do a quick inspection of your kitchen walls, focusing on the 2-foot zone around your stovetop, the area above your sink, and any corners where grease tends to collect. Look for faint, sticky patches or discoloration that indicate early grease buildup. Catching these spots early means you can wipe them away with a damp cloth before they harden, avoiding the need for harsh degreasers or scrubbing that can damage paint.
Scheduled Deep Cleaning Routines
Every 4-6 weeks, do a full deep clean of your kitchen walls to remove hidden grease that daily wipe-downs miss. Use a soft sponge and a gentle degreaser (vinegar and water or a commercial kitchen-safe formula) to wipe down all wall surfaces, including the tops of cabinets and the edges of backsplashes where grease tends to accumulate. For tough, set-in stains, let the cleaner sit for 1-2 minutes before wiping to break down the oil bond.
Ventilation System Upkeep for Safety
Clean your range hood or exhaust fan’s grease filter monthly with warm soapy water to maintain maximum airflow. If you have a vented range hood with ductwork running through your ceiling or walls, have the ducts professionally cleaned every 1-2 years to remove accumulated grease. Built-up grease in ducts is a major fire hazard, and regular cleaning reduces that risk while keeping your ventilation system working efficiently to prevent wall grease. The area around your sink and wall-mounted faucet is also prone to grease and grime buildup from dishwashing and food prep, so if you’re due for fixture maintenance, removing and deep cleaning your faucet can prevent hidden grime from spreading to adjacent walls.
Frequently Asked Questions
How can I stop grease from sticking to kitchen walls?
Start by installing a full-height backsplash in your cooking zone to block splatters before they hit paint, use a vented range hood to capture airborne grease particles, and wipe walls down within 5 minutes of cooking while splatters are still fresh. For extra protection, apply a food-safe wall protectant spray every 2-3 weeks to create a hydrophobic barrier that stops grease from bonding to surfaces.
What materials are best for preventing grease stains on kitchen walls?
Non-porous, smooth materials are the most effective at resisting grease: ceramic, porcelain, and glass tiles for backsplashes, satin or semi-gloss scrubbable paint for walls, stainless steel for full-height backsplashes, and removable PVC wall panels for renters. Avoid flat/matte paint and textured wall coverings in kitchen zones, as they absorb grease quickly and are hard to clean.
How often should I clean kitchen walls to prevent grease buildup?
Wipe down walls in the 2-foot zone around your stovetop after every cooking session where you used oil, and do a full wall wipe-down once a week with a damp cloth. Deep clean all kitchen walls every 4-6 weeks with a gentle degreaser to remove hidden buildup that daily cleaning misses.
Can ventilation really reduce kitchen wall grease?
Yes, proper ventilation removes airborne grease particles before they can settle on walls. A vented range hood can capture 90% of airborne grease when used correctly, while even simple cross-ventilation from open windows can cut airborne grease levels by 50% or more.
Will grease buildup damage my painted walls over time?
Yes, if left unaddressed, grease can seep into porous paint and drywall, causing discoloration, peeling, and even mold growth if combined with moisture. Set-in grease often requires harsh scrubbing or full repainting to remove, so prevention is far more cost-effective than remediation.
Final Thoughts
Preventing kitchen wall grease doesn’t require expensive renovations or hours of scrubbing every week. By combining a few simple strategies—like using a vented range hood, wiping walls immediately after cooking, and choosing a grease-resistant paint finish—you can cut grease buildup by 70% or more, and keep your kitchen looking fresh with minimal effort. The key is consistency: small, daily habits add up to big results over time, and you’ll never have to spend a weekend scrubbing caked-on grease off your walls again.
If you’re planning a kitchen refresh to make grease prevention even easier, explore color scheme options that pair with your existing cabinetry for a low-maintenance, cohesive look that hides minor splatters with ease.