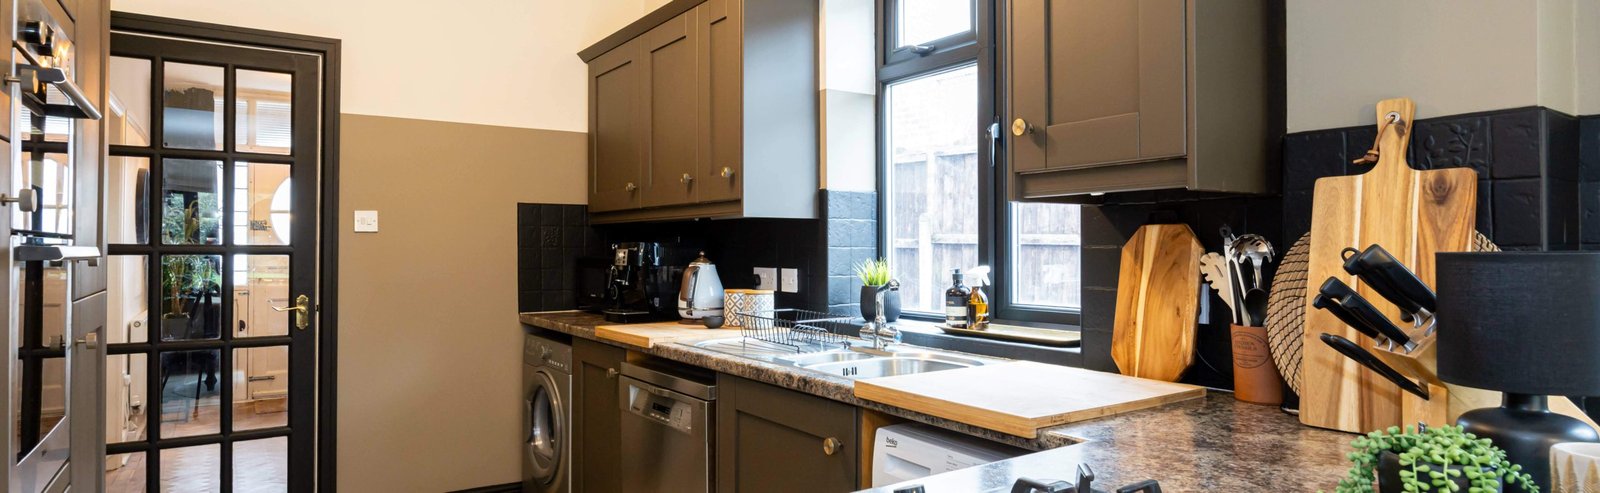
How to Paint Kitchen Wall Tiles: Easy Steps for a Stunning Makeover
Staring at dated, stained, or just plain boring kitchen wall tiles can make even the most beloved home feel stale. A full tile replacement is expensive, messy, and often requires a contractor, but painting your existing tiles is a low-cost, DIY-friendly alternative that can completely transform your kitchen’s look in a single weekend. When done correctly, a professional-quality painted tile job will last 3–5 years, even in high-moisture kitchen environments, for a fraction of the cost of renovation.
In this guide, we’ll walk you through every step of painting kitchen wall tiles, from prepping the surface to sealing and maintaining your finish for long-lasting results. We’ll cover common mistakes to avoid, how to choose the right paint and supplies for your space, and tips for a flawless, showroom-worthy finish — no prior DIY experience required. For more on this, see our guide on how to regrout kitchen wall tiles easy steps.
Is Painting Kitchen Tiles a Good Fit for Your Space?
Not all kitchen tiles are ideal for painting, and the project works best for specific conditions to ensure long-lasting results. Painting is a great option if you have ceramic or porcelain wall tiles in good condition (no deep cracks, chips, or loose grout) and want to refresh a low- to medium-traffic backsplash. It’s also a popular choice for renters who can’t make permanent changes to their rental property.
Skip painting if your tiles are severely damaged, loose, or part of a high-moisture area like a shower surround, as paint will not adhere properly to compromised surfaces. For tiles directly behind a stove or sink, you can still paint them, but you’ll need to use heat- and water-resistant epoxy paint and apply extra coats of sealer to protect against frequent exposure to steam, splashes, and cooking heat. For more on this, see our guide on how to paint wall tiles in kitchen.
Material costs for a DIY tile paint job typically stay under $300, a small fraction of the average cost for full tile replacement and professional installation, making it a budget-friendly option for homeowners looking to refresh their space without a major renovation.
What You’ll Need: Tools, Supplies, and Safety Gear
Proper supplies are the foundation of a successful tile paint job, and cutting corners on materials will lead to peeling, chipping, or an uneven finish. We’ve broken down exactly what you need, with specific product recommendations to avoid common guesswork. For more on this, see our guide on how to paint over kitchen wall tiles.
Essential Painting Supplies
- TSP-safe degreaser or heavy-duty dish soap for deep cleaning grease and grime
- 220-grit fine sandpaper or a flexible sanding sponge for surface roughening
- Painter’s tape rated for glossy surfaces to protect edges, outlets, and fixtures
- Bonding primer specifically formulated for glossy, non-porous surfaces like tile and glass
- Epoxy paint or water-based urethane tile paint (avoid standard latex wall paint)
- 3/8-inch nap foam roller for smooth, streak-free coverage on large tile areas
- Angled synthetic brush for cutting in along grout lines, edges, and tight spaces
- Drop cloths or plastic sheeting to protect floors and countertops from paint splatters
- Paint tray with a liner for easy cleanup
- Tack cloth or clean microfiber rags to wipe away sanding dust
- Grout-specific paint (optional, for refreshing grout lines alongside tiles)
Safety Equipment
- NIOSH-approved respirator (especially if using oil-based primers or epoxy paint, which emit strong fumes)
- Nitrile gloves to protect skin from degreasers, primers, and paints
- Safety goggles to shield eyes from dust and splatters
- Old cotton clothes or a disposable protective apron to avoid staining
- Portable fan to improve ventilation and reduce fume exposure while painting
Step 1: Prep the Tile Surface for Long-Lasting Adhesion
Surface prep is the most important step in the entire process — skipping or rushing it is the #1 cause of peeling, chipping paint that fails within months. Taking 1–2 hours to properly clean and sand your tiles will ensure your finish lasts for years.
Deep Clean to Remove Grease and Grime
Kitchen wall tiles behind stoves and sinks accumulate layers of invisible grease, food splatter, and grime that will prevent paint from sticking if not fully removed. Start by clearing all items off the tiled area, then spray the tiles with a TSP-safe degreaser (avoid harsh ammonia-based cleaners, which can leave residue that interferes with paint adhesion). Scrub the tiles with a non-abrasive scouring pad, paying extra attention to textured grout lines and crevices where grease builds up. For more on this, see our guide on how to do kitchen wall tiles.
If you want to refresh your grout lines for a fully cohesive look, apply a small amount of grout-specific paint to the lines with a detail brush after cleaning, before moving on to priming. Make sure the grout paint is compatible with your topcoat paint to avoid adhesion issues.
Rinse the tiles thoroughly with clean water, then wipe them down with a damp microfiber cloth to remove any leftover cleaner residue. Let the tiles air dry completely for 2–4 hours — any leftover moisture will cause primer to peel and create bubbles in your final finish. A common DIY mistake is skipping the full drying step, assuming the tiles look dry to the naked eye, but even small amounts of hidden moisture will ruin your paint job. For more on this, see our guide on how to remove kitchen tiles from wall.
Light Sanding for Better Grip
Smooth, glossy tile has no texture for paint to grip, so light sanding is a non-negotiable step for long-lasting results. Use 220-grit sandpaper or a flexible sanding sponge to rub the entire tiled surface in circular motions until the glossy sheen is completely gone and the tile feels slightly dull to the touch. Avoid pressing too hard, as you only need to scuff the surface, not scratch through the tile’s glaze.
After sanding, wipe away all dust with a tack cloth or a damp microfiber rag, then let the surface dry fully. Skipping this step is the most common cause of premature peeling on painted tile, as paint has no way to bond to a perfectly smooth surface.
 A dull, non-glossy surface after light sanding is key to primer adhesion.
Image source: www.reddit.com
A dull, non-glossy surface after light sanding is key to primer adhesion.
Image source: www.reddit.com
Step 2: Apply Primer for Maximum Durability
Primer creates a bond between the smooth tile surface and your paint, preventing peeling and ensuring even color coverage. Using the wrong primer or skipping this step entirely will lead to a paint job that chips and fades within months.
Selecting the Appropriate Bonding Primer
Standard wall primers will not adhere to smooth, non-porous tile, so you need a product specifically labeled for glossy surfaces, glass, or tile. Look for terms like “bonding primer” or “multi-surface primer for glossy finishes” on the label to ensure you’re getting the right product.
Water-based bonding primers are low-VOC, easy to clean up with soap and water, and dry quickly (1–2 hours), making them ideal for most DIY projects. Oil-based primers offer superior adhesion for very smooth porcelain tiles but have strong fumes, longer drying times (4–6 hours), and require mineral spirits for cleanup. If you’re using a tile paint kit that includes a built-in primer, this will work for most standard ceramic tiles, but a standalone bonding primer is recommended for high-moisture areas or very glossy surfaces.
Application Techniques for Even Coverage
Start with your fully prepped, dry, dust-free tile surface. Use the angled synthetic brush to cut in along grout lines, the edges of the tiled area, and around outlets, light switches, and fixtures to ensure full coverage in hard-to-reach spots. Then, use the foam roller to apply primer to large, flat tile areas for a smooth, even finish.
Apply one thin, even coat of primer — thick coats will drip and take longer to dry. Let the first coat dry completely per the manufacturer’s instructions before applying a second coat if needed. For dark tile colors being painted with a light paint, a second coat of primer will help hide the base color and reduce the number of paint coats you need. Primed tiles should look completely matte, with no remaining glossy sheen; if you still see shine, apply a second coat of primer for better adhesion.
For safe handling of primers and paints, follow OSHA’s recommended ventilation and PPE guidelines for residential painting projects to minimize fume exposure and protect your health.
Step 3: Paint Your Tiles for a Flawless Finish
With your surface prepped and primed, you’re ready to apply the paint that will transform your kitchen’s look. Using the right paint and application technique will ensure a smooth, streak-free finish that holds up to daily use.
Pick the Right Paint and Finish
Not all paints work for kitchen wall tiles: standard latex wall paint lacks the adhesion and moisture resistance needed to hold up to kitchen splatters, steam, and cleaning, so it will peel and chip within months. The two best options for kitchen tiles are:
- Epoxy paint: The most durable option for high-traffic areas behind stoves and sinks, epoxy paint resists moisture, heat, and abrasion, and typically lasts 3–5 years with proper sealing. It has a strong odor during application, so extra ventilation is required.
- Water-based urethane tile paint: A low-VOC, user-friendly option ideal for DIYers, this paint dries quickly, is easy to clean up, and offers good durability for low- to medium-traffic backsplashes. It won’t yellow over time, making it perfect for light paint colors.
For finish, opt for semi-gloss or satin: high-gloss paint shows every surface imperfection and sanding mark, while matte paint stains easily and is hard to clean. Semi-gloss offers a subtle shine that’s easy to wipe down and hides minor surface flaws.
Application Techniques for Streak-Free Results
Use the same cut-in then roller method you used for priming to apply paint. Start by using the angled brush to paint along grout lines, edges, and around fixtures, then use the foam roller to cover large flat areas with thin, even strokes. Roll in a W pattern to avoid streaks, then fill in the W with vertical strokes for full coverage.
Apply 2–3 thin coats of paint, waiting 2–4 hours between coats (check your paint can for exact drying times) to avoid smudging and ensure each layer adheres properly. A common DIY mistake is applying thick coats of paint to try to get full coverage in one go, but this leads to sagging, uneven curing, and a bumpy finish. After each coat dries, use a small detail brush to touch up any missed spots along grout lines for a seamless look. If you painted your grout lines earlier, you may need an extra coat of paint over the grout to match the tile finish.
For step-by-step guidance on surface prep and coating application, refer to University of Minnesota Extension’s residential painting best practices, which outlines industry-standard techniques for durable, long-lasting paint jobs.
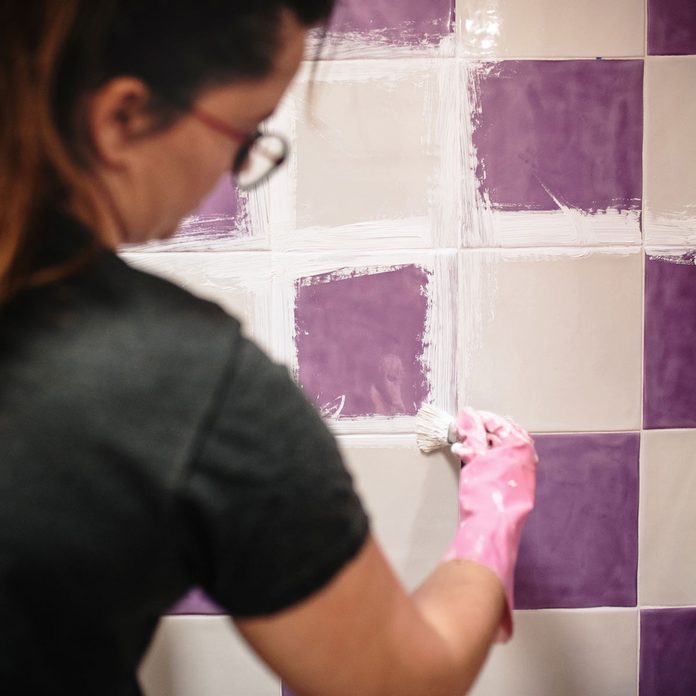 Thin, even paint coats applied with a foam roller minimize streaks and drips for a professional finish.
Image source: www.familyhandyman.com
Thin, even paint coats applied with a foam roller minimize streaks and drips for a professional finish.
Image source: www.familyhandyman.com
Step 4: Seal Painted Tiles for Long-Term Protection
Sealing is optional for low-traffic areas like a dining nook backsplash, but it’s critical for tiles behind stoves or sinks, where they’ll be exposed to heat, moisture, and frequent cleaning. The right sealer will protect your paint from staining, chipping, and peeling, extending its lifespan by 2–3 years.
Choosing the Right Sealer for Your Kitchen
Not all sealers work for painted tile, so pick a product formulated for painted surfaces to avoid adhesion issues or yellowing:
- Water-based acrylic sealer: The most versatile option, this low-VOC sealer dries clear, won’t yellow over time, and is easy to apply. It’s ideal for light paint colors and low- to medium-heat areas.
- Oil-based polyurethane sealer: Extremely durable and heat-resistant, this sealer is best for tiles directly behind a stove, but it can yellow over time when used with light paint colors. Avoid using epoxy sealer over painted tile unless you used epoxy paint, as the two products can interact and cause adhesion issues or a cloudy finish.
Application Process for Full Coverage
Wait at least 72 hours after your final coat of paint is completely dry before applying sealer — sealing too soon will trap moisture under the sealer and cause peeling. Use a clean foam roller or soft-bristle brush to apply 2–3 thin, even coats of sealer, letting each coat dry for 2–3 hours between applications.
Work in a well-ventilated area with low humidity (below 60%) to avoid cloudiness in the sealer. Avoid applying thick coats, which will take longer to dry and can drip or bubble. After the final coat dries, let the tiles cure for 24 hours before light use, and wait 7 days before exposing them to heavy moisture, heat, or harsh cleaners.
Curing and Drying: What to Expect
Understanding the difference between drying and curing will help you avoid damaging your fresh paint job and ensure your finish lasts as long as possible.
Drying vs. Curing: The Key Difference
Drying is the point where paint is no longer wet to the touch, usually 24–48 hours after the final coat, depending on paint type and humidity. At this point, you can lightly use the kitchen, but avoid scrubbing or placing heavy objects on the tiles.
Curing is the process where paint fully hardens and bonds to the tile surface, which takes 7–14 days. During this time, the paint reaches its full durability and moisture resistance. Avoid cleaning the tiles, placing dishes or decor on them, or exposing them to steam or splashes during the full cure period to prevent damage.
Tips to Protect Tiles During Curing
- Keep windows open or run a portable fan in the kitchen for 24–48 hours after painting to improve ventilation and speed up curing.
- Avoid cooking near the freshly painted backsplash for the first 3 days if possible, or use a temporary plastic sheet to cover the tiles while cooking to protect them from steam and grease splatters.
- Keep the kitchen temperature consistent (between 60°F and 80°F) during curing — extreme cold or heat can cause paint to dry improperly and lead to flaking.
- Resist the urge to clean the tiles for the first 2 weeks, even if they get dusty, as wiping can remove uncured paint and cause dull spots.
 Even, consistent sanding across the entire tile surface ensures uniform primer and paint adhesion.
Image source: thediynuts.com
Even, consistent sanding across the entire tile surface ensures uniform primer and paint adhesion.
Image source: thediynuts.com
Maintaining Painted Tiles for Long-Lasting Results
With proper care, your painted tile backsplash will look fresh and vibrant for years. Follow these simple tips to avoid wear and keep your finish looking like new.
Cleaning and Daily Care
Painted tile is just as easy to clean as regular tile when properly sealed, but it requires gentle care to avoid damaging the paint and sealer. For daily cleaning, use a soft microfiber cloth or non-abrasive sponge with warm water and mild dish soap. Wipe up spills immediately, especially acidic spills like tomato sauce, lemon juice, or wine, which can stain paint if left to sit.
Avoid abrasive scrubbers, steel wool, or harsh chemical cleaners like bleach, ammonia, oven cleaner, or abrasive bathroom cleaners, as these will break down the sealer and paint over time. For stubborn stuck-on food, let the area soak with warm soapy water for 5–10 minutes before gently wiping clean, never scrubbing hard.
Fixing Chips and Scratches
Minor chips and scratches are inevitable in a busy kitchen, but they’re easy to fix with leftover paint from your project. Keep a small, sealed jar of your paint labeled with the color, brand, and date for touch-ups. To fix a chip:
- Lightly sand the chipped area with 320-grit sandpaper to smooth the edges and remove any loose paint.
- Wipe away dust with a damp cloth, then let dry completely.
- Use a small detail brush to apply a thin coat of paint to the chip, feathering the edges to blend it with the surrounding paint.
- Let the touch-up paint dry for 2–4 hours, then apply a thin coat of sealer to match the rest of the tile.
Small touch-ups will blend in seamlessly if you match the paint exactly, but large or frequent chips may require repainting the entire tile to maintain a uniform look.
Common Tile Painting Mistakes to Avoid
Even experienced DIYers run into issues with tile painting if they skip key steps. Avoid these common pitfalls for a flawless, long-lasting finish:
- Skipping surface prep: Even a small amount of leftover grease or skipping the sanding step will cause paint to peel within months. Always deep clean and sand tiles thoroughly before starting.
- Using the wrong paint: Standard latex wall paint lacks the adhesion and moisture resistance needed for tile, leading to chipping and peeling within weeks. Always use paint specifically formulated for tile or glossy surfaces.
- Applying thick coats: Thick coats of paint or sealer take much longer to cure, lead to drips and sagging, and create a bumpy, unprofessional finish. Always apply thin, even coats and wait for full drying between layers.
- Sealing too soon: Sealing over uncured paint traps moisture under the sealer, causing peeling and cloudiness. Always wait at least 72 hours after the final paint coat is dry before applying sealer.
- Using harsh cleaners: Abrasive scrubbers and chemical cleaners will break down sealer and paint over time, leading to stains and wear. Stick to mild soap and soft cloths for cleaning.
Budget Kitchen Makeover Ideas to Pair With Painted Tiles
Freshly painted tiles will instantly brighten your kitchen, but pairing them with other small, low-cost upgrades will create a cohesive, professional-looking space for a fraction of the cost of a full renovation.
Start by coordinating your new tile color with your wall paint for a balanced, intentional look. If you have green kitchen cabinets, opt for complementary wall shades that bring out the cabinet’s natural tone; for brown cabinets, matching wall tones create a cozy, timeless vibe that pairs perfectly with painted tile backsplashes.
If you’re also updating your kitchen fixtures, you can easily swap out an old wall-mounted faucet in an afternoon with basic tools to complete the refresh. Once your makeover is done, host a dinner party to show off your new space, and pair your meal with easy homemade winemaking for a fun, personalized touch — you can find all the online winemaking supplies you need to get started without leaving your home.
Frequently Asked Questions
How do I prepare kitchen tiles for painting?
Start by removing all grease, grime, and food residue with a TSP-safe degreaser and a non-abrasive scouring pad, then rinse thoroughly and let dry completely for 2–4 hours. Next, lightly sand the entire surface with 220-grit sandpaper until the glossy sheen is gone, then wipe away all dust with a tack cloth. This two-step prep ensures the primer and paint bond properly to the tile, preventing peeling.
What type of paint is best for kitchen tiles?
Epoxy paint or water-based urethane tile paint are the best options for kitchen walls, as they resist moisture, heat, and frequent scrubbing. Avoid standard latex wall paint, which lacks the adhesion and durability needed for glossy tile surfaces. For high-traffic areas behind stoves or sinks, epoxy paint offers the longest lifespan, typically lasting 3–5 years with proper sealing.
How many coats of paint do kitchen tiles need?
Most projects require 2–3 thin coats of paint for full, even coverage. If you’re painting over a dark tile with a light color, or using a light paint over a dark primer, you may need a third coat. Always wait for each coat to dry completely (usually 2–4 hours, depending on the product) before applying the next to avoid drips and uneven curing.
Can I paint kitchen tiles myself or should I hire a pro?
Painting kitchen wall tiles is a beginner-friendly DIY project for most homeowners, as long as you follow proper prep and application steps. It’s a great option for renters who can’t modify their rental’s permanent fixtures. Hire a professional if you have large, uneven textured tiles, limited experience with painting, or want a flawless finish with zero hassle for a high-end kitchen.
How long does painted kitchen tile last?
With proper prep, quality materials, and regular maintenance, painted kitchen wall tiles will last 3–5 years in high-traffic areas, and up to 7 years in low-use spaces like a dining nook backsplash. The lifespan depends heavily on how well you seal the tiles and avoid harsh cleaners.
Can I paint kitchen tiles behind the stove or sink?
Yes, but these high-moisture, high-heat areas require extra care: use a heat- and water-resistant epoxy paint, apply 2–3 coats of sealer after painting, and avoid placing hot pans or splashing water directly on the tiles for the first 2 weeks of curing.
Conclusion
Painting kitchen wall tiles is one of the most cost-effective, low-lift ways to transform your kitchen’s look without the mess, cost, and hassle of a full tile replacement. The key to a stunning, long-lasting result is prioritizing prep: deep cleaning, light sanding, and using a high-quality bonding primer will prevent peeling and ensure your paint adheres properly for years.
Take your time with each coat of paint and sealer, and follow the manufacturer’s recommended drying and curing times to avoid common issues like bubbles, streaks, or chipping. With proper maintenance — gentle cleaning and quick touch-ups for minor wear — your painted tiles will look fresh and vibrant for 3–5 years or more.
Ready to tackle your kitchen makeover? Grab your supplies this weekend, and enjoy a space that feels brand new without breaking the bank. For more budget-friendly kitchen DIY tips, browse our full library of home improvement guides.
Ethan Cole is a kitchen innovation enthusiast and food technology writer at DiningGadgets.com. With over 8 years of experience reviewing cookware, smart kitchen tools, and design trends, he helps readers discover gadgets that make cooking easier and dining more enjoyable. When he’s not testing the latest kitchen appliances, Ethan enjoys experimenting with recipes and sharing practical tips for modern homes.