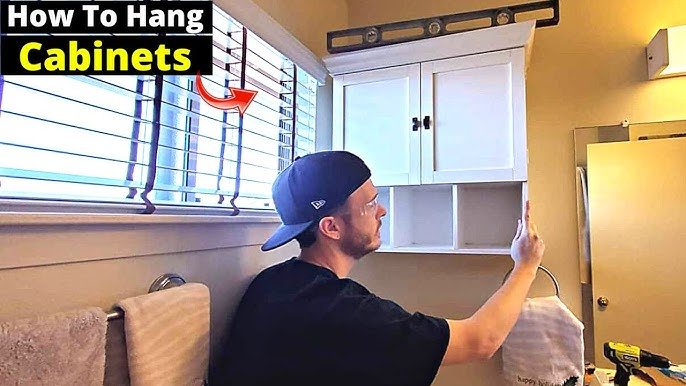
How to Hang Wall Cabinets on Drywall: Easy Steps for Secure Mounting
If you’ve ever eyed a set of sleek wall cabinets for your kitchen or bathroom but hesitated to install them yourself, you’re not alone. Drywall alone can’t support the weight of even a small cabinet, and a botched install can lead to sagging shelves, damaged walls, or even dangerous cabinet collapse that costs hundreds to repair. The good news? Hanging wall cabinets on drywall is a straightforward DIY project if you follow 2026 industry best practices for secure mounting—no professional experience required.
This guide walks you through every step, from prepping your wall to troubleshooting common issues, so you can get flawlessly aligned, rock-solid cabinets without the professional installer markup. We’ll cover critical details most DIY guides skip, like proper screw sizing, stud confirmation techniques, and reinforcement for heavy loads, to ensure your cabinets stay secure for decades.
 Credit: www.familyhandyman.com
Aligning the cabinet back with pre-marked stud centers ensures a secure, wobble-free mount.
Credit: www.familyhandyman.com
Aligning the cabinet back with pre-marked stud centers ensures a secure, wobble-free mount.
Why Proper Mounting Is Non-Negotiable
Standard 1/2" thick drywall has a maximum weight capacity of 10–15 lbs per square foot without reinforcement. A typical 30" wide wall cabinet weighs 40–80 lbs empty, and can hold an additional 50+ lbs of dishware, appliances, and decor when full. Relying solely on drywall anchors for this load will lead to cabinet failure over time, per National Association of Home Builders (NAHB) safety data. NAHB home safety guidelines recommend always anchoring cabinets to wall studs for loads over 20 lbs, rather than relying solely on drywall anchors. Improper installation is also one of the top causes of preventable kitchen injuries, per NAHB, making correct mounting a critical safety step for your household.
Tools and Materials You’ll Need
Skipping a trip to the hardware store mid-project is easy when you have all supplies on hand before you start. The right tools and hardware will cut down on errors and ensure a secure, long-lasting install.
Essential Tools
- Electronic stud finder: A magnetic stud finder only locates nail heads, while an electronic model detects the full edge and center of studs behind drywall for more accurate placement.
- Cordless drill with 3/16" and 1/2" drill bits: 3/16" bits are for pre-drilling pilot holes into wood studs, while 1/2" bits are for toggle bolt installation. A 24" level is the minimum recommended size for most cabinets; a laser level is ideal for uneven walls.
- Tape measure and mechanical pencil: Use a mechanical pencil for fine, visible layout marks that won’t smudge easily.
- Stud finder with built-in wire/pipe detection: This lets you avoid drilling into hidden electrical or plumbing runs behind drywall.
- 2" bar clamps: Hold the cabinet steady while you position it, eliminating the need for a helper for lighter cabinets.
- Utility knife: For trimming shims and scoring drywall if you need to cut mounting holes.
Required Hardware
- 2.5" to 3" wood screws: Use screws long enough to penetrate 1" into the center of a stud for maximum holding power. 2.5" screws work for 1/2" thick drywall, while 3" screws are needed for 3/4" drywall. Avoid drywall screws, which are brittle and prone to breaking under heavy load.
- Metal drywall anchors: Plastic anchors are only suitable for lightweight cabinets under 15 lbs. For medium loads (15–50 lbs) without stud access, use metal expansion anchors rated for the cabinet’s weight.
- Toggle bolts: 1/8" toggle bolts support up to 50 lbs in 1/2" drywall, while 1/4" toggle bolts support up to 100 lbs. For cabinets over 100 lbs, use 3/16" toggle bolts spaced 16" apart vertically.
- Wood or plastic shims: 1/8" thick shims fill gaps between uneven walls and cabinet backs to ensure a level mount.
- Optional mounting ledger board: A 1×4 board you temporarily screw to the wall to support the cabinet while you position and secure it, ideal for solo DIYers.
Safety Gear
- Safety glasses: Protect your eyes from drywall dust and wood splinters while drilling.
- Work gloves: Prevent cuts from sharp cabinet edges and drill bits.
- Knee pads: Reduce strain if you’re working on lower wall sections.
- Dust mask: Avoid inhaling drywall dust while drilling pilot holes.
For guidance on selecting fasteners rated for heavy loads, refer to the U.S. Consumer Product Safety Commission's recommendations for secure wall mounting.
Pre-Installation Wall Prep
Skipping wall prep is the most common cause of misaligned, unstable cabinets. Follow these steps to set yourself up for a smooth install:
- Clear the work area: Remove all outlet covers, wall decor, and items from the cabinet installation zone. Lay down a drop cloth to catch drywall dust and debris.
- Locate and mark studs: Run your electronic stud finder slowly along the wall, marking both the left and right edges of each stud with a pencil, then mark the exact center of each stud with a small "X". Studs are typically spaced 16" or 24" apart on center, per standard framing codes. Confirm stud locations by tapping the wall: a solid, high-pitched sound indicates a stud, while a hollow sound indicates empty drywall.
- Check for hidden utilities: Use the wire/pipe detection feature on your stud finder to mark the locations of any electrical wires or plumbing runs with painter's tape. Avoid drilling within 6" of any marked utility line to prevent damage.
- Mark your cabinet layout: Measure up from the floor to your desired cabinet bottom height. Standard installation height is 54" from the floor to the bottom of the cabinet, which aligns with 36" standard countertop height and leaves 18" of clearance for small appliances. Adjust this height 1–2" up or down if you are significantly shorter or taller than average for comfort. Use your level to draw a continuous, straight horizontal line across the wall at this height—this is your primary mounting guide.
- Mark stud alignment for multiple cabinets: If you’re installing multiple cabinets, mark the stud centers that align with each cabinet’s mounting points to avoid re-scanning the wall during installation.
If you’re coordinating your new cabinetry with a full kitchen refresh, checking wall color pairings for green cabinets first can help you pick a palette that highlights your new storage.
Step-by-Step Secure Mounting Process
Follow these steps to hang your cabinets securely, with no sagging or misalignment:
Step 1: Prep Your Cabinet First
A common DIY mistake is hanging the cabinet first, then realizing the back panel is warped or mounting holes are misaligned. Start by removing all cabinet doors, shelves, and hardware to reduce weight and avoid damage during installation. Lay the cabinet on a soft surface, and check the back panel for warping: if it bows more than 1/8" from flat, you’ll need to use thicker shims behind the cabinet to compensate. Pre-drill pilot holes through the cabinet’s back panel at the mounting points, aligning them exactly with the stud centers you marked on the wall. This prevents the cabinet back from splitting when you drive screws. If your cabinet has a top mounting rail, align your pilot holes with this rail for extra holding power.
Step 2: Position the Cabinet
If you’re working alone, screw a temporary 1×4 ledger board to the wall at your pre-marked level line, then rest the cabinet on top of the board to hold it in place while you align it. If you have a helper, have them hold the cabinet steady while you check alignment. Use your level to confirm the cabinet is perfectly straight front to back and side to side. If there are gaps between the cabinet back and wall, insert shims behind the mounting points to level the cabinet. In practice, most walls have a 1/8" to 1/4" variation in flatness, so shims are almost always required for a seamless fit.
Step 3: Secure to Wall Studs
Drive your 2.5" or 3" wood screws through the pre-drilled pilot holes in the cabinet back into the center of the marked studs. Start with the top mounting screws first, tightening them just until the cabinet is snug against the wall—do not over-tighten, as this can warp the cabinet back or strip the stud. A common mistake is screwing into the edge of the stud instead of the center, which reduces holding power by 50% per NAHB testing. Once the top screws are secure, drive the bottom mounting screws, rechecking the cabinet level after each screw to ensure it stays aligned.
Step 4: Reinforce Non-Stud Mounting Points
For cabinets longer than 24", it’s common to have mounting points that fall between studs. For these points, use 1/4" toggle bolts rated for at least 100 lbs each. Drill a 1/2" hole through the cabinet back and drywall at the mounting point, insert the toggle bolt, and tighten until the spring-loaded wings are flush against the back of the drywall. For cabinets over 100 lbs, add a heavy-duty mounting bracket between studs, anchored to the drywall with toggle bolts, then attach the cabinet to the bracket for extra support. Never use plastic drywall anchors for loads over 15 lbs, as they can pull out under dynamic weight (e.g., slamming cabinet doors).
Step 5: Final Adjustments and Finishing
Once all screws are fully tightened, remove the temporary ledger board if you used one. Recheck the cabinet level one final time, adjusting shims as needed. Fill any gaps between the cabinet and wall with paintable caulk to prevent moisture and pests from getting behind the cabinet. Reattach cabinet doors, shelves, and hardware, then wipe down the cabinet to remove any drilling dust.
If you’re also updating other kitchen fixtures during your renovation, our guide to swap out old kitchen faucets walks you through removing a wall-mounted faucet without damaging your new drywall.
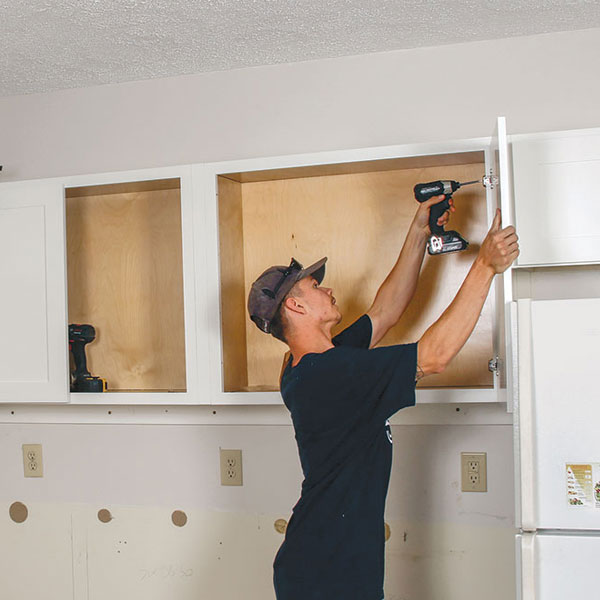 Credit: www.royalcrownrenos.ca
Properly mounted wall cabinets sit flush against the wall with no visible gaps or sagging.
Credit: www.royalcrownrenos.ca
Properly mounted wall cabinets sit flush against the wall with no visible gaps or sagging.
Troubleshooting Common Mounting Issues
Even with careful prep, you may run into minor issues during installation. These quick fixes will get your cabinets back on track:
Crooked or Uneven Cabinets
If your cabinet isn’t level after mounting, loosen the mounting screws slightly, add or remove shims behind the mounting points, then retighten. For walls with more than 1/4" of variation, use a 1×2 mounting board behind the cabinet instead of multiple shims, which can shift over time and cause sagging.
Screws Won’t Bite Into Studs
This usually happens if you drilled into the edge of a stud, or the stud is damaged by old nails. Move the pilot hole 1/2" to the left or right to hit the center of the stud. If the stud is rotten or damaged, use a 3" screw to reach the adjacent stud, or add a mounting bracket that spans across two studs for extra support.
Sagging Cabinets After Installation
Sagging is almost always caused by under-sized screws or failing to hit stud centers. First, tighten all mounting screws, then add an extra screw into a nearby stud for additional support. If the cabinet is still sagging, check that your screws are long enough to penetrate 1" into the stud—1.5" screws, a common DIY mistake, only penetrate 1/2" into a stud and cannot support heavy loads.
Stripped Screw Holes
If a screw hole in the stud is stripped, remove the screw, fill the hole with a small amount of wood glue and a wooden toothpick, let it dry, then re-drive the screw into the filled hole for a fresh grip.
Long-Term Maintenance for Secure Cabinets
Properly mounted cabinets will stay secure for decades with minimal upkeep. Follow these maintenance tips to avoid costly repairs:
- Inspect mounting points every 6 months: Check for loose screws, gaps between the cabinet and wall, or sagging. Catching small issues early prevents major damage to your cabinets and drywall.
- Tighten hardware as needed: Over time, temperature and humidity changes can loosen screws and hinges. Tighten all visible hardware with a screwdriver, and replace any rusted or stripped screws with new 2.5" wood screws.
- Avoid overloading cabinets: The recommended maximum weight per shelf is 50 lbs for cabinets anchored to studs. Avoid storing heavy items (like large cast iron cookware) on upper shelves, as the weight can pull the cabinet away from the wall over time.
- Clean carefully: Wipe cabinets with a soft, damp cloth and mild soap to avoid damaging finishes. Avoid harsh chemical cleaners that can weaken wood or metal hardware over time.
For homeowners looking to add a dedicated hosting nook to your new kitchen, at-home winemaking setups let you create custom drinks to pair with meals served from your new cabinets.
 Credit: www.youtube.com
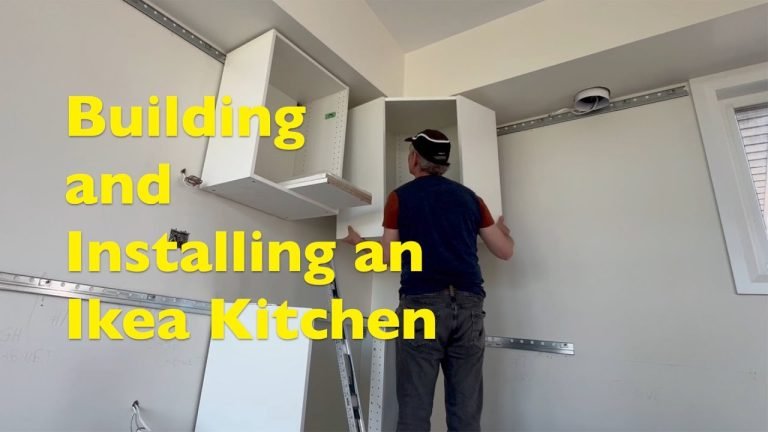
A visual walkthrough of the cabinet mounting process can help clarify alignment and screw placement steps.
Credit: www.youtube.com
A visual walkthrough of the cabinet mounting process can help clarify alignment and screw placement steps.
Frequently Asked Questions
How do you find studs behind drywall for cabinets?
Use an electronic stud finder to locate the full edge and center of each stud behind drywall. Mark both edges and the center of each stud with a pencil, then confirm the location by tapping the wall: a solid, high-pitched sound indicates a stud, while a hollow sound indicates empty drywall. Always anchor cabinets to the center of studs for maximum holding power.
What type of screws work best for drywall cabinets?
Use 2.5" or 3" wood screws, not drywall screws. Wood screws have thicker shanks and deeper threads that grip studs securely, while drywall screws are brittle and prone to breaking under heavy load. Always pre-drill pilot holes to prevent the cabinet back or stud from splitting.
Can you hang cabinets on drywall without studs?
Hanging cabinets solely on drywall is unsafe for loads over 15 lbs. If you cannot hit studs for any mounting point, use 1/4" toggle bolts rated for at least 100 lbs each, spaced 16" apart vertically, and limit total cabinet weight to 50 lbs maximum. Plastic drywall anchors are not suitable for cabinet installation, as they can pull out under dynamic weight.
How high should wall cabinets be installed?
The standard installation height is 54" from the floor to the bottom of the cabinet, which aligns with 36" standard countertop height and leaves 18" of clearance for small appliances. Adjust this height 1–2" up or down if you are significantly shorter or taller than average for comfort.
How long does it take to hang wall cabinets?
A single 30" cabinet takes 1–2 hours to install, including prep. A full kitchen set of 6–8 cabinets takes 4–6 hours with a helper, or 6–8 hours if working alone.
What weight can a properly mounted wall cabinet hold?
Cabinets anchored securely to studs can hold 100–150 lbs total, with a recommended maximum of 50 lbs per shelf to avoid sagging. Cabinets mounted only with drywall anchors have a maximum weight limit of 15–20 lbs, suitable only for very small, lightweight cabinets.
Next Steps for Your Kitchen Renovation
Once your cabinets are securely mounted, you can tackle the rest of your kitchen refresh with confidence. If you’re still finalizing your design, wall color pairings for brown cabinets offer warm, complementary options that pair perfectly with natural wood cabinetry. To stock your new hosting space, our guide to wine serving accessories has durable, stylish options for storing and displaying your favorite bottles. For homeowners who love to entertain, beginner winemaking kits make it easy to get started without expensive equipment, and upgrade your kitchen faucet is a quick swap that complements your new cabinetry.
Conclusion
Hanging wall cabinets on drywall is an achievable DIY project that cuts down on renovation costs and gives you full control over your kitchen’s layout and style. The key to a secure, long-lasting install is simple: always anchor to wall studs with properly sized screws, take the time to prep your wall and cabinet before lifting, and check your level at every step. By following the steps in this guide, you’ll avoid the common mistakes that lead to sagging, unsafe cabinets, and enjoy a professional-looking result that lasts for decades.
If you run into any issues during your installation, refer back to our troubleshooting section for quick fixes, or consult a professional if you encounter significant wall damage or structural concerns.