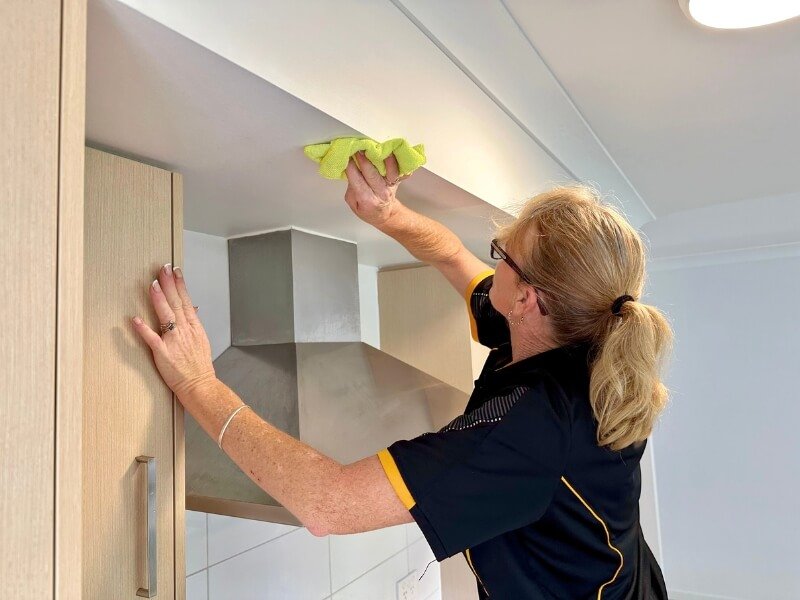
How to Clean Kitchen Walls before Painting: Easy Steps for Perfect Prep
Your kitchen sees daily splatters, baked-on grease, and humidity that leave walls coated in invisible grime — and if you skip proper prep before painting, that grime will cause peeling, bubbling, and uneven coverage within months, wasting your time and money. Whether you’re refreshing a tired space or prepping for a full kitchen remodel, learning how to clean kitchen walls before painting is the most important step to a flawless, long-lasting finish. This 2026 updated guide walks you through every step, from assessing wall condition to verifying your surface is ready for paint, with practical, experience-backed tips to avoid common DIY mistakes.
 Image source: www.thespruce.com
A degreaser wipe-down removes baked-on cooking grease that prevents paint adhesion.
Image source: www.thespruce.com
A degreaser wipe-down removes baked-on cooking grease that prevents paint adhesion.
Why Proper Wall Cleaning Is Non-Negotiable for Kitchen Paint Jobs
Kitchen walls accumulate far more residue than other rooms: cooking grease, food splatter, soap scum, and humidity-driven mold or mildew all build up over time, even if the walls look visually clean. Paint can’t adhere to these residues, leading to peeling, flaking, and stains bleeding through new paint as early as 6 months after application. Proper cleaning removes these barriers, ensures primer and paint bond fully to the drywall, and extends the life of your paint job by 5–10 years with minimal touch-ups. Skipping this step is the most common cause of failed kitchen paint projects, and it’s entirely avoidable with a few simple, low-cost steps. For more on this, see our guide on how to clean grease off kitchen walls before.
Step 1: Assess Your Wall’s Condition First
Before you start cleaning, identify all issues that need to be addressed to avoid painting over problems that will ruin your finish later.
Check for Grease and Surface Grime
Run your hand over walls, especially within 2 feet of the stove, range hood, sink, and countertops. Sticky, slick areas indicate heavy grease buildup that will prevent paint from sticking, even if the wall looks clean. Check above cabinets and near light fixtures too, where airborne grease and dust accumulate over time.
Identify Mold, Mildew, and Water Damage
Look for black, green, or white fuzzy spots near sinks, under windows, and behind appliances, and note any musty odors. Soft, bubbling drywall indicates water damage from leaks or condensation that needs to be repaired before cleaning. For EPA-approved protocols to safely remove mold and prevent regrowth, follow official EPA mold remediation guidance.
Inspect for Peeling Paint, Cracks, and Glossy Finishes
Peeling or flaking paint signals poor previous adhesion or underlying moisture issues; painting over these spots will lead to quick failure. Glossy semi-gloss kitchen paint (common in older homes) needs to be roughened up with sanding to help new paint adhere. Also check for old wallpaper residue, which will cause new paint to bubble and peel.
Note Nail Holes and Trim Gaps
Small holes from hanging decor and gaps between wall trim, baseboards, and cabinets will be visible under new paint if left unrepaired. Mark these areas to address in the repair step.
Step 2: Protect Surrounding Areas to Avoid Costly Messes
Before you start cleaning, protect all surfaces you don’t want to get wet or stained:
- Cover countertops, floors, and lower cabinets with plastic sheeting or heavy-duty drop cloths, securing them with painter’s tape to prevent shifting.
- Remove switch plates, outlet covers, and any removable hardware from walls and cabinets.
- Apply painter’s tape to trim, cabinet edges, and the tops of walls where they meet the ceiling to create clean, sharp lines.
- If you have a wall-mounted kitchen faucet, remove it temporarily to avoid water damage and clean hidden grime buildup behind it. Our step-by-step wall-mounted faucet removal guide walks you through disconnecting plumbing safely without damaging fixtures.
- Move small appliances out of the room, and cover large, non-movable appliances (like your refrigerator or dishwasher) with plastic sheeting.
Step 3: Gather the Right Cleaning Supplies and Protective Gear
Having the right tools on hand will make the job faster and more effective, and avoid damage to your walls.
Cleaners for Every Type of Grime
Not all kitchen messes require the same product, and choosing the right cleaner for your wall’s condition will save you time and avoid damage:
- Light dust and fingerprints: Warm water mixed with 1–2 teaspoons of mild dish soap
- Heavy baked-on grease: Trisodium phosphate (TSP) or a TSP substitute (mix 1/4 cup per gallon of warm water for standard grime; use 1/2 cup for stubborn, baked-on buildup near stoves)
- Mold and mildew: EPA-approved mold remover, or a 1:3 ratio of household bleach to warm water (always use in a well-ventilated area)
- Sensitive skin/respiratory concerns: Plant-based citrus degreaser (note that these may require extra scrubbing for heavy grease, but are non-toxic and low-fume) In practice, a common mistake is using undiluted cleaner, which can leave residue that interferes with paint adhesion. Always follow product mixing instructions, and test any cleaner on an inconspicuous spot (like behind a cabinet) first to check for discoloration.
Essential Cleaning Tools
- Microfiber cloths (lint-free, to avoid leaving fibers on walls)
- Soft sponges and a soft-bristle scrub brush (for scrubbing greasy spots without scratching drywall)
- Bucket for mixing cleaning solutions
- Vacuum with a brush attachment (for textured walls and hard-to-reach corners)
- Putty knife, 120-grit sandpaper, spackling compound, painter's caulk, and a drywall knife (for repairs)
- Clean, dry towels for drying walls
Protective Gear
Kitchen cleaning often involves harsh chemicals, dust, and mold spores, so protect yourself:
- Nitrile gloves (resist chemical exposure better than latex)
- Safety goggles (for TSP or mold remover use, to avoid splashes in your eyes)
- N95 mask (if sanding or treating mold, to avoid inhaling dust or fumes)
- Old clothes or a disposable apron, and non-slip shoes
Step 4: Remove Surface Dust and Loose Debris
Dust left on walls will mix with paint and create a rough, uneven finish, so this step is critical even if your walls look clean.
Dust All Horizontal Surfaces First
Start at the top of the room to avoid letting dust fall on already-cleaned areas. Dust the tops of upper cabinets, crown molding, baseboards, window sills, and light fixtures with a dry microfiber cloth or duster. Use a vacuum with a brush attachment to remove dust and cobwebs from textured walls and corners, as these areas trap more debris than smooth walls. A common oversight is skipping horizontal surfaces, which causes dust to fall onto clean walls later.
Wipe Down Wall Surfaces
Use a dry, lint-free microfiber cloth to wipe walls from top to bottom, working in 2×2 foot sections. For textured walls (like orange peel or knockdown finishes), use a soft-bristle brush to dislodge dust trapped in crevices. Don’t use a damp cloth for this step — excess moisture can cause drywall to swell, leading to uneven surfaces once dry. If you have a lot of dust, work in sections and rinse your cloth frequently to avoid spreading dirt around.
Step 5: Treat Grease and Grime Buildup
Kitchen grease is the biggest barrier to paint adhesion, so it needs targeted treatment to remove fully.
Spot-Test Your Degreaser
Before applying any cleaner to the full wall, dab a small amount on an inconspicuous spot (like behind a cabinet or behind a piece of artwork) and wait 5 minutes. If the area doesn’t discolor or damage the existing paint or drywall, you’re clear to proceed. Skipping this step can lead to permanent, irreversible stains on your walls.
Scrub High-Grease Areas
Focus on zones within 2 feet of the stove, range hood, sink, and countertops, where grease splatter and soap scum build up the fastest. Dip a sponge in your pre-mixed degreaser or TSP solution, wring out excess liquid (the sponge should be damp, not dripping), and scrub the area in small circular motions. For baked-on grease that’s been on the wall for months, let the solution sit for 2–3 minutes to break down the residue before scrubbing. Avoid saturating the wall, as excess water can seep into drywall and cause swelling or mold growth.
Rinse and Dry Each Section
After scrubbing a section, wipe it with a clean, damp cloth to remove any cleaner residue, then dry immediately with a clean, dry towel. Residue left behind will create a barrier between the wall and primer/paint, leading to peeling later. Work from the top of the wall down to avoid dirty water dripping onto already-cleaned areas.
Step 6: Eliminate Mold and Mildew Safely
Mold and mildew not only ruin paint jobs, but they also harm indoor air quality and can cause health issues if left unaddressed.
Fix Underlying Moisture Issues First
Mold grows in humid, damp conditions, so cleaning it without fixing the root cause will lead to regrowth within weeks. Before you start cleaning, check for leaky pipes under sinks, poor ventilation (install a range hood that vents outside if you don’t have one), or condensation on windows. For EPA-approved protocols to safely remove mold and prevent regrowth, follow official EPA mold remediation guidance.
Apply Mold Remover
For small spots (smaller than 1 square foot), mix a 1:3 ratio of household bleach to warm water, or use a commercial mold remover. Spray or dab the solution onto the affected area, let sit for 10 minutes to kill mold spores at the root, then scrub with a soft-bristle brush. Wear gloves, a mask, and keep windows open for ventilation to avoid inhaling fumes. For larger mold infestations (larger than 1 square foot), hire a professional mold remediation service to avoid spreading spores to other areas of your home.
Rinse and Dry Thoroughly
Wipe the cleaned area with a clean, damp cloth to remove any cleaner residue, then dry completely with a fan or by opening windows. Mold will grow under paint if the wall is even slightly damp, so wait at least 24 hours after cleaning to confirm the area is fully dry. If you have recurring mold issues, apply a mold-inhibiting primer after cleaning to prevent future growth.
Step 7: Repair Wall Imperfections
Skipping repairs will leave every crack, hole, and gap visible under new paint, ruining an otherwise perfect finish.
Fill Holes, Cracks, and Gaps
Use a putty knife to apply spackling compound to small nail holes, dents, and cracks smaller than 1/8 inch wide. For larger cracks or holes, use a patching compound designed for drywall repairs. To seal gaps between the wall and upper cabinets, baseboards, or trim, apply painter's caulk with a caulk gun, smoothing it with a damp finger before it dries. Caulking these gaps prevents paint from cracking later and creates a seamless, professional finish. Let all filler and caulk dry completely (usually 1–2 hours, depending on product) before sanding.
Sand Patched Areas Smooth
Use 120-grit sandpaper to sand patched areas, caulk lines, and any peeling paint edges until they are flush with the rest of the wall. Sand in small, circular motions to avoid creating dips or uneven spots. After sanding, wipe the wall with a damp cloth to remove dust, then let dry completely before moving to the final cleaning step.
 Image source: www.thespruce.com
Well-mixed paint applies evenly and reduces the number of coats needed for full coverage.
Image source: www.thespruce.com
Well-mixed paint applies evenly and reduces the number of coats needed for full coverage.
Step 8: Final Degreasing and Surface Readiness Check
The final cleaning step removes last traces of residue, and the readiness check ensures you don’t paint too early.
Wipe All Walls with TSP Solution
Even if you spot-cleaned grease earlier, a full-wall TSP wipe-down removes invisible residues, soap scum, and dirt that regular cleaners miss. Mix TSP according to package instructions (standard ratio is 1/4 cup TSP per gallon of warm water), wear gloves and goggles, and wipe the entire wall surface from top to bottom with a damp sponge. Wring out the sponge frequently to avoid oversaturating the wall. For users with sensitive skin or respiratory issues, a TSP substitute works equally well for most kitchen grime. For detailed safety instructions when working with trisodium phosphate, refer to University of Illinois Extension home painting safety recommendations.
Let Walls Dry Completely
Allow walls to air dry for at least 24 hours, longer in humid climates or if you cleaned moldy areas. Use fans or open windows to speed up drying, especially in windowless kitchens. A common mistake I see in DIY projects is painting over walls that are still slightly damp to the touch, which causes bubbling, peeling, and mold growth under the paint within 2–3 months. To test for dryness, run the back of your hand over the wall: if it feels cool or damp, it needs more time to dry.
Verify Surface Readiness
Once walls are dry, run a clean white cloth over the surface in random spots. If the cloth comes away dirty or stained, clean the area again. If the cloth remains perfectly white and the wall is smooth to the touch, it’s ready for primer. Primer is non-negotiable for kitchen walls: it seals the surface, blocks stubborn stains and grease from bleeding through new paint, and ensures even, consistent coverage. If you’re covering a dark wall with light paint, use a tinted primer to reduce the number of paint coats needed.
 Image source: www.thespruce.com
A stain-blocking primer creates a uniform base for paint, especially over old wallpaper or heavily stained walls.
Image source: www.thespruce.com
A stain-blocking primer creates a uniform base for paint, especially over old wallpaper or heavily stained walls.
Frequently Asked Questions
How do I prepare kitchen walls before painting?
Start by assessing the wall for grease, mold, peeling paint, and damage. Protect surrounding surfaces, remove dust, treat greasy and moldy areas, repair imperfections, clean with TSP, let dry completely, and apply a stain-blocking primer before painting.
What cleaning solution works best for kitchen walls?
For light grime, warm water and mild dish soap work well. For heavy baked-on grease, trisodium phosphate (TSP) or a citrus-based degreaser is most effective. For mold, use an EPA-approved mold remover or a 1:3 bleach:water solution. Always test cleaners in an inconspicuous spot first.
Can I paint kitchen walls without cleaning first?
No. Even walls that look clean have invisible grease, dust, and residues that prevent paint from adhering properly. Painting without cleaning leads to peeling, bubbling, and uneven coverage within months, costing you more time and money to repaint later.
How long should kitchen walls dry before painting?
Wait at least 24 hours after the final TSP cleaning, longer in humid climates or if you cleaned moldy areas. To test, touch the wall with the back of your hand: if it feels cool or damp, it needs more drying time.
Can I use vinegar to clean kitchen walls before painting?
Vinegar is safe for light grease and dirt, but it’s not strong enough to cut through heavy baked-on grease common in kitchens. For best results, use a dedicated degreaser or TSP for heavy buildup, then rinse with clean water.
Do I need to sand kitchen walls before painting after cleaning?
Only if you have glossy existing paint, peeling paint you’ve scraped off, or patched areas. Sanding roughs up smooth surfaces to help new paint adhere, and smooths out patched spots for an even finish.
Next Steps for Your Kitchen Refresh
Once your walls are prepped, primed, and painted, you can focus on finishing touches that tie the space together. If you’re still choosing a paint color, our guide to pairing paint with green cabinets offers curated palettes that balance modern and cozy aesthetics, while coordinating wall hues for brown cabinets provides warm, inviting options for traditional kitchens. If you removed a wall-mounted faucet during prep, our wall-mounted faucet removal guide includes tips for reinstallation and preventing leaks once your paint job is complete.
Conclusion
Cleaning kitchen walls before painting isn’t just an extra step — it’s the foundation of a paint job that looks flawless and lasts for years. Skipping degreasing, mold treatment, or proper drying will lead to peeling, bubbling, and costly touch-ups within months, while taking the time to follow these steps ensures your new paint adheres evenly, resists kitchen splatter, and stays fresh for a decade or more. From spot-testing cleaners to verifying surface dryness, each step is designed to eliminate barriers between your wall and fresh paint, so you can enjoy a beautiful, low-maintenance kitchen refresh that stands up to daily use. Ready to get started? Grab your supplies, protect your space, and work through each step methodically for a perfect finish you’ll love for years to come.