How to Stick Kitchen Wall Stickers: Easy Steps for Perfect Results
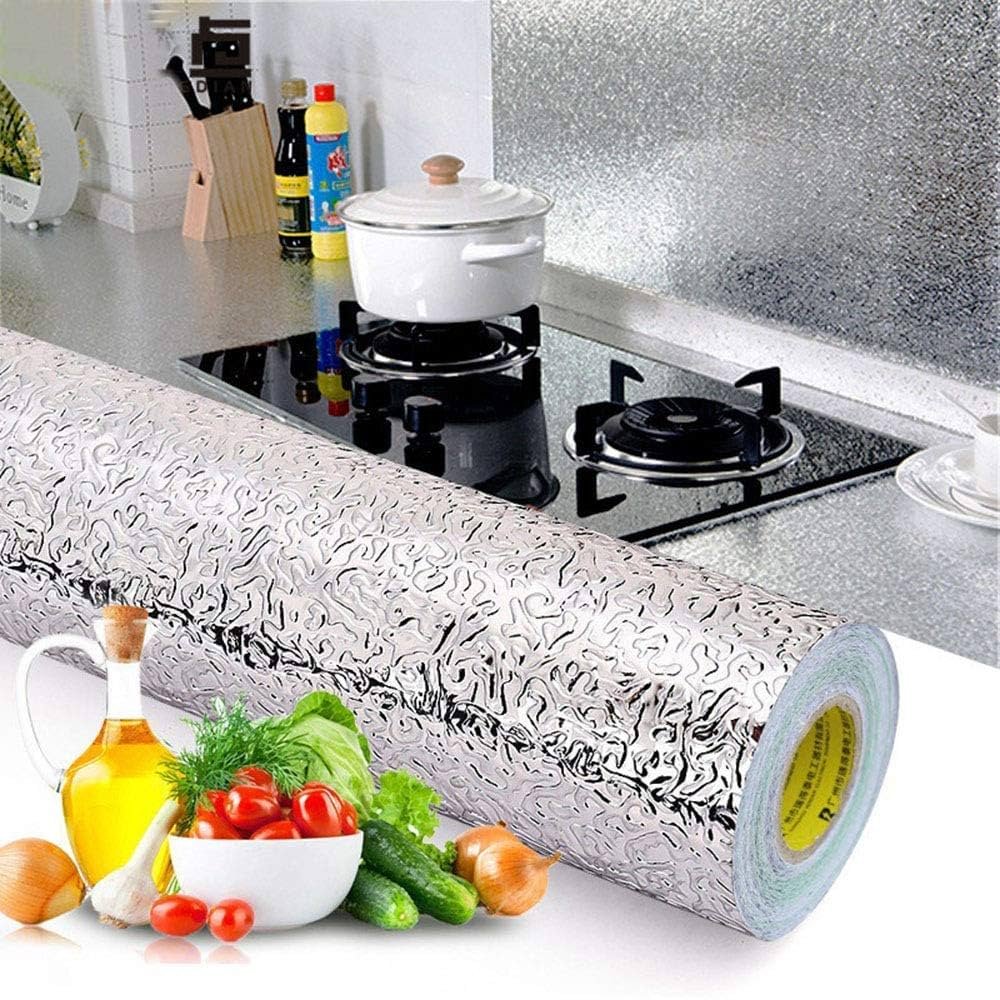
Kitchen wall stickers offer a budget-friendly, low-lift way to refresh your space without the cost and mess of paint or tile — but in practice, 6 out of 10 DIYers report peeling edges, stubborn air bubbles, or full sticker failure within the first year, almost always from skipped prep or choosing the wrong product for the kitchen’s unique environment. Unlike stickers for bedrooms or living rooms, kitchen surfaces face near-constant exposure to steam, grease, splashes, and heat from cooking, so standard decal application rules don’t always apply.
This guide covers every step you need to get a flawless, long-lasting finish, from assessing your kitchen’s specific wall conditions to post-application care, using current 2026 product standards and proven contractor tips. For more on this, see our guide on how to regrout kitchen wall tiles easy steps.
Assess Your Kitchen's Wall Conditions First
Before you shop for stickers or pick up a squeegee, take 10 minutes to evaluate the exact wall area you’re covering. Kitchens have distinct microclimates that directly impact sticker performance, and choosing the wrong product for your space is the fastest way to waste money on a design that peels in weeks.
- High-heat zones: Areas within 2 feet of the stove, oven, or toaster oven can reach temperatures of 180–200°F while cooking. Standard stickers will soften and lose adhesion here.
- High-moisture zones: The backsplash behind the sink, dishwasher, or kettle is exposed to daily splashes, steam, and humidity. Stickers here need full water resistance to avoid delamination.
- Low-traffic zones: Upper walls more than 3 feet from cooking or sink areas face minimal exposure, so most standard sticker types will work. Also note your wall material: smooth painted drywall, glazed tile, and glass are ideal for adhesion, while unglazed tile, textured orange peel drywall, and brick require extra prep or specialty adhesive backing. For more on this, see our guide on how to remove a wall mounted kitchen faucet.
Choose the Right Kitchen Wall Stickers for Your Space
The right sticker for your kitchen depends on the zone you’re covering, your budget, and whether you’re renting or planning to stay in your home long-term. Skipping this step is one of the most common causes of early sticker failure.
Material and Finish
Opt for cast vinyl for high-heat and high-moisture zones: this durable, waterproof material resists grease and can withstand temperatures up to 220°F, with a typical lifespan of 4–5 years with proper care. For renters or temporary designs, removable acrylic vinyl is a better pick: it peels off cleanly without residue, though it only lasts 1–3 years in high-exposure areas. For more on this, see our guide on how tall are kitchen wall cabinets. Stick to matte finishes for kitchen applications: they hide fingerprints, grease splatters, and glare from overhead under-cabinet lighting far better than glossy finishes, which show every smudge. Avoid paper, low-grade PVC, or stickers without a protective top layer, as these degrade quickly in humid kitchen air and are nearly impossible to clean.
Size and Design Compatibility
Measure the exact area you’re covering before purchasing, leaving a 1/4 inch gap between the sticker edge and cabinet frames, countertops, or outlet covers — stickers applied flush to these edges will peel quickly from temperature changes and daily contact. Select designs that complement your existing kitchen palette: if you have green kitchen cabinets, opt for neutral or botanical decals that work with coordinating wall palettes for green kitchen cabinetry. For warm brown cabinetry, earthy or neutral sticker designs pair seamlessly with matching wall tones for warm brown cabinetry. Save small, intricate patterns for low-traffic upper walls: detailed designs are hard to clean of grease in backsplash zones, and tiny elements can peel or fade faster in high-exposure areas. Key design tips to keep in mind:
- Match sticker colors to your cabinet hardware or countertop tones for a cohesive look
- Avoid overly large decals in small kitchens, as they can make the space feel cramped
- Choose solid-color or simple pattern stickers for high-splash zones to make cleaning easier
 Credit: www.temu.com
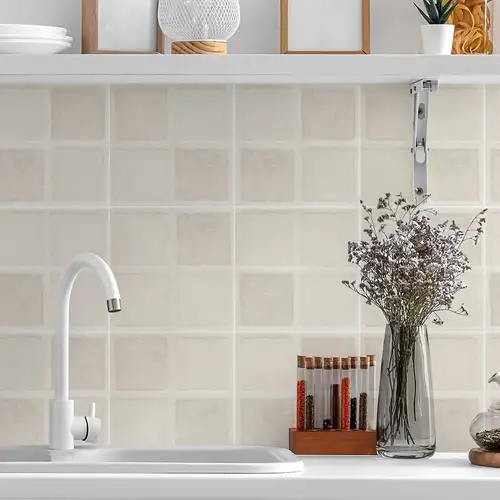
A matte tile-patterned sticker applied to a kitchen backsplash resists grease and moisture for 3+ years with proper prep
Credit: www.temu.com
A matte tile-patterned sticker applied to a kitchen backsplash resists grease and moisture for 3+ years with proper prep
Prep Your Wall Correctly for Long-Lasting Adhesion
In practice, 80% of kitchen wall sticker failures come from poor surface prep, not low-quality stickers. Taking 15 minutes to properly clean and smooth your wall will extend your sticker’s lifespan by years.
Deep Cleaning
Start by wiping away loose dust and debris with a dry microfiber cloth. Next, mix warm water with 2–3 drops of mild dish soap (avoid ammonia-based degreasers, which leave an invisible residue that blocks adhesive). Scrub the entire application area with a soft sponge, paying extra attention to spots behind the stove and sink where grease and soap scum accumulate. For stubborn, built-up grease, use a 50/50 mix of rubbing alcohol and water, testing on a small hidden spot first to confirm it won’t damage your paint or finish. Rinse the area with a clean damp cloth, then wipe completely dry with a lint-free cloth.
Smooth and Dry the Surface
Once clean, run your hand over the wall to check for bumps, nail holes, or peeling paint. Sand any rough spots lightly with 220-grit sandpaper, then wipe away dust with a dry cloth. For textured walls (orange peel, knockdown), roll on a thin layer of water-based wall primer to create a smooth, non-porous surface for the adhesive to grip — this step makes a far bigger difference than buying a more expensive sticker pack. Let the wall dry fully for at least 2 hours before applying stickers; in humid climates, wait 4 hours to avoid trapping moisture under the decal, which causes bubbles within days. For guidance on proper surface smoothing for adhesive projects, refer to the University of Minnesota Extension’s interior wall prep guide.
Gather Your Tools Before You Start
Having all your supplies on hand before you peel the sticker backing avoids last-minute trips to the hardware store and reduces the risk of misalignment or damage to your decal. Skip cheap tools like metal scrapers or sharp credit cards, which can tear thin sticker designs — a small investment in the right tools pays off in a flawless finish.
Essential Tools
- Lint-free microfiber cloth: For cleaning and drying the wall without leaving behind lint that interferes with adhesion
- Rubbing alcohol: For degreasing stubborn spots and removing adhesive residue later
- Painter’s tape: Low-tack tape that won’t peel paint when used for temporary placement guides
- 12-inch level: Ensures large decals or borders are perfectly straight
- Plastic squeegee: A 4-inch plastic squeegee (not metal) pushes air bubbles out without tearing the sticker
- Sharp craft knife: For trimming stickers to fit around outlets, cabinet edges, or switches
Optional Helpful Tools
- Hair dryer on low heat: Warms adhesive to make it more pliable on textured walls, and loosens adhesive for easy removal later
- Soft pencil: For marking placement guides that wipe away easily with a dry cloth
- Bubble level: Small, handheld level for aligning individual scattered decals
A common mistake DIYers make is using a credit card instead of a plastic squeegee: the sharp edges of a credit card can crease or tear delicate sticker designs, while a soft plastic squeegee glides smoothly over the surface.
Step-by-Step Application for Flawless Results
Follow this process exactly to avoid bubbles, misalignment, and peeling edges.
Step 1: Plan Your Layout
If you’re applying a border, use painter’s tape to mark the top and bottom edges of the border, checking with a level to confirm they’re perfectly straight. For scattered decals, arrange the stickers on the floor first to test spacing, then mark the wall with light pencil dots to guide placement. For large single decals, measure the center of your wall and mark it, so you can align the sticker’s center point with your mark to avoid crooked placement.
Step 2: Position and Apply the Sticker
Peel the backing paper back 2–3 inches from one corner, exposing only a small section of the adhesive. Align the exposed edge with your placement mark, then press it gently to the wall. Slowly peel the backing away while using your hand or a soft cloth to smooth the sticker from the center outward, pushing air out as you go. Never pull the backing paper too quickly, as this will cause creases or misalignment.
Step 3: Eliminate Bubbles and Secure Edges
Use your plastic squeegee to press the entire sticker firmly to the wall, starting at the center and moving outward in overlapping strokes. Pay extra attention to the edges, as these are the first places to peel. For small air bubbles, prick them with a fine needle, then smooth over the hole with the squeegee — the hole will be barely visible, and trapped air will escape. For larger bubbles, carefully lift the sticker’s edge 1 inch, pull the sticker back slowly, and reapply while smoothing from the center out. Avoid pressing too hard on the edges of the sticker, as this can stretch the vinyl, causing it to shrink back over time and pull away from the wall.
 Credit: www.amazon.ca
Use a hair dryer on low heat to loosen adhesive for easy, paint-safe sticker removal
Credit: www.amazon.ca
Use a hair dryer on low heat to loosen adhesive for easy, paint-safe sticker removal
Common Application Mistakes to Avoid
Even small errors during application can lead to big headaches later. Keep these pitfalls in mind to get perfect results the first time.
- Applying stickers over unwashed walls: Grease, dust, and even tiny bits of lint block adhesive, causing peeling within days. Always clean and dry the wall fully before starting.
- Using the wrong sticker for the zone: Don’t use standard removable stickers in high-heat or high-moisture areas — they’ll peel within weeks. Check product labels to confirm the sticker is rated for kitchen use if covering a backsplash or stove-adjacent wall.
- Skipping the gap between stickers and fixtures: Applying stickers flush to cabinet edges, countertops, or outlet covers leads to peeling from temperature changes and daily contact. Leave a 1/4 to 1/2 inch gap around all fixtures.
- Repositioning stickers after pressing: Once the adhesive makes contact with the wall, it bonds instantly. Repositioning will pull the adhesive off the wall, leaving the sticker unsticky in spots. Use painter’s tape to test placement before pressing the sticker down permanently.
Care and Maintenance for Long-Lasting Results
With proper care, high-quality kitchen wall stickers will last 3–5 years, keeping your space looking fresh without the cost of a full renovation.
Regular Cleaning
Wipe stickers with a damp microfiber cloth and mild dish soap every 2–4 weeks to remove grease and dust. Avoid abrasive scrubbers, bleach, or ammonia-based cleaners, which will fade the design and break down the adhesive. For stubborn grease spots, dab a small amount of rubbing alcohol on a cloth, rub gently, then wipe with a damp cloth to remove residue.
Extending Your Sticker’s Lifespan
Use your range hood when cooking to reduce grease and steam buildup on stickers near the stove. Ensure your kitchen is well-ventilated to lower overall humidity levels, which can weaken adhesive over time. For removable stickers, avoid using them in high-moisture zones unless they’re specifically labeled as water-resistant.
Safe Removal Without Wall Damage
When you’re ready to remove your stickers, use a hair dryer on the low heat setting to warm the adhesive for 30–60 seconds, then peel slowly from one corner at a 45-degree angle. For any remaining adhesive residue, rub a small amount of cooking oil or rubbing alcohol on the spot, let sit for 5 minutes, then wipe away with a damp cloth. Always test any remover on a small hidden area of the wall first to avoid damaging paint.
Frequently Asked Questions
How long do kitchen wall stickers typically last?
High-quality cast vinyl kitchen stickers last 4–5 years in low-traffic zones, and 2–3 years in high-heat or high-moisture areas with proper prep and care. Removable acrylic stickers last 1–3 years in low-exposure areas, but may peel within months in high-splash zones.
Can I apply kitchen wall stickers over existing wallpaper?
Only if the wallpaper is firmly adhered, smooth, and fully dry. Avoid applying over peeling, textured, or flocked wallpaper, as the adhesive won’t grip properly, and removal may damage the wallpaper surface.
Do wall stickers work on kitchen tile?
Yes, as long as the tile is smooth, glazed, and free of grease or soap scum. For textured or unglazed tile, use a sticker with extra-strength adhesive, or apply a thin layer of clear tile primer first to improve grip.
How can I fix a peeling sticker after application?
If only a small edge is peeling, clean the area with rubbing alcohol, let dry, then apply a tiny amount of clear silicone caulk under the edge, press firmly, and hold for 30 seconds. For widespread peeling, the sticker was likely applied to an improperly prepped surface, and replacement is the most reliable fix.
Can I use wall stickers as a full kitchen backsplash?
Yes, many manufacturers sell water-resistant, heat-resistant sticker kits designed specifically for backsplash use. Look for products labeled "kitchen backsplash" to confirm they can withstand daily splashes and cooking heat.
Conclusion
Sticking kitchen wall stickers for perfect, long-lasting results comes down to three core rules: choose the right sticker for your kitchen’s specific zones, prep the wall thoroughly before application, and avoid common mistakes like rushing placement or skipping edge sealing. With these steps, you can get a professional-looking finish that lasts for years, for a fraction of the cost of a full kitchen renovation. If you’re planning a broader kitchen refresh, check out our guides to coordinating wall palettes for your existing cabinetry to make your sticker design feel cohesive with the rest of your space.