How to Paint Your Kitchen Walls: Expert Tips for a Stunning Makeover
Tired of drab, outdated kitchen walls that drag down the whole feel of your home? Painting your kitchen walls is one of the highest-ROI DIY upgrades you can tackle, costing a fraction of a full remodel while making the space feel larger, cleaner, and more aligned with your personal style. You don’t need professional painting experience to get a flawless, long-lasting result – you just need the right prep, products, and techniques, all covered in this 2026 updated guide.
Pre-Project Planning: Set Yourself Up for Success
Skipping pre-project planning is the top cause of avoidable painting headaches, from splattered floors to wrong color choices. Spend 30 minutes prepping your space before you buy a single can of paint to cut down on wasted time and materials. For more on this, see our guide on what color to paint my kitchen walls with.
Clear and Protect the Space
Remove all small appliances, dishware, and décor from countertops and nearby shelves. Move large furniture (like kitchen tables or islands) to the center of the room, then cover it with a cotton drop cloth rather than plastic, which prevents slipping and catches paint drips better. If you have a wall-mounted kitchen faucet, removing wall-mounted faucets first will give you a cleaner edge around fixtures and avoid accidental paint splatters on metal finishes.
Choose the Right Timing
Aim to paint on a mild, low-humidity day with temperatures between 50°F and 85°F (10°C and 29°C). High humidity slows drying time and can cause paint to blister, while extreme heat can cause paint to dry too fast, leading to streaks. Avoid painting right before a big cooking session, as steam and grease will interfere with curing. For more on this, see our guide on how to choose paint color for kitchen walls.
Identify Potential Hazards
If your home was built before 1978, test for lead paint with an EPA-approved kit before sanding or scraping any existing layers. Disturbing lead paint releases harmful particles into the air, so if you detect lead, hire a certified lead abatement professional rather than tackling the job yourself.
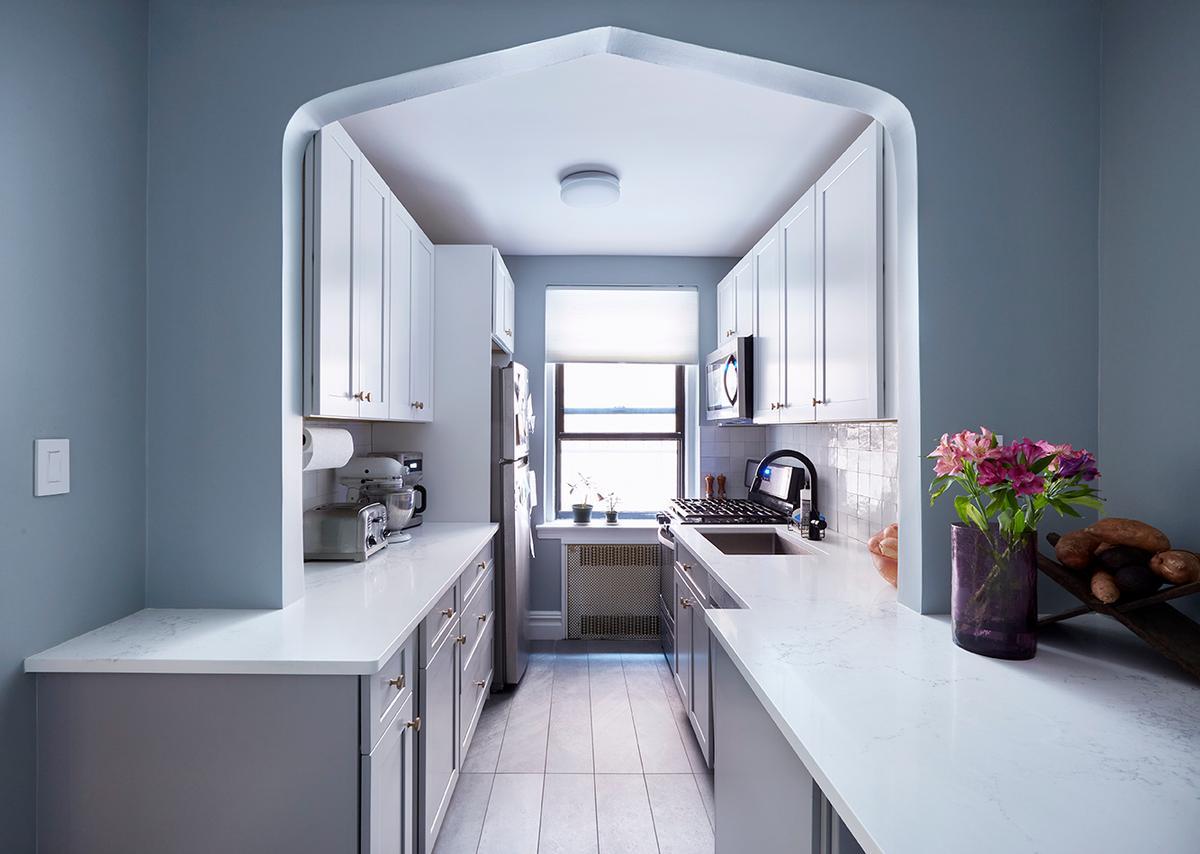 A fresh paint job costs a fraction of a full kitchen remodel and can make the space feel larger and more inviting.
Credit: www.blockrenovation.com
A fresh paint job costs a fraction of a full kitchen remodel and can make the space feel larger and more inviting.
Credit: www.blockrenovation.com
Choose the Perfect Paint for Your Kitchen
Kitchen walls face unique stressors: daily grease splatters, steam from cooking, frequent wiping, and constant foot traffic. Standard interior paint won’t hold up to these conditions, so selecting a kitchen-specific formula is non-negotiable for a long-lasting finish.
Paint Finishes Demystified
Paint sheen directly impacts durability and ease of cleaning, so pick a finish matched to your kitchen’s usage:
- Matte/Flat: No shine, excellent at hiding wall imperfections like small cracks or uneven plaster, but difficult to clean and not recommended for high-traffic kitchen walls.
- Eggshell: Subtle soft sheen, wipeable for minor messes, and works well for low-traffic kitchens or dining nooks attached to kitchen spaces.
- Satin: The most popular choice for kitchen walls, with a soft glow that resists moisture, stains, and scuffs. It’s easy to wipe down with a damp sponge for splatters or smudges.
- Semi-Gloss: High shine, extremely durable, and ideal for trim, cabinets, or walls in extremely humid kitchens (like those with no exterior ventilation). It can highlight wall imperfections, so only use it on perfectly smooth surfaces.
- Gloss: Ultra-shiny and virtually indestructible, but best reserved for cabinet doors, not walls, as it magnifies every surface flaw.
Avoid high-gloss finishes on kitchen walls unless you have perfectly smooth, new drywall, as they will make small bumps or texture variations highly visible.
Color Selection Tips for Every Kitchen Style
Color sets the tone for your entire kitchen, so test 2-3 swatches on your wall and observe them in both natural daylight and your kitchen’s artificial evening light before committing, as colors can shift dramatically under different lighting. For small, dim kitchens, light neutrals like soft white, warm cream, or pale gray reflect light to make the space feel larger. For larger kitchens with bold cabinetry, you can experiment with deeper tones like muted navy or sage green without making the space feel cramped.
If your kitchen has dark wood cabinetry, coordinating wall hues with brown cabinets like warm cream or muted sage will balance the space without feeling heavy. For kitchens with trendy green cabinetry, pairing wall colors with green cabinetry in soft white or pale terracotta creates a fresh, organic feel.
Eco-Friendly and Low-VOC Options
For households with children, pets, or respiratory sensitivities, opt for paints certified low-VOC by the EPA’s indoor air quality guidelines, which limit harmful volatile organic compound emissions and reduce lingering odors. Modern zero-VOC kitchen paints perform just as well as traditional oil-based formulas, with no trade-off in durability or stain resistance. Look for paints with added mold and mildew inhibitors if you live in a humid climate or have poor kitchen ventilation.
Wall Preparation: The Foundation of a Flawless Finish
Skipping or rushing wall prep is the most common cause of peeling, chipping, or uneven paint coverage. Even the highest-quality paint will fail if applied to an unclean, unprimed surface. A common mistake DIYers make is skipping the degreasing step, which leads to paint peeling within 6 months in high-traffic kitchens, as grease residues prevent paint from adhering properly to drywall or plaster.
Degrease and Clean Thoroughly
Kitchen walls accumulate layers of cooking grease, dust, and grime that regular soap won’t fully remove. Start by wiping down all walls with a TSP-free degreaser (trisodium phosphate is restricted in many regions due to environmental concerns) to cut through stubborn grease buildup, especially around stovetops and sink areas. For heavy, caked-on grease, let the degreaser sit for 5-10 minutes before scrubbing with a soft-bristled brush, then rinse with clean water and let the walls dry completely.
Repair Imperfections
Inspect walls for cracks, holes, peeling paint, or water damage. Fill small nail holes and cracks with a lightweight spackle, using a putty knife to smooth it flush with the wall surface. For larger holes or water-damaged areas, use a setting-type joint compound for stronger, more durable repairs. Once all patching material is dry, sand the repaired areas with 120-grit sandpaper until smooth, then wipe away dust with a microfiber cloth.
Prime for Better Adhesion and Coverage
Priming is non-negotiable if you’re painting over dark colors, stained surfaces, or unprimed drywall/plaster. A high-quality primer seals porous surfaces, blocks old stains from bleeding through new paint, and improves adhesion to extend the life of your paint job. Use a water-based latex primer for most kitchen walls, and a stain-blocking oil-based primer if you’re covering water stains or dark, saturated colors. For best results, apply primer with a roller just like you would paint, and let it dry fully (usually 2-4 hours) before painting.
 Testing paint samples in your kitchen’s natural morning light and artificial evening light prevents unexpected color shifts.
Credit: www.thespruce.com
Testing paint samples in your kitchen’s natural morning light and artificial evening light prevents unexpected color shifts.
Credit: www.thespruce.com
Essential Tools and Materials for a Professional Result
Using the right tools eliminates streaks, drips, and uneven coverage, and cuts down on your total project time. Skip the cheap, disposable supplies – investing in quality tools will pay off in a smoother finish and tools you can reuse for future projects.
Brushes, Rollers, and Edgers
Use a 2.5-inch angled sash brush for cutting in edges around cabinets, windows, and trim – the angled tip gives you precise control for clean lines. For large wall areas, choose a woven polyester roller with a nap length matched to your wall texture: ⅜-inch nap for smooth drywall, ½-inch nap for lightly textured walls, and ¾-inch nap for heavily textured plaster. A paint edger is a worthwhile add-on for getting crisp lines along ceilings and trim without painter’s tape, if you’re comfortable with the tool. For an ultra-smooth finish, add a paint conditioner to your paint can to reduce brush and roller marks, especially in humid conditions.
Protection Supplies
Painter’s tape designed for delicate surfaces (like finished wood cabinets) will prevent paint from seeping onto trim and countertops without leaving residue. Apply tape firmly to edges, and press down the edges with a putty knife for a fully sealed line. Use cotton drop cloths rather than plastic, as they absorb drips and won’t slip underfoot. Cover countertops, floors, and any remaining furniture with a double layer of protection for extra security.
Pro-Test Add-Ons
Keep a set of microfiber cloths on hand for quick cleanup of drips before they dry, and a small paint touch-up pot for any missed spots after the main job is done. Wear disposable gloves and old, paint-resistant clothing to avoid staining your regular wardrobe.
Step-by-Step Painting Process for Smooth, Even Coverage
Follow this exact sequence to avoid lap marks, streaks, and uneven coverage, even if you’ve never painted a wall before.
Step 1: Cut In Edges
Start by using your angled sash brush to paint a 2-3 inch border along all edges where the wall meets the ceiling, trim, cabinets, and outlets. Hold the brush like a pencil for maximum control, and apply thin, even coats to avoid drips. Work in 2-foot sections at a time, so the paint stays wet as you move to the next area – this prevents visible lines where wet paint meets dried paint.
Step 2: Roll Large Wall Areas
Once the edges are cut in, use your roller to cover the large wall areas in 3-foot wide sections. Roll paint onto the wall in a “W” or “M” pattern to spread it evenly, then fill in the pattern without lifting the roller to create a consistent finish. Work from the top of the wall down to avoid drips running over finished areas.
Step 3: Apply Additional Coats and Backroll
Most kitchen walls require two coats of paint for full, even coverage. Let the first coat dry completely (2-4 hours for most modern water-based paints) before applying the second coat. After rolling the second coat, go back over the entire wall with a dry roller (a process called backrolling) to smooth out any roller marks and create an even sheen across the whole surface.
Step 4: Allow Proper Curing Time
While paint may feel dry to the touch in a few hours, it takes 7-14 days to fully cure to its maximum hardness and stain resistance. Avoid wiping down walls, hanging wall decor, or exposing the walls to heavy steam or grease for at least 72 hours after the final coat. For best results, wait 2 weeks before cleaning the walls with even a mild soap.
 Moisture-resistant paint is ideal for walls adjacent to tiled backsplashes to prevent peeling from steam and splashes.
Credit: rustoleumcolours.co.uk
Moisture-resistant paint is ideal for walls adjacent to tiled backsplashes to prevent peeling from steam and splashes.
Credit: rustoleumcolours.co.uk
Post-Paint Care to Keep Your Walls Looking New
A few simple maintenance steps will keep your kitchen walls looking fresh for 5-10 years before needing a full repaint. For minor smudges or grease splatters, wipe the area with a soft sponge and mild dish soap, avoiding abrasive scrubbers that can scratch satin or semi-gloss finishes. Store any leftover paint in a sealed, labeled container in a cool, dry place (not the garage, where temperature fluctuations can ruin the formula) – it will stay usable for 2-5 years for small touch-ups. For small chips or marks, dab a small amount of paint onto the area with a fine-tipped brush, blending the edges softly to avoid visible patch marks.
Troubleshoot Common Kitchen Painting Issues
Even with careful prep, small issues can pop up during a painting project. Here’s how to fix them without starting over:
Drips, Streaks, and Uneven Coverage
Drips form when you apply too much paint at once, or paint too quickly. If you notice a drip while the paint is still wet, smooth it out with a dry brush or roller before it dries. Streaks are usually caused by uneven pressure on the roller, or painting over a dried edge – to fix, sand the streaked area smooth once dry, then apply a thin, even coat of paint. Uneven patchy coverage happens when you apply paint too thinly or don’t use enough coats – fix this by adding a thin third coat to the affected area, blending the edges into the surrounding paint.
Flashing and Hatching
Flashing is an uneven sheen that appears as darker or lighter patches on the wall, usually caused by not backrolling the second coat, or painting over a primed surface with too little paint. To fix, sand the affected area smooth and apply a thin, even coat of paint, making sure to backroll for a consistent finish. Hatching is a crosshatch pattern that appears on the wall, caused by rolling too fast over a partially dried edge. Sand the area smooth once fully dry, then repaint the section, working slowly to keep a wet edge.
Mildew and Peeling
If you notice mildew spots appearing on your newly painted walls within a few months, it’s usually because the walls weren’t properly degreased and primed with a mold-resistant primer before painting. Scrape off the peeling paint, clean the area with a bleach solution (1 part bleach to 3 parts water) to kill mildew spores, let it dry completely, then apply a mold-resistant primer and repaint the section. For widespread peeling, you may need to sand the entire wall and repaint from scratch.
Frequently Asked Questions
What type of paint is best for kitchen walls?
Satin finish paint is the best all-around choice for most kitchens, as it resists moisture, scuffs, and stains while being easy to wipe clean. For extremely humid kitchens with poor ventilation, opt for a semi-gloss finish for extra moisture resistance.
How long do I need to wait to use my kitchen after painting?
Wait at least 72 hours before exposing newly painted walls to steam, grease, or heavy cleaning. Full curing takes 7-14 days, so avoid hanging heavy wall decor or placing items directly against freshly painted walls for 2 weeks.
Can I paint over wallpaper in my kitchen?
You can paint over non-textured wallpaper if it’s fully adhered to the wall and in good condition, but you’ll need to apply an oil-based primer first to seal the wallpaper and prevent it from peeling. Textured or peeling wallpaper should be removed completely before painting for best results.
What’s the best paint color for a small, dark kitchen?
Light, cool neutrals like soft white, pale gray, or muted blue reflect light to make small, dim kitchens feel larger and brighter. Avoid dark, saturated colors, as they will absorb light and make the space feel even smaller.
Conclusion
Painting your kitchen walls is a simple, high-impact upgrade that transforms your space without the cost and hassle of a full remodel. By taking the time to properly prep your walls, choose the right paint and tools, and follow the step-by-step process outlined above, you’ll get a flawless, long-lasting finish that makes your kitchen feel new for years to come. The most important rule to remember is to never skip prep – a few extra hours of cleaning, repairing, and priming will save you hours of touch-ups and repainting down the line.
Ready to start your kitchen makeover? Grab your supplies, test a few color samples this weekend, and transform your space for a fraction of the cost of a full remodel.