How to Install Tile in Kitchen Wall: Easy Steps for Perfect Results
Dreaming of a custom kitchen backsplash or full accent wall, but intimidated by the thought of cutting tile and mixing grout? Installing tile on a kitchen wall is a beginner-friendly DIY project that costs a fraction of a professional contractor’s fee, adds value to your home, and creates a durable, easy-to-clean surface that resists grease, splatters, and moisture. This step-by-step guide walks you through every part of the process, from prepping your wall to sealing grout for long-lasting results, with tips to avoid the most common DIY mistakes. Even if you’ve never handled a tile cutter before, you can achieve professional-looking results with patience and careful planning.
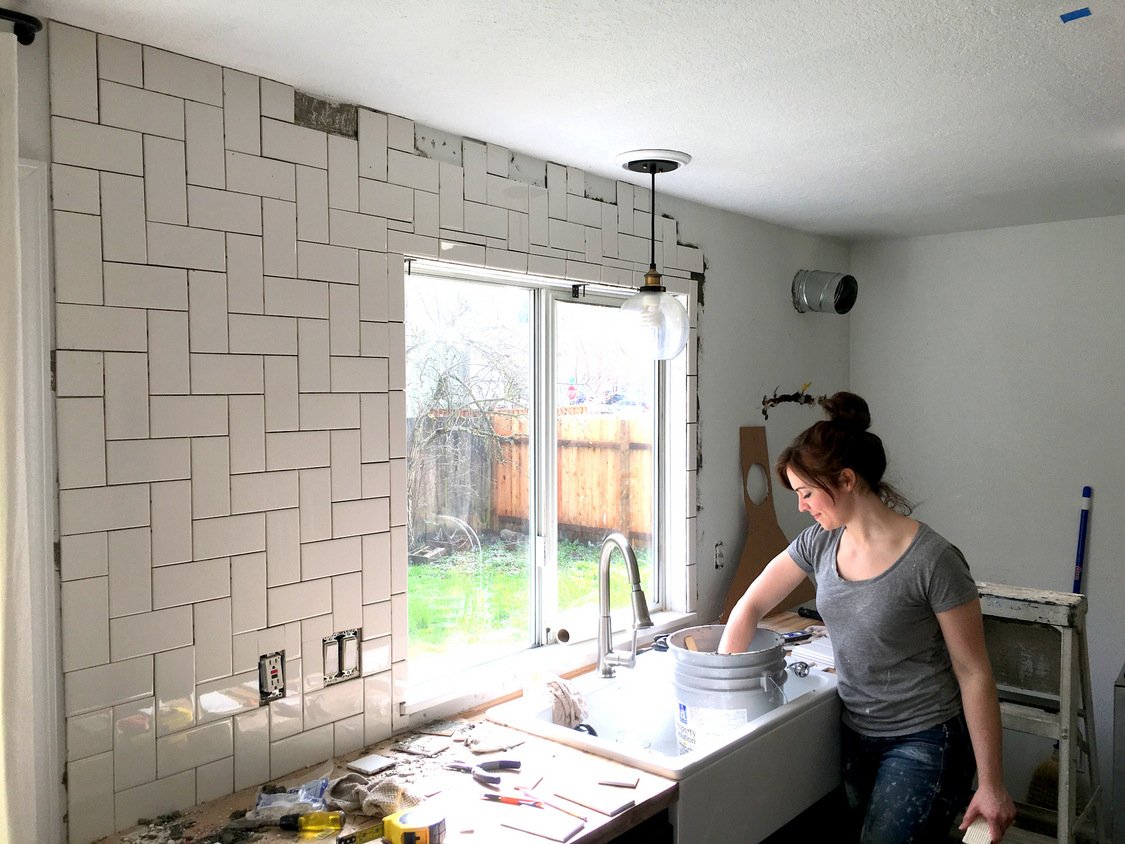
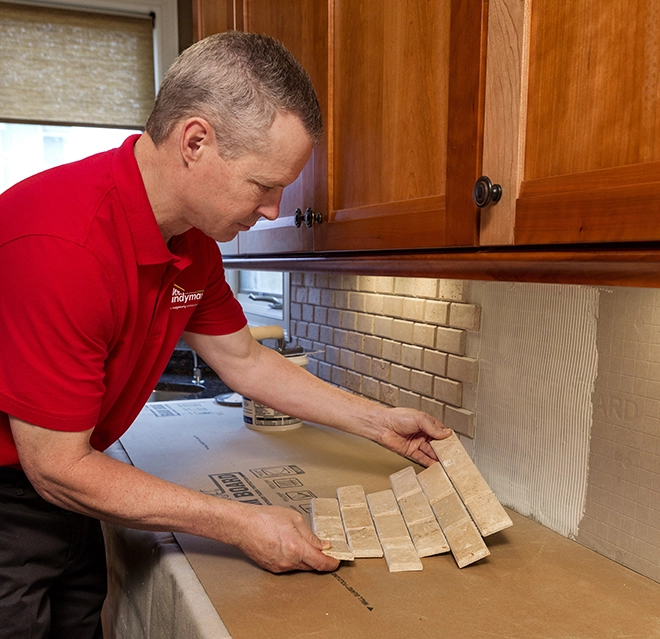 A correctly installed subway tile backsplash resists grease and moisture, making it ideal for busy cooking spaces.
Pre-Project Planning: Set Yourself Up for Success
Skipping pre-project checks is the top cause of failed DIY tile installations. Taking 30 minutes to assess your space and pick the right materials will save you hours of rework and costly repairs down the line. For more on this, see our guide on how to regrout kitchen wall tiles easy steps.
Assess Your Wall & Choose Your Tile Location
First, decide if you’re installing a standard 4–6 inch backsplash above your countertops, or a full wall that runs from the counter to the ceiling. Backsplashes can be installed over standard moisture-resistant drywall, but full-wall installations require cement board or a waterproof backer material to prevent water damage from sinks and stoves. Use a level to check your wall for flatness: gaps larger than 1/8 inch will cause tile lippage (uneven tile edges) and will need to be filled with joint compound before proceeding. Before you start tiling near your sink, safely remove your wall-mounted faucet first to avoid damaging plumbing or making awkward tile cuts around fixtures later. For more on this, see our guide on how to install ceramic tile in kitchen wall.
Pick the Right Tile for Your Kitchen
Not all tile is suited for kitchen walls. For high-splash zones near sinks and stoves, opt for tile with a water absorption rate of less than 3%: porcelain and glazed ceramic are top choices, as they resist stains and moisture without sealing. Unglazed ceramic and porous natural stone (like marble or travertine) require regular sealing to prevent water damage and discoloration, making them better for low-splash accent walls. If you have existing cabinetry, coordinating wall tones for green cabinetry or harmonizing with brown cabinetry will help you pick a tile shade that feels cohesive with your existing decor, rather than clashing. For busy households, matte-finish tile hides smudges and water spots far better than glossy finishes, while textured mosaic tiles add visual interest without showing every splash of sauce.
 Travertine mosaic tiles add natural texture to kitchen walls, but require sealed grout to prevent staining from food and liquids.
Gather Your Tools & Materials
Having everything on hand before you start will keep your project on schedule and reduce frustration. For a standard 30-square-foot backsplash, you’ll need:
- Safety gear: safety glasses, dust mask, knee pads, and work gloves
- Prep tools: TSP substitute degreaser, joint compound, sandpaper, 6-inch putty knife, chalk line, level, tape measure
- Installation tools: 1/4-inch notched trowel, tile cutter or rentable wet saw, tile nippers, rubber grout float, tile spacers (1/8 or 1/4 inch), rubber mallet, sponge, bucket
- Materials: thin-set mortar with latex additive, sanded or unsanded grout with mildewcide, 100% silicone caulk, grout sealer (for porous tile)
If you’re a beginner, stick to large-format subway tile (3×6 inches or larger) for your first project: it’s easy to cut, requires fewer awkward edge cuts, and is forgiving of minor alignment errors.
Step 1: Prep the Wall Surface for Adhesion
Proper wall prep is non-negotiable: 90% of DIY tile failures happen because the wall wasn’t clean, flat, or primed correctly.
Clean and Repair the Wall
Start by washing the entire wall with a TSP substitute degreaser to remove built-up kitchen grease—soap and water alone won’t cut through the oily residue that prevents thin-set from sticking. Rinse with clean water, then let the wall dry completely for at least 24 hours. Next, patch all holes, cracks, and loose plaster with fiberglass-reinforced joint compound: the mesh tape embedded in the compound prevents future cracking. Sand all repairs smooth until the surface is even to the touch, then wipe away dust with a damp cloth. For very porous walls (like unprimed drywall), apply a thin coat of thin-set as a bonding primer, and let it dry for 24 hours before proceeding. Finally, use a level to mark a straight horizontal chalk line 1/8 inch above your countertop or floor—this is your starting guide, and it accounts for the small gap you’ll fill with silicone caulk later, not grout, to allow for wall movement.
Mark Your Layout Lines
Measure the width of your wall and divide by the width of your tile (including grout lines) to find the center point. Mark a vertical chalk line at this center point to ensure your tile layout is balanced, with even cuts on both left and right edges. For full-wall installations, mark vertical reference lines every 2–3 tiles to keep your layout straight as you work upward.
Step 2: Apply Thin-Set Mortar & Lay Tiles
Working carefully and slowly in this step will ensure your tiles are level, evenly spaced, and stay in place for decades.
Mix and Apply Thin-Set Mortar
Read the thin-set manufacturer’s instructions carefully, and use cool water if you’re working in a warm kitchen to prevent the mortar from setting too quickly. Mix the powder into water slowly, stirring until you reach a smooth, peanut-butter consistency with no lumps. Let the mixture slake (rest) for 10 minutes, then remix before use—this step ensures the adhesive reaches its full bonding strength. For industry-standard application guidelines, the Tile Council of North America recommends working in 3-square-foot sections to prevent the thin-set from skinning over before you place tiles. Use a 1/4-inch notched trowel held at a 45-degree angle to spread the mortar on the wall, then comb the grooves in a straight, consistent pattern to create uniform ridges for the tile to grip.
Lay Tiles and Make Cuts
Press the first tile firmly into the thin-set at the intersection of your horizontal and vertical layout lines, twisting it slightly to set it in the mortar. Use 1/8 or 1/4 inch tile spacers between each tile to maintain even grout lines, and check each tile with a level as you go to avoid lippage—a common DIY mistake that makes grouting difficult and leaves uneven edges. For cuts around outlets, corners, and edges, measure twice and cut once with a wet saw for straight cuts, and use tile nippers for small, curved adjustments. When using power tools, follow OSHA safety guidelines for power tool operation, including wearing safety glasses and a dust mask to avoid inhaling hazardous silica dust. Once all tiles are laid, use a rubber mallet to gently tap each tile to ensure it’s fully embedded in the thin-set, then let the mortar cure for 24 hours before grouting—rushing this step will cause tiles to shift as you work.
 A 1/4-inch notched trowel creates uniform grooves in thin-set mortar to ensure even tile adhesion and prevent slippage.
Step 3: Grout Tiles for a Durable, Polished Finish
Grout fills the gaps between tiles, locks them in place, and prevents water from seeping behind the tile to damage your wall. Proper grouting will make your installation look professional and last for decades.
Choose the Right Grout
Select grout based on your gap width and kitchen conditions:
- Sanded grout: Best for gaps wider than 1/8 inch, as the sand additives add strength and prevent cracking. It’s the most common choice for kitchen walls.
- Unsanded grout: Ideal for narrow gaps under 1/8 inch, as it’s smooth and easy to apply without sand getting stuck in small joints.
- Epoxy grout: Highly stain and water-resistant, but has a steep learning curve for beginners and sets very quickly, so it’s not recommended for first-time projects. For color, matching grout creates a seamless, uniform look, while contrasting grout highlights your tile pattern. Always choose grout with a mildewcide additive for kitchen walls to prevent mold growth in damp conditions.
Apply and Clean Grout
Mix grout to a smooth, paste-like consistency, following package instructions. Let the mixture slake for 10 minutes, then remix before use to ensure even texture. Use a rubber grout float held at a 45-degree angle to press grout into the tile joints, working in small 2×2 foot sections and moving diagonally across tiles to avoid pulling grout out of the gaps. After 10–15 minutes, the grout will start to set. Wipe excess grout off the tile surface with a damp sponge, rinsing the sponge frequently to avoid spreading dried grout on the tile. After 1 hour, polish the tiles with a dry microfiber cloth to remove any remaining grout haze. Let the grout cure fully for 72 hours before exposing it to moisture or heavy use.
Step 4: Finishing Touches for Long-Lasting Results
These final steps will protect your installation from wear and tear and keep it looking new for years.
Seal Grout and Caulk Perimeter Edges
Once the grout is fully cured, apply a penetrating grout sealer with a small brush or applicator, covering all grout lines evenly. Wipe off any excess sealer immediately to avoid staining the tile, and let it dry for 24 hours before use. Reapply sealer every 1–2 years for high-traffic kitchens to maintain stain resistance. For all perimeter edges (where tile meets the countertop, backsplash meets the wall, and around outlets), use 100% silicone caulk instead of grout. Silicone is flexible, accommodating natural wall and cabinet movement without cracking, and is fully water-resistant to prevent mold growth behind the tile.
Clean and Maintain Your Tile Wall
Clean the tile surface with warm water and mild dish soap—avoid abrasive cleaners, as they can scratch glazed tile and wear down grout over time. For stained grout, use a baking soda paste and soft-bristle brush instead of bleach, which can discolor colored grout. Wipe down the tile and grout weekly to prevent grease and dirt buildup, and inspect the grout annually for cracks or discoloration. Small repairs, like re-sealing grout or re-caulking edges, take less than an hour and will extend the life of your installation by years.
Common DIY Tile Installation Mistakes to Avoid
Even experienced DIYers run into these avoidable errors:
- Skipping thorough wall prep: Grease, dust, and uneven surfaces prevent thin-set from bonding, leading to tiles falling off months after installation.
- Not using tile spacers: Skipping spacers leads to uneven grout lines that look unprofessional and are harder to clean.
- Rushing cure times: Thin-set needs 24 hours to reach full strength, and grout needs 72 hours before exposure to moisture. Rushing this step is the top cause of cracked grout and loose tiles.
- Using the wrong grout type: Sanded grout in narrow gaps will crack, while unsanded grout in wide gaps will crumble over time.
- Forgetting perimeter caulk: Using grout instead of silicone at edges allows water to seep behind the tile, causing mold and drywall damage.
Frequently Asked Questions
How do I prepare the kitchen wall for tiling?
Start by removing all grease, dirt, and old adhesives using a TSP substitute degreaser, not just soap and water. Patch all holes and cracks with fiberglass-reinforced joint compound, sand smooth, and wipe away dust. For full-wall installations over drywall, install a cement board backer first for extra moisture resistance. Let all repairs dry completely for at least 24 hours before applying thin-set.
What tools do I need to install kitchen wall tiles?
Core tools include a notched trowel, tile cutter or rentable wet saw, rubber grout float, tile spacers, level, tape measure, and safety gear (safety glasses, dust mask, knee pads). For materials, you’ll need thin-set mortar, grout with mildewcide, silicone caulk, and grout sealer if using porous tile like natural stone.
How long does a kitchen wall tiling project take?
For a standard 30-square-foot backsplash, expect 1–2 days for active work, plus 24 hours for thin-set curing and 72 hours for grout curing before sealing. Full-wall installations (counter to ceiling) may take 3–4 days of active work, with the same curing timelines. In practice, cool, damp kitchens may require an extra 12 hours of cure time, so plan accordingly to avoid rushed work.
Can I tile over existing kitchen tiles?
Yes, if the existing tiles are fully adhered, flat, and free of cracks or loose areas. Clean the old tiles thoroughly with a degreaser, scuff the surface with 120-grit sandpaper to improve adhesion, and use a tile-on-tile thin-set mortar. Avoid tiling over more than one layer of existing tile, as the added weight can cause wall failure over time.
Conclusion
Installing tile on your kitchen wall is a rewarding, budget-friendly DIY project that transforms your space and adds long-term value to your home. With careful prep, patience during curing, and attention to detail, even first-time tilers can achieve professional, durable results that stand up to daily cooking and cleaning. Don’t be afraid to take your time with each step—rushing is the fastest way to make avoidable mistakes. Ready to get started? For more kitchen design inspiration, check out our guides to coordinating wall tones for green cabinetry and harmonizing with brown cabinetry to pick the perfect tile shade for your space.