How Far from Wall Should Recessed Lights Be in Kitchen: Expert Guide
Planning a kitchen renovation or updating your existing lighting? Getting the distance between recessed lights and your kitchen walls right is one of the most impactful choices you’ll make for the space. Too close, and you’ll end up with harsh glare, dark shadows across countertops, and a cramped, uneven feel. Too far, and you’ll have dim work zones, underlit corners, and a space that feels dim even with all fixtures turned on.
The right placement doesn’t just improve how your kitchen looks—it makes food prep safer, reduces eye strain while cooking or cleaning, and even boosts your home’s resale value by making the space feel bright and welcoming. This guide breaks down exact measurements, factors that adjust those numbers, zoning rules for different kitchen tasks, and common mistakes to avoid, all based on current 2026 industry best practices.
The Baseline Rule for Recessed Light Wall Distance in Kitchens
Standard Minimum and Maximum Distances
For most standard residential kitchens with 8-foot ceilings and 4- or 6-inch LED recessed cans, the ideal distance from the wall is 12 to 24 inches. This range is designed to eliminate harsh shadows along the base of the wall, evenly illuminate countertop workspace, and avoid glare off glossy cabinet faces or backsplash tile.
The exact distance within that range depends on your priorities: if you prioritize bright task lighting for food prep, lean toward the 12–18 inch end of the range. If you’re prioritizing even ambient light across the whole room, 18–24 inches works best. A common rule of thumb to tie wall distance to overall fixture spacing: the distance between each recessed light should be equal to twice the distance from the wall to the first fixture. For example, if your first light is 18 inches from the wall, the next should be 36 inches from that first fixture, or 4.5 feet from the wall, to maintain even coverage. For a 10-foot-wide kitchen with 8-foot ceilings, this layout would place the first can 18 inches from each side wall, with subsequent fixtures spaced 4 feet apart to fill the center of the room.
How Ceiling Height Changes the Baseline
If your kitchen has 9-foot or higher ceilings, you can extend the maximum wall distance to 30 inches, as light spreads further as it falls from a greater height. For 10-foot or vaulted ceilings, work with a lighting professional to adjust placement and aim, as standard downlights may not reach work areas effectively without adjustable trim.
 This diagram illustrates the standard 12–24 inch wall distance and even spacing between fixtures for optimal kitchen lighting.
Credit: lednetwork.ca
This diagram illustrates the standard 12–24 inch wall distance and even spacing between fixtures for optimal kitchen lighting.
Credit: lednetwork.ca
Key Factors That Adjust Your Ideal Wall Distance
No two kitchens are identical, so these variables will shift your ideal placement outside the standard 12–24 inch range:
| Factor | Adjustment to Wall Distance | Real-World Example |
|---|---|---|
| 9+ foot ceilings | Add 6–12 inches to the standard range | 18–30 inches from wall instead of 12–24 |
| 12-inch deep upper cabinets | Place lights 18–24 inches from wall to light the counter, not the cabinet face | 12 inches will cast light on the cabinet, leaving the counter dim |
| Dark matte walls or cabinets | Subtract 2–4 inches from the standard range | 10–20 inches from wall to bounce light off the surface and avoid a dim feel |
| Adjustable eyeball trim | Can use as close as 10 inches from wall | Aim the fixture directly at the countertop for targeted task lighting |
| Glossy backsplash or countertops | Add 2–3 inches to the standard range to reduce glare | 14–26 inches from wall to avoid harsh reflections off shiny surfaces |
In practice, 18 inches from the wall is the sweet spot for most 8-foot ceiling kitchens with standard 12-inch upper cabinets, as it balances task lighting for countertops and even ambient light across the whole room. If you have a galley kitchen with limited space, you may need to push lights to 12 inches from each wall to avoid dark zones along the central walkway. Wall color also plays a role: if you have dark cabinetry or green cabinet wall pairings, you’ll need to place lights 1–2 inches closer to the wall to bounce light off the surface. Similarly, if you’ve opted for brown cabinet wall pairings with warm, light wall finishes, you can use the full 24-inch maximum without losing brightness.
Zoning Your Kitchen: Wall Distance Rules for Every Use Case
Modern kitchen lighting relies on layering three types of light: task, ambient, and accent. Each zone has different wall distance requirements to function effectively.
Task Lighting for Countertops, Sinks, and Cooktops
Task lighting is the most critical for kitchen function, as it illuminates the spaces where you chop, mix, clean, and cook. For these zones, place recessed lights 12–18 inches from the wall, positioned directly above the work surface. If you have upper cabinets, place the fixture between the front edge of the cabinet and the back edge of the counter, so the light falls on the workspace rather than the cabinet face. For island peninsulas, place recessed lights 12–18 inches from the edge of the island to avoid glare while working. If your recessed layout falls near a sink or wall-mounted kitchen faucet, keep lights at least 18 inches from the fixture to avoid glare off wet surfaces.
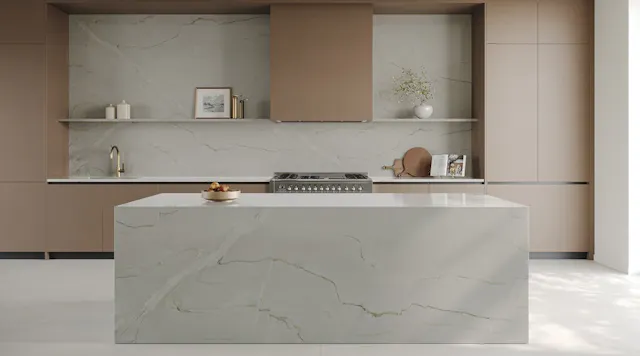 Properly spaced recessed lights eliminate shadows on countertops and highlight design features like tile backsplashes.
Credit: www.probuilder.com
Properly spaced recessed lights eliminate shadows on countertops and highlight design features like tile backsplashes.
Credit: www.probuilder.com
Ambient General Lighting
Ambient lighting fills the whole kitchen with soft, even illumination to eliminate dark corners and make the space feel open. For these fixtures, place them 18–24 inches from walls, spaced evenly across the ceiling using the "twice the wall distance" spacing rule outlined earlier. If you have a small galley kitchen, you may need to place ambient lights as close as 12 inches from each wall to avoid dark zones along the walkway.
Accent Lighting for Design Features
Accent lighting highlights design elements like tile backsplashes, open shelving, artwork, or glass-front cabinets. For these fixtures, place them 6–12 inches from the wall, and use a narrow beam angle (30–40 degrees) to focus light directly on the feature without spilling into the rest of the room. If you’re highlighting a tall cabinet or piece of art, you can place the light up to 18 inches from the wall to cover the full height of the feature. Keep in mind that dedicated accent lights may create slightly uneven ambient lighting in that zone, which you can fix with a small under-cabinet light to fill the gap.
Common Placement Mistakes That Ruin Kitchen Lighting
Even small placement errors can lead to frustrating, inefficient lighting. Avoid these common pitfalls:
Too Close to Walls: Glare and Dark Central Zones
Placing recessed lights less than 12 inches from the wall creates harsh "wall wash" that leaves the center of the room dim, and causes glare off glossy surfaces like tile backsplashes or stainless steel appliances. In practice, this mistake is easy to make when you’re working with a small kitchen and trying to fit as many lights as possible, but it will leave you squinting while prepping food.
Too Far From Walls: Shadowed Work Areas and Wasted Light
Lights placed more than 24 inches from the wall (for standard 8-foot ceilings) leave dark shadows along the base of the wall, under upper cabinets, and on countertops. This forces you to add extra under-cabinet lights or portable task lights to compensate, increasing your energy use and clutter. It also makes your kitchen feel smaller and less inviting, as corners and edges fall into shadow.
Ignoring Layout Obstructions
Failing to account for ceiling joists, exposed beams, or HVAC vents when planning your layout will lead to lights that are blocked or misaligned. For example, if you have a wooden beam running across your ceiling, you’ll need to adjust your placement so the light isn’t cast in shadow by the beam, or use adjustable trim to aim the light past the obstruction.
Step-by-Step Installation Tips for Perfect Placement
Proper installation ensures your carefully planned layout translates to real-world performance:
Plan Your Layout Before Cutting Holes
Map out your kitchen’s work zones first: mark where your sink, cooktop, prep areas, and high-traffic walkways are, then place lights to prioritize those areas. Use a floor plan to mark fixture locations before you cut any holes in your ceiling, to avoid costly mistakes if you need to adjust placement.
Use Precise Marking Tools
Skip the tape measure alone—use a laser level to mark all fixture locations to ensure they’re perfectly aligned, even if your ceiling is slightly uneven. For sloped or vaulted ceilings, use a template designed for sloped applications to mark placement, and invest in adjustable sloped ceiling trim to aim lights down onto work areas.
Test Your Layout Before Finalizing
Install the recessed cans without the trim or bulbs, turn on a work light to simulate final illumination, and walk through the kitchen at night to check for shadows or glare. Adjust placement by 1–2 inches if needed before you install the trim and finish the ceiling. This small step will save you from having to patch and re-cut holes later.
Energy Efficiency and Fixture Pairings for Optimal Performance
Choosing the right fixtures and bulbs for your placement will improve performance and reduce energy costs:
Match Beam Angle to Wall Distance
For lights placed 12–18 inches from the wall (task zones), use a wide beam angle (60+ degrees) to spread light evenly across the countertop. For lights placed 18–24 inches from the wall (ambient zones), a medium beam angle (40–60 degrees) works well to fill the room without hot spots. For accent lights 6–12 inches from the wall, use a narrow beam angle (30–40 degrees) to focus light on your design feature.
Bulb and Dimmer Selection
U.S. Department of Energy guidance on LED lighting reports that LED recessed lights use up to 75% less energy than traditional incandescent models, with lifespans 25 times longer, making them the standard for modern kitchen renovations. Opt for dimmable LED bulbs paired with a compatible LED dimmer switch to adjust brightness for different tasks: bright, cool white (4000K) for food prep, and warm white (2700K-3000K) for ambient lighting during meals or gatherings. Industry standards for residential kitchen lighting, published by the Illuminating Engineering Society kitchen lighting standards, recommend 30–50 foot-candles of illumination for general task areas, a benchmark you can hit with proper recessed placement.
Frequently Asked Questions
How far should recessed lights be from kitchen walls?
For most standard kitchens with 8-foot ceilings and 4- or 6-inch LED recessed cans, the ideal distance from the wall is 12 to 24 inches. This range balances countertop illumination, eliminates harsh wall shadows, and avoids glare off glossy surfaces. For 9-foot or higher ceilings, you can extend this to 18–30 inches, as light spreads further from a greater height.
How far from the wall should recessed lights be with 12-inch deep upper cabinets?
Place recessed lights 18–24 inches from the wall, positioned between the front edge of the upper cabinet and the back edge of the countertop. This ensures light falls on the workspace rather than the cabinet face, eliminating shadows while you prep food.
Does recessed light size change the recommended wall distance?
Yes. Smaller 4-inch recessed cans can be placed as close as 12 inches from the wall, as they produce a more focused light output. Larger 6-inch cans should be placed at least 18 inches from the wall to avoid harsh glare, as they cast a wider beam of light.
Can recessed lights be too close to kitchen walls?
Yes. Placing lights less than 12 inches from the wall creates harsh glare, dark shadows in the center of the room, and wasted light that illuminates the wall rather than your workspace. If you have limited ceiling space, use adjustable eyeball trim to aim the light away from the wall and onto the countertop.
How do I adjust placement for a galley kitchen?
Galley kitchens have narrow walkways between countertops, so place recessed lights 12–18 inches from each side wall, spaced 3–4 feet apart down the center of the ceiling. This avoids dark zones along the walkway while eliminating glare off countertops on both sides.
What if I have a sloped ceiling?
For sloped ceilings, place recessed lights 12–18 inches from the highest point of the wall, and use adjustable sloped ceiling trim to aim the light directly down onto work areas. Avoid placing lights too close to the low point of the ceiling, as they will cast uneven shadows across the room.
 Galley kitchen layouts require adjusted spacing to avoid dark zones along the central walkway.
Credit: www.reddit.com
Galley kitchen layouts require adjusted spacing to avoid dark zones along the central walkway.
Credit: www.reddit.com
Final Tips for a Bright, Functional Kitchen
Getting recessed light placement right is one of the easiest ways to transform your kitchen’s functionality and feel. Stick to the 12–24 inch baseline wall distance for standard ceilings, adjust for your specific layout and work zones, and test your layout before finalizing installation to avoid costly rework.
If you’re completing a full kitchen refresh, start by mapping your recessed layout early in the renovation process to align with other upgrades like wall-mounted kitchen faucet installation or green cabinet wall pairings to create a cohesive, well-lit space. For more guidance on kitchen design, explore our resources on brown cabinet wall pairings, home wine making tools for beverage station upgrades, and commercial-grade wine making equipment if you’re adding a dedicated drink prep area to your kitchen. For those who love hosting, proper lighting also makes the space perfect for pasta making and wine tasting events with friends and family.
By following these guidelines, you’ll create a kitchen that’s bright, functional, and welcoming for every task, from morning coffee to late-night snack prep.