How to Clean Outdoor Tableware: Easy Steps That Work
How to clean outdoor tableware starts by identifying the material, wood, metal, glass, or resin, then choosing a cleaner matched to that surface. Use a mix of warm water and mild dish soap with a soft brush for routine grime. Tackle stubborn stains with targeted solutions like vinegar for mineral deposits or hydrogen peroxide for mildew.
Always rinse thoroughly and let everything dry completely before reassembling cushions or moving furniture back into place.
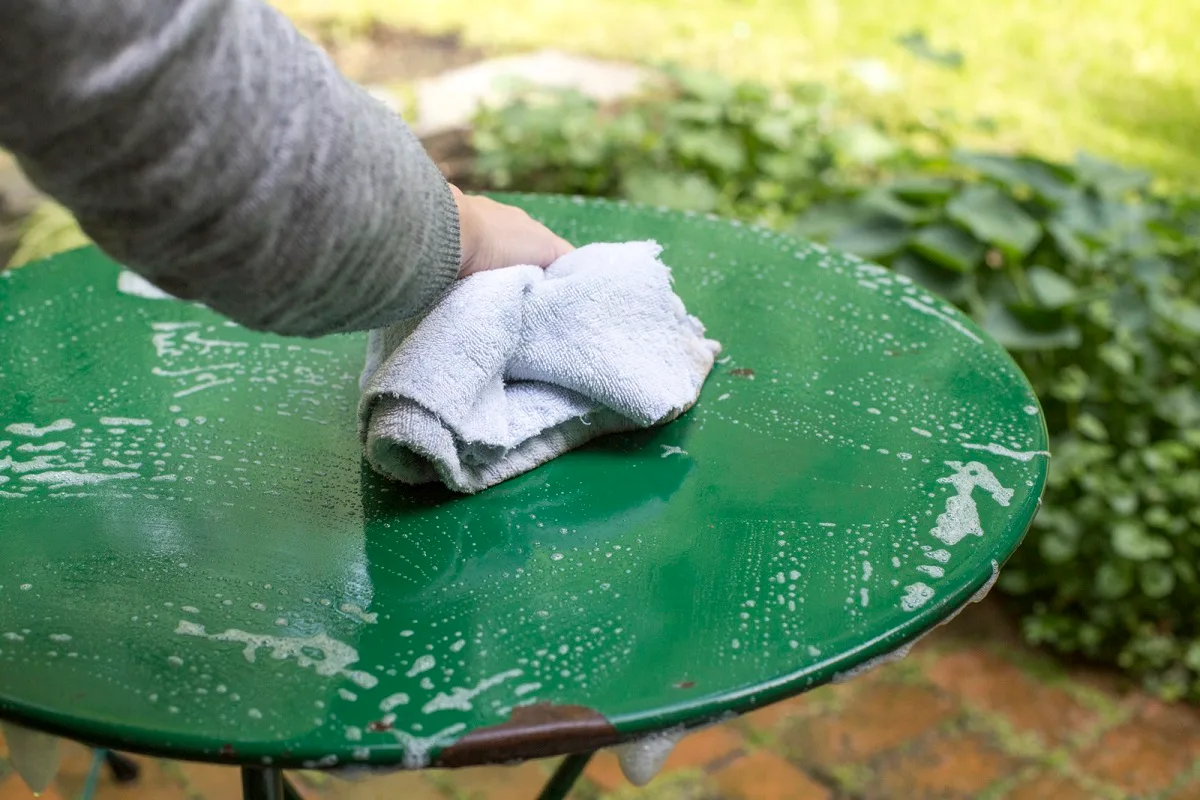
Image source: Bing (Web (fair-use with source credit))
The First Thing You Need to Know (Before You Touch a Sponge)
Most people reach for the strongest cleaner they have and assume that's the way forward. That instinct is usually wrong. Different outdoor materials react very differently to chemicals, pressure, and abrasion.
A method that revives one table can permanently damage another sitting three feet away on the same patio.
The smart move is figuring out exactly what you're working with before you apply anything. Once you know the material, the rest of the process becomes much simpler, you pick the right tool, the right cleaner, and the right technique. Getting that first step right saves time, money, and a lot of frustration down the road.
Why Your Material Changes Everything
Outdoor tableware spans several distinct families of material, and each one carries its own cleaning rules. Teak and other solid woods absorb moisture and can warp or split if saturated. Powder-coated aluminum resists rust but scratches easily under abrasive action.
Resin wicker traps dirt deep inside its weave and needs gentle agitation rather than force. Glass handles harsher cleaners but shows every fingerprint and water spot if left to air-dry.
If you treat all surfaces the same way, you'll inevitably wreck something. The cost of a mistake, a stripped finish, a warped plank, a clouded glass top, far outweighs the fifteen seconds it takes to identify the material correctly.
The 30-Second Identification Test
You don't need a degree in materials science to figure out what you're dealing with. Try these quick checks in order:
- Look at the underside or the rim for a brand label or model number. Manufacturers often stamp this right into the frame.
- Feel the surface. Is it warm and smooth like plastic resin? Cool and metallic to the touch? Grainy and organic like wood?
- Tap it lightly. Metal rings. Wood thuds. Glass ping's clearly.
- Check for visible grain patterns. Real wood has irregular grain lines that continue around edges and corners. Synthetic wicker has repeating woven patterns.
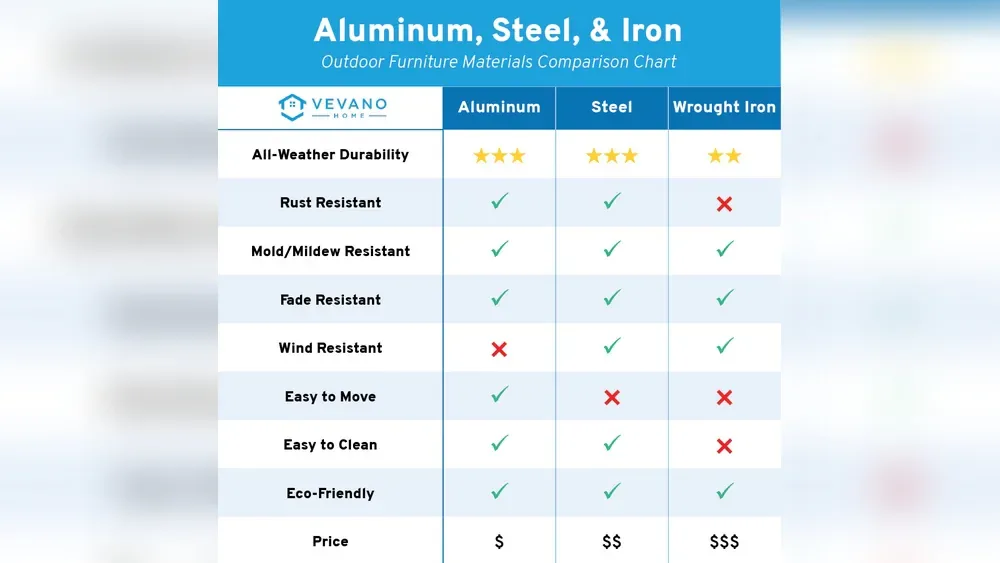
Image source: Bing (Web (fair-use with source credit))
When to Stop and Call a Pro Instead
Some situations go beyond a basic clean. If your teak table has deep cracks or the finish is flaking off in large patches, sanding and re-oiling may be the only real fix. Wrought iron that's actively rusting through, not just surface orange spotting, might need professional restoration.
And if you're cleaning an expensive dining set built from mixed materials, checking the manufacturer's care instructions should be your first step before reaching for any product.
When in doubt, start gentle. You can always escalate the cleaning strength later. Once you strip a finish or gouge a surface, there's no going back.
How to Clean Your Outdoor Tableware by Material
This is where the decision tree really branches. Pick the right path based on what you identified in the previous section, and follow the steps specific to that material. Skipping ahead or mixing methods is what causes most DIY failures.
Teak and Solid Wood Tables
Teak is famously durable outdoors because of its natural oils. Those same oils are why teak behaves differently from every other material on this list. Harsh chemicals strip those oils away and leave the wood dry, brittle, and prone to cracking.
Use warm water mixed with a small amount of mild dish soap, about one tablespoon per bucket. Scrub gently with a soft-bristle brush following the grain direction. For darker stains or weathered grey patina, a dedicated teak cleaner works better than soap alone.
Apply it, let it sit for the time specified on the label, then rinse thoroughly. Never let cleaning solution dry on the wood surface.
After the table dries completely, applying a teak sealer or oil every six to twelve months keeps the colour rich and slows weathering. Unsealed teak turns silver-grey naturally over time, which some people prefer. That's a personal choice, not a failure.
Aluminum and Powder-Coated Metal
Aluminum won't rust, but it does scratch and dull. Powder-coated finishes add an extra protective layer that makes cleaning easier but still requires care. Abrasive pads, steel wool, and harsh scouring powders will mar that coating permanently.
A simple soap-and-water solution handles most everyday dirt on aluminum. For baked-on food residue or sticky sunscreen buildup, let the soapy water sit on the spot for five to ten minutes before gently scrubbing. Rinse with a hose on a medium setting, no pressure washer needed.
White spots from hard water minerals are common and annoying. A fifty-fifty mix of white vinegar and water applied with a cloth lifts those cleanly without damaging the finish. Buff dry with a microfiber towel to prevent new spots from forming.
Resin Wicker and Synthetic Rattan
Resin wicker is everywhere on outdoor patios because it's lightweight and low-maintenance. That woven texture is also its downfall, dirt, pollen, and leaves pack into the gaps and harden over time.
Fill a bucket with warm soapy water and use a soft brush or even an old toothbrush to work the solution deep into the weave. Work in small sections so the soap doesn't dry before you can rinse it out. A garden hose with a spray nozzle makes rinsing far easier than pouring bucket water over the furniture.
Let resin wicker dry completely before putting cushions back on. Trapped moisture inside the weave leads to mould growth that's much harder to remove later.
Glass Table Tops
Glass is straightforward to clean but demanding when it comes to finishing. Fingerprints, water spots, and streaks show instantly on a transparent surface, so the drying step matters more here than anywhere else.
Use a standard glass cleaner or a vinegar-and-water mix. Spray it on, wipe with a microfiber cloth in an S-pattern to avoid re-depositing dirt, then buff with a dry cloth until clear. Avoid paper towels, they leave lint and tiny scratches that accumulate over time.
If your glass top has a stone or wooden base, protect those materials from overspray and runoff during the cleaning process.
Tackling the Stains That Actually Show Up Outside
Routine cleaning keeps most problems away. But outdoor dining throws a lot at your tableware that normal washing doesn't handle well. Wine spills, barbecue grease, bird droppings, and morning dew all leave behind marks that need targeted treatment.
Wine, Coffee, and Tannin Rings
Tannin stains appear as reddish-brown circles left by wine glasses, coffee mugs, or flower vases sitting on a surface too long. On sealed wood and glass, they're usually surface-level and come out fairly easily.
Make a paste from baking soda and a small amount of water. Spread it over the ring, let it sit for ten minutes, then gently rub with a soft cloth in a circular motion. Wipe away the residue with a damp cloth and dry the area immediately.
On unsealed wood, act faster, tannins penetrate quickly and become permanent if soaked in.
Grease, Oil, and Sunscreen Buildup
Grease stains on outdoor tables are surprisingly persistent. They attract dust, darken the surface, and feel sticky to the touch. Sunscreen and bug spray create a similar problem, a gummy film that regular washing can't shift.
Sprinkle baking soda directly onto the greasy spot. Pour a small amount of dish soap over the baking soda to activate it. Let the mixture sit for fifteen minutes, then scrub with a soft brush.
The baking soda lifts the oil while the soap breaks it down. Rinse thoroughly and dry.
This method works on wood, metal, and glass. Avoid using undiluted degreasers on any finished surface unless the manufacturer explicitly says it's safe.
Mildew and Green Algae Spots
Mildew loves damp, shaded corners of patio furniture. It appears as black or dark green patches that smell musty and refuse to budge with plain soap and water. The CDC recommends standard guidance for household mould, see their resources on mould remediation for background on why prompt removal matters.
Mix one part household bleach with three parts water. Apply with a spray bottle or sponge, let it sit for five minutes, then scrub gently and rinse completely. Never mix bleach with vinegar or ammonia, that creates toxic gas.
Work in a ventilated area and wear gloves.
For a bleach-free option on lighter-coloured furniture, hydrogen peroxide at three percent concentration does the job safely and breaks down into water and oxygen after use.
Rust Stains on Neighbouring Surfaces
Rust from wrought iron chairs can bleed onto wooden tables, stone pavers, and fabric cushions. Once that orange staining sets in, it's difficult to reverse. Prevention beats cure every time.
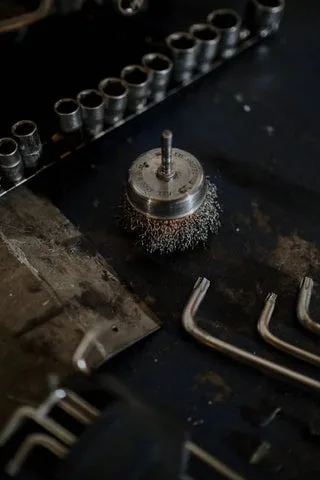
Image source: Web (Bing) / sihandrails.com (Web image (fair-use with source credit))
If rust has already stained another surface, try a commercial rust remover gel applied according to the product instructions. On wood, light sanding after the rust chemical lifts the stain often removes the last traces. On glass or sealed stone, a paste of cream of tartar and a few drops of lemon juice can help lift discolouration.
Never ignore active rust on iron furniture. A little surface oxidation looks normal. Flaking, scaling, or red-orange powder coming from joints means the metal is deteriorating and needs proper treatment, not just a cosmetic clean.
Hard Water Marks and Mineral Deposits
Hard water leaves white, cloudy rings wherever drops evaporate on a surface. These are common in areas with high mineral content in the water supply and show up fastest on glass and shiny metal.
Vinegar does the heavy lifting here. Soak a cloth in white vinegar, lay it over the deposit for ten minutes, then wipe away. For stubborn buildup, sprinkle baking soda on the wet vinegar cloth and gently rub the spot.
Rinse and buff dry immediately after.
The Biggest Mistakes People Make (And How to Avoid Them)
Cleaning outdoor furniture seems simple enough, but the margin for error is wider than most people expect. A single wrong choice, the wrong brush, the wrong chemical, the wrong technique, can shorten the life of your furniture by years. Here are the most common missteps and how to sidestep them.
The Bleach Trap
Bleach is tempting because it kills mould, whitens surfaces, and feels like a powerful solution. But bleach destroys organic materials. It weakens wood fibres, fades dyed fabrics, and corrodes certain metals over time.
Using full-strength bleach on teak or resin wicker is almost guaranteed to cause visible damage.
Dilute bleach heavily if you use it at all, no more than one part bleach to three parts water. Apply it only to affected areas, never dump it over an entire table. Rinse thoroughly within minutes of application.
Whenever possible, choose hydrogen peroxide or an oxygen-based cleaner instead. They kill the same organisms without the collateral damage.
Pressure Washer Disasters
Pressure washers are incredibly convenient, and that convenience makes them dangerous for outdoor furniture. The forceful stream can strip paint, splinter wood, push water into joints where it causes rot, and crack glass or thin metal panels.
If you decide to use a pressure washer, keep the PSI below 1,500 and hold the nozzle at least twelve inches from the surface. Use a wide fan tip, never a pinpoint jet. Test on an inconspicuous area first.
Hand washing with a brush and bucket is safer for nearly every type of outdoor tableware and takes only slightly longer.
Scratching the Finish
Abrasive tools look effective but leave permanent marks. Steel wool, Scotch-Brite pads, wire brushes, and rough scrub sponges all score surfaces. On powder-coated aluminum, a single scratch exposes bare metal to moisture and starts a rust cycle.
On teak, scratches catch more dirt and accelerate weathering in that spot.
Soft-bristle brushes, microfiber cloths, and non-scratch sponges are sufficient for ninety-five percent of outdoor cleaning jobs. Save the aggressive tools for tasks where scratching doesn't matter, like cleaning grill grates or patio pavers.
Skipping the Dry-Down
Leaving furniture wet invites the very problems you were trying to clean away. Standing water in wood grain causes swelling and eventual splitting. Moisture trapped under cushions grows mould.
Wet metal joints develop corrosion faster.
After rinsing, wipe every surface with a dry microfiber cloth. Prop cushions upright in a sunny spot to air dry on both sides. Leave slatted tables upside down or on their sides so water drains freely from every gap.
Only return cushions and covers once everything feels completely dry to the touch.
Mixing Cleaners That Create Hazards
This one deserves special emphasis because the consequences are serious. Combining bleach with vinegar produces chlorine gas. Mixing bleach with ammonia creates chloramine gas.
Both are dangerous to breathe and can damage your lungs.
Never use two different cleaners on the same surface without confirming they're chemically compatible. Stick to one product per session, rinse thoroughly between products, and keep cleaner bottles separated in storage.
Keeping It Looking Fresh Without Constant Effort
Good cleaning habits prevent problems from forming in the first place. A structured approach to maintenance means you spend less time fighting tough stains and more time enjoying your outdoor space.
The Seasonal Deep-Clean Schedule
Plan a thorough clean at least twice a year, ideally once in spring and once in autumn. Spring cleaning removes winter accumulation and preps furniture for heavy seasonal use. Autumn cleaning clears summer grime and prepares the set for whatever kind of winter your climate brings.
Between deep cleans, do a quick rinse and wipe-down every few weeks. That thirty-minute job prevents dirt and organic matter from building up to the point where it needs serious effort to remove.
Re-Sealing and Re-Oiling Windows
Sealed and oiled surfaces need periodic renewal to stay protected. Teak oil typically lasts six to twelve months depending on sun exposure and weather. Powder-coated furniture rarely needs reapplication unless the coating is physically damaged.
Check your sealer's condition by sprinkling a few drops of water on the surface. If the water beads up, the protection is still doing its job. If it soaks in immediately, it's time to reseal or reoil.
Clean and dry the surface completely before applying any new treatment.
Protective Covers That Actually Help
Furniture covers reduce dirt accumulation and shield surfaces from UV damage and precipitation. But covers also trap moisture against the furniture if they're put on while anything is even slightly damp. That combination breeds mould and accelerates deterioration.
Only cover furniture that's completely dry. Choose breathable fabric covers designed for outdoor use rather than impermeable plastic tarps. Remove covers periodically to air out the furniture underneath, even during dry weather.
What to Do After Storms and Barbecues
High winds deposit leaves, pollen, and debris that scratch surfaces if left to sit. Heavy rain can leave mineral deposits as it evaporates. Barbecue sessions track grease and smoke residue onto nearby tableware.
After any storm, give the furniture a quick rinse with a hose to remove loose debris. After a barbecue, wipe down nearby surfaces with soapy water before grease cools and hardens. These two ten-minute actions prevent hours of scrubbing later in the season.
Maintenance Tips That Actually Stick
Regular upkeep prevents the heavy work later. A simple rinse after each use removes pollen, dust, and light spills before they bond to the surface. Keep a soft cloth and bucket of soapy water nearby for quick touch-ups during busy seasons.
Store or cover furniture before winter if your climate brings frost, snow, or freezing rain. Even weather-resistant materials degrade faster when exposed to repeated freeze-thaw cycles. Pull cushions inside and store them in a dry place.
Check seals, joints, and fasteners annually. Tighten loose screws on metal frames. Inspect wood for early signs of cracking or warping.
Address small issues while they're still repairable rather than waiting for structural problems.
For more on protecting your complete dining setup beyond just the table, consider how proper silver care and dinnerware selection impact long-term enjoyment of outdoor meals.
Frequently Asked Questions
How long does drying take before using furniture again?
Most materials need two to four hours of air drying after washing. Thick cushions and woven resin may require twenty-four hours. Never replace covers or cushions until everything feels completely dry to the touch.
Trapped moisture causes mould and unpleasant odours.
Can I clean outdoor tableware in the direct sun?
No. Sunlight makes cleaning solutions evaporate too quickly, leaving streaks and residue. It also heats surfaces to uncomfortable levels and can cause certain cleaners to damage finishes faster.
Clean furniture in the shade or during cooler morning or evening hours.
What should I do if mildew returns after cleaning?
Mildew returning usually means moisture is trapped somewhere. Check for poor drainage, covered furniture placed while damp, or shade conditions that stay wet too long. Improve airflow around the furniture and ensure it dries completely after each rain or cleaning session.
Is it safe to leave furniture out year-round?
Most quality outdoor furniture is designed for permanent exterior use, but lifespan varies by material and climate. Powder-coated aluminum and synthetic wicker handle years of exposure well. Unsealed wood and wrought iron benefit from winter protection even if they're rated for outdoor use.
When should I apply sealant or oil after cleaning?
Always wait until the surface is fully dry before applying any sealant or oil. Moisture trapped beneath these products prevents proper adhesion and causes peeling or clouding. Follow manufacturer timing guidelines, typically allowing twenty-four hours after cleaning before treatment application.

Sophia Martinez is a culinary lifestyle writer and product reviewer for DiningGadgets.com. Passionate about blending style with functionality, she explores the latest dining essentials, kitchen décor, and cleaning hacks that transform everyday cooking spaces. With a background in home organization and design, Sophia brings readers expert advice on creating beautiful, practical kitchens that truly feel like the heart of the home.