How to Use a Picnic Basket: The Complete Beginner’s Guide
When you're learning how to use a picnic basket properly, most people pack it like a regular lunchbox. They throw in some sandwiches, slap on a lid, and head to the park. But the difference between a happy outdoor meal and a day ruined by spilled juice or warm food comes down to a few deliberate choices made before you even tie the lid shut.
Per USDA food safety guidelines, perishable foods shouldn't sit above 40°F for more than two hours in normal weather, and just one hour once temperatures climb past 90°F. That means your basket choice and your packing method are actually safety decisions, not just convenience ones.
The truth is that "how to use picnic basket" involves strategy, not just stuffing. This guide walks you through picking the right basket type for your situation, layering your food in an order that keeps everything cold and organised, and avoiding the five mistakes that turn a great afternoon into a food-safety risk.
Image source: Web (Bing) / doba.com (Web image (fair-use with source credit))
Quick Answer: The One Thing That Changes Everything
If you remember only one thing about using a picnic basket, let it be this. Your ice strategy must match your trip duration and the outside temperature. A two-hour stroll to the local green space is a totally different calculation from a six-hour beach day in mid-July heat.
- Under two hours in mild weather: standard reusable ice packs work fine.
- Two to four hours or warm days above 75°F: use block ice alongside gel packs for longer retention.
- Over four hours, hot weather over 85°F, or direct sun exposure: pre-chill your basket first, then pack with a mix of frozen gel packs and block ice.
Most picnic basket disasters happen because people skip that first step entirely. They grab whatever ice packs are lying around without checking whether they will actually last the whole outing. You can always add more ice later if you brought extras.
You cannot fix warm food once it has sat too long in the danger zone.
Pick Your Basket Type Before You Pack Anything
Choosing the right basket matters more than most people realise. You wouldn't lug a sports car onto an off-road trail, and you shouldn't grab a classic wicker hamper for a sunny beach day either.
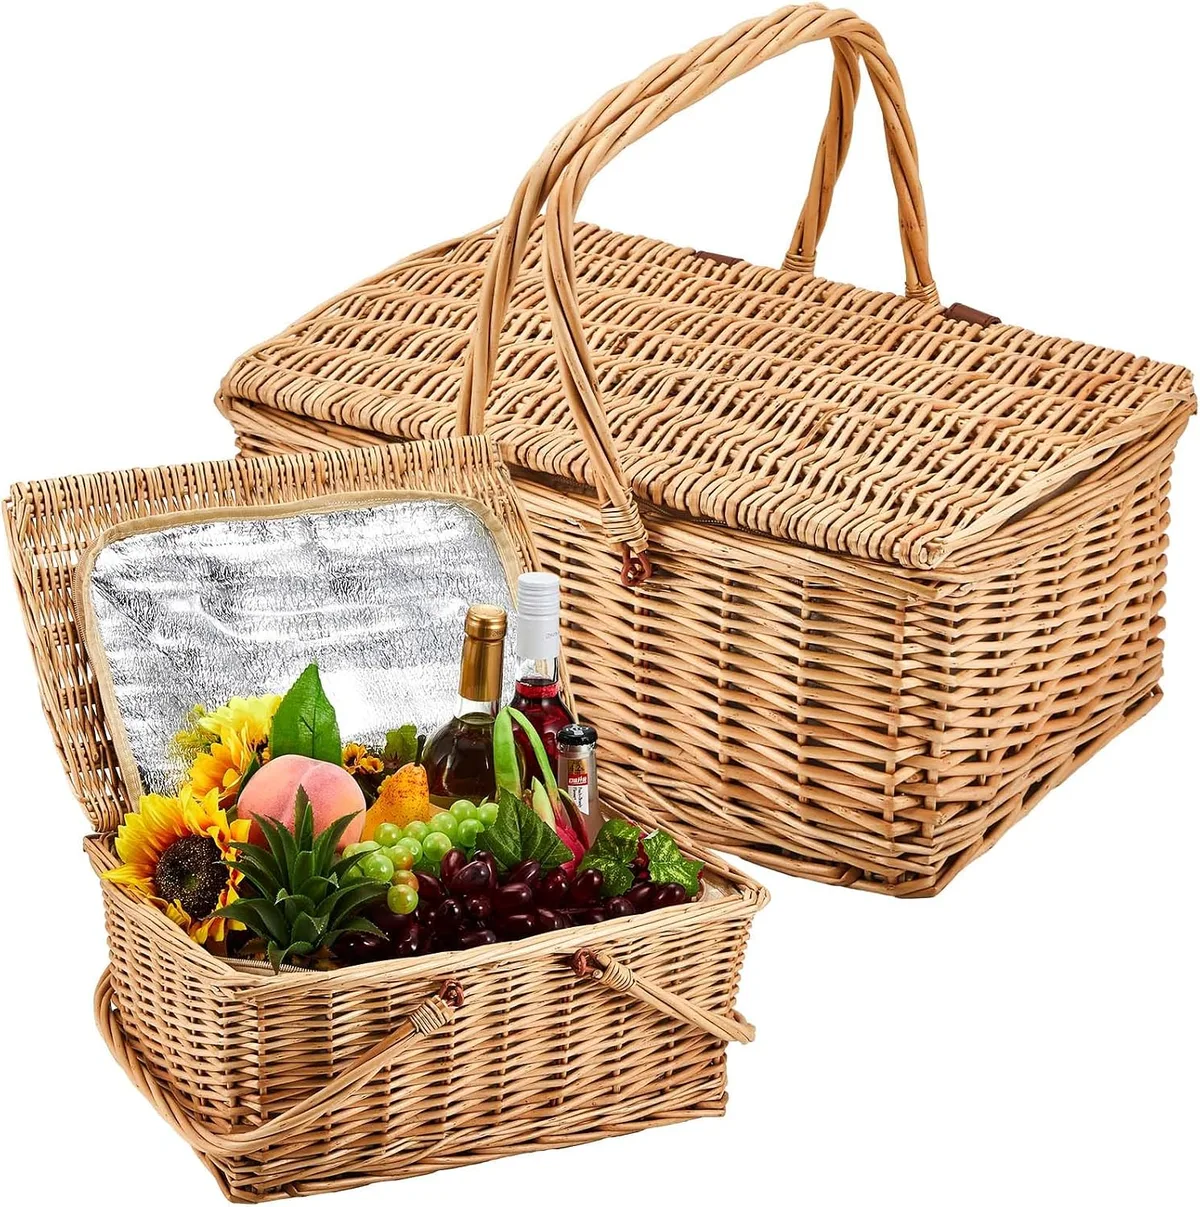
Image source: Web (Bing) / amazon.com (Web image (fair-use with source credit))
Each basket type serves a different purpose, and understanding that helps you avoid buying something stylish that fails the moment the sun comes out.
Traditional Wicker Hampers
Classic wicker baskets made from natural rattan or willow look gorgeous on a garden table. They are light and easy to carry. But they offer almost no insulation on their own.
You will need to add a separate thermal liner or wrap cold items in insulated bags inside the basket. They work fine for short outings under two hours in cool weather. They fall apart fast on a hot summer day.
Insulated Picnic Baskets
These come with built-in foam lining or thermal fabric walls. They keep cold things cold significantly longer than bare wicker ever could. Most models include detachable washable liners, which makes cleanup straightforward.
They are the best all-round choice for family outings lasting three to five hours. They trade a bit of weight and vintage charm for actual performance.
Hard-Shell Cooler Baskets
Think of these as cooler boxes disguised as picnic baskets. Thick insulation, latch locks, and sometimes even drain plugs are common features. They maintain cold temperatures for eight hours or more with minimal effort.
They excel at all-day trips, hot climates, and situations involving raw meats that need serious protection. The downside is weight and a less elegant appearance.
Rolling Picnic Carts
Wheeled designs transform into a cart for easy transport across longer distances. They suit large groups, families with young children, and anyone who needs to cover ground from a parking area. Most include seating lids or storage compartments underneath.
They save your arms on uneven terrain. They are bulkier to store at home compared to compact basket options.
| Basket Type | Best For | Cold Retention | Weight | Typical Price Range |
|---|---|---|---|---|
| Traditional wicker | Short cool outings, aesthetics | Low, requires add-on liner | Light | $30 to $80 |
| Insulated basket | Family day trips, moderate heat | Moderate to high | Medium | $60 to $200 |
| Hard-shell cooler | All-day trips, hot weather, raw food | High | Heavy | $100 to $400 |
| Rolling cart | Large groups, long carries, uneven ground | Varies by model | Bulky | $80 to $300 |
Capacity is another factor worth considering upfront. A basket advertised as fitting twelve dinner plates might barely handle a couple of wrapped sandwiches and a bottle of wine. Look for baskets listing clear quart or litre capacities instead of relying on place-setting claims, which manufacturers tend to inflate.
A 10-quart basket actually holds about 10 quarts of stuff.
Your Packing Strategy Depends on These Four Conditions
Your packing approach shifts depending on four key variables. Two hours in the shade versus six hours on a sandy beach changes everything about how you load your basket. Getting these right prevents warm drinks, crushed bread, and ruined ingredients.
Trip Duration Shapes Your Ice Plan
The length of your outing is the single biggest driver of your cooling strategy.
- Under two hours: Standard gel ice packs are sufficient. Focus on keeping cold foods separated rather than burying everything under a mountain of ice.
- Three to five hours: Freeze your gel packs the night before. Add a couple of sealed water bottles as extra ice blocks. They melt slower than loose cubes and provide drinking water as they thaw.
- Over five hours or full-day events: Pre-chill the empty basket with ice overnight if possible. Bring more ice than you think you need. Separate raw proteins in their own sealed containers away from ready-to-eat foods.
Weather and Temperature Accelerate Spoilage
Heat turns your basket into a bacterial playground fast. The FDA recommends discarding perishables left above 90°F for more than one hour. Cloudy days still carry serious heat, so shade alone does not guarantee safety.
On cooler days under 60°F, you have considerably more margin. Raw meats stay safer longer. Dairy dips won't warm through as quickly.
But do not get complacent. Air temperature and direct sunlight combine to raise internal basket temperatures well beyond what you might expect.
Group Size and Menu Influence What Travels Well
A solo sandwich and piece of fruit requires minimal planning. Feeding four hungry adults with multiple courses demands careful organisation and heavier cooling capacity.
Choose menu items that travel reliably. Hard cheeses hold shape better than soft varieties. Whole apples and grapes resist bruising better than cut fruit.
Marinated meats seal cleanly in containers. Anything requiring immediate refrigeration after opening, like opened yogurt or deli slices, belongs in the coldest zone of your basket.
Destination Terrain Dictates Carrying Choices
Smooth grass and flat pavement make any basket comfortable to carry. Sandy beaches, rocky trails, and long walks from the car parking area change the equation entirely.
For beach trips, sand infiltrates zippers and hinges constantly. Choose baskets with tight-sealing zippers and wipe everything down thoroughly after use. Placing your basket directly on hot sand accelerates warming significantly.
Bring a small blanket or mat to set it on. Uneven ground calls for sturdy handles and secure closures. A tipped basket spills everything.
Rolling carts remove carrying stress for long distances but add bulk to your transport. If you end up needing to move fragile items regularly, it may also help to understand the best way to pack glassware safely since the same principles apply outdoors.
Step-by-Step: How to Pack a Picnic Basket Like Someone Who's Done This Before
The order in which you pack matters as much as what you pack. Follow this sequence and your picnic stays organised from departure to cleanup. Messed-up packing order leads to crushed food, leaked containers, and drinks that warm up before you even arrive.
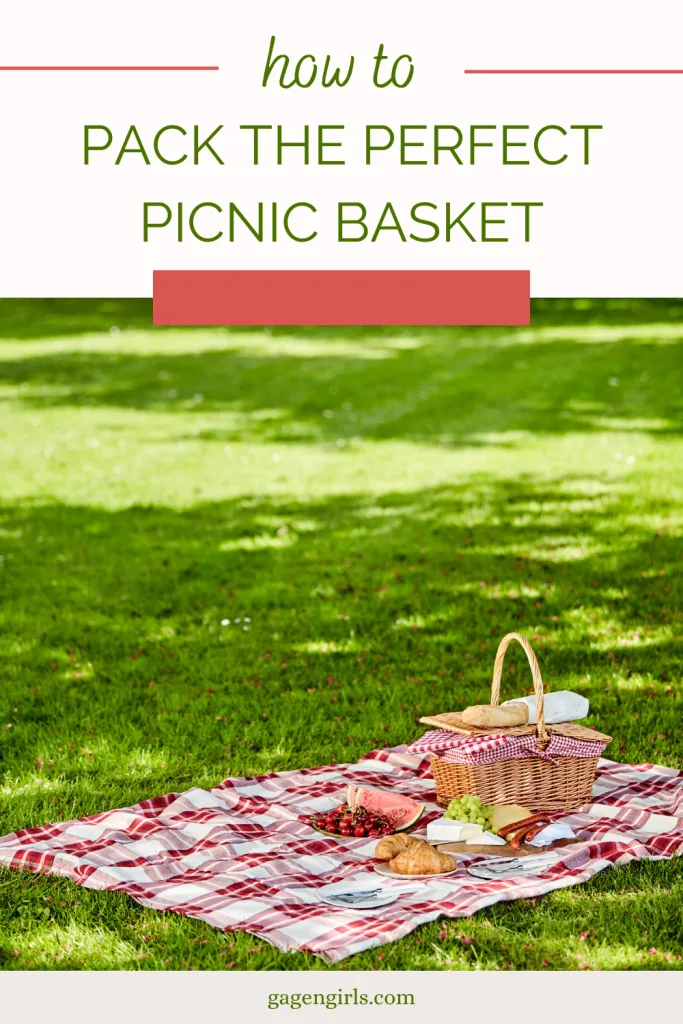
Image source: Web (Bing) / gagengirls.com (Web image (fair-use with source credit))
Step One: Pre-Chill the Empty Basket
This step gets skipped by most people, and it shows. An empty warm basket raises the internal temperature before you even add food. Fill your basket with ice packs or frozen gel blocks for about thirty minutes before loading anything.
Remove the ice and pat the interior dry with a clean towel. This gives your food a genuine head start against ambient warmth.
Step Two: Place Your Ice Layer Down Bottom
Line the base with your frozen elements first. Gel packs work well here because they conform to the basket shape. If you are using block ice, wrap it in a thin towel to prevent direct contact with containers that could crack from extreme cold.
Leave small gaps between ice packs for air circulation. More surface contact melts ice faster but cools surrounding items more effectively.
Step Three: Pack Heavy Dense Containers Next
Dense food containers like jars of cheese, thick tubs of dip, and sealed meat packages go above the ice layer. Their weight stabilises everything below and protects the ice from shifting during transport. Use hard-sided square or rectangular containers rather than flimsy round tubs.
They stack efficiently and waste less space than irregular shapes.
Step Four: Layer Ready-to-Eat Foods Above
Delicate items like salads, opened packages, and half-cut fruit belong in the upper section. Keep them in sealed containers where possible. Foods you will eat first upon arrival should sit near the top so you avoid digging through everything else.
Bread and crackers go in a separate compartment or wrapped cloth to stay crisp.
Step Five: Secure Loose Items and Accessories
Zippered sections shift during movement. Roll napkins and cloth towels into tight bundles instead of folding them flat. Use small rubber bands to keep individual utensil sets together.
Condiment packets and small bags stay put better when pressed against the lid area rather than buried at the base where they get lost under heavier items.
Step Six: Close the Lid Without Overstuffing
If the lid will not close, you have packed too much. Overstuffed baskets strain latches, crack wicker frames, and compress delicate foods underneath. Leave just enough clearance for the closure mechanism to seal fully.
When in doubt, underpack slightly and bring a second smaller bag for overflow items. A comfortably closed basket survives transport intact.
If you are bringing serving plates along for a group meal, choosing a durable best American-made flatware set or a solid 12 piece flatware set early means you know exactly how much space the cutlery will take up before you even start loading.
Five Mistakes That Turn a Great Picnic Into a Food-Safety Risk
Even seasoned picnickers repeat these errors regularly. Recognising them beforehand saves you from stomach bugs and ruined afternoons outdoors.
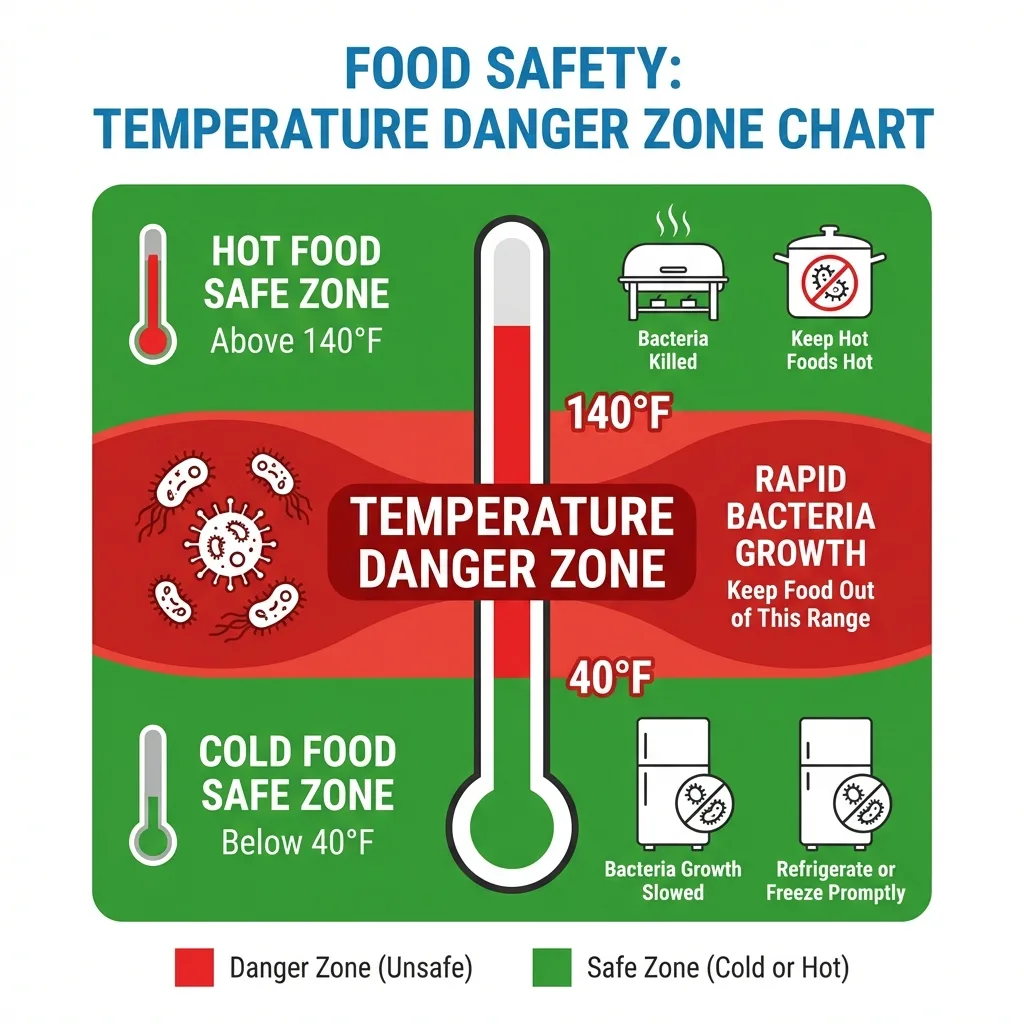
Image source: Web (Bing) / easytemperature.com (Web image (fair-use with source credit))
Mistake One: Overpacking Until Handles Fail
Baskets rated for twenty pounds fail dramatically when pushed past that limit. Plastic latches crack audibly. Wicker handles snap under sudden downward tension.
Soft-sided baskets bulge and split at stressed seams. Load only what fits comfortably with the lid sealing fully. Extra weight never improves organisation.
Mistake Two: Ignoring the Temperature Danger Zone
Perishable foods enter the danger zone between 40°F and 140°F, where bacteria multiply rapidly. The USDA advises discarding perishables left in that range for more than one hour when outdoor temperatures exceed 90°F. Start counting elapsed time from when food leaves your refrigerator, not from when you notice it feels warm.
Mistake Three: Leaving Food Uncovered Near Pests
Ants locate exposed food within minutes. Birds, squirrels, and raccoons investigate open baskets when left unattended. Cover everything actively not being eaten.
Use containers with tight lids or drape clean cloths over platters temporarily. Never leave a basket unguarded at your site, even for a quick walk back to the car.
Mistake Four: Storing Wet Items Directly in Wicker
Melting ice packs, condensation from cold drinks, and minor juice leaks create moisture inside wicker baskets. Left unchecked, damp wicker develops mould quickly and develops persistent odours. Always use removable liners or place wet containers on waterproof trays.
Air-dry the basket completely after every outing before storing it away for extended periods.
Mistake Five: Skipping Interior Cleaning Between Uses
Food residue builds up in corners and along seams over time. Sugary spills attract crawling insects. Grease from previous meals contaminates fresh food.
Wipe the interior with mild soap and warm water after each use. Check hinges and zippers for trapped crumbs or debris. Store your basket open and dry whenever possible, especially before seasonal storage.
Cleaning, Drying, and Storing Your Basket So It Lasts Years
How you maintain your basket determines whether it survives three seasons or ten. Regular cleaning prevents mould, stubborn smells, and hardware corrosion. Proper drying stops moisture from weakening wicker or fostering bacteria.
Correct storage keeps everything ready for the next outing without damage.
Cleaning Liner Inserts and Interior Surfaces
Most insulated baskets come with removable fabric liners. Pull these out and machine wash them on a gentle cold cycle using mild detergent. Avoid bleach because it degrades insulation over time.
For hard interiors like plastic or metal, wipe down with warm soapy water and a soft cloth. Rinse well and air dry completely before replacing.
For stains inside the basket, make a paste from baking soda and water. Gently scrub the affected area with a soft brush, then rinse. This lifts wine spills and food residue without harsh chemicals.
Never soak wicker baskets or submerge them in water, because trapped moisture ruins the weave from the inside out.
Treating Wicker Without Warping or Cracking It
Natural wicker needs occasional conditioning to stay supple and resist splitting. Once or twice a year, apply a thin coat of linseed oil or a dedicated rattan sealant using a soft cloth. Work it into the weave following the grain direction.
Let it soak in for an hour, then buff off any excess.
Never use waterproof sprays designed for outdoor furniture on picnic baskets. They can clog the breathability of the fibers and trap humidity inside. If your basket gets wet from rain or melting ice, let it dry thoroughly in a shaded, well-ventilated area.
Direct heat from a dryer or radiator will crack the material rapidly.
Seasonal Storage Tips to Avoid Moisture Damage and Odours
Before packing your basket away for winter or long-term storage, ensure it is completely dry. Any lingering dampness guarantees mould growth during months of inactivity. Stuff the interior with crumpled acid-free paper or clean towels to help retain shape and absorb residual moisture.
Store baskets in a cool, dry place away from direct sunlight. UV rays fade colours and weaken fibres over time. Keep them upright rather than stacked, which prevents handles from warping under weight.
If storing in a garage or shed, place the basket off concrete floors on a shelf to avoid ground moisture and pest contact.
FAQs: Practical Answers to the Questions People Actually Ask
These are the most common real-world questions we see about using picnic baskets effectively. Each answer gives you a clear rule you can apply immediately.
How long will ice packs keep food cold in a picnic basket?
Standard reusable gel ice packs keep food cold for two to four hours in typical conditions. Block ice lasts longer, often six to eight hours, because it melts slower. In hot weather above 80°F, expect half those durations unless you pre-chill the basket first.
Can I put a hot dish directly in my basket?
No. Direct contact between a hot pot and cold ice packs creates rapid temperature swings that can warp containers and melt ice too quickly. Always place hot items in insulated thermal bags or wrap them in towels before putting them inside the basket.
Is a traditional wicker basket safe for hot summer days?
Only for very short trips under two hours when temperatures stay mild. Wicker provides zero insulation, so internal temperatures rise fast in sun. For anything beyond an hour-long outing in summer heat, choose an insulated model instead.
What's the easiest way to prevent spills inside the basket?
Use rigid, square-shaped containers with secure snap lids rather than flexible tubs or open bowls. Pack heavier items on the bottom layer and lighter boxes on top. Keep the basket closed while carrying it and set it down gently on a level surface.
Do I really need separate containers or can I use Tupperware?
You absolutely need separate sealed containers. Loose sandwiches shift and crush, opening condiment packets leaks everywhere, and uncovered items attract pests instantly. Containers also create clear zones where ice packs and foods can be organised efficiently.
Opting for a versatile top-rated Corelle dinnerware set or a durable 16-piece stoneware collection for your outdoor spread keeps things lightweight and shatter-resistant compared to standard porcelain.

Sophia Martinez is a culinary lifestyle writer and product reviewer for DiningGadgets.com. Passionate about blending style with functionality, she explores the latest dining essentials, kitchen décor, and cleaning hacks that transform everyday cooking spaces. With a background in home organization and design, Sophia brings readers expert advice on creating beautiful, practical kitchens that truly feel like the heart of the home.