How to Use a Camping Coffee Maker: Step-by-Step Guide
To use a camping coffee maker, start by matching your brewer to your heat source. Bring water to the right temperature on a stable stove setup. Measure your coffee carefully and brew using the correct timing for your chosen method.
Clean and dry your gear immediately after each use. This simple workflow delivers consistently good coffee at camp.
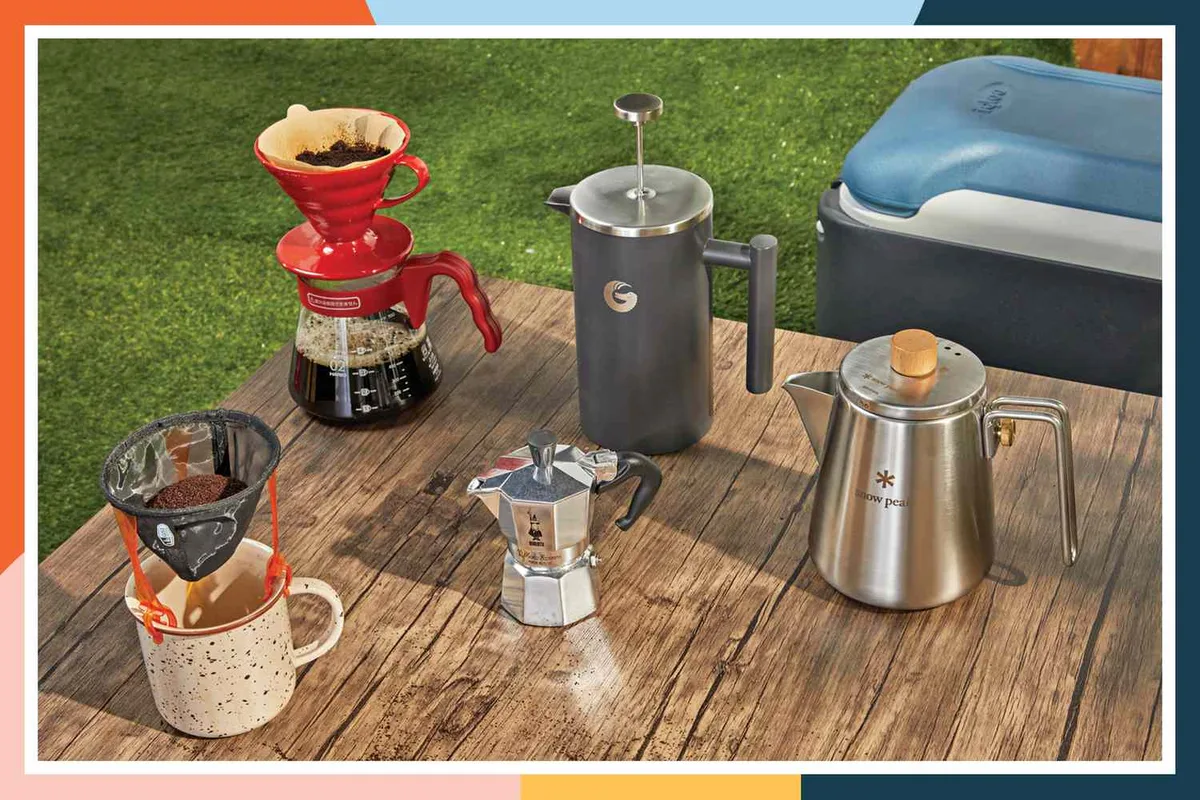
Let's face it, figuring out how to use camping coffee maker gear can feel overwhelming. You've probably burned one too many batches or ended up with a cup that tastes like campfire smoke. The truth is, there isn't one universal method.
Your perfect morning cup depends entirely on what you packed, where you're brewing, and who you're sharing it with.
Whether you want a hearty percolator brew or a precise single-cup pour-over, picking the right maker is your first move. Research shows that successful camp coffee comes down to matching your gear to your heat source and your group's pace. Once you nail that choice, the brewing part becomes simple, repeatable, and actually enjoyable.
Match Your Coffee Gear to Your Heat Source
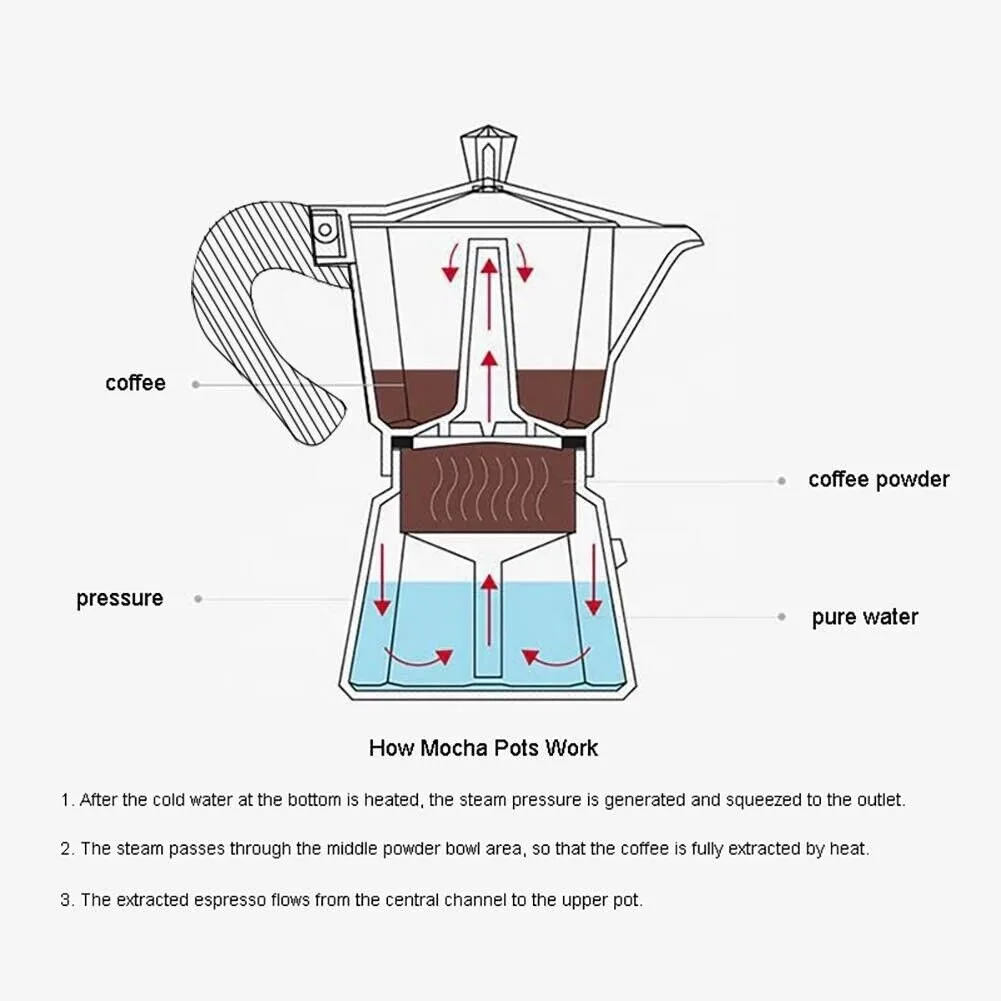
This is the biggest decision you'll make. Picking a maker that doesn't work with your fuel is a fast track to a cold brew and a frustrated morning. Your heat source dictates what's possible.
A standard camp stove isn't the same as a delicate alcohol burner, and a roaring fire needs different handling than a flat-top portable cooktop.
| Heat Source | Best Maker Matches | What to Watch Out For |
|---|---|---|
| Canister Stove | Moka Pot, AeroPress, Pour-over | High heat can scorch the bottom of the pot; use low flame. |
| Wood Campfire | Percolator, Cast Iron Dripper | Embers are fierce; use a grate for stable, indirect heat. |
| Alcohol Stove | Titanium Pour-over, Simple French Press | Low, gentle heat means slower boils; patience is key. |
| Solar (Oxid) | Dedicated Solar Coffee Maker Only | Very slow; only works in peak sun for hours, not minutes. |
| Caravan/Induction | Any standard kitchen-style maker | Full power; treat like your home kitchen gear. |
Choosing the right pair saves you stress. In our research, hikers often favor the AeroPress or a collapsible pour-over cone because they pair easily with any small stove. Families car-camping usually opt for a classic percolator that can handle both a camp stove and a controlled fire.
The goal is zero friction when you're tired and cold at dawn.
Think about your primary fuel on the trip. If you're doing solo backpacking, your stove is likely a small canister model, which points toward lightweight, compact brewers. If you're car camping with a full setup, a heavier Moka pot or perculator might be fine.
Don't overthink it, but do commit to one solid pair for the trip. You can always improvise later.
The Universal Setup Workflow (Steps That Apply To Almost Any Maker)
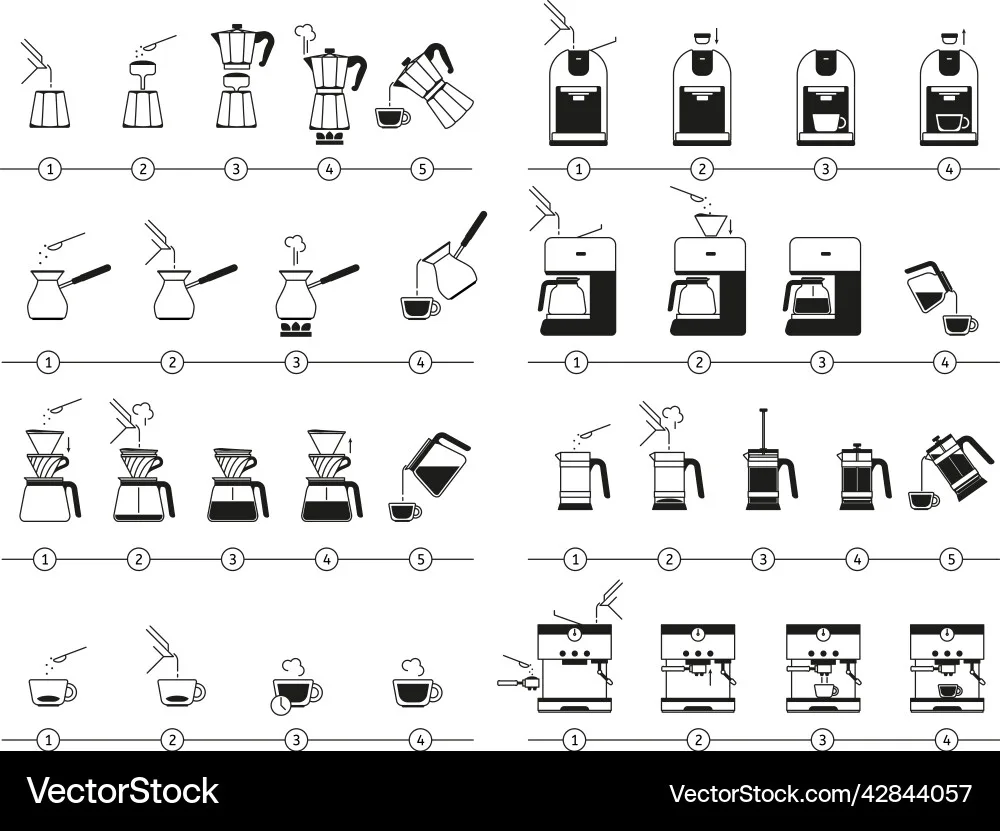
Once you've got your maker and heat source locked in, the actual brewing follows a nearly identical path no matter what you're using. Learning this core sequence means you can brew good coffee with almost anything, even if you forgot your favorite tool. Master these steps, and you'll never burn a batch again.
First, set up your station. Place your windscreen and stove on a flat, stable surface. This is non-negotiable for safety and consistent results.
Add your water to the maker's chamber. Use the exact amount you plan to drink plus a little buffer for spillage and rinsing. Next, measure your coffee.
The sweet spot is usually a 1:15 ratio of coffee to water by weight, though taste is your final judge.
If you're grinding fresh, do it now for maximum flavor. Load your filter and add the grounds. For a Moka pot, fill the basket without tamping.
For pour-over, fold the paper and give it a quick rinse. Set your maker on the heat. Bring it to a steady simmer, not a rolling boil, unless your maker specifically calls for a hard boil.
Watch the process closely. Your goal is even saturation and a steady flow. When the brewing cycle finishes, usually marked by a gurgling sound or a clear color change, remove it from the heat immediately.
Let it settle for a moment if needed. Serve right away into your favorite insulated mug. Cleaning is part of the workflow, so rinse it out before the dregs dry on.
The beauty of this workflow is its flexibility. You can tweak grind size, steep time, or water temp on the fly. That's how you adjust for altitude, which is crucial since water boils at a lower temperature up high, often requiring a longer extraction or a finer grind.
Consistency comes from practicing this routine until it becomes muscle memory.
Mistakes That Ruin Camp Coffee (And How To Avoid Them)
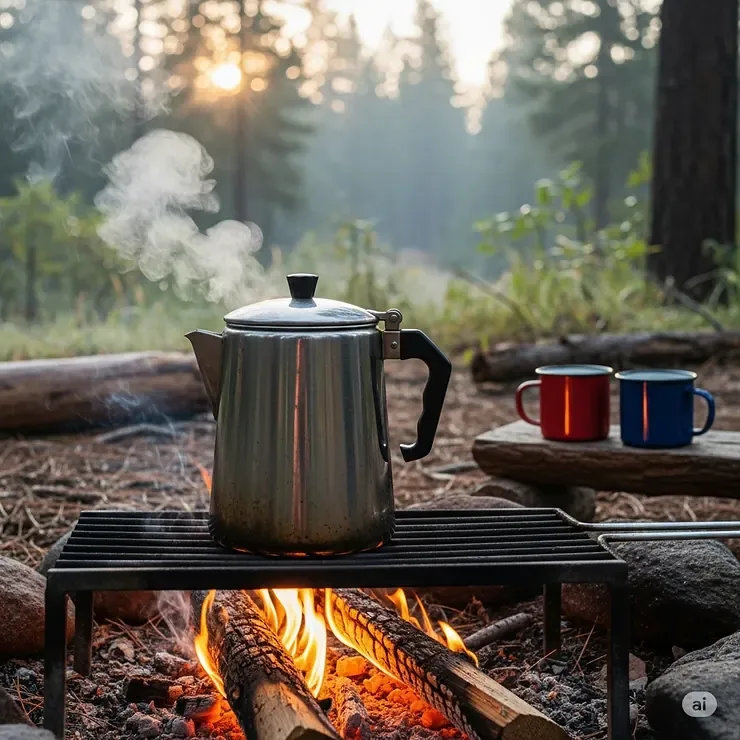
Even experienced campers mess up their morning brew. Most bad coffee isn't about the gear; it's about a handful of repetitive mistakes. Recognizing these pitfalls will instantly improve your daily cup and save you from dumping a whole pot down the drain.
Let's talk about the common traps and how to sidestep them.
One huge error is using boiling water directly on coffee grounds, especially for pour-over styles. Water just off the boil, around 200°F, extracts better without pulling out bitter compounds. Another culprit is skipping the preheat.
A cold pot sucks heat from your water and slows the entire brew. Always rinse your vessel with hot water before you start.
| Common Mistake | Why It Happens | Quick Fix |
|---|---|---|
| Burnt, acrid flavor | Grounds scorched on bottom of pot; flame too high | Lower heat; remove from flame at first gurgle. |
| Weak, sour coffee | Coarse grind or rushed brew time | Grind finer; extend contact time by 30 seconds. |
| Muddy, gritty cup | Filter missed or damaged; fine grounds escaped | Check filter integrity; consider a secondary filter. |
| Inconsistent batches | Guessing measurements instead of weighing | Use a simple scoop ratio or small scale. |
| Hard cleanup in field | Coffee oils dried inside maker | Rinse immediately after use; brush out grounds. |
Forgetting to account for altitude is another big one. At higher elevations, water boils at a lower temperature, which changes extraction. You may need to adjust your grind slightly coarser or let steep times run a touch longer to get a balanced cup.
Also, never ignore fuel levels mid-brew. Running out halfway through is pure agony. Top off your canister beforehand or have a backup fuel source ready.
These fixes are simple but game-changing. By focusing on heat control, accurate timing, and proper cleanup, you'll dramatically reduce waste and frustration. Good camp coffee is about control, not luck.
Pay attention to these details and your routine will become reliable trip after trip.
Safety, Waste Rules, And Keeping Your Gear Reliable
Brewing coffee outside involves fire, heat, and waste. Handling these responsibly keeps you safe, protects the environment, and preserves your gear for years of trips. These practices aren't just recommendations; they're essential habits for any conscientious camper.
Prioritize safety and cleanliness alongside your quest for the perfect cup.
Start with stove safety. Never place your stove on an unstable surface, and always keep it well away from tent walls, overhanging branches, and flammable gear. Use a sturdy windscreen when needed, but never enclose a canister stove completely, it needs airflow.
Allow all components to cool fully before packing them away. Hot metal can cause serious burns or ignite stored items if not handled correctly.
Waste management is critical. Never dump used coffee grounds or wastewater directly into streams, lakes, or onto soil near your campsite. Coffee is acidic and can harm aquatic life and alter soil chemistry.
Pack out used filters if possible, or scatter dry grounds far from water sources and your sleeping area. Follow Leave No Trace principles strictly to minimize your impact.
For gear reliability, clean thoroughly after every use. Coffee oils go rancid quickly and ruin future brews. Disassemble makers according to the manufacturer's instructions.
Soak parts in warm water with a bit of dish soap if needed, then air-dry completely before storage. Inspect seals and gaskets regularly for cracks or wear, replacing them as necessary to prevent leaks and maintain pressure. Store your equipment in a dry place, loose rather than tightly packed, to avoid damage during transit.
By treating your coffee setup with the same respect as your cooking or safety gear, you ensure it performs reliably when you need it most. A little care upfront pays off in great coffee and a clean camp. Keep your workflow tight, your waste managed, and your equipment maintained.
Expert Tips For Better-Tasting Coffee At Camp
Elevating your camp coffee from drinkable to genuinely great comes down to a handful of small tweaks. These refinements transform your routine from basic survival caffeine into something you'll actually savor around the fire. Start by taking control of your water quality.
Use filtered water when available, since hard or mineral-heavy sources can severely muddle flavor clarity.
Preheating your vessel is another game-changer. Swirl hot water through your pot or carafe before adding coffee. This simple step maintains brewing temperature longer, leading to more even extraction.
Always measure your coffee rather than eyeballing it. Consistent ratios mean consistent results trip after trip.
Adjusting for altitude requires patience but pays off handsomely. Above 5,000 feet, water boils below 203°F, which changes extraction dynamics entirely. You may need a finer grind or slightly longer steep time to compensate for the lower boiling point.
Many experienced hikers keep a small altitude adjustment chart in their kit.
Consider investing in a lightweight travel grinder. Freshly ground beans release volatile aromatics that pre-ground coffee loses within minutes of grinding. Even a basic hand-crank burr grinder dramatically improves flavor compared to pre-ground bags left sitting in your pack.
The extra ounce of weight is absolutely worth it.
Finally, serve immediately into a pre-warmed insulated mug. Coffee cools rapidly in cold morning air, and heat loss from an unwarmed vessel steals precious degrees. A quick rinse with hot water before serving keeps your brew drinkable much longer.
These tips collectively elevate your daily ritual from adequate to exceptional.
FAQs
How long does it take to boil water for coffee camping?
Boiling time depends on your stove type and altitude. A standard canister stove typically brings one liter to boil in two to four minutes. Alcohol stoves take longer, often five to eight minutes for the same amount.
Wind conditions significantly affect any open flame setup. Higher elevations also extend boiling time due to lower atmospheric pressure.
Can I use regular coffee filters in a camping percolator?
Most percolators come with built-in metal mesh baskets designed specifically for the cycling action. Standard paper cone filters won't fit properly and will likely disintegrate under the pressure. You can purchase paper percolator baskets, but they require careful handling.
Metal filters remain the most reliable choice for consistent performance and easier cleanup.
What's the best coffee-to-water ratio for outdoor brewing?
A solid starting point is one tablespoon of ground coffee per six ounces of water. This roughly translates to a 1:15 ratio by weight for most palates. Adjust based on personal preference and bean strength.
Dark roasts often taste better slightly stronger, while light roasts may need a touch more water. Keep notes on what works for your specific setup.
Is instant coffee really that bad for camping?
Instant coffee isn't terrible when brewed correctly and mixed with proper water temperature. The issue stems from how people typically prepare it, often using water that's too hot and causing a scorched, acidic taste. Dissolve the powder in a small amount of warm water first, then top with fresh hot water.
Quality freeze-dried varieties can actually be quite good when prepared thoughtfully.
How do I clean my camping coffee maker without soap?
Rinse immediately after use while residues are still wet. Use hot water and a small brush to scrub interiors thoroughly. For stubborn coffee oils, add a pinch of coarse salt and shake vigorously with warm water.
This abrasive action lifts residue effectively without soap. Allow all parts to air-dry completely before packing away to prevent mildew growth.
Does pre-grinding coffee lose flavor quickly outdoors?
Pre-ground coffee begins oxidizing and losing aromatic compounds within fifteen minutes of grinding. In warm or humid conditions, this degradation accelerates noticeably. If you must use pre-ground, store it in an airtight container away from heat and moisture.
Whole bean grinding just before brewing preserves volatile oils and delivers noticeably brighter, more complex flavors on the trail.

Sophia Martinez is a culinary lifestyle writer and product reviewer for DiningGadgets.com. Passionate about blending style with functionality, she explores the latest dining essentials, kitchen décor, and cleaning hacks that transform everyday cooking spaces. With a background in home organization and design, Sophia brings readers expert advice on creating beautiful, practical kitchens that truly feel like the heart of the home.