5 Outdoor Pizza Oven Problems (and How to Fix Them Fast)
Running an outdoor pizza oven should be about great food, not frustration. You might be wrestling with cracked domes, stubborn smoke, or flames that won't cooperate. These outdoor pizza oven problems and solutions often come down to understanding how heat, airflow, and materials interact.
A proper fix starts with diagnosing the real issue, not just treating symptoms.
Manufacturer specifications show that well-maintained ovens can reach 700 to 950°F (370 to 510°C) within 45 minutes of heating. Yet temperature inconsistency remains the top complaint among owners. Below, we break down the most common issues, how to spot them, and exactly what to do so you can get back to baking without the guesswork.
Quick Answer
Most outdoor pizza oven problems stem from three areas: improper heat management, fuel choice, and maintenance. Cracks in the dome or hearth require refractory cement repair. Smoke issues usually trace to dampers, airflow, or wet wood.
Temperature swings are often fixed by calibrating thermometers and adjusting vent positions. Addressing these root causes typically resolves 80% of common complaints.
The 6 Most Common Outdoor Pizza Oven Problems (And What They Actually Mean)
Outdoor pizza ovens deliver incredible flavor, but they come with predictable frustrations. Knowing what each problem signals saves time, prevents damage, and keeps your cooking on track. Here are the six issues owners encounter most, along with what they really mean for performance.
1. Cracked Dome or Hearth
A crack in the dome or baking floor is usually a sign of thermal shock or improper curing. Rapid heating or cooling causes the refractory material to expand and contract unevenly, creating stress fractures. Fine hairline cracks are common early on and can be monitored.
Wide or growing cracks need immediate attention.
Left unchecked, cracks let heat escape and can eventually compromise the oven's structure. Small hairline fractures are cosmetic but still warrant sealing with high-temperature refractory cement. Major cracks affecting the dome's integrity may require professional repair or replacement of the chamber liner.
2. Cold Spots and Uneven Heating
One area of your oven consistently cooks slower than another? That's a cold spot, and it's almost always an airflow problem. Outdoor ovens rely on convective heat circulation.
When that flow is blocked or uneven, some zones stay cooler. This happens if the chimney is too small, vents are misadjusted, or the fire isn't positioned correctly.
Cold spots ruin pizza because cheese melts unevenly while the crust stays pale. The fix involves rebalancing fuel placement, checking vent openings, and rotating your pizza during cook. Understanding how heat moves through your specific oven model is key to eliminating dead zones.
3. Excessive Smoke and Poor Flavor
Smoke should enhance flavor, not overwhelm it. When your pizza tastes sooty or bitter, the problem usually lies in one of two places: the fuel source or the combustion efficiency. Wet or unseasoned wood produces thick, acrid smoke.
Incomplete combustion from poor airflow creates the same result.
Ideal smoke is thin and blue, not white and billowing. If your oven is smoking excessively, check that your wood is properly cured and that your air intake is open enough to support complete burning. A clogged chimney or restricted draft will also force smoke back into the cooking chamber instead of out the flue.
4. Temperature Fluctuations
Your thermometer reads 750°F one moment and 600°F the next with no change in fuel? That's likely sensor drift or calibration error. Many built-in gauges lose accuracy over time, especially when exposed to repeated thermal cycling.
An inaccurate reading leads to frustrated decisions. You might add more fuel when the oven is already hot, causing further swings.
External factors like wind, ambient temperature, and humidity also play a role. A cold wind blowing across the dome can chill the outer shell and distort readings. Using a reliable infrared thermometer to verify actual surface temperatures helps you distinguish between real fluctuations and faulty instruments.
5. Flame Issues: Too High, Too Low, or Unstable
Gas ovens should have steady, blue flames. Yellow, lifting, or roaring flames indicate problems. A flame that's too high wastes fuel and can scorch the dome.
One that's too low means insufficient gas pressure or a clogged burner. Unstable flickering often points to a dirty nozzle or inconsistent supply from the propane tank.
Wood-fired ovens have different flame expectations. You want a lively fire with active tongues of flame licking the dome, not a slow smolder. If your fire dies quickly or won't catch, the issue is likely fuel quality, air supply, or how you've stacked the wood.
Proper fire-building technique matters as much as the hardware.
6. Ash Buildup and Vent Blockage
Ash is unavoidable with wood-fired ovens, but letting it accumulate causes real problems. It blocks airflow under the firebox, chokes the grate, and insulates the heat source from the cooking chamber. Over time, ash compaction makes lighting difficult and reduces overall temperature capacity.
Regular ash removal is one of the simplest yet most neglected maintenance tasks. Depending on usage, you may need to rake ash out after every few cooks. Also check that vent passages and the chimney base stay clear.
A simple wire brush or shop vacuum designed for hot debris can keep these pathways open and maintain proper draft.
How Your Outdoor Pizza Oven Works — Heat, Draft, and Why Everything Is Connected
Understanding the basics of how your oven operates turns troubleshooting from guesswork into a logical process. Every component, from the firebox to the chimney, works in concert to manage three things: heat generation, heat retention, and exhaust flow. When one element falters, the others suffer.
The Role of Thermal Mass
The dome and hearth aren't just structural. They're thermal batteries. Materials like refractory brick, cordierite, or soapstone absorb and store intense heat, then radiate it steadily during cooking.
This thermal mass is what allows outdoor ovens to sustain the high temperatures needed for authentic pizza. Without it, you'd need constant fuel additions just to maintain heat.
However, thermal mass also means longer heat-up times and slower response to adjustments. A thick brick floor might take 45 minutes to fully saturate with heat but will hold that temperature far longer than a thin steel pan. This is why patience during the preheat phase pays off in cooking consistency.
Airflow and Draft Dynamics
Draft is the invisible force that pulls air through your oven. It enters through intake vents, feeds the fire, carries combustion gases upward, and exits through the chimney. Strong, steady draft means efficient burning and clean smoke.
Weak or erratic draft leads to smoky interiors, poor heat distribution, and difficulty maintaining temperature.
Several factors influence draft: chimney height, ambient wind conditions, vent sizes, and even the shape of your fire. Taller chimneys generally create stronger pull. Obstructions like nearby walls or trees can disrupt airflow patterns.
Learning to read your oven's behavior, how the smoke moves and how the flames respond to vent adjustments, gives you direct control over performance.
Heat Distribution Patterns
Heat doesn't distribute evenly in an outdoor pizza oven. The area directly above the firebox runs hottest. The rear and sides are cooler.
Professional pizzerias position their dough to move through these zones deliberately, achieving a charred bottom and perfectly melted topping in one bake. At home, you can mimic this by rotating your pie or using a peel to shift it around.
Understanding where heat concentrates in your specific model helps you compensate for weaknesses. Some ovens have naturally hotter spots near the door due to draft turbulence. Others cool faster at the front.
Mapping these variations through test cooks lets you develop a mental layout you can use every time you fire up.
Diagnose the Problem: A Step-by-Step Decision Tree
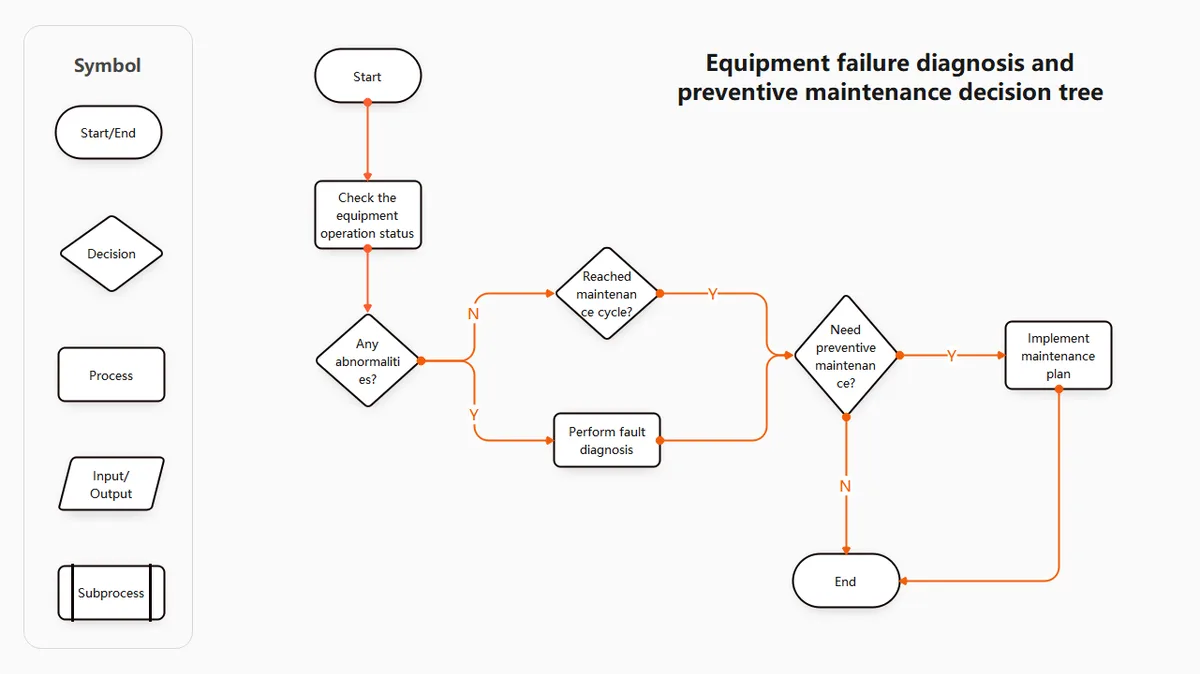
When something goes wrong, jumping to conclusions wastes time and parts. A systematic diagnosis approach lets you isolate the root cause before taking action. Use the following decision tree to narrow down what's actually happening with your outdoor pizza oven.
Step 1: Identify the Symptom
Start by clearly defining what's wrong. Is the oven not reaching temperature? Is there excessive smoke?
Are you seeing uneven browning? Write it down or note it mentally. Vague complaints like "it's not working right" don't lead anywhere.
Specific observations do.
Common symptom categories include:
- Temperature issues: not hot enough, fluctuates wildly, recovers slowly
- Airflow issues: smoke backup, poor draft, hard to light
- Fuel issues: wood won't burn cleanly, gas flame behaves oddly
- Structural issues: cracks, rust, loose components
Step 2: Check the Obvious First
Before disassembling anything, verify the simple stuff. Is the chimney cap removed? Are both intake and exhaust vents open?
Is the propane tank empty or the wood seasoned? These are overlooked often enough to cause genuine problems. A blocked vent or closed damper can mimic far more serious issues.
Also inspect visually for clear obstructions. Look inside the firebox for ash buildup. Check the chimney throat for creosote buildup or nesting debris.
Ensure the oven door seal is intact and closing properly. Many "malfunctions" resolve with a quick visual and physical check.
Step 3: Test Under Controlled Conditions
If the basics check out, run a diagnostic cook. Light the oven and let it reach operating temperature while observing behavior. Note where flames hover, how smoke moves, and how quickly temperature climbs.
Use a handheld infrared thermometer to map surface temperatures across the dome and floor.
This test phase reveals patterns that casual observation misses. For example, you might notice the back left corner lags 50 degrees behind the rest. That's a cold spot rooted in draft design.
Or you might see flame lift off the burner tips on one side, indicating a clog in that jet.
Step 4: Match Symptom to Likely Cause
Now cross-reference what you observed with common problem profiles:
| Symptom | Likely Cause | Next Action |
|---|---|---|
| Slow heat-up | Wet wood, closed vents, poor insulation | Dry fuel, open intakes, check dome condition |
| Smoky interior | Weak draft, dampers closed, unseasoned fuel | Clear chimney, adjust vents, replace wood |
| Cracked dome/hearth | Thermal shock, rapid cooling, manufacturing defect | Seal small cracks, avoid ice water on hot surfaces |
| Flame flickers yellow | Gas impurity, clogged burner, low pressure | Clean burner ports, check regulator, replace fuel source |
| Uneven browning | Hot/cold spots, poor rotation habit, wind exposure | Rotate pie frequently, shield from wind, recalibrate |
Step 5: Isolate and Resolve
Once you've pinpointed the probable cause, address it methodically. Make one change at a time, then retest. This prevents confusion about what actually fixed the issue.
If temperature was the problem, adjust vents and monitor for 20 minutes before declaring success.
Document your findings and adjustments. Over time, you'll build a personalized troubleshooting log that speeds up future diagnoses. Your oven's quirks become known quantities rather than mysteries.
Fixes You Can Do Yourself — Real Steps, Real Results
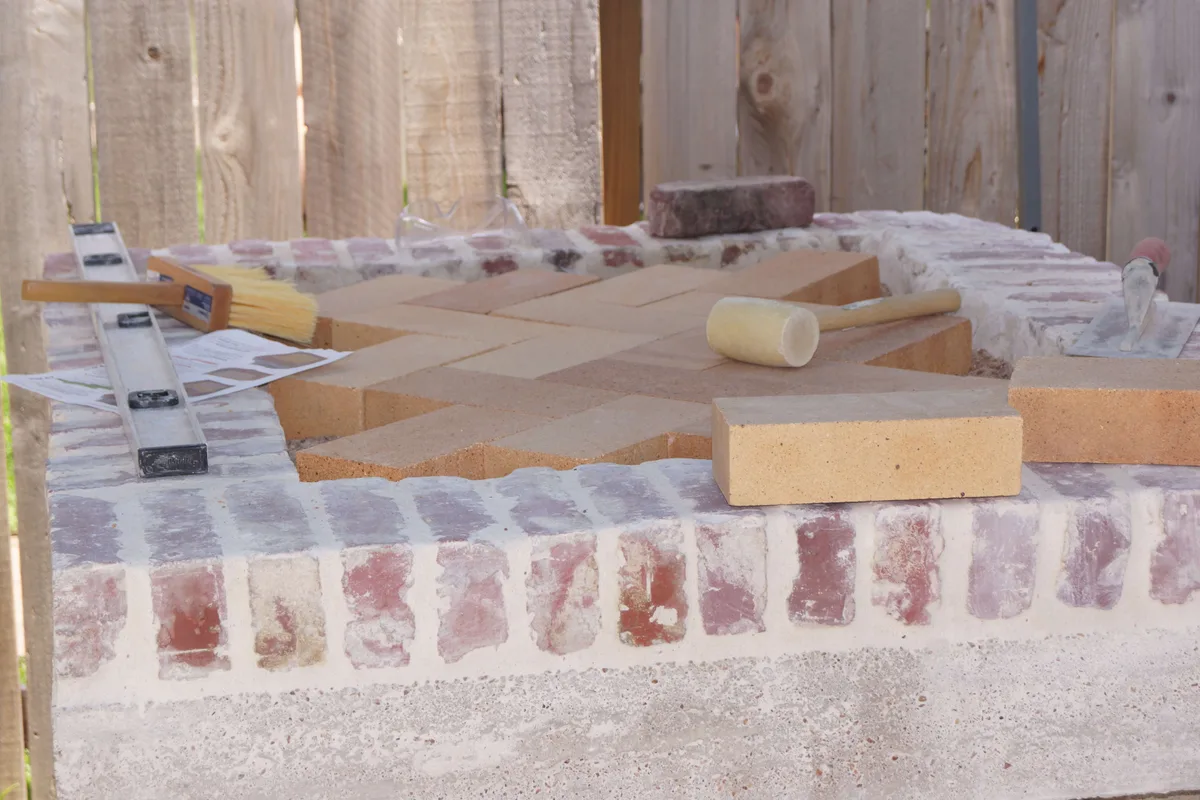
Some outdoor pizza oven problems demand professional help, but many can be resolved with basic tools and a little patience. Below are actionable fixes for the most frequent issues, complete with the materials you'll need and the steps to follow safely.
Fixing Cracks in the Dome or Hearth
What you'll need: Refractory cement (high-temperature rated), putty knife, wire brush, safety gloves, dust mask.
Steps:
- Let the oven cool completely. Working on hot material risks burns and poor adhesion.
- Clean the crack area thoroughly. Remove loose debris, soot, and old sealant with a wire brush.
- Mix the refractory cement according to manufacturer instructions. It should have a thick, paste-like consistency.
- Press the mixture into the crack using a putty knife. Overfill slightly to account for shrinkage as it dries.
- Allow to cure fully, usually 24 to 48 hours depending on product and humidity.
- Fire the oven gently at low temperature first, then gradually increase to normalize the repair.
Note: Hairline cracks may appear again over time as the material seasons. Reapply cement annually as part of routine maintenance.
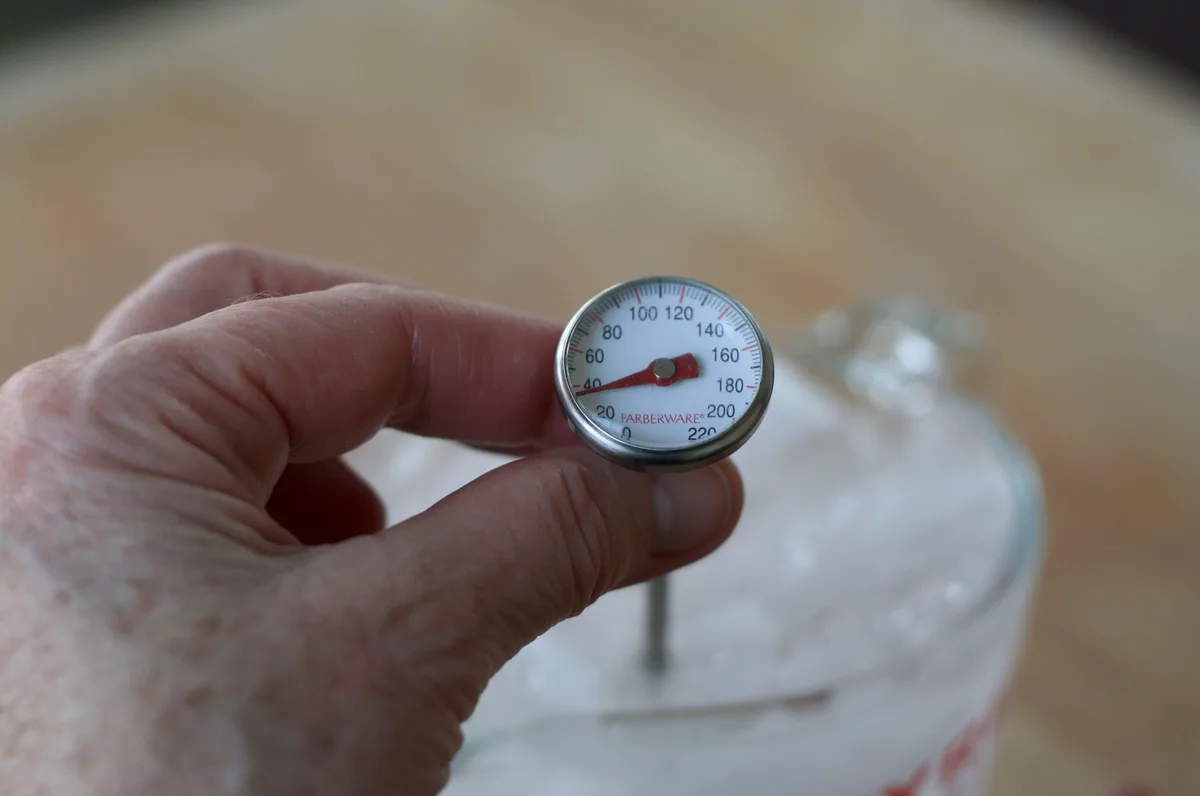
Calibrating a Drifting Thermometer
What you'll need: Ice, water, large container, thermometer reference chart, small screwdriver (for analog gauges).
Steps:
- Fill a container with ice and cold water. Stir and let sit for two minutes.
- Submerge your thermometer's sensor or bulb into the ice bath. Ensure it doesn't touch the container walls.
- Wait one minute for the reading to stabilize. An accurate thermometer should read 32°F (0°C).
- If it reads differently, locate the calibration nut on the back of the gauge. Use the screwdriver to adjust until it matches.
- For digital thermometers, consult the manual for offset adjustment procedures.
- Verify again in a hot environment near the fire to ensure consistency across ranges.
Regular calibration, at least once per season, keeps your temperature readings trustworthy.
Clearing a Blocked Chimney or Vent
What you'll need: Chimney brush set, shop vacuum (hot-rated if possible), long flexible rod, ladder (if needed), flashlight.
Steps:
- Ensure the oven is completely cold and no embers remain.
- Remove any chimney caps or deflectors carefully.
- Insert the appropriate-sized brush into the flue. Push through gently, rotating as you go.
- Use the shop vacuum to extract loosened creosote and debris from the bottom.
- Check intake vents and air dampers for ash accumulation. Clean with a brush or compressed air.
- Reassemble all components securely before lighting the oven.
Blockages restrict draft and force smoke backward into the cooking area. Cleaning should be part of your end-of-season or heavy-use maintenance schedule.
Adjusting Gas Burner Flames
What you'll need: Manufacturer's manual, hex key set, non-corrosive cleaner, soft brush, replacement igniter electrodes if worn.
Steps:
- Turn off gas supply and disconnect power if electronic ignition exists.
- Locate the burner assembly and remove protective shields.
- Inspect burner ports for food debris, grease, or insect nests. Clean gently with a brush and approved cleaner.
- Check electrode spacing against manual specifications, typically 1/8 inch from the burner.
- Reassemble and restore power. Test ignition sequence.
- Observe flame pattern. It should be steady blue with minimal yellow tipping. Adjust air shutter if adjustable.
Persistent flame issues may indicate a faulty regulator or damaged gas line. In those cases, consult a certified technician rather than attempting further DIY repairs.
Mistakes That Turn a Small Problem Into a Big One
Even well-intentioned owners can worsen oven troubles with common missteps. Avoid these pitfalls to prevent minor annoyances from becoming costly repairs or safety hazards.
Ignoring Early Warning Signs
A small crack today becomes a dome failure tomorrow. A slightly stiff damper handle now may seize completely later. Don't dismiss unusual noises, strange odors, or gradual performance drops.
Catching issues early saves money and keeps your oven reliable.
Using the Wrong Materials
Refractory cement isn't regular caulk. High-temperature paint isn't exterior house paint. Substituting incorrect products compromises safety and performance.
Always use materials rated for the specific temperature and application your oven demands. Check manufacturer recommendations before purchasing substitutes.
Rushing the Cure Process
New ovens and repaired ones need gradual heating to drive out moisture and set materials properly. Cranking the heat too soon causes cracking, spalling, or binding issues. Follow a prescribed cure schedule, even if it takes several hours, to protect your investment long-term.
Neglecting Regular Maintenance
Ash removal, vent cleaning, and visual inspections shouldn't wait for a problem to appear. Establish a simple routine after each use and a deeper check every few months. Consistent upkeep prevents the majority of issues covered in this guide.
Skipping Safety Checks
Gas leaks, unstable placement, and blocked clearances aren't inconveniences. They're dangers. Before every cook, verify connections, stability, and clearance distances.
Keep a Class ABC fire extinguisher nearby. Never leave a lit oven unattended for extended periods. Per NFPA guidelines on outdoor cooking equipment, minimum clearance from combustibles should be maintained at all times.
Addressing these mistakes proactively transforms your outdoor pizza oven from a finicky appliance into a dependable cooking centerpiece.
Frequently Asked Questions
Why does my outdoor pizza oven smoke too much?
Excessive smoke usually comes from wet wood, closed dampers, or incomplete combustion. Use properly seasoned firewood with under 20% moisture. Open all air intakes fully during lighting.
Keep the chimney clear of obstructions so draft flows freely upward instead of spilling back into the chamber.
How do I fix a cracked outdoor pizza oven dome?
Clean the crack thoroughly with a wire brush. Apply high-temperature refractory cement with a putty knife, overfilling slightly for shrinkage. Let it cure for 24 to 48 hours.
Fire the oven at low heat first, then ramp up gradually. Monitor the repair each season and reseal if hairline cracks reappear.
What causes cold spots in an outdoor pizza oven?
Cold spots are caused by poor airflow, misadjusted vents, incorrect fire positioning, or wind exposure. Map your oven's temperature zones with an infrared thermometer. Reposition your fuel source toward the cooler area.
Rotate your pizza more frequently during cooking. Shield the oven from prevailing winds with a windbreak.
How do I know if my oven thermometer is inaccurate?
Perform an ice-water test. Fill a container with ice and water, stir, and wait two minutes. Submerge the thermometer sensor without touching the container.
A calibrated gauge reads 32°F (0°C). If it doesn't match, adjust the calibration nut on analog models or follow the digital offset procedure in your manual.
How often should I clean ash from my outdoor pizza oven?
Remove ash after every two to three cooking sessions for wood-fired ovens. Gas ovens produce no ash but benefit from monthly burner inspection. Heavy users should clear ash pans weekly.
Accumulated ash restricts airflow, chokes the fire, and reduces operating temperature. A clean oven runs hotter and more efficiently.
When should I call a professional for outdoor pizza oven repair?
Call a professional for structural dome failures, gas line leaks, persistent ignition problems despite cleaning, or cracked heat exchangers. DIY repairs are fine for surface cracks, vent adjustments, thermometer calibration, and ash removal. If a problem persists after following troubleshooting steps, professional assessment prevents further damage and ensures safety compliance.

Sophia Martinez is a culinary lifestyle writer and product reviewer for DiningGadgets.com. Passionate about blending style with functionality, she explores the latest dining essentials, kitchen décor, and cleaning hacks that transform everyday cooking spaces. With a background in home organization and design, Sophia brings readers expert advice on creating beautiful, practical kitchens that truly feel like the heart of the home.