How to Clean Oily Kitchen Walls: Easy Tips for a Sparkling Finish
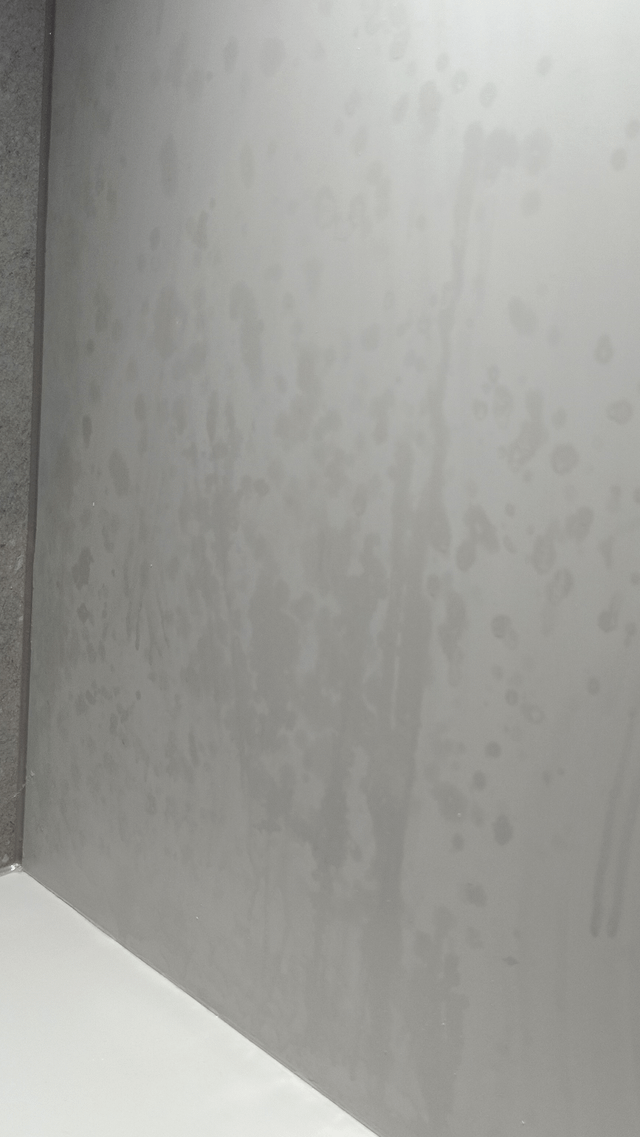
If you’ve ever wiped down your kitchen walls only to find greasy streaks reappear a week later, you’re not alone. Oily residue is one of the most common kitchen cleaning headaches, and it’s about more than just unsightly smudges: accumulated grease traps dust, can harbor bacteria, and over time, degrades paint, wallpaper, and grout if left untreated. The good news is that with the right techniques and supplies, you can remove even months of set-in grease without damaging your walls, and keep them sparkling long-term with simple preventive habits. This 2026-updated guide covers every wall type, natural and chemical cleaning methods, and pro tips to cut your cleaning time in half. You can also read our guide on how to regrout kitchen wall tiles easy steps for a fresh look.
What Causes Greasy Buildup on Kitchen Walls?
Common Sources of Airborne Kitchen Grease
Grease on kitchen walls doesn’t come from direct splatters alone—most of it is airborne. When you fry, sauté, roast meat, or even bake with butter, tiny lipid particles are released into the air and settle on nearby surfaces, including walls up to 6 feet from your cooking area. According to EPA guidance on indoor cooking emissions, these particles are hydrophobic, meaning they repel water and bind easily to porous surfaces, making them far harder to remove with plain soap and water than surface-level food splatters. You can also read our guide on what to use to clean grease off kitchen walls.
Other common grease sources include:
- Uncovered pots and pans releasing steam and fat while simmering or boiling
- Burnt food or overheated oil creating smoke that carries grease particles across the room
- Grilling or broiling foods that release large amounts of rendered fat into the air
Walls within 3 feet of your stove or range hood will accumulate grease 2-3 times faster than walls on the opposite side of the kitchen, which is why targeted cleaning of these high-traffic zones is so important. You can also read our guide on how to clean kitchen wall tiles and grout.
How Grease Damages Different Wall Surfaces
Over time, unaddressed grease buildup does more than make walls look dirty:
- Painted drywall: Grease seeps into matte or eggshell paint, causing discoloration, yellowing, and peeling over time. It also attracts dust, creating a sticky, grimy layer that’s harder to clean the longer it sits.
- Tile and grout: Grease settles into porous grout lines, causing dark stains and creating a breeding ground for mold and mildew if combined with moisture.
- Wallpaper: Grease can dissolve the adhesive on non-washable wallpaper, causing peeling, bubbling, or permanent staining.
- Natural stone (marble, granite, brick): Grease can etch porous stone surfaces, leaving permanent dull spots if not cleaned promptly with pH-neutral products.
 A vinegar-water solution is one of the safest natural degreasers for most interior wall finishes.
Supplies You’ll Need for Safe, Effective Cleaning
Using the wrong supplies can scratch paint, etch stone, or leave behind residue that attracts more grease over time. We’ve organized the most effective options by wall type below. You can also read our guide on how to remove grease from walls in kitchen.
Cleaning Agents Safe for Every Wall Type
Choose a cleaner matched to your wall finish to avoid damage:
| Cleaning Agent | Best For Wall Type | Key Notes |
|---|---|---|
| Mild dish soap | Painted drywall, wallpaper | Safe for most finishes; avoid heavy-duty degreaser soaps on matte paint, as they can strip the topcoat |
| White vinegar (1:1 with water) | Ceramic tile, sealed brick | Cuts grease effectively; avoid on natural stone (marble, granite) as the acid can etch surfaces |
| Baking soda paste | All surfaces, especially set-in stains | Gentle abrasive; test on painted walls first to avoid scuffing delicate finishes |
| Commercial kitchen degreaser | Tile, stainless steel, unsealed surfaces | Use only on non-porous finishes; always spot test and ventilate the area thoroughly when using |
| Diluted castile soap | Painted drywall, washable wallpaper | Biodegradable, pH-neutral; ideal for households with kids, pets, or sensitive respiratory systems |
For all cleaning agents, the Consumer Product Safety Commission’s safe kitchen cleaning guidelines recommend avoiding harsh chemical mixes (like bleach and vinegar) that can release toxic fumes in enclosed kitchen spaces. You can also read our guide on what colors are best for kitchen walls.
Tools That Won’t Scratch or Damage Finishes
Pair your chosen cleaner with the right tools to avoid scuffing walls:
- Microfiber cloths (lint-free, for wiping and drying)
- Non-abrasive sponges (with a soft scrubbing side for light stains)
- Soft-bristled scrub brush (for grout lines and textured surfaces)
- Spray bottle (for even application of liquid cleaners)
- Step stool or sturdy ladder (for high walls near the ceiling)
- Drop cloth or old towels (to protect floors and countertops from drips)
In practice, many homeowners over-saturate their walls when cleaning, which can lead to water damage behind drywall or mold growth in grout lines—always wring out sponges or cloths until they are only lightly damp. You can also read our guide on apron hanging in kitchen.
Pre-Cleaning Prep to Avoid Damage or Mess
Skipping prep steps can lead to ruined finishes, water damage, or extra cleanup work later. Follow these 10-minute steps before you start scrubbing:
Clear and Protect Your Space
Start by removing all wall-mounted items (art, clocks, shelves, outlet covers) to give you full access to the wall surface. Lay a drop cloth or old towels along the floor and over countertops near the walls to catch drips and debris. Use painter’s tape to cover the edges where walls meet cabinets, countertops, and trim to protect these surfaces from cleaner residue. If you’re cleaning walls near electrical outlets, cover them with plastic wrap or removable outlet covers to avoid moisture getting inside and causing electrical hazards. You can also read our guide on best tea towels for drying dishes.
Test Cleaners in an Inconspicuous Spot First
A common mistake homeowners make is skipping a spot test, leading to faded or peeling paint on visible wall sections. Dab a small amount of your chosen cleaner on a hidden area (like behind a cabinet or in a corner) and wait 5 minutes to check for discoloration or damage before applying it to the full wall. You can also read our guide on how to install kitchen exhaust vent through wall.
 Baking soda paste lifts set-in grease without scratching paint or tile surfaces.
Step-by-Step Cleaning Process for All Wall Types
This process works for all wall finishes, with minor adjustments for surface type noted below.
- Remove loose debris first: Use a dry microfiber cloth or soft brush to wipe away dust, crumbs, and loose grease from the wall surface. This prevents smearing grease around during the cleaning process and preps the surface for deeper cleaning.
- Apply your cleaning solution: For light grease, spray or dab your chosen cleaner onto the wall, focusing on high-grease zones (within 3 feet of the stove, behind the sink, near light switches). Let it sit for 3-5 minutes to break down grease; for heavy buildup, let it sit for 10-15 minutes.
- Scrub gently: Use a non-abrasive sponge or soft-bristled brush to scrub the wall in small circular motions. Avoid harsh scrubbing, which can scratch paint or damage grout. For set-in stains, apply a small amount of baking soda paste directly to the spot before scrubbing for extra lifting power.
- Rinse thoroughly: Wipe the wall with a clean, lightly damp cloth to remove all cleaner and grease residue. Leftover soap can attract new dirt and grease over time, so rinse until the cloth comes away clean.
- Dry completely: Pat the wall dry with a clean, lint-free towel. For tiled walls, pay extra attention to grout lines to avoid moisture buildup that leads to mold.
How to Clean Oily Kitchen Walls by Surface Type
Different wall finishes require minor tweaks to the standard process for the best results:
Painted Drywall
Painted drywall is the most common kitchen wall finish, and it’s also the most prone to grease damage. Stick to pH-neutral cleaners (mild dish soap, diluted castile soap, or vinegar-water solution) and avoid over-saturating the wall, as excess moisture can seep into the drywall and cause mold or warping. For matte paint finishes, skip abrasive tools entirely to avoid scuffing the delicate topcoat. For more guidance on maintaining tiled kitchen surfaces, check out our dedicated cleaning guide. You can also read our guide on outdoor kitchen design tool.
Ceramic or Porcelain Tile
Tile is non-porous, so it’s far more resistant to grease damage than drywall or wallpaper. You can use a commercial kitchen degreaser for heavy buildup, and a soft-bristled brush to scrub grout lines without worry. For extra-shiny grout, mix baking soda and hydrogen peroxide into a paste, apply to grout lines, let sit for 10 minutes, then scrub and rinse. Once your tile is clean, you can refresh its look with our tips for styling your kitchen tile surfaces with open shelving or decorative accents. You can also read our guide on best quality table linens.
Wallpaper
Only use cleaners on wallpaper labeled as washable. For non-washable wallpaper, avoid liquid cleaners entirely—use a dry microfiber cloth to gently blot grease spots, or a small amount of cornstarch sprinkled on the stain to absorb grease before brushing off. For washable wallpaper, use a diluted vinegar-water solution and a soft cloth to wipe away grease, being careful not to over-saturate the paper to avoid peeling. You can also read our guide on how to clean kitchen walls.
Brick, Stone, or Stainless Steel Backsplashes
Unsealed brick and stone are porous, so they require pH-neutral cleaners only to avoid etching. Use a soft brush to scrub grease out of the crevices of brick or stone, then rinse and dry thoroughly. For stainless steel backsplashes, use a dedicated stainless steel cleaner to avoid water spots and streaks, wiping with the grain of the metal for the best finish. You can also read our guide on how to clean kitchen wall grease.
Natural Cleaning Alternatives for Chemical-Free Homes
If you prefer to avoid harsh chemical cleaners, these natural options are just as effective for most grease buildup, with the added benefit of being non-toxic for kids, pets, and sensitive respiratory systems. You can also read our guide on best drying towels for dishes.
Vinegar and Baking Soda Paste
This classic duo is one of the most effective natural degreasers for light to moderate grease. Sprinkle a small amount of baking soda directly onto the greasy spot, then spray or dab a 1:1 mix of white vinegar and water over it. The fizzing reaction helps lift grease and grime from the wall surface without scrubbing. Let it sit for 5 minutes, then wipe clean with a damp cloth and dry. You can also read our guide on how to remove kitchen cabinets without damaging wall.
Lemon Juice and Castile Soap Mix
The citric acid in lemon juice breaks down oily residues naturally, while castile soap adds gentle degreasing power without harsh chemicals. Mix 1 cup warm water, 1 tablespoon castile soap, and 2 tablespoons fresh lemon juice in a spray bottle, apply to greasy walls, let sit for 3 minutes, then wipe clean. The citrus scent also leaves your kitchen smelling fresh without artificial fragrances. You can also read our guide on how to wash kitchen walls.
When to Avoid Natural Cleaners
Natural cleaners are not suitable for all surfaces: avoid vinegar on natural stone (marble, granite, travertine) as the acid will etch the surface, and avoid baking soda on glossy painted finishes, as it can cause light scuffing. For heavy grease on porous surfaces or non-washable wallpaper, stick to gentle dish soap and avoid acidic or abrasive natural ingredients. You can also read our guide on presque isle wine making supplies.
Tackling Stubborn, Set-In Stains
If grease has been building up for months or years, standard cleaning methods may not be enough to fully remove stains. Here’s how to handle the toughest buildup:
Specialized Degreasers for Heavy Buildup
For grease that’s been left untreated for 6+ months, a commercial kitchen degreaser formulated for walls will break down thick, bonded grease layers faster than homemade solutions. Always follow the product instructions, ventilate the area well while using, and rinse thoroughly after cleaning to avoid residue buildup. For grease stains on grout, a hydrogen peroxide and baking soda paste left to sit for 30 minutes before scrubbing will lift even the darkest, oldest stains. For consistent maintenance, follow our tips for targeting stubborn wall grease before it has time to set in and cause permanent damage. You can also read our guide on best dish towels for drying dishes.
When Repainting Is the Best Solution
If stains remain visible after deep cleaning, or if paint is peeling or discolored from long-term grease exposure, repainting is the only way to fully restore your walls. Before repainting:
- Clean the wall thoroughly with a degreaser to remove all loose grease and residue
- Apply a stain-blocking primer (such as Kilz or Zinsser) to seal in any remaining grease stains and prevent them from bleeding through new paint
- Choose a washable, semi-gloss or satin paint finish for kitchen walls, as these are more resistant to grease and easier to clean than matte finishes
If you’re repainting after deep cleaning, consider coordinating wall hues with cabinet finishes to create a cohesive, fresh look for your space. You can also read our guide on how to paint wall tiles in kitchen.
 A quick deep clean can remove months of accumulated kitchen wall grease in under an hour.
Prevent Future Grease Build-Up for Less Work Long-Term
The easiest way to clean oily kitchen walls is to avoid needing to deep clean them in the first place. These simple habits will cut your cleaning time by 70% or more:
Optimize Kitchen Ventilation
The single most effective way to reduce grease buildup is to capture airborne grease before it settles on your walls. If your current exhaust fan or range hood isn’t powerful enough to clear smoke and steam within 5 minutes of cooking, consider upgrading your kitchen exhaust system to a higher CFM (cubic feet per minute) model. Clean your range hood filters monthly—clogged filters can’t capture grease, and will actually recirculate it back into your kitchen air. If you don’t have a built-in range hood, open a window or use a portable air purifier with a HEPA filter while cooking to capture airborne particles. You can also read our guide on how to fix wall tiles in kitchen.
Build a Simple Weekly Maintenance Routine
You don’t need to deep clean your walls every week to keep them grease-free. Add these 2-minute tasks to your regular kitchen cleaning routine:
- Wipe down the wall behind your stove and countertops with a vinegar-water solution after every cooking session that uses oil or butter
- Keep a microfiber cloth and small spray bottle of cleaner under your sink for quick touch-ups of splatters before they set
- Wipe down range hood filters and exhaust fan grilles monthly to avoid recirculating grease
Frequently Asked Questions
What causes oily kitchen walls so quickly?
Oily kitchen walls are almost always caused by cooking activities that release airborne grease particles, which settle on walls over time. Lack of ventilation, infrequent cleaning, and cooking habits that involve frequent frying or sautéing will speed up buildup significantly. You can also read our guide on how to clean kitchen walls for painting.
How often should I clean my kitchen walls?
For most households, a quick wipe-down of high-grease zones (behind the stove, near the sink) once a week is enough to prevent buildup. Deep clean all kitchen walls every 1-2 months, or more often if you cook with oil daily. The longer grease sits, the harder it is to remove, so consistent light cleaning is far more effective than occasional deep scrubbing. You can also read our guide on how to remove kitchen wall tile.
What tools are best for cleaning oily kitchen walls without damage?
A microfiber cloth, soft non-abrasive sponge, and soft-bristled scrub brush are the safest tools for all wall types. Avoid steel wool, rough scouring pads, or stiff-bristled brushes, which can scratch paint, tile, and wallpaper. You can also read our guide on how to clean kitchen wall tiles easily.
Can vinegar remove grease from kitchen walls?
Yes, diluted white vinegar is highly effective at cutting through light to moderate grease on most non-porous surfaces, including tile, sealed brick, and painted drywall. Avoid using vinegar on natural stone surfaces, as the acid can etch and damage the finish. You can also read our guide on how to clean kitchen walls without removing paint.
Can I use dish soap to clean oily kitchen walls?
Yes, mild, pH-neutral dish soap is safe for all wall types when diluted with warm water. Avoid heavy-duty degreaser dish soaps (like Dawn Platinum) on matte or eggshell painted walls, as they can strip the paint’s topcoat and cause discoloration. You can also read our guide on how to clean kitchen grease off walls.
Will cleaning oily walls damage my paint?
No, as long as you use a paint-safe cleaner, avoid over-saturating the wall, and use soft, non-abrasive tools. Always spot test cleaners in an inconspicuous area first to ensure they won’t cause fading or peeling. You can also read our guide on how to remove oil grease from kitchen walls.
Final Thoughts
Cleaning oily kitchen walls doesn’t have to be a time-consuming, frustrating chore. By using the right cleaner for your wall type, following a simple step-by-step process, and building small preventive habits into your weekly routine, you can keep your walls sparkling year-round without harsh chemicals or expensive professional cleaning services. You can also read our guide on how to decorate small kitchen walls.
Small, consistent efforts make the biggest difference: a 2-minute wipe-down after cooking will save you hours of deep scrubbing later. If you’re considering a full kitchen update after refreshing your walls, check out our guide to pairing wall colors with cabinetry to create a cohesive, welcoming space you’ll love cooking in. You can also read our guide on plastic apron for kitchen.