What is a Pony Wall in a Kitchen: Stylish Space-Saving Solution
If you’re remodeling a cramped galley kitchen, working with an open concept layout that lacks clear zones, or looking for a low-cost alternative to full wall removal, you’ve likely come across the term "pony wall." Unlike a full-height wall that blocks light and sightlines, or a completely open layout that leaves kitchen, dining, and living areas feeling undefined, a pony wall strikes the perfect balance: it creates subtle visual boundaries, adds functional counter or storage space, and keeps your home feeling airy and connected.
In this guide, we’ll break down exactly what a pony wall is, the best materials and finishes for your space, cost expectations, layout-specific placement tips, and common pitfalls to avoid. Whether you’re a seasoned DIYer or working with a contractor, you’ll leave with actionable insights to determine if a pony wall is the right space-saving solution for your kitchen. For more on this, see our guide on how to build a pony wall for kitchen.
What Exactly Is a Kitchen Pony Wall?
Core Definition and Primary Use Cases
A kitchen pony wall is a short, partial wall that typically stands 36 to 42 inches tall (matching standard kitchen counter height) and extends 4 to 6 inches thick from the floor, but does not reach the ceiling. In practice, the terms "pony wall" and "half wall" are often used interchangeably, though some builders distinguish the two: pony walls are frequently load-bearing, meaning they support weight from upper cabinets, countertops, or ceiling joists, while half walls are almost always non-structural, used only for zone definition.
Pony walls serve three core purposes in kitchen design: they create clear visual boundaries between distinct work zones (cooking, prepping, dining) without blocking natural light or foot traffic; they provide a sturdy base for countertop overhangs that add casual seating or extra prep space; and they can hide unsightly plumbing, electrical panels, or small appliance clutter to keep the main living area tidy. For more on this, see our guide on what to do with empty wall space in.
Common Materials for Kitchen Pony Walls
The material you choose will impact the wall’s durability, cost, aesthetic, and weight capacity. Below is a breakdown of the most popular options, with pros, cons, and ideal use cases:
| Material | Pros | Cons | Best Use Case |
|---|---|---|---|
| Moisture-resistant drywall (green board) | Affordable, easy to paint or texture, seamless finish | Prone to denting, requires sealing to prevent water damage | Non-structural pony walls in low-moisture zones, painted decorative finishes |
| Solid wood/plywood (stained or painted) | Warm, natural aesthetic, highly durable, can support heavy countertops | Requires sealing to prevent warping, higher cost than drywall | Load-bearing pony walls, farmhouse or modern rustic kitchen styles |
| Brick/stone veneer | Extremely durable, easy to clean, high visual impact | Heavy, requires professional installation, highest material cost | Industrial or rustic kitchens, accent walls in high-traffic zones |
| Tempered/frosted glass | Maximizes light transmission, modern minimalist look, easy to clean | Shows smudges and fingerprints, requires professional installation for safety, higher cost | Small, dark kitchens, modern layouts where unobstructed sightlines are a priority |
| Powder-coated metal (steel/aluminum) | Moisture-resistant, scratch-resistant, ultra-durable | Cold to the touch, can dent, higher upfront cost | Commercial-style home kitchens, industrial design schemes |
Choosing the right material starts with assessing your kitchen’s existing style, moisture levels, and whether the wall will need to support weight. For most residential projects, moisture-resistant drywall or sealed wood offers the best balance of cost, durability, and versatility.
 This 42-inch pony wall adds casual bar seating while keeping sightlines open between the kitchen and adjacent living space.
Key Benefits of Pony Walls in Kitchen Design
Pony walls have become a staple of modern kitchen design for good reason: they solve common pain points of both small and open concept layouts without the high cost or disruption of full construction. Below are the top benefits, aligned with industry design standards:
Space Optimization for Small and Open Concept Kitchens
For galley kitchens (typically 10 to 12 feet wide) or small L-shaped layouts, a full dividing wall can make the space feel cramped and reduce traffic flow. The National Kitchen and Bath Association (NKBA) recommends maintaining at least 36 inches of clearance between work zones for safe, comfortable movement, a standard a pony wall easily supports by only taking up 4 to 6 inches of floor space. In practice, a 4-foot long pony wall at the end of a galley kitchen can increase perceived space by up to 30% by eliminating the need for a full wall, while also adding 10 to 15 square feet of usable counter space if topped with a durable slab.
Improved Workflow and Zone Definition
Open concept kitchens often suffer from unclear zones: cooking, prepping, dining, and living areas blend together, leading to cross-traffic that disrupts meal prep and increases accident risk. A pony wall creates a subtle visual boundary that guides foot traffic away from hot stoves and sharp prep surfaces without blocking views of the rest of the home. For households with kids or pets, a pony wall also acts as a partial barrier to keep vulnerable individuals out of the cook zone while still letting you supervise the rest of the space.
Boosted Visual Appeal and Design Flexibility
Unlike a full wall, which can feel heavy and out of place in an open layout, a pony wall can be styled to act as an intentional design focal point. You can paint it to match your existing walls for a seamless look, or use a contrasting finish, textured material, or built-in decor to make it stand out. For example, a shiplap pony wall in a farmhouse kitchen adds rustic charm, while a frosted glass pony wall in a modern minimalist space creates a sleek, airy feel.
Increased Resale Value
Real estate analysts note that defined, open kitchen layouts are a top priority for home buyers in 2026, as they combine the social benefits of open concept spaces with the functionality of separate work zones. A well-designed pony wall adds value by making a small kitchen feel larger and more functional, without the $5,000 to $15,000 cost of a full structural wall removal. For homeowners planning to sell in the near future, a pony wall is a low-cost, high-impact upgrade that appeals to a wide range of buyers.
Cost Breakdown: Is a Pony Wall Budget-Friendly?
One of the biggest advantages of a pony wall over a full wall addition or removal is its low cost. Total project costs depend on the materials you choose, whether you hire a professional, and whether the wall is load-bearing. Below is a typical cost breakdown for an 8-foot long, 42-inch tall pony wall:
| Cost Component | DIY (Low-End) | Professional Installation (High-End) |
|---|---|---|
| Materials | $150–$400 (lumber, drywall, paint, fasteners) | $300–$800 (premium materials like stone veneer, tempered glass, custom countertops) |
| Labor | $0 (for those with basic carpentry experience) | $500–$1,500 (varies by region and complexity, includes permit fees for load-bearing walls) |
| Total Project Cost | $150–$400 | $800–$2,300 |
For context, a full structural wall removal (a common alternative to adding a pony wall for open concept remodels) costs an average of $10,000, making a pony wall a highly accessible option for budget-conscious homeowners. Always budget an extra 10–15% for unexpected costs, such as additional lumber or permit fees.
Where to Place a Pony Wall in Your Kitchen: Layout-Specific Ideas
Placement is one of the most critical factors in ensuring your pony wall improves your kitchen’s function rather than hindering it. Below are layout-specific recommendations for the most common kitchen configurations:
Galley Kitchens
Galley kitchens are narrow, linear spaces that often lack clear zone separation. Place a 3 to 4-foot long pony wall at one end of the galley, separating the cooking zone (stove, sink) from a small dining nook. This creates two distinct zones without reducing the 36-inch traffic clearance required for safe movement. Add a 10-inch counter overhang to the dining side for two stools, turning the dead end of the galley into a casual breakfast spot.
L-Shaped Kitchens
For L-shaped kitchens open to a dining or living area, place the pony wall along the open edge of the L, parallel to the longer run of countertop. This maintains the efficient L-shaped work triangle (sink, stove, fridge) while defining the kitchen as a separate zone from the rest of the home. A 5 to 6-foot long pony wall here can also support a countertop overhang for extra prep space or casual seating.
U-Shaped Kitchens
If one side of your U-shaped kitchen is open to an adjacent living space, a pony wall along that open edge can reduce noise and clutter transfer while keeping sightlines open. This is especially useful for households with young kids or pets, as it creates a partial barrier to keep them out of the cook zone without closing off the kitchen entirely.
Open Concept Kitchens
In large open concept layouts, place the pony wall between the kitchen island and the living room sofa area, or between the stove and the dining table. A 3-foot tall pony wall is sufficient to create a visual boundary here, as you’ll want to keep sightlines to fireplaces, TVs, or dining areas unobstructed.
Step-by-Step Installation Considerations
While non-structural pony walls are a manageable DIY project for homeowners with basic carpentry skills, load-bearing pony walls require professional expertise and permits. Below is a breakdown of key considerations for a successful install:
DIY vs Professional Installation
A common mistake among DIYers is assuming a pony wall is non-structural when it is actually load-bearing, which can lead to sagging, structural damage, or even collapse over time. Non-structural pony walls (used only for zone definition, no countertop or upper cabinet support) can be installed by DIYers with basic tools and carpentry knowledge. Load-bearing pony walls, which support weight from upper cabinets, heavy countertops, or ceiling joists, require a licensed contractor and building permit to ensure they meet safety standards. Always consult a structural engineer or your local building department to confirm the load status of your planned wall before starting work.
Pre-Installation Planning Steps
- Verify load requirements and permits: Check local building codes, which align with standards set by the International Code Council (ICC) for residential structural safety. Load-bearing walls will require a permit, while non-structural walls typically do not.
- Map your layout: Mark the wall’s location on the floor and ceiling with a level, ensuring it is perfectly straight and aligned with your existing cabinetry for a cohesive look. Standard height is 36–42 inches, but adjust to match your countertop height if you plan to add an overhang.
- Plan for utilities: If you’re adding electrical outlets, under-cabinet lighting, or a countertop, run all rough-ins for wiring and plumbing before installing your chosen finish material. If your pony wall runs near existing plumbing fixtures, you may need to adjust connections first; our guide on safe faucet removal steps walks through that process safely.
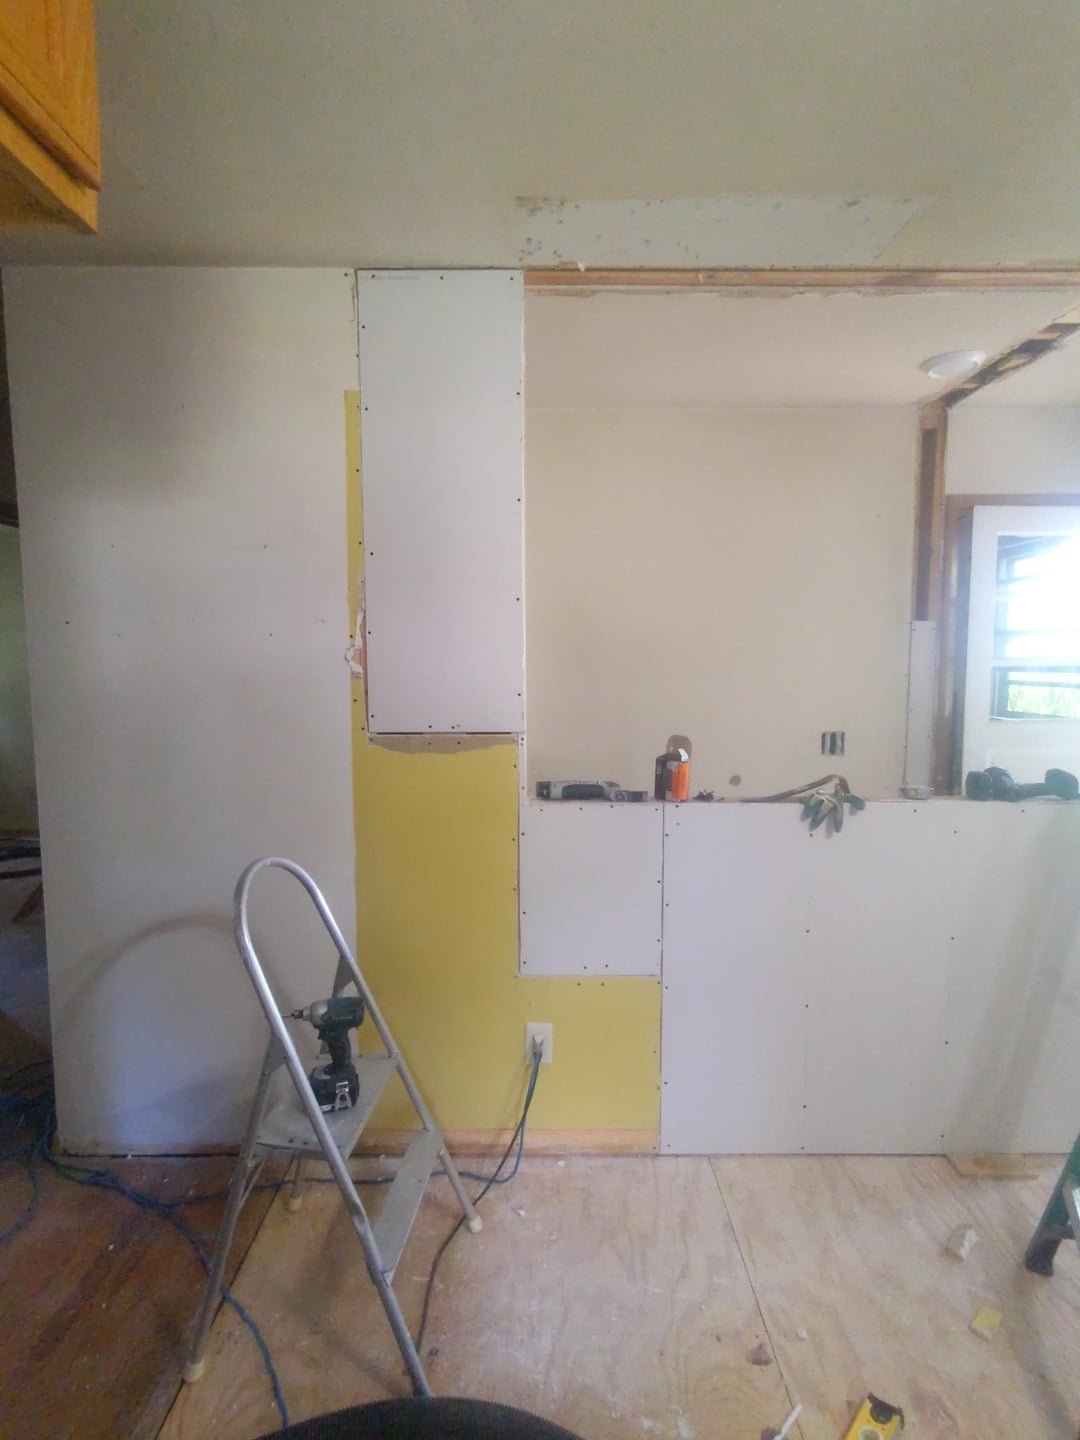
- Anchor the structure: Secure wall studs to the floor and ceiling joists with construction adhesive and 3-inch screws, using metal brackets for extra support if the wall is load-bearing. For added stability, install a pressure-treated bottom plate if the wall is being built on a concrete slab.
Post-Installation Finishing
Once the structure is fully anchored and level, install your chosen finish material. For drywall, tape and mud the seams, then sand smooth before painting or texturing. For wood or veneer finishes, seal all surfaces with a water-resistant polyurethane coating to prevent moisture damage, especially if the wall is near the sink or dishwasher. Caulk all gaps between the pony wall and adjacent walls, floors, and ceilings to prevent drafts and moisture infiltration.
Properly anchoring studs to the floor and ceiling joists is critical for structural stability, especially for load-bearing pony walls.
Styling Your Pony Wall: Design Ideas for Every Kitchen Style
A pony wall is as much a design feature as it is a functional one, and the right finish and add-ons can tie it seamlessly into your existing kitchen aesthetic. Below are actionable styling ideas for every design style:
Finish Options to Match Your Kitchen Aesthetic
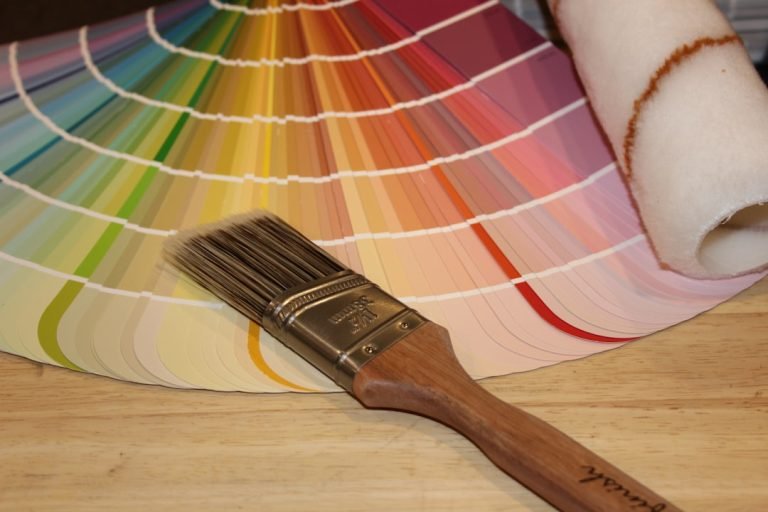
- Painted finishes: For a seamless, understated look, paint the pony wall the same color as your existing kitchen walls, or a soft contrasting shade to make it stand out as a subtle focal point. If you have bold green cabinetry, pair your pony wall with a soft neutral or muted complementary shade using guidance on coordinating wall colors for green cabinetry for a balanced, cohesive palette.
- Wood and texture finishes: For farmhouse or rustic kitchens, use reclaimed wood or shiplap for the pony wall, staining it to match your existing cabinets. For modern or industrial kitchens, opt for a smooth wood veneer, matte metal, or brick veneer for a sleek, edgy look.
- Glass finishes: Frosted or tinted glass pony walls are ideal for small, dark kitchens, as they block sightlines of clutter while still letting natural light pass through. Tempered glass is required for safety in areas near the stove or high-traffic zones.
Functional Add-Ons to Maximize Usability
- Countertop overhang: Add a 10 to 12-inch overhang to the dining side of the pony wall for casual bar seating. Opt for a durable material like quartz or butcher block that can stand up to daily use, spills, and scratches.
- Built-in storage: Add open cubbies for cookbooks and decor, closed cabinets for small appliances, or wall-mounted hooks for pots and pans. For small kitchens, this extra storage can eliminate the need for standalone shelving units, freeing up valuable floor space.
- Lighting: Install under-cabinet LED strips or a small pendant light above the counter overhang to illuminate the space for late-night snacks or homework sessions, while adding ambient ambiance to the room.
Complementing Existing Kitchen Features
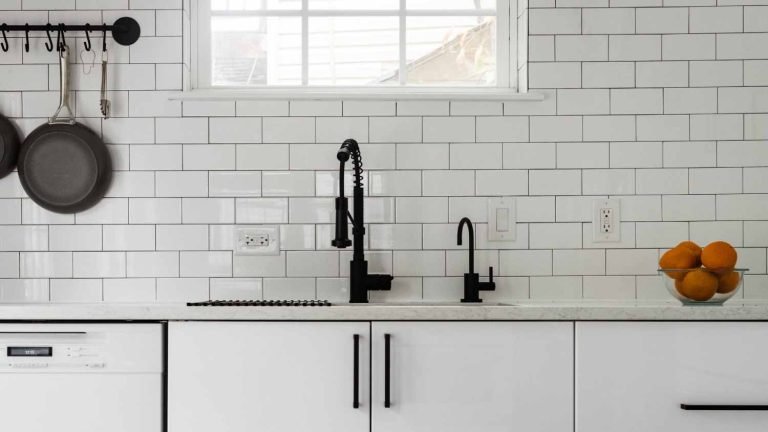
For warm, traditional kitchens with brown wood cabinets, reference pairing wall colors with brown cabinets to pick a pony wall finish that ties the whole room together. For modern kitchens with stainless steel appliances, a matte black metal or frosted glass pony wall creates a cohesive, sleek look that complements your existing fixtures.
Pony Walls vs. Other Kitchen Dividers: Which Is Right for You?
Pony walls are not the only option for defining kitchen zones — half walls, breakfast bars, and open shelving are also popular choices. Below is a side-by-side comparison to help you pick the best option for your space:
| Divider Type | Typical Height | Light Blockage | Seating Capability | Storage Capability | Best Use Case |
|---|---|---|---|---|---|
| Pony wall | 36–42 inches | Minimal | Yes (with counter overhang) | Yes (with built-ins) | Open concept kitchens that need zone definition without full separation, plus extra seating or storage |
| Half wall | 42–48 inches | Low | No | Limited | Separating kitchen from living areas where minor privacy is desired, without blocking light |
| Breakfast bar | 36–42 inches | Minimal | Yes (primary function) | Limited | Adding casual dining space in small kitchens, encouraging social interaction while cooking |
| Open shelving | 12–24 inches (per shelf) | None | No | Yes (primary function) | Displaying dishware or decor while maintaining full openness, ideal for small spaces where every inch of storage counts |
In short: choose a pony wall if you want a multi-functional divider that adds seating, storage, and zone definition. Choose a breakfast bar if your top priority is extra dining space. Choose open shelving if you want zero light blockage and maximum display storage. Choose a half wall if you want slightly more privacy between your kitchen and living area.
Common Mistakes to Avoid When Adding a Pony Wall
Even a well-planned pony wall can fall short if you overlook common, easily avoidable errors. Below are the top mistakes homeowners make, and how to sidestep them:
Proportion and Scale Errors
The most common mistake is building a pony wall that is too tall, too wide, or placed in a location that disrupts traffic flow. A wall taller than 48 inches will block sightlines and make your kitchen feel closed off, while a wall wider than 8 feet in a small kitchen will reduce clearance and create awkward bottlenecks. Always leave at least 36 inches of unobstructed clearance between the pony wall and adjacent countertops, appliances, and walkways, per NKBA accessibility guidelines.
Poor Material Selection for the Space
Choosing the wrong material for your kitchen’s conditions leads to premature wear and damage. Avoid untreated wood or standard drywall in high-moisture zones near the sink or dishwasher, as these materials will warp, rot, or grow mold over time. Instead, use moisture-resistant green board drywall or sealed hardwood, and add a tile or stone backsplash on the kitchen-facing side of the wall for extra protection. Another common error: selecting heavy materials like stone veneer without verifying that your floor joists and wall studs can support the extra weight, leading to sagging or structural damage over time.
Ignoring Local Building Codes
Skipping permits for load-bearing pony walls is a costly, dangerous mistake. If the wall fails or causes structural damage to your home, your insurance provider may deny your claim if the work was not permitted. Always consult your local building department before starting work, even for non-structural walls, to ensure you comply with fire, safety, and zoning codes.
Frequently Asked Questions
Does a pony wall require a permit?
It depends on whether the wall is load-bearing. Load-bearing pony walls (which support upper cabinets, heavy countertops, or structural loads) require a permit in nearly all jurisdictions, per standards set by the International Code Council (ICC). Non-structural pony walls used only for zone definition typically do not require a permit, but it’s always best to check with your local building department to avoid fines.
Can I install a pony wall in a rental property?
Most rental properties allow non-structural, freestanding pony walls that do not damage existing walls, floors, or ceilings. Opt for a temporary design using modular wood panels or tension-mounted wall systems that can be removed without leaving marks when you move out. Always get written approval from your landlord before starting any work.
How tall should a kitchen pony wall be?
Standard pony walls are 36 to 42 inches tall, which aligns with standard kitchen counter height (36 inches) and leaves enough space for upper cabinets to be mounted above if desired. For spaces where you want slightly more privacy between the kitchen and living area, you can go up to 48 inches, but avoid going taller than that, as it will block sightlines and make the space feel closed off.
Can a pony wall support upper kitchen cabinets?
Yes, if it is built as a load-bearing wall with properly sized 2×4 or 2×6 studs and anchored securely to ceiling joists. Non-structural pony walls cannot support upper cabinets, as they are not designed to hold that weight. If you plan to mount heavy upper cabinets on your pony wall, consult a structural engineer to confirm the wall can handle the load.
 Frosted glass pony walls are ideal for small, dark kitchens, as they block sightlines of clutter while still letting natural light pass through.
Final Verdict: Is a Pony Wall Right for Your Kitchen?
A kitchen pony wall is a versatile, cost-effective solution for anyone looking to define zones, add functional space, and improve their kitchen’s flow without the high cost and disruption of a full structural remodel. It’s ideal for small galley kitchens, open concept layouts, and remodels where you want to avoid blocking natural light or sightlines to the rest of your home.
If you’re considering a pony wall, start by assessing your kitchen’s layout, measuring your available space, and consulting your local building department to confirm load requirements. For design inspiration, coordinate your pony wall’s finish with your existing cabinetry and wall color to create a cohesive, polished look. For more kitchen design tips and step-by-step guides to small prep projects, explore our full library of home improvement resources.