What Size Screws for Kitchen Wall Cabinets: Ultimate Guide Revealed
Installing or upgrading kitchen wall cabinets is a rewarding DIY project, but one wrong choice in fastener size can lead to sagging shelving, damaged drywall, or even a full cabinet collapse that risks injury and costly repairs. Many homeowners guess at screw sizes, only to face loose cabinets a few months later when undersized fasteners pull out of wall studs or engineered wood backs split under load. This guide eliminates the guesswork with exact, code-aligned specifications, step-by-step length calculations, and proven installation tips from professional contractors and home improvement experts. Whether you’re working with standard MDF cabinet backs, solid wood frames, or masonry walls, you’ll leave with a clear, actionable plan for a secure, long-lasting installation. You can also read our guide on flatware sets clearance.
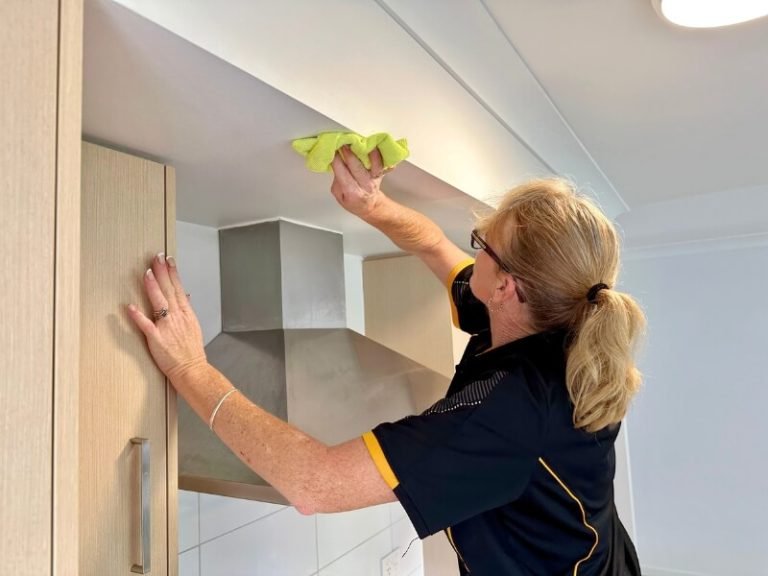
 Correct screw sizing ensures cabinet backs are fully secured without protruding through the wall.
Why Screw Size Is Non-Negotiable for Cabinet Safety and Longevity
The average residential kitchen wall cabinet holds 50 to 100 pounds of distributed weight, from dishes and cookware to small appliances and glassware. Fasteners that are too short, thin, or low-strength cannot support this load over time, leading to gradual pull-out, sagging, or sudden failure. Per University of Minnesota Extension home improvement guidance, wall-mounted cabinets must support a minimum of 100 pounds of distributed load without failure, while the International Residential Code (IRC) requirements mandate that cabinet fasteners embed at least 1 inch into load-bearing wall studs or approved anchors to prevent accidents. Skipping these requirements not only puts your belongings at risk but can also cause damage to countertops, flooring, and even household members if a cabinet falls unexpectedly. You can also read our guide on how tall are kitchen wall cabinets.
Exact Screw Specifications for Standard Installations
Most residential kitchen wall cabinets use a narrow range of screw sizes, with the right choice depending on your cabinet back material, wall type, and expected load. The table below outlines the most common, code-compliant options for typical installs:
| Screw Diameter (Gauge) | Length Range | Ideal Use Case | Max Supported Load Per Stud | Key Notes |
|---|---|---|---|---|
| 6 (6d) | 1.5"–2" | Lightweight plastic/thin aluminum cabinets, <25lbs | 25lbs | Only for drywall-only mounts with heavy-duty anchors; not recommended for wood or MDF cabinets |
| 8 (8d) | 2"–2.5" | Standard 1/2" or 3/4" plywood/MDF cabinet backs on wood studs | 40–60lbs | Most common choice for residential kitchen installs, works for 90% of standard cabinet setups |
| 10 (10d) | 2.5"–3" | Heavy solid wood cabinets, cabinets holding dense items (canned goods, cast iron) | 60–100lbs | Use for cabinets over 30lbs each or mounted to masonry walls |
| 1/4" masonry | 2"–3.5" | Concrete, brick, or plaster walls | 50–80lbs (with sleeve anchor) | Requires a masonry drill bit; use only for solid masonry, not hollow brick |
How to Calculate Your Exact Screw Length
Guessing at screw length is the most common cause of installation failures. To get the exact size you need, follow this simple 3-step formula:
- Measure the thickness of your cabinet back panel: most standard cabinets use 1/2" or 3/4" plywood or MDF.
- Add the thickness of your wall material: 1/2" for standard drywall, 1" for plaster, 2"+ for concrete block.
- Add 1" to 1.5" of embedment into your wall support (wood stud, anchor, or masonry) to meet IRC requirements.
For example, a standard 3/4" MDF cabinet back mounted to 1/2" drywall with 1.25" of stud embedment requires a 2.5" screw (0.75 + 0.5 + 1.25 = 2.5), the most common size for residential installs. You can also read our guide on best way to keep fermenter warm.
Gauge vs. Length: What Matters Most?
While length is critical for embedment, screw diameter (gauge) determines how much weight a single fastener can support. A 10d screw has a 30% larger cross-sectional area than an 8d screw, giving it far higher shear strength to resist bending under heavy loads. For most standard cabinets, 8d screws are sufficient, but upgrade to 10d for heavy loads or softwood studs that are prone to splitting. You can also read our guide on how to install a wall cabinet.
Best Screw Types for Every Cabinet and Wall Material
Not all screws are created equal: the right type depends on your cabinet back material, wall framing, and kitchen humidity levels. Using the wrong screw type can lead to splitting, rust, or premature pull-out, even if the size is correct. You can also read our guide on how to install kitchen cabinets on uneven walls.
Wood Screws
The most common option for residential cabinet installs, wood screws feature sharp, tapered threads that grip wood studs and solid wood/plywood cabinet backs securely. Opt for coarse-thread screws for softwood studs (pine, fir) and fine-thread screws for hardwood studs (oak, maple) to maximize grip. Flat-head screws sit flush against the cabinet back for a clean finish, while pan-head screws work better for cabinets with recessed mounting holes. For kitchens near sinks, dishwashers, or exterior walls, choose stainless steel or hot-dip galvanized wood screws to resist rust from humidity; standard zinc-plated screws will corrode within 2-3 years in damp environments. Avoid drywall screws entirely for cabinet mounting: their brittle, low-carbon steel construction snaps easily under shear load, and they lack the corrosion resistance needed for kitchen use. You can also read our guide on www yoursite com what height are kitchen wall.
Confirmat Screws
Budget and mid-range cabinets almost always use particleboard or MDF (medium-density fiberboard) for their back panels, materials that split easily when driven with standard wood screws. Confirmat screws are purpose-built for this use case, featuring a wider shank and deeper, more aggressive threads that distribute load across a larger area of engineered wood, eliminating splitting and pull-out. They require a 3/16" pilot hole for installation and are most commonly available in 2" and 2.5" lengths, perfect for standard cabinet depths. In practice, Confirmat screws reduce the risk of stripped screw holes in MDF backs by 70% compared to standard wood screws, making them a worthwhile investment for any cabinet with an engineered wood back. You can also read our guide on how to attach kitchen cabinets to a brick wall.
Masonry Screws
For plaster, concrete, or brick walls, standard wood screws will not anchor securely. Masonry screws (often called Tapcons) are made of hardened, blue-coated steel that cuts its own thread into masonry material when driven with a masonry drill bit. For solid concrete or brick, pair them with sleeve anchors for extra hold, and ensure at least 1" of embedment into the masonry. For plaster walls over brick, use 2.5" to 3" masonry screws to penetrate through the plaster and anchor into the brick behind. You can also read our guide on what color to paint kitchen walls with gray cabinets.
Sheet Metal Screws
For commercial kitchen installs or basements with steel metal studs, sheet metal screws are the best choice. Their fully threaded shanks and self-tapping design cut into steel studs for a much tighter grip than standard wood screws, which can strip threads in thin metal framing. Opt for stainless steel sheet metal screws for humid environments to avoid rust. You can also read our guide on how to remove kitchen tiles from wall.
Step-by-Step Installation Best Practices
Even with the right screws, poor installation technique will lead to loose cabinets over time. Follow these professional tips to ensure a secure, level mount:
Pre-Drill Pilot Holes Correctly
Skipping pilot holes is a top cause of split cabinet backs and stripped screw holes. For 8d wood screws, use a 3/32" drill bit; for 10d screws, use a 1/8" bit. For MDF or particleboard, use a bit 1/16" smaller than the screw diameter to avoid splitting the engineered wood. Drill through the cabinet back first, then use the hole to mark the exact spot on your wall, ensuring you hit a stud or anchor point on the first try. You can also read our guide on how to fix a leaking wall mounted kitchen faucet.
 Pre-drilling pilot holes prevents splitting in wood and MDF cabinet backs, a critical step for long-lasting installation.
Anchor Selection for Non-Stud Wall Areas
If your cabinet mounting points don’t align with wall studs, choose anchors rated for the weight of your cabinet:
- For light cabinets (<25lbs) in hollow drywall: 3/8" toggle bolts hold up to 50lbs each, and are easy to install without special tools.
- For medium-weight cabinets (25-50lbs) in solid drywall: 1/4" molly bolts hold up to 40lbs each in 1/2" drywall, and are less obtrusive than toggle bolts.
- For heavy cabinets or runs that don’t align with studs: install a French cleat (a 1×3 or 1×4 board cut at a 45-degree angle) mounted to at least two studs, then hang your cabinet on the cleat. This distributes the full weight of the cabinet across multiple studs, eliminating the need for each individual mounting screw to hit a stud.
Torque and Tightening Guidelines
Over-tightening is just as damaging as using undersized screws: it strips screw holes, cracks MDF backs, and reduces holding power by up to 50%. Use a cordless drill with an adjustable torque setting, set to 60-70% of maximum torque for wood cabinet backs, and 40-50% for MDF/particleboard. Tighten each screw until the head is flush with the cabinet back—do not countersink unless the mounting hole is specifically designed for it, as this weakens the screw’s grip. If a screw starts spinning without tightening, remove it immediately, fill the stripped hole with wood glue and a wooden dowel or toothpick, let it dry fully, then re-drill a new pilot hole. You can also read our guide on how to install wall mounted kitchen cabinets.
Safety Precautions
Always use an electronic stud finder that detects live electrical wires and plumbing before drilling into walls. Turn off power to the wall circuit if drilling near outlets or light switches, and wear safety glasses to protect your eyes from drywall or wood debris. If you’re mounting cabinets above a countertop, ensure screws do not protrude more than 1/4" through the wall to avoid hitting plumbing or wiring behind the sink. Before drilling, remove any existing wall-mounted fixtures like faucets using our pre-install removal guide to avoid damage and ensure clear access to your mounting points. You can also read our guide on cream kitchen cabinets what colour walls.
Common Installation Mistakes to Avoid
Even experienced DIYers fall prey to these common errors, which can lead to costly rework or safety hazards:
- Using drywall screws for cabinet mounting: Drywall screws are designed only to attach drywall to studs, not to support heavy loads. Their low-carbon steel construction snaps easily under shear stress, and they rust quickly in humid kitchens, leading to failure in as little as 1 year.
- Skipping stud detection: The "knock test" for studs is unreliable with plaster walls or uneven drywall, leading many DIYers to anchor screws only in drywall. A common mistake is assuming a screw that feels tight when first driven is secure—over time, the drywall around the screw will crush, leading to gradual sagging. Always use an electronic stud finder to confirm stud locations before drilling.
- Miscalculating screw length: Forgetting to account for cabinet back thickness, wall material, and required embedment leads to screws that are either too short (no stud hold) or too long (protruding through the wall, hitting plumbing or wiring). Use the 3-step calculation formula outlined earlier to get the exact length you need.
- Mixing screw lengths in a single cabinet run: Using different length screws for different mounting points on the same cabinet causes uneven hanging, misaligned doors, and visible gaps between the cabinet and wall. Use the same length screw for all mounting points on a single cabinet, and match screw lengths across adjacent cabinets for a seamless look.
- Using non-corrosion-resistant screws in humid areas: Standard zinc-plated screws rust within 2-3 years in kitchens near sinks or dishwashers, weakening their hold and leaving rust stains on cabinet backs. Upgrade to stainless steel screws for all kitchen installs, especially in damp climates.
Long-Term Maintenance and Replacement Tips
Even a perfectly installed cabinet set requires occasional maintenance to stay secure and safe over time:
Routine Inspection Schedule
Check all cabinet mounting screws every 6 months, especially after adding heavy items like cast iron cookware or large appliances to your cabinets. Use a manual screwdriver to test each screw for play: if it turns easily, tighten it immediately to prevent gradual sagging. Pay extra attention to cabinets above sinks or dishwashers, which are exposed to more humidity and heavier loads. You can also read our guide on how to mount upper kitchen cabinets.
Signs You Need to Replace Screws
Replace screws immediately if you notice any of the following:
- Visible rust or corrosion on the screw head or shaft
- Stripped heads that won’t tighten with a screwdriver
- Cracks in the cabinet back around the screw hole
- Visible sagging of the cabinet, or squeaking when opening doors
When replacing screws, use fasteners 1/4" longer than the original to anchor into fresh stud or wood material, and fill any stripped screw holes with wood filler or a wooden dowel before installing the new screw to restore holding power. You can also read our guide on grey kitchen units what colour walls.
Upgrading for Heavy Loads
If you store heavy items on your wall cabinets, upgrade your fasteners for extra safety: swap 8d screws for 10d screws, and add a mounting cleat attached to multiple studs to distribute weight across a larger area of the wall. For cabinets over 30lbs each, use at least 3 mounting screws per cabinet, all anchored into studs or a cleat, to meet IRC load requirements. You can also read our guide on what color walls go with dark brown kitchen cabinets.
Frequently Asked Questions
What size screws are best for 1/2" thick cabinet backs?
For standard 1/2" thick cabinet backs mounted to wood studs, 2" to 2.5" 8d wood screws are ideal. If you can only anchor to drywall without stud access, use 2.5" to 3" screws paired with heavy-duty toggle bolts to ensure enough embedment into the wall. You can also read our guide on what colour walls go with white kitchen cabinets.
Can I use deck screws for kitchen cabinets?
No. Deck screws have wider, aggressive threads and oversized heads designed for outdoor wood decking. They often split cabinet backs, don’t sit flush against the panel, and have lower shear strength than dedicated wood screws, leading to premature failure. You can also read our guide on what color to paint kitchen walls with dark cabinets.
Do I need washers for cabinet screws?
Only if your cabinet back has oversized mounting holes. Use flat stainless steel washers to distribute the load across the back panel, preventing the screw head from pulling through MDF or particleboard over time. You can also read our guide on how to fix wall tiles in kitchen.
What if I can’t align my cabinet screws with wall studs?
Install a French cleat (a 1×3 or 1×4 board cut at a 45-degree angle) mounted to at least two studs, then hang your cabinet on the cleat. This distributes the cabinet’s full weight across multiple studs, eliminating the need for each individual mounting screw to hit a stud. You can also read our guide on how to remove kitchen cabinets without damaging wall.
Are stainless steel screws worth the extra cost?
Yes, especially for kitchens near sinks, dishwashers, or exterior walls. Stainless steel resists rust and corrosion from kitchen humidity, lasting 2-3x longer than zinc-plated screws, and is required for installs in damp climates per most building codes. You can also read our guide on how to build a kitchen wall cabinet.
Conclusion
Choosing the right screw size for your kitchen wall cabinets is a small step that makes a massive difference in the safety, longevity, and appearance of your installation. By measuring your cabinet back and wall material first, selecting screws matched to your load and wall type, pre-drilling pilot holes, and anchoring into studs or a reinforced cleat, you’ll avoid the most common DIY pitfalls and enjoy perfectly aligned, secure cabinets for decades. Avoid the temptation to use whatever screws you have on hand: investing in the right fasteners and following proper installation technique will save you time, money, and frustration in the long run. Once your cabinets are securely hung, you may want to refresh your wall finish to complete the kitchen update—our guide to neutral wall pairings offers tested, design-approved color combinations for every aesthetic. If you’ve opted for vibrant green cabinets, our guide to coordinating wall finishes ensures your new cabinetry and walls complement each other perfectly. For homeowners tackling full kitchen refreshes, our pre-install removal walkthrough walks through safely taking out old fixtures before you start drilling. You can also read our guide on how to protect wall behind kitchen sink.