How to Lay Wall Tiles in Kitchen: Easy Steps for a Stunning Finish
A kitchen wall takes a constant beating from cooking grease, steam, splattering sauce, and daily scuffs — making durable, easy-to-clean tile one of the most practical and high-impact upgrades you can make for the space. Laying wall tiles in your kitchen isn’t just a cosmetic choice: it protects your walls from moisture damage, boosts your home’s resale value, and lets you customize your space to match your personal style, whether you prefer classic subway tile, bold geometric patterns, or sleek large-format slabs. While the process may seem intimidating for first-time DIYers, breaking it into clear, manageable steps makes it totally achievable, even with minimal prior experience. This guide walks you through every stage of the process, from wall prep to final sealing, with pro tips to avoid common mistakes and get a smooth, professional-looking finish that lasts for years.
Step 1: Prep Your Kitchen Wall for Long-Lasting Results
Surface preparation is the most critical phase of any tiling project — cutting corners here is the top cause of premature tile failure, loose adhesion, and cracked grout. Taking extra time to prep your wall properly will save you hours of rework and frustration down the line. For more on this, see our guide on how to regrout kitchen wall tiles easy steps.
Assess Your Wall Type
The type of wall you’re tiling over dictates what prep work you need to do. Plaster walls are relatively forgiving but often have small cracks that need filling before tiling. Drywall in kitchens should be moisture-resistant green board or cement backer board, especially for areas behind sinks, dishwashers, and stoves; standard drywall will warp and rot when exposed to repeated moisture. If you’re retiling over existing tile, scuff the surface with 80-grit sandpaper to help new thin-set grip, and check for loose tiles that need to be removed first.
Clean, Repair, and Smooth the Surface
Start by removing all grease, dirt, and old wallpaper from the wall using a heavy-duty kitchen degreaser — standard mild detergent won’t cut through the built-up cooking residue that prevents adhesive from bonding. Fill cracks deeper than 1/8 inch with a setting-type joint compound (standard spackle will crumble in high-moisture areas), then sand all repaired spots smooth until they’re flush with the rest of the wall. Wipe away all dust with a damp cloth before moving on; even a thin layer of dust can weaken adhesive grip. For more on this, see our guide on how to lay kitchen wall tiles.
Apply Waterproofing for Moisture Protection
Kitchens are high-moisture zones, so a waterproofing barrier is non-negotiable for any area that will see regular splashes. Apply a liquid-applied waterproofing membrane (like RedGard) to the entire tiling area, or use cement backer board as your base for maximum durability. This barrier prevents water from seeping behind tiles and causing mold, rot, or wall damage, even if you accidentally leave a spill sitting for a few hours.
 Full-height wall tiling behind a range hood protects walls from grease splatters and heat damage.
Credit: www.create-enjoy.com
Full-height wall tiling behind a range hood protects walls from grease splatters and heat damage.
Credit: www.create-enjoy.com
Mark Your Layout Guidelines
Start by finding the exact center point of your tiling area horizontally and vertically, then draw a cross with a laser level or long spirit level to use as your starting anchor. This ensures your tiles stay straight across the entire surface and avoids ending up with a sliver of a tile at the end of a row. For areas with outlets, cabinets, or appliances, mark the edges of these obstacles first so you can plan your tile layout to minimize awkward small cuts. A story stick (a straight board marked with tile widths and spacer sizes) is a helpful tool for mapping out your layout before you start adhesive. For more on this, see our guide on how to do kitchen wall tiles.
Following industry-standard prep protocols, like those outlined by University of Minnesota Extension, ensures long-lasting adhesion and reduces common issues like tile slippage and premature grout failure.
Step 2: Choose Tiles, Adhesive, and Grout for Kitchen Conditions
The materials you pick will make or break the longevity and ease of your project, so prioritize durability and practicality alongside style for kitchen spaces. For more on this, see our guide on how to remove kitchen tiles from wall.
Pick the Right Tile Material & Size
Look for tiles with a PEI (Porcelain Enamel Institute) hardness rating of 3 or higher, as these resist scratches and scuffs from daily kitchen use. Ceramic tile is affordable and versatile for most applications, while porcelain is denser and more water-resistant, making it ideal for high-moisture areas. Glass tile adds a decorative accent but is more fragile, so it’s best reserved for small backsplash sections rather than full-wall coverage. For DIYers, small subway tiles (3×6 inches) are more forgiving of minor wall imperfections and easier to cut, while large-format tiles (12×24 inches or larger) create a sleek, modern look but require an extremely flat wall and precise cutting to avoid lippage (uneven tile edges).
Select the Correct Thin-Set Adhesive
Never use water-based mastic for kitchen wall tiling, as it will fail when exposed to moisture or temperature fluctuations. Opt for a polymer-modified thin-set mortar, which has stronger adhesion and flexibility for long-lasting results. For large-format tiles over 15 inches, use a large-format thin-set with a latex additive to prevent tiles from sagging while the adhesive cures. Always mix thin-set by adding powder to water (not the other way around) to avoid lumps, and only mix as much as you can use in 1-2 hours. For more on this, see our guide on how to clean kitchen wall tiles easily.
Choose Grout That Resists Stains and Moisture
Unsanded grout works best for grout lines narrower than 1/8 inch, while sanded grout is more durable for wider gaps. For kitchen walls, avoid standard unmodified cement grout if possible: choose a grout with a built-in mildewcide, or opt for epoxy grout for high-traffic areas, as it’s completely stain-proof and requires no sealing. If you use cement-based grout, plan to seal it 72 hours after installation to lock out moisture and grease stains.
Essential Tools & Supplies
Having all your tools ready before you start will keep your workflow smooth and avoid unnecessary trips to the hardware store. Use this quick reference to make sure you don’t miss anything:
| Tool/Supply | Purpose | Pro Tip for DIYers |
|---|---|---|
| Polymer-modified thin-set mortar | Bonds tiles to the wall | Mix in small batches to avoid it drying out before use |
| Notched trowel (1/4" x 1/4" for small tiles, 1/2" x 1/2" for large tiles) | Spreads adhesive evenly | Hold at a 45-degree angle to create consistent ridges for better grip |
| Tile cutter or wet saw | Cuts tiles to size for edges and corners | Practice on scrap tiles first to avoid wasting expensive material |
| Tile spacers (1/8" or 3/16") | Maintains even grout gaps | Use cross-shaped spacers for corners to keep alignment perfect |
| Rubber grout float | Presses grout into joints | Use the edge to scrape excess grout off tile surfaces before it dries |
| Grout sealer | Protects porous grout from stains and moisture | Apply with a small brush or roller, and reapply every 6-12 months in high-use kitchens |
| Safety gear (goggles, gloves, dust mask, knee pads) | Protects you during cutting and mixing | Wear a dust mask when cutting tile to avoid inhaling silica dust |
Don’t forget basic supplies like a mixing bucket, margin trowel, sponge, and clean rags for cleaning up excess adhesive and grout as you work.
Step 3: Apply Adhesive and Lay Tiles Precisely
Laying tiles with consistent alignment is the key to a professional-looking finish, and it’s easier than you think if you work in small, controlled sections.
Mix Thin-Set to the Perfect Consistency
Mix your thin-set to a peanut butter-like consistency: it should hold its shape when you lift the mixing paddle, but not be so thick that it’s hard to spread. Let the mixture slake (rest) for 5-10 minutes after mixing to allow the polymer additives to activate, then stir again before use. Mixed thin-set stays workable for 1-2 hours depending on temperature and humidity, so only mix as much as you can use in that window to avoid waste.
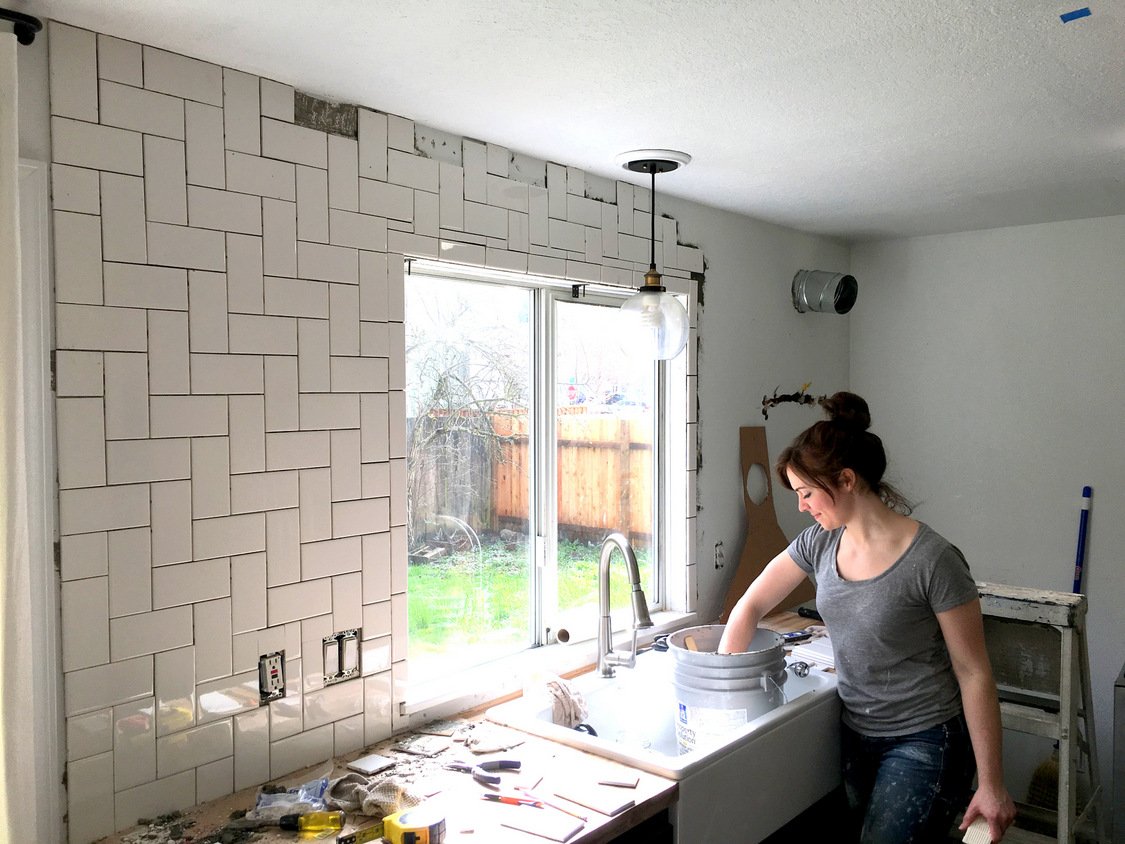
Spread Adhesive in Small, Manageable Sections
Work in 3×3 foot sections max, so the adhesive doesn’t skin over (form a dry film) before you can place tiles. Spread the adhesive with your notched trowel, holding it at a 45-degree angle to create uniform ridges that help tiles grip and allow air to escape from behind them. For large-format tiles, back-butter each tile by spreading a thin layer of adhesive on the back of the tile before setting it — this ensures full coverage and prevents hollow spots that can cause cracking later. A common DIY mistake is spreading adhesive too thick or too thin, which leads to uneven tiles and poor adhesion.
Set Tiles with Consistent Spacing
Press each tile firmly into the adhesive, twisting it slightly to ensure full contact with the ridges. Insert cross-shaped tile spacers at each corner as you go to maintain even grout gaps. After placing 4-5 tiles, use a spirit level or straightedge to check alignment both horizontally and vertically — small alignment errors compound quickly as you work upward, leading to lippage or uneven rows. If you notice a tile is sitting too high or low, adjust it immediately while the adhesive is still wet.
 Cross-shaped tile spacers ensure uniform grout gaps for a professional, consistent finish.
Credit: decorateandmorewithtip.com
Cross-shaped tile spacers ensure uniform grout gaps for a professional, consistent finish.
Credit: decorateandmorewithtip.com
Cut Tiles for Edges, Corners, and Obstacles
Tiles rarely fit perfectly at edges, corners, or around outlets, so precise cutting is required for a seamless finish. Measure and mark cuts carefully with a pencil and square before cutting. For straight cuts, a manual tile cutter works for most jobs, but for L-shaped cuts around corners or notches for outlets, a wet saw delivers cleaner, more precise edges. Always wear safety goggles when cutting tile to protect your eyes from shards. For outlets, leave a 1/8-inch gap between the tile and the edge of the outlet box — you’ll fill this with caulk later, not grout, to allow for movement and make future repairs easier.
Step 4: Grout and Seal for a Durable Finish
Grouting fills the gaps between tiles, locks them in place, and creates a watertight seal that prevents moisture from seeping behind your tile. Rushing this step leads to grout haze, weak joints, and stained, uneven lines.
Mix Grout to the Right Consistency
Mix your grout to a smooth, peanut butter-like consistency: too thick and it will be hard to spread into narrow joints, too thin and it will run out of gaps as it dries. Let the grout slake for 5-10 minutes after mixing to allow the additives to activate, then stir again before use. Only mix as much grout as you can apply in 20-30 minutes, as it will start to set quickly once mixed.
Apply Grout Evenly Across All Joints
Use a rubber grout float held at a 45-degree angle to push grout into the joints, moving diagonally across the tiles to avoid pulling grout out of the gaps. Work in small sections to prevent the grout from drying before you can clean it. For textured tiles, use a float with a softer edge to avoid scratching the tile surface.
Clean Excess Grout Without Damaging Joints
Wait 15-30 minutes for the grout to firm up slightly (it should feel hard to the touch but not fully dry), then use a damp (not soaking wet) sponge to wipe the tile surface in a circular motion. Rinse the sponge frequently in clean water to avoid spreading grout haze. Avoid using too much water, as it can wash grout out of joints and create weak spots. After the first wipe, wait another hour, then buff the tiles with a dry microfiber cloth to remove any remaining haze.
Seal Grout for Long-Term Protection
Once the grout is fully cured (usually 72 hours after installation), apply a penetrating grout sealer with a small brush or roller. Sealer locks out moisture, grease, and stains, preventing mold growth and discoloration. In high-use kitchens, reseal grout every 6-12 months to maintain protection. Avoid using harsh cleaning products like bleach or abrasive scrubbers on sealed grout, as they can break down the sealer over time.
Step 5: Finishing Touches for a Polished Look
These final steps protect your work and give your tiled wall a seamless, professional appearance.
Install Trim and Caulk Gaps
Use metal, PVC, or matching tile trim to cover the exposed edges of the tiled area for a clean, finished look. Cut trim to size with a miter saw for corners, and attach it with thin-set or silicone adhesive. For gaps between the tile and countertops, cabinets, or walls, use 100% silicone caulk instead of grout — silicone is flexible, so it can handle expansion and contraction from temperature changes without cracking. Match the caulk color to your grout for a seamless finish.
Clean and Cure the Final Surface
Wait 24-48 hours after grouting before exposing the tiles to water or steam, to allow the grout and adhesive to fully cure. Clean the tiles with a mild, pH-neutral cleaner to avoid damaging the grout or tile finish. Avoid abrasive scrubbers or harsh chemicals that can discolor grout or etch glossy tile surfaces.
 This classic white subway tile backsplash with gray grout works with both modern and traditional kitchen designs.
Credit: www.create-enjoy.com
This classic white subway tile backsplash with gray grout works with both modern and traditional kitchen designs.
Credit: www.create-enjoy.com
Common Tiling Mistakes to Avoid
Even small errors can ruin the look of your tiled wall, so watch out for these common pitfalls:
- Skipping or rushing wall prep: 90% of tile failures stem from poor surface preparation, not bad materials. Don’t cut corners on cleaning, repairing, or waterproofing.
- Using mastic in wet areas: Water-based mastic will fail when exposed to moisture, so always use polymer-modified thin-set for kitchen walls.
- Not accounting for tile thickness when marking layout lines: Forgetting to offset for tile and spacer thickness will leave you with uneven, sliver-sized cuts at the top and bottom of your wall.
- Grouting before thin-set is fully cured: Grouting too early (before 24 hours) can disturb the adhesive, leading to loose, shifting tiles.
- Using too much water when cleaning grout: Excess water washes grout out of joints, creating weak spots that crack over time.
- Using grout instead of caulk for expansion gaps: Grout is rigid and will crack in gaps between tile and countertops, cabinets, or walls; use flexible silicone caulk instead.
Frequently Asked Questions
Can I tile over existing kitchen wall tiles?
Yes, as long as the existing tiles are firmly attached, clean, and free of grease or gloss. Scuff the surface of the old tiles with sandpaper to help new adhesive grip, then clean thoroughly before applying thin-set. If the old tiles are loose or damaged, remove them first to avoid future failures.
How long does kitchen wall tiling take for a DIYer?
For a standard 30-square-foot backsplash, expect to spend 2-3 days total: 1 day for prep and layout, 1 day for laying tiles, and 1 day for grouting and sealing. Full-wall tiling will take longer, depending on the size of the area.
Do I need a waterproof membrane behind kitchen wall tiles?
Yes, for any area that will be exposed to regular moisture (behind sinks, dishwashers, and stoves). A liquid-applied membrane or cement backer board provides a critical barrier against water damage, mold, and wall rot, even if you use moisture-resistant drywall.
How do I fix a cracked tile after installation?
If a tile cracks due to impact, carefully remove the grout around the tile with a grout saw, then pry the tile off the wall with a putty knife. Clean the area, apply new thin-set, and set a replacement tile, matching the original grout color and sealer application.
Conclusion
Laying wall tiles in your kitchen is a rewarding DIY project that delivers a high-end look for a fraction of the cost of a full remodel. By taking the time to prep your wall properly, choose the right materials, and follow each step carefully, you’ll get a durable, stain-resistant finish that holds up to daily kitchen use for years. If you’re coordinating your tile choice with your existing kitchen décor, check out our guides to complementing green cabinetry or pairing with brown cabinets to nail a cohesive, stylish palette. For other kitchen upgrade projects, our step-by-step guide to removing existing wall fixtures makes prepping for tiling even easier.