How to Make Kitchen Wall Decor: Easy DIY Ideas to Transform Your Space
Your kitchen walls don’t have to stay blank, generic, or covered in store-bought art that doesn’t match your style. With a few simple DIY projects, you can transform those underutilized spaces into warm, personality-filled features that make your kitchen feel like the heart of your home — no professional design skills or massive budget required. Whether you’re a renter who can’t make permanent changes, a busy home cook looking for functional decor, or someone who loves hosting and wants a space that wows guests, these easy, actionable kitchen wall decor ideas will help you get a polished, custom look in a single weekend. The average piece of store-bought kitchen wall art costs $50 to $200, while most of these DIY projects come in under $20, and many use items you already have lying around the house.
Why DIY Kitchen Wall Decor Is Smarter Than Store-Bought
Custom DIY decor lets you match your kitchen’s exact vibe, whether that’s cozy rustic, bright modern, or eclectic maximalist, without paying a premium for generic mass-produced pieces. You can also repurpose items you already own — old plates, vintage utensils, scrap wood — to reduce waste and add sentimental value to your space. For renters, most of these projects use damage-free hanging methods, so you can update your space without losing your security deposit. A common mistake homeowners make is buying expensive decor that isn’t rated for kitchen conditions, leading to warped, faded, or grease-stained pieces within a few months; DIY projects let you choose moisture-resistant materials tailored to your kitchen’s unique layout.
How to Choose the Perfect Wall Spot for Your DIY Decor
Assess Layout, Traffic, and Potential Damage Risks
Start by scanning your kitchen for high-impact blank walls that won’t interfere with daily use. Avoid hanging decor directly above the sink (where splashes and grease will damage unsealed pieces) or within 2 feet of the stove (where heat and cooking fumes will fade fabrics and paint over time). Ideal spots include the blank wall next to your fridge, the area above your kitchen island, the space behind your coffee station, or the wall above your dining nook. Always use a laser level (even $10 models from hardware stores) to ensure your hangs are straight; a common beginner error is using a small regular level for large gallery walls, leading to crooked, unbalanced displays. For renters, prioritize leaning displays or command strips to avoid wall damage.
Pick 1-2 Focal Points to Avoid Clutter
Kitchens are full of visual noise from appliances, cabinets, and countertop items, so covering every blank wall will feel overwhelming rather than inviting. Choose 1-2 natural focal points to anchor your decor, and leave other blank walls empty for breathing room. If you have green cabinetry, coordinating paint shades will make your DIY decor pop; for brown cabinet setups, matching wall tones create a cohesive, balanced look. Keep the center of your focal piece at 57-60 inches from the floor, the standard eye-level height for wall decor that feels intentional rather than randomly placed.
Essential Tools and Materials for Long-Lasting Kitchen Wall Decor
Basic Non-Negotiable Supplies
These core materials cost less than $30 total and will ensure your projects hold up to kitchen wear and tear:
- Painter’s tape ($2-$3 per roll): No-residue, safe for renters and painted walls, and protects edges when painting or applying adhesives.
- Moisture-resistant adhesive or command strips ($5-$10 per pack): Always check the weight rating before hanging heavy pieces; regular glue fails in humid, greasy kitchen environments.
- Basic laser level ($10-$15): Prevents crooked hangs for large gallery walls or shelf installations.
- Clear acrylic sealant ($5-$8 per can): Protects porous materials like wood, canvas, and pressed botanicals from splashes and grease.
- Appropriate wall anchors ($3-$5 per pack): Rated for your wall type (drywall, plaster, tile); never hang heavy pieces with just a single nail, as they can fall and cause damage or injury.
Optional Embellishments to Elevate Your Design
Add these low-cost items to customize your decor: food-themed stencils (herbs, coffee cups, fruit slices — free printable templates are available online), reclaimed wood scraps, vintage kitchen utensils, pressed herbs, fabric scraps, chalkboard paint, LED strip lights, and small potted succulents or herbs.
Quick Reference: 8 Easy DIY Kitchen Wall Decor Ideas
| DIY Idea | Estimated Cost | Time Required | Skill Level |
|---|---|---|---|
| Framed Pressed Herb Gallery | <$15 | 1 hour + 2 weeks pressing | Beginner |
| Upcycled Vintage Plate Gallery | $10-$20 | 1 hour | Beginner |
| Reclaimed Wood Shelf with Planters | $15-$30 | 2 hours | Beginner |
| Chalkboard Menu Wall | <$10 | 30 mins + 24hr drying | Beginner |
| Hanging Utensil Display | <$10 | 1 hour | Beginner |
| Stenciled Food Accent | $5-$15 | 1 hour | Beginner |
| Framed Recipe Card Gallery | <$20 | 1 hour | Beginner |
| LED Strip Accent Lighting | $10-$20 | 30 mins | Beginner |
1. Framed Pressed Herb Gallery
Step 1: Pick fresh herbs (basil, rosemary, mint) from your garden or grocery store, press between heavy books for 7-14 days until flat and dry. Step 2: Arrange on neutral cardstock, frame in inexpensive dollar-store frames. Step 3: Hang in a 3-piece grid above your prep station. If you don’t have fresh herbs to press, you can download free, high-quality printable botanical illustrations from the USDA’s home gardening library to frame instead. This project adds a touch of greenery and natural scent to your space, and you can swap out the prints seasonally for a fresh look.
2. Upcycled Vintage Plate Gallery
Step 1: Collect 5-7 mismatched vintage plates from thrift stores (usually $1-$2 each, look for cohesive color palettes like blue and white, or earth tones). Step 2: Use adhesive plate hangers or small wall hooks to mount on a blank wall, leaving 2-3 inches of space between each plate for breathing room. Step 3: Arrange in an asymmetrical layout for a relaxed, collected look, or a tight grid for a more formal feel. Avoid hanging plates directly above the sink or stove, where splashes and heat can cause them to crack over time.
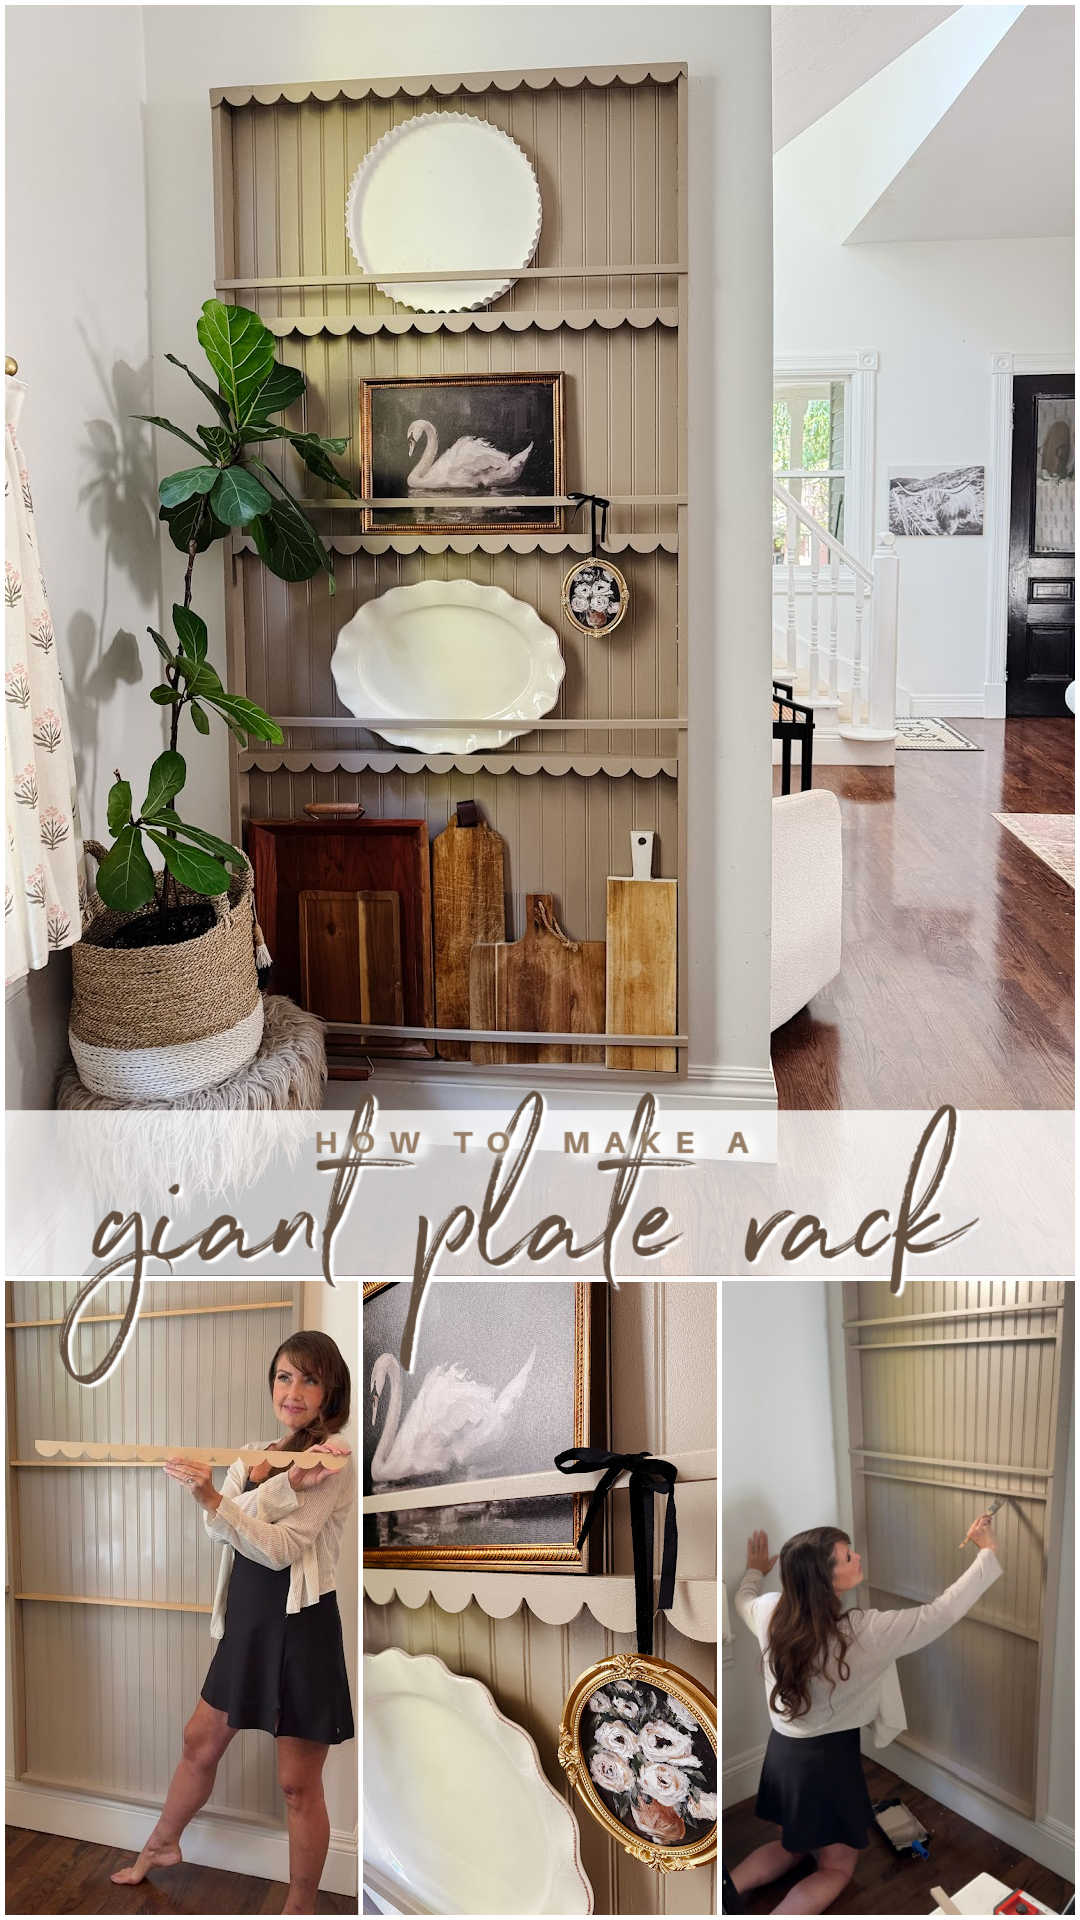 Repurposed vintage plates mounted on a reclaimed wood rack make a striking, low-cost kitchen focal point.
Credit: tatertotsandjello.com
Repurposed vintage plates mounted on a reclaimed wood rack make a striking, low-cost kitchen focal point.
Credit: tatertotsandjello.com
3. Rustic Reclaimed Wood Shelf with Small Planters
Step 1: Sand a piece of reclaimed pallet wood or unfinished pine shelf smooth, seal with clear acrylic sealant to protect against moisture. Step 2: Mount heavy-duty brackets to the wall, attach the shelf, use a level to ensure it’s straight. Step 3: Add small potted herbs, succulents, or vintage mugs to hold utensils. For renters, use a freestanding shelf instead of wall-mounted to avoid damage. This project adds functional storage for spices, cookbooks, or small kitchen gadgets while adding warm, natural texture to your walls.
4. Chalkboard Menu Wall
Step 1: Paint a 2×3 foot section of wall (or a large piece of plywood) with 2 coats of chalkboard paint, let dry fully for 24 hours. Step 2: Prime the surface by rubbing chalk all over it, then erase to remove excess dust. Step 3: Hang above your prep station, write weekly meal plans, grocery lists, or seasonal recipes with colorful chalk markers. For renters, lean a large pre-made chalkboard against the wall instead of painting, no damage required. This project combines decor and function, and is perfect for families who want to keep track of meals and snacks.
5. Hanging Vintage Utensil Display
Step 1: Collect vintage copper or wooden kitchen utensils from thrift stores, or use old utensils you no longer use for cooking. Step 2: Mount a small pegboard or individual metal hooks on the wall, arrange utensils by size or color. Step 3: Add small handwritten labels if you want to mark what each utensil is for. Hang the display within easy reach of your prep station for maximum functionality. This project adds a rustic, personal touch while keeping your most-used tools within arm’s reach.
6. Simple Food-Themed Stenciled Accent
Step 1: Choose a simple stencil design (herbs, coffee cups, fruit slices) and secure it to the wall with painter's tape. Step 2: Dab acrylic paint on a stencil brush (don’t rub, to avoid paint bleeding under the stencil) to fill in the design. Step 3: Remove the stencil, let dry, add a clear sealant for extra durability. If you’re new to stenciling, start small with a narrow strip of stenciling above your upper cabinets, or a tiny coffee cup design next to your coffee maker.
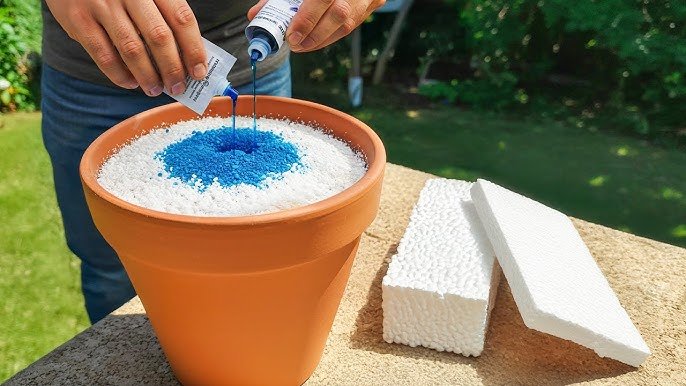
 Step-by-step video tutorials are a great resource for first-time DIYers tackling wall decor projects.
Credit: www.youtube.com
Step-by-step video tutorials are a great resource for first-time DIYers tackling wall decor projects.
Credit: www.youtube.com
7. Framed Recipe Card Gallery
Step 1: Collect handwritten recipe cards from family members, or print your own favorite recipes on cardstock. Step 2: Frame in matching inexpensive frames, arrange in a cluster on a blank wall. Step 3: Add small labels with the recipe name for extra charm. These prints pair perfectly with Rome-inspired pasta and wine evenings if you love hosting dinner parties for friends and family. This project adds sentimental value to your space, and makes for a great conversation starter when guests visit.
8. LED Strip Accent Lighting
Step 1: Buy warm-white adhesive LED strips (battery-powered options require no wiring, perfect for renters). Step 2: Stick strips under upper cabinets, along the back of open shelves, or behind framed art to create a soft, ambient glow. Step 3: Plug in or turn on, adjust brightness to your preference. Avoid cool-white LED strips, which can make your kitchen feel clinical; warm white (2700K-3000K) mimics natural light and makes food look more appetizing. This project costs less than $20 and takes 30 minutes, but dramatically elevates the look of your existing decor.
Pro Tips for Durable, Professional-Looking Kitchen Wall Decor
Prioritize Moisture and Grease Resistance
Kitchens have high humidity and frequent grease splatters, so avoid unsealed canvas, untreated wood, and unlaminated paper prints in areas near the stove or sink. For sealants, choose EPA-approved non-toxic formulas if you’re applying decor near food prep surfaces, to avoid harmful fumes or chemical leaching. Use glass-fronted frames for prints and photos, which are easy to wipe down and protect the art underneath from splatters. In practice, a simple sealed wood frame will last 5+ years in a kitchen, while an unsealed one will warp and fade within 1-2 years.
Mix Textures for a Cohesive, Layered Look
Combine hard surfaces (ceramic plates, metal hooks, wooden shelves) with soft textures (macramé hangings, woven baskets, fabric art) and natural elements (dried herbs, small potted plants) to add visual depth. A common mistake is using only one type of material, which makes decor feel flat and generic; mixing 2-3 texture types makes your space feel intentional and curated. If you have green or brown cabinets, coordinating paint shades will make your mixed textures look cohesive, not chaotic.
Secure Heavy Pieces Properly for Safety
Never hang heavy shelves, plate galleries, or 3D art with just a single nail; use wall anchors rated for your wall type (drywall anchors for drywall, masonry anchors for tile or brick) and check the weight rating before hanging. For renters, use command strips or hooks rated for the weight of your piece to avoid wall damage when you move out. In practice, a 10-pound plate gallery needs at least 2 heavy-duty command strips, or 2 wall anchors, to stay securely in place.
Seasonal Maintenance and Easy Updates to Keep Your Kitchen Fresh
Quick Weekly Cleaning Routine
Dust all wall decor and surfaces weekly with a soft microfiber cloth to prevent grease and dust buildup. Wipe splatters immediately with a damp cloth and mild dish soap; avoid harsh abrasives, bleach, or excessive water, which can peel paint, scratch glass, or damage porous materials. For fabric hangings, vacuum with an upholstery attachment monthly, and spot clean with a damp cloth as needed. With regular care, most DIY kitchen wall decor will last 3-5 years before needing a refresh.
Low-Effort Seasonal Swaps
You don’t need to redo your entire wall every season: swap out framed prints for holiday-themed ones, add small seasonal accents (pumpkins in fall, fresh herbs in spring, mini string lights in winter), or rotate pieces on your shelves instead of hanging new ones. For holiday gatherings, swap in festive decor and pair your new space with homemade wine gifts for guests, or stock up on affordable wine making supplies online to make your own batches for dinner parties. If you’re new to home brewing, check out beginner-friendly home wine making tools to get started with minimal investment.
 Mixed-media 3D wall art adds depth and visual interest to plain kitchen walls.
Credit: mindfulhues.com
Mixed-media 3D wall art adds depth and visual interest to plain kitchen walls.
Credit: mindfulhues.com
Frequently Asked Questions
What materials are best for kitchen wall decor?
Opt for moisture-resistant, durable materials that can hold up to kitchen humidity, grease, and occasional splashes. Top picks include sealed wood, ceramic or porcelain plates, framed glass prints, metal wall art, and washable fabric hangings. Avoid unsealed canvas, untreated paper, and porous fabrics in areas near the stove or sink, as they will degrade quickly. For renters, prioritize removable adhesives and command hooks to avoid wall damage.
How can I personalize my kitchen wall decor without it looking cluttered?
Stick to 1-2 focal walls instead of covering every blank space, and tie personal pieces to a cohesive theme. For example, if you love cooking, frame a few of your go-to recipe cards alongside small potted herbs, or hang a gallery of vintage kitchen utensils in matching metal frames. Personal touches feel intentional when they align with your kitchen’s overall style, rather than random additions.
What are the easiest DIY kitchen wall decor ideas for beginners?
The most beginner-friendly projects require no special skills or expensive tools: a framed herb print gallery, a hanging utensil display, a small stenciled accent strip, or a leaning chalkboard for meal plans. All of these can be completed in an hour or less for under $20, and you can adjust them as your style changes.
How do I keep kitchen wall decor clean without damaging it?
Dust all pieces weekly with a soft microfiber cloth to prevent grease buildup. For smudges or splatters, use a damp cloth with mild dish soap, and avoid harsh chemicals, abrasive sponges, or excessive water, which can peel paint or damage finishes. For glass-fronted frames, use a glass cleaner sprayed on the cloth (not directly on the glass) to avoid seepage into the frame.
Can I hang kitchen wall decor if I rent my home?
Absolutely. Prioritize removable, damage-free hanging methods: command strips rated for the weight of your piece, leaning displays (like a large chalkboard or framed art propped on the counter), or tension rods for hanging light fabric pieces. Avoid nails, screws, or permanent adhesive that will leave holes or residue when you move out.
Conclusion
Transforming your kitchen walls with DIY decor doesn’t require professional skills, a massive budget, or permanent changes to your space. Start small with a single project — like a framed herb gallery or a hanging utensil display — and build from there as you get comfortable. The best kitchen wall decor reflects your personal style, fits your kitchen’s unique layout, and holds up to the demands of daily cooking and hosting. Don’t be afraid to mix textures, repurpose items you already own, and swap out pieces with the seasons to keep your space feeling fresh year-round. Ready to get started? Pick one of these easy ideas this weekend, and enjoy a kitchen that feels warm, inviting, and uniquely yours.