How to Install Ceramic Wall Tile in Kitchen: Easy Step-by-Step Guide
As of 2026, ceramic wall tile remains the most popular choice for kitchen backsplashes and accent walls, prized for its durability, water resistance, and endless style options. Many homeowners assume professional installation is required, but a careful DIY install can save $1,000–$3,000 on a standard 30-square-foot kitchen backsplash, while delivering a custom, high-end finish. That said, skipping key steps is the top cause of peeling tiles, cracked grout, and uneven layouts that cost more to fix later. This guide walks you through every step, with trade-specific tips to avoid common pitfalls, whether you’re a first-time DIYer or tackling a second tile project.
Tools and Materials You’ll Need
Gathering all supplies before you start eliminates mid-project trips to the store and ensures you don’t cut corners on critical materials. The right tools also reduce physical strain and improve the final finish. For more on this, see our guide on how to install ceramic tile in kitchen wall.
Essential Tools
- Tile cutter or 7-inch wet saw: A manual tile cutter works for straight cuts on small-format tile (3×6 subway tile), while a wet saw is ideal for larger format tile (12×12 and up) and notches for outlets. Rent a wet saw for $30–$50 a day if you don’t own one.
- Notched trowel: Use a 1/4-inch square-notch trowel for tiles under 8 inches wide, and a 1/2-inch notch for larger format tile to ensure full adhesive coverage.
- Tile spacers: 1/8-inch spacers work for most standard grout lines; use 1/16-inch spacers for tight subway tile layouts.
- 4-foot spirit level and tape measure: Critical for checking wall flatness and keeping tile rows straight.
- Rubber grout float: A 9-inch float with a rubber edge is standard for pushing grout into joints without damaging tile surfaces.
- Margin trowel: For mixing thin-set and grout without making a mess.
- Safety gear: Safety glasses, a dust mask (for cutting tile), and knee pads for comfort during installation.
- Rubber mallet: To gently tap tiles into place and ensure full contact with adhesive.
Tile Options for Kitchens
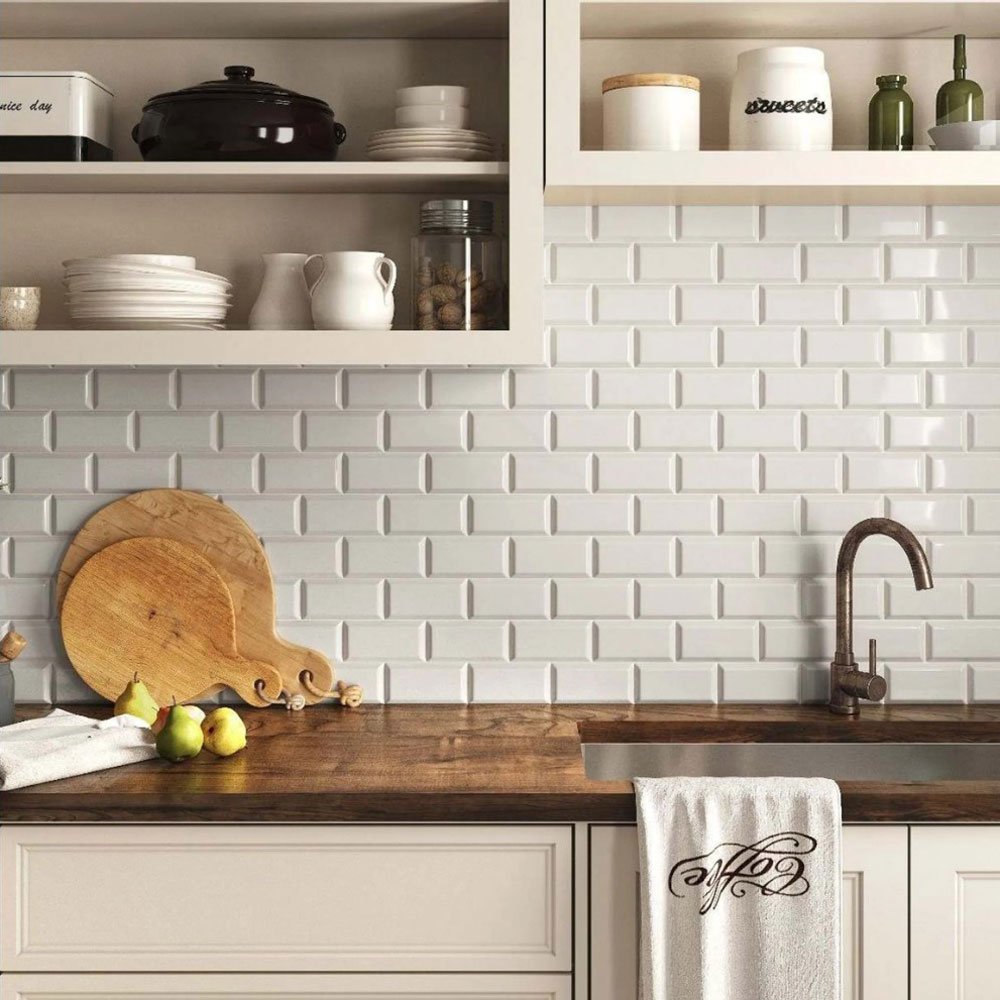
Glazed ceramic tile is the best choice for kitchen walls, as its non-porous surface resists stains, water, and heat. For high-splash areas near the sink, choose a matte or textured finish to hide water spots and smudges. Polished glazed tile works well for low-splash areas to reflect light and make small kitchens feel larger. Subway tile (3×6 inch) remains the most popular 2026 style for classic looks, while 12×12 large-format tile reduces grout lines for a modern, low-maintenance finish. If you have green kitchen cabinets, pairing tile with green cabinetry can create a cohesive, modern farmhouse aesthetic, while warm beige or terracotta tile complements brown cabinet finishes for a traditional look.
Adhesives and Grout
Choose a polymer-modified thin-set mortar for most kitchen wall installations; it adds flexibility to resist wall movement and improves water resistance, unlike outdated organic mastic which can fail in high-humidity kitchen environments. For grout, sanded cement grout works for joints 1/8 inch or wider, while unsanded grout is best for narrower gaps to avoid cracking. For high-traffic areas near the stove or sink, epoxy grout costs twice as much as cement grout but resists stains and mold for 10+ years, compared to 3–5 years for standard cement grout. You’ll also need 100% silicone caulk for the bottom edge where tile meets the countertop, to allow for natural wall and counter movement.
Prep Your Kitchen Wall for Tile
Proper surface preparation is the difference between a tile job that lasts 20 years and one that starts peeling after 12 months. A common mistake DIYers make is skipping this step to save time, which leads to costly repairs later.
Clear and Clean the Workspace
Start by removing all outlet covers, cabinet hardware, and any existing backsplash materials. If you have a wall-mounted kitchen faucet, removing a wall-mounted faucet first will give you full access to the installation area and avoid damage to plumbing during tile cuts. Clean the entire backsplash area with a heavy-duty kitchen degreaser to remove built-up grease, especially above the stove, as even small amounts of grease prevent adhesive from bonding to the wall.
Repair and Level the Surface
Fill all holes, cracks, and dents with a setting-type joint compound (not regular spackle, which shrinks as it dries). Sand patched areas smooth with 120-grit sandpaper, then wipe away all dust with a tack cloth. Check the wall for flatness with a 4-foot level: if the wall is more than 1/8 inch out of level over a 4-foot span, apply a thin layer of leveling compound and sand smooth before priming. The University of Minnesota Extension recommends checking wall flatness within this tolerance before installing tile to avoid uneven adhesion and lippage (tiles that sit higher or lower than their neighbors).
Apply a Bonding Primer
Use an acrylic latex primer designed for tile adhesion to seal the wall surface and improve thin-set bond. Apply a thin, even coat with a roller, and let it dry fully per the label instructions (most modern primers are ready for tile installation in 30 minutes to 2 hours). Avoid skipping priming on drywall or plaster walls, as these porous surfaces absorb thin-set moisture and weaken the bond over time.
Plan Your Tile Layout to Avoid Awkward Cuts
Spending 30 minutes planning your layout will save you hours of frustration and eliminate thin, wobbly sliver cuts along wall edges that look unprofessional.
Mark Reference Lines
Measure the width and height of your backsplash area, then mark the vertical and horizontal center lines with a chalk line. For standard installations, the bottom of the backsplash sits 18 inches above the countertop, but adjust this height if you have outlets in the backsplash zone to leave 1 inch of space above the outlet for an extender. Mark the center point where the two lines cross—this is your starting point for tile placement.
Dry Fit Tiles
Lay out tiles along your center lines without adhesive, using spacers to mimic grout lines. For staggered layouts like subway tile, offset each row by 1/3 of a tile width to avoid aligning vertical grout lines, which looks more polished. Check that full tiles fit at the left and right edges: if the remaining gap is less than half a tile width, shift your center line by half a tile width to avoid thin, unstable cuts.
Adjust for Outlets and Edges
Mark the location of all outlets on your dry-fit tiles with a pencil, and plan cuts so outlets sit centered on full tiles where possible. If you have cabinets that end mid-wall, plan cuts to hide the rough edge behind cabinet frames so only full tiles are visible from the front of the kitchen.
Apply Thin-Set Adhesive Correctly
Proper adhesive application ensures tiles stay firmly in place for decades, even with daily kitchen splashes and steam.
Mix and Apply Thin-Set
Follow the manufacturer’s mixing ratio on the label (typically 4.5 lbs of powder to 1.25 quarts of water for a 25 lb bag), mixing with a drill and mixing paddle for 3–5 minutes until smooth and lump-free. Let the mixture slake (rest) for 5 minutes, then remix before use. Spread thin-set over a 2×2 foot section with your notched trowel, holding the trowel at a 45-degree angle to create uniform ridges. A common mistake is spreading thin-set over an entire wall at once, which causes it to skin over and lose its bonding power before you place tiles.
Work in Small Sections
Stick to 2×2 foot work sections to keep thin-set fresh and sticky. Press each tile firmly into the ridges with a slight twisting motion, then tap the center of the tile with a rubber mallet to ensure full contact with the adhesive. Check each tile for level with a small spirit level as you go, adjusting position before the thin-set sets (usually 10–15 minutes for most standard thin-sets).
Install Tiles with Precision
Taking your time during tile placement eliminates uneven rows and lippage that ruin the final look.
Place Tiles Along Reference Lines
Start at the bottom center of your marked reference lines, placing the first tile flush with the bottom edge of the backsplash area. Work upward and outward from this starting point, placing tiles along both sides of the center line to keep the layout balanced. Insert 1/8-inch spacers at each corner of every tile to maintain consistent grout lines, checking spacing every 3–4 tiles to avoid uneven gaps.
Cut Tiles for Edges and Outlets
Measure the gap at the left and right edges of the backsplash, and mark cut lines on tiles with a pencil. Use a wet saw for straight cuts and notches for outlets, and a tile nipper for small curved cuts around faucet bases. Always measure twice before cutting, and wear safety glasses when operating cutting tools. Smooth rough cut edges with a rubbing stone to avoid chipping when placing tiles. Place cut tiles against wall and cabinet edges, so the rough cut side is hidden from view.
 Even grout lines and full tile cuts around outlets create a polished, professional finish.
Image source: commomy.com
Even grout lines and full tile cuts around outlets create a polished, professional finish.
Image source: commomy.com
Grout Your Tile Joints Properly
Grouting fills gaps between tiles, locks them in place, and creates a watertight seal to protect your wall from moisture and stains.
Mix Grout to the Right Consistency
For cement grout, mix powder with water per label instructions (usually 5 lbs of grout to 1.5 quarts of water) until it reaches a smooth, peanut-butter consistency with no lumps. Let the mixture slake for 10 minutes, then remix before use. For epoxy grout, mix parts A and B as directed, working quickly as it sets in 20–30 minutes. Avoid adding extra water to grout to make it easier to spread, as this weakens the mix and leads to crumbly, stain-prone grout.
Apply Grout to Joints
Use a rubber grout float held at a 45-degree angle to push grout firmly into all joints, working in 3×3 foot sections to avoid grout drying out before you can clean it. Hold the float almost flat to scrape excess grout from tile surfaces. Make sure all joints are completely filled, as gaps in grout let water seep behind tiles and cause mold growth.
Clean and Seal Grout
Wait 10–15 minutes (or per the grout label for fast-setting formulas) before cleaning. Use a damp (not soaking) sponge to wipe tile surfaces in a circular motion, rinsing the sponge frequently to avoid smearing grout. After the first pass, do a second wipe with a clean damp sponge to remove remaining haze. Let grout cure for 72 hours before exposing it to water. Once cured, apply a penetrating grout sealer with a small brush, avoiding excess on tile surfaces, and apply a second coat for extra protection in high-splash areas near the sink.
Add Finishing Touches for a Professional Look
These final steps protect your work and make the installation look like it was done by a professional.
Install Edge Trim and Caulk
If your tile ends at the countertop or cabinet edge, install PVC or metal trim that matches your tile, cutting to length with a miter saw for clean 90-degree corners. Attach trim with construction adhesive or small finish nails. Apply 100% silicone caulk along the bottom edge where tile meets the countertop, and along the top edge where tile meets cabinets, to allow for temperature-related wall movement and prevent water from seeping behind the tile. Smooth the caulk with a wet finger for a neat, uniform finish.
Final Clean and Polish
Wipe all tile surfaces with a soft cloth and mild dish soap to remove remaining dust and grout haze. Polish with a dry microfiber cloth to bring out the tile’s natural shine. Avoid harsh abrasive cleaners, which can scratch glazed ceramic tile surfaces over time.
Common Mistakes to Avoid
Even small errors during installation can lead to big problems down the line. Keep these tips in mind to avoid costly fixes:
- Skipping the dry fit: Always lay out tiles before applying adhesive to avoid uneven cuts and thin sliver tiles along edges.
- Using the wrong trowel size: A trowel with notches too small won’t apply enough adhesive, leading to tiles popping off later; too large causes tiles to sit unevenly.
- Disturbing tiles within 24 hours of installation: Even small bumps can shift tiles out of alignment before thin-set cures fully.
- Using regular grout in wet areas: Cement grout absorbs water over time, leading to mold and mildew; use epoxy grout or seal cement grout annually for backsplashes near sinks.
- Not accounting for outlet depth: Measure the depth of your electrical outlet boxes before cutting tiles, and use an outlet extender if needed to ensure outlets sit flush with the tile surface.
Care and Maintenance for Long-Lasting Tile
Ceramic tile is one of the lowest-maintenance kitchen wall materials available, but small routine steps will keep it looking new for decades:
- Wipe spills immediately, especially acidic substances like lemon juice or vinegar, which can etch glazed tile surfaces over time.
- Clean grout lines monthly with a baking soda and water paste to prevent staining, and avoid harsh scrubbers that can damage grout.
- Reapply grout sealer every 12–18 months (modern sealers last longer than the 6–12 month guideline recommended in older guides) to maintain water and stain resistance.
- If a tile chips, remove the surrounding grout with a grout saw, pry off the damaged tile with a putty knife, apply thin-set to the back of a new matching tile, and press it into place before re-grouting the joint.
- Ceramic tile is heat-resistant, so you can place hot pans directly on it, but avoid dropping heavy cast iron cookware which can chip the glaze.
 Pressing grout firmly at a 45-degree angle ensures no air pockets are left in the joints.
Image source: www.create-enjoy.com
Pressing grout firmly at a 45-degree angle ensures no air pockets are left in the joints.
Image source: www.create-enjoy.com
 Sealing grout lines after installation protects against stains from cooking spills and splatters.
Image source: commomy.com
Sealing grout lines after installation protects against stains from cooking spills and splatters.
Image source: commomy.com
Frequently Asked Questions
How high should I install kitchen wall tile?
Standard backsplash height is 18 inches above the countertop, but many 2026 designs go up to 24 inches or even full-wall for a dramatic look. If you have outlets in the backsplash area, plan to install tile up to 1 inch above the outlet to allow for outlet extender installation.
Can I install ceramic tile over existing tile?
Yes, if the existing tile is firmly attached, clean, and free of gloss or sealer. Sand the existing tile with 120-grit sandpaper to rough the surface, apply a bonding primer, then install new tile as normal. Avoid installing over more than one layer of existing tile, as it adds too much weight to the wall.
How long do I have to wait to use the kitchen after installing tile?
Wait 24 hours for thin-set to cure, and 72 hours for grout to fully cure before exposing it to water or heavy use. Avoid cooking near the backsplash for 48 hours to prevent steam from interfering with grout curing.
Do I need to seal ceramic tile itself?
Glazed ceramic tile is non-porous, so it does not need sealer. Only the grout lines need to be sealed to prevent staining from cooking spills and splatters.
What size grout lines should I use for kitchen tile?
For standard 3×6 subway tile, 1/16-inch grout lines create a tight, authentic look. For 12×12 or larger tile, use 1/8-inch grout lines to accommodate minor variations in tile size and make grouting easier.
Conclusion
Installing ceramic wall tile in your kitchen is a manageable DIY project that adds significant value to your home, with a return on investment of over 70% for mid-range kitchen remodels per 2026 real estate industry data. By taking the time to prep your wall properly, plan your layout, and follow each step carefully, you can achieve a professional, long-lasting finish without the cost of hiring a contractor. If you’re planning a full kitchen refresh, pairing your new tile with a cohesive wall color can elevate the entire space—check out our guides to pairing tile with green cabinetry and coordinating tile with brown cabinet finishes for design inspiration. For official guidelines on adhesive selection and installation standards, refer to the Tile Council of North America’s reference materials. Happy tiling!