How to Get Rid of Oil Stains on Kitchen Walls: Easy & Effective Tips
Stubborn oil splatters on kitchen walls are one of the most frustrating side effects of home cooking. Not only do those greasy marks make your kitchen look dull and unkempt, but over time, bonded grease traps dust, dirt, and even bacteria, leading to permanent paint discoloration or peeling if left unaddressed. Many homeowners waste time and money on harsh chemical cleaners that damage paint or fail to lift set-in grime, but the right combination of gentle supplies, targeted techniques, and preventive habits can restore your walls to their original finish without risk. This guide covers everything from immediate fixes for fresh splatters to long-term strategies to keep your kitchen walls spotless, no professional help required for most minor stains.
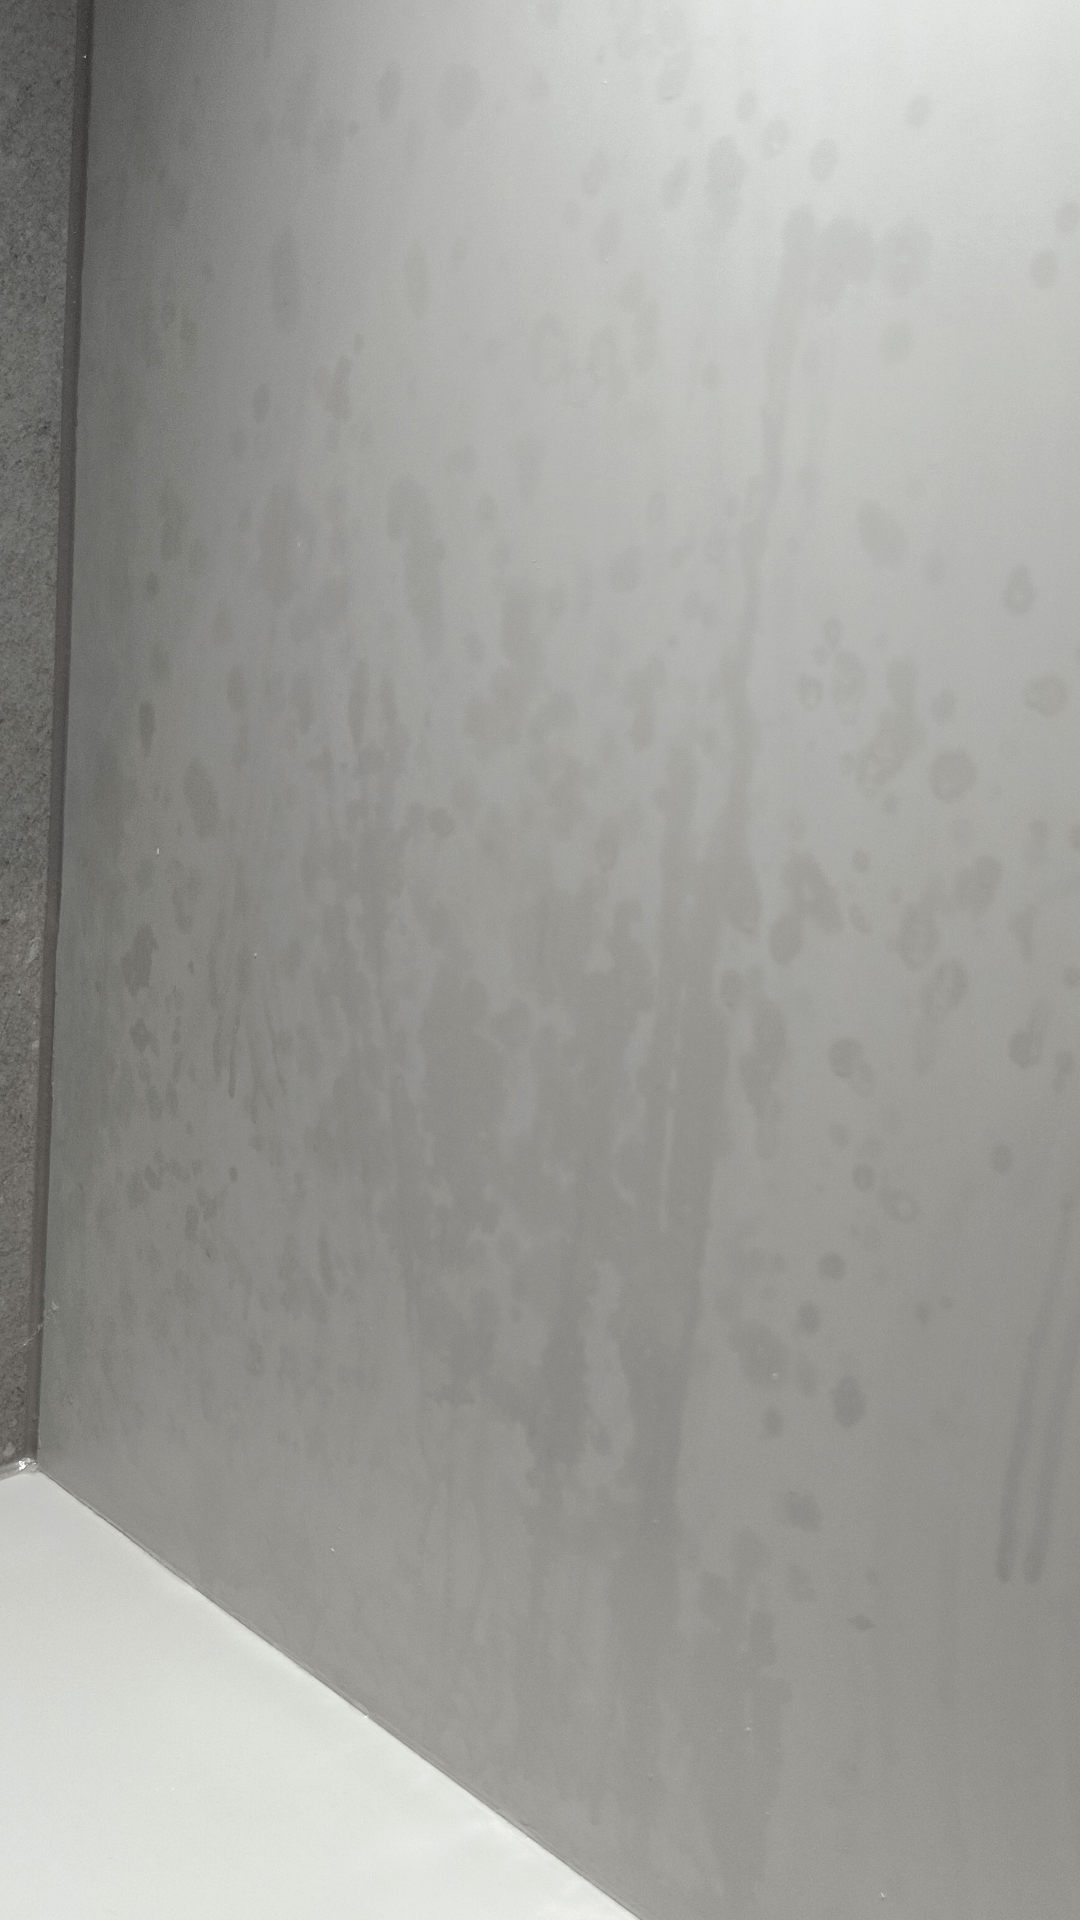
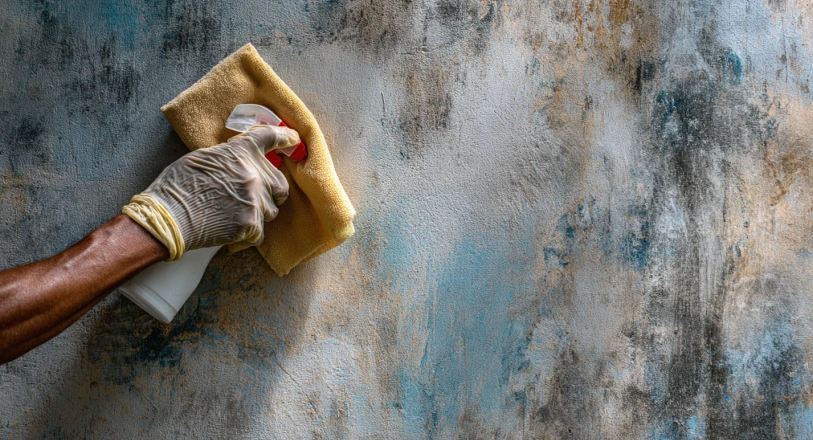 Fresh oil splatters on a painted kitchen wall, left unaddressed for several days
Credit: www.nobroker.in
Fresh oil splatters on a painted kitchen wall, left unaddressed for several days
Credit: www.nobroker.in
What Causes Kitchen Wall Oil Stains?
Oil stains on kitchen walls don’t appear randomly—they’re a direct byproduct of everyday cooking activities, and understanding how they form helps you both remove existing stains and prevent future buildup. For more on this, see our guide on how to get rid of grease stains on.
Common Grease Sources in the Kitchen
The most frequent culprits behind kitchen wall oil stains include:
- Deep frying, searing, or sautéing food over high heat, which releases large amounts of hot oil droplets into the air
- Using aerosol oil sprays or butter sprays near walls, which create a fine, widespread mist that settles quickly on surfaces
- Splatters from tossing food in pans, washing greasy utensils, or pouring hot cooking oil near wall edges
- Grease-laden steam from boiling or simmering food that condenses on cooler wall surfaces, mixing with ambient dust to form sticky grime
- Lack of ventilation during cooking, which traps grease particles in the air instead of drawing them outside
How Oil Bonds to Wall Surfaces
When hot oil droplets cool after contact with your walls, they harden and seep into the tiny pores of paint, wallpaper, or unsealed drywall. Over time, this grease mixes with airborne dust, skin cells, and dirt to create a dark, sticky layer that becomes increasingly difficult to remove the longer it sits. Matte and flat paint finishes are especially prone to staining, as their porous texture absorbs grease quickly, while satin, semi-gloss, and sealed tile or glass surfaces repel grease far more effectively. For guidance on selecting non-toxic, effective cleaning products that won’t compromise indoor air quality, the EPA’s Safer Choice program offers vetted kitchen cleaning recommendations for households with kids or pets.
Tools and Supplies You’ll Need
Using the right supplies makes oil stain removal faster, safer, and more effective, while protecting your wall’s finish from accidental damage. We’ve split these into essentials for spot cleaning and gear to keep you safe during the process.
Gentle Cleaning Essentials
For most kitchen wall stains, you won’t need expensive specialty products. Stock these basic supplies first:
- Microfiber cloths (soft, lint-free, and non-abrasive for all paint finishes)
- Mild liquid dish soap (degreasasing power without harsh chemicals that damage paint)
- Baking soda (mild abrasive and grease absorbent for set-in stains)
- White distilled vinegar (acidic formula that cuts through stuck-on grease without leaving rinse residue)
- A small spray bottle for mixing and applying homemade cleaning solutions
- A soft-bristle brush (an old toothbrush works perfectly for small, textured stains)
- Clean, lint-free towels for drying
Protective Gear for Safe Cleaning
Even mild cleaning supplies can irritate skin or eyes, especially when scrubbing overhead. Wear:
- Rubber dish gloves to protect your hands from cleaners and grease
- Safety goggles if you’re working on stains above shoulder height to avoid splashes in your eyes
- A mask if you’re using strong commercial degreasers with strong fumes, or if you have dust allergies
How to Prep Your Wall for Stain Removal
Skipping prep steps can lead to smudged stains, damaged paint, or wasted cleaning effort. These two quick steps ensure your cleaning process works as intended.
Remove Surface Dust and Debris
Start by wiping the stained area with a dry microfiber cloth or a soft brush to remove loose dust, crumbs, and surface dirt. If you skip this step, dirt will mix with your cleaning solution and create a muddy, smudged mess that’s harder to rinse away. Use gentle, vertical strokes to avoid spreading grease to clean areas of the wall. When deep cleaning hard-to-reach areas behind fixtures like your faucet or range hood, you may need to remove temporary hardware to access stuck-on grease; our step-by-step guide to removing a wall-mounted kitchen faucet ensures you don’t damage plumbing or finishes in the process.
Test Cleaners on a Hidden Spot
Never apply a new cleaning solution directly to a visible stain first. Dab a small amount of your chosen cleaner on an inconspicuous spot, such as behind a cabinet, near the ceiling, or in a corner, and wait 10-15 minutes. Check for discoloration, peeling, streaking, or paint lifting. If the wall reacts negatively, switch to a milder solution. This step is extra critical for wallpaper, vintage paint, or unsealed drywall, which are far more prone to damage from harsh cleaners.
Home Remedies for Oil Stains (No Harsh Chemicals)
For fresh to moderately set-in stains, pantry staples are often just as effective as commercial cleaners, without the risk of damaging paint or exposing your family to harsh fumes. These methods work for most painted drywall, tile, and sealed wall surfaces.
Dish Soap and Warm Water (For Fresh Stains)
For oil splatters that are less than 24 hours old, dish soap is your first line of defense. A common mistake homeowners make is rubbing fresh splatters instead of blotting, which pushes grease deeper into the paint’s pores and makes the stain larger. To avoid this, mix 1 teaspoon of mild liquid dish soap with 2 cups of warm water in a bowl, dip a microfiber cloth into the solution, and wring it out until it’s damp, not soaking wet. Blot the stain gently, working from the outside in to avoid spreading the grease. Rinse the area with a clean, damp cloth, then dry immediately with a towel. Acting within 24 hours prevents grease from bonding to the paint, making removal almost effortless.
Baking Soda Paste (For Set-In Grime)
For stains that have darkened or hardened over several days, baking soda’s mild abrasive and alkaline properties break down grease and lift it from porous surfaces. Mix 3 parts baking soda with 1 part warm water to form a thick paste, then apply it directly to the stain. Let it sit for 10-15 minutes to absorb the grease, then scrub gently with a soft-bristle brush or damp microfiber cloth in small circular motions. Wipe away the residue with a clean, damp cloth, then dry the area thoroughly. Avoid using dry baking soda, as it can leave a white, powdery residue on light-colored walls.
Vinegar and Lemon Solutions (For Stubborn Discoloration)
White vinegar’s acidity cuts through the sticky bond between grease and paint, while lemon’s citric acid also brightens yellowed discoloration from old oil stains. For minor stains, mix equal parts white vinegar and warm water in a spray bottle, spritz the area, let sit for 5 minutes, then wipe clean with a damp cloth. For tougher stains, cut a lemon in half, dip the cut side into coarse salt, and rub gently over the stain in circular motions. The salt adds mild abrasion to lift grime, while the lemon leaves a fresh, clean scent. Note: Avoid using undiluted vinegar on unsealed drywall or paint finishes older than 10 years, as the high acidity can degrade the surface over time.
Common Mistakes to Avoid with Home Remedies
- Never rub fresh oil splatters: this pushes grease deeper into the paint’s pores, making the stain larger and harder to remove. Always blot first.
- Avoid abrasive scouring pads or steel wool: these scratch paint and leave permanent marks on wall surfaces.
- Don’t soak the wall with excess liquid: water can seep into drywall, causing mold growth, paint peeling, or warping.
Commercial Cleaners for Tough, Set-In Stains
For stains that have set for weeks or months, or for heavily greased kitchens with frequent cooking splatters, commercial degreasers offer stronger, faster results when used correctly. The key is choosing a product matched to your wall’s finish to avoid damage.
How to Choose a Safe Degreaser for Your Wall Type
Not all degreasers are safe for all wall surfaces:
- For painted drywall, matte, or flat paint: Choose a water-based degreaser labeled “safe for painted surfaces” to avoid solvent damage, peeling, or discoloration. Avoid heavy-duty solvent-based degreasers, as they can dissolve paint finishes.
- For tile, glass, or stainless steel backsplashes: Citrus-based or solvent-based degreasers work well to cut through thick, baked-on grease, as these surfaces are non-porous and resistant to chemical damage.
- For wallpaper: Stick to mild, pH-neutral cleaners labeled safe for wall coverings; avoid vinegar, bleach, or abrasive cleaners, which can dissolve wallpaper adhesive or fade printed patterns.
Always read product labels for usage instructions, and avoid any cleaner with bleach unless you have solid white walls and confirm the paint is bleach-safe, as bleach can yellow painted surfaces over time.
Application Tips for Commercial Products
Spray or apply the degreaser directly to the stain, let it sit for the time recommended on the label (usually 1-3 minutes for most kitchen degreasers), then scrub gently with a soft-bristle brush or microfiber cloth. Wipe away the residue with a clean, damp cloth, then dry the area immediately to prevent water damage. For extra tough stains, apply a second layer of degreaser and let it sit for 5 minutes before scrubbing.
Step-by-Step Cleaning Process for All Stain Types
Follow these targeted steps based on how old your oil stain is to get the best results without damaging your walls.
Cleaning Fresh Oil Splatters (Under 24 Hours Old)
- Blot the stain gently with a paper towel to absorb as much excess oil as possible. Do not rub, as this will spread the grease.
- Mix 1 tsp mild dish soap with 2 cups warm water, dip a microfiber cloth in the solution, and wring out excess liquid.
- Blot the stain gently, working from the outer edges inward to avoid spreading grease to clean areas.
- Wipe the area with a clean, damp cloth to remove soap residue.
- Dry the wall immediately with a lint-free towel to prevent water spots or moisture damage.
Removing Set-In, Darkened Stains (Older Than 1 Week)
- Make a thick baking soda paste with 3 parts baking soda and 1 part warm water, and apply it directly to the stain.
- Let the paste sit for 10-15 minutes to absorb grease and lift it from the paint.
- Scrub gently with a soft-bristle brush (an old toothbrush works for small stains) in small circular motions.
- Wipe the area with a cloth dampened with equal parts white vinegar and warm water to cut through remaining grease.
- Rinse with a clean, damp cloth, then dry thoroughly with a towel.
- If a faint stain remains, repeat the process once more before moving to spot-painting.
What To Do If Cleaning Doesn’t Fully Remove the Stain
If you’ve repeated the cleaning process 2-3 times and the stain is still visible, or if the paint around the stain is peeling or cracked, spot-cleaning won’t be enough. A simple touch-up job will restore your wall’s finish without the cost of repainting the entire kitchen.
Spot-Priming and Touch-Up Painting Steps
- Lightly sand the stained area with fine-grit sandpaper (220-grit works for most painted walls) to smooth out any rough, peeling paint. Wipe away sanding dust with a dry cloth.
- Apply a thin coat of stain-blocking primer (such as KILZ or Zinsser) to the sanded area, extending the edges slightly beyond the stain to blend with the surrounding paint. Let the primer dry completely, per the product instructions (usually 1-2 hours).
- Use a small, angled paint brush to apply 1-2 thin coats of your matching wall paint, feathering the edges of each coat to avoid harsh lines. Let each coat dry fully before applying the next.
This process takes less than an hour for most small stains, and costs under $10 in supplies, making it far more affordable than full repainting or professional services for minor damage.
Prevent Future Oil Stains on Kitchen Walls
Preventing oil stains is far easier than removing set-in grime, and small proactive habits will cut down on your cleaning workload by most home maintenance experts. Implement these strategies to keep your walls spotless long-term.
Install a Splash Guard or Backsplash
A physical barrier between your stovetop and walls is the single most effective way to prevent splatters. Options include:
- Mounted stainless steel or tempered glass splash guards: These attach directly to the wall 2-3 inches above the stovetop, and catch the majority of cooking splatters before they reach paint. They’re easy to wipe down with dish soap and water after cooking.
- Removable silicone or acrylic splash mats: These stick to the wall behind the stove and can be taken down and washed in the dishwasher monthly for easy maintenance.
- Full tile or shiplap backsplashes: If you’re renovating, a sealed tile or treated wood backsplash extends up the wall 12-18 inches above the stovetop, and is completely grease-proof for easy wiping.
Build a Quick Post-Cooking Wipe-Down Routine
The best way to prevent stains from setting is to address splatters within minutes of cooking:
- Keep a microfiber cloth and a small spray bottle of dish soap solution next to your stove for immediate spot cleaning.
- Wipe the wall area within 2 feet of the stovetop after every cooking session, while grease is still warm and easy to lift.
- Run your range hood or exhaust fan during cooking and for 10-15 minutes after you finish, to draw grease-laden air out of the kitchen instead of letting it settle on walls.
Choose Grease-Resistant Paint for High-Splash Zones
If you’re repainting your kitchen, opt for a satin, semi-gloss, or eggshell finish instead of flat or matte paint for walls within 3 feet of the stovetop. These non-porous finishes repel grease and moisture, making splatters easy to wipe away without damaging the paint. For homes with green cabinetry, our guide to grease-resistant wall colors for green kitchens includes low-maintenance, light-reflective paint hues that also help mask minor, fresh splatters before you have time to wipe them down. For kitchens with warm wood tones, coordinating wall shades for brown cabinetry can help hide small splatters between regular wipe-downs.
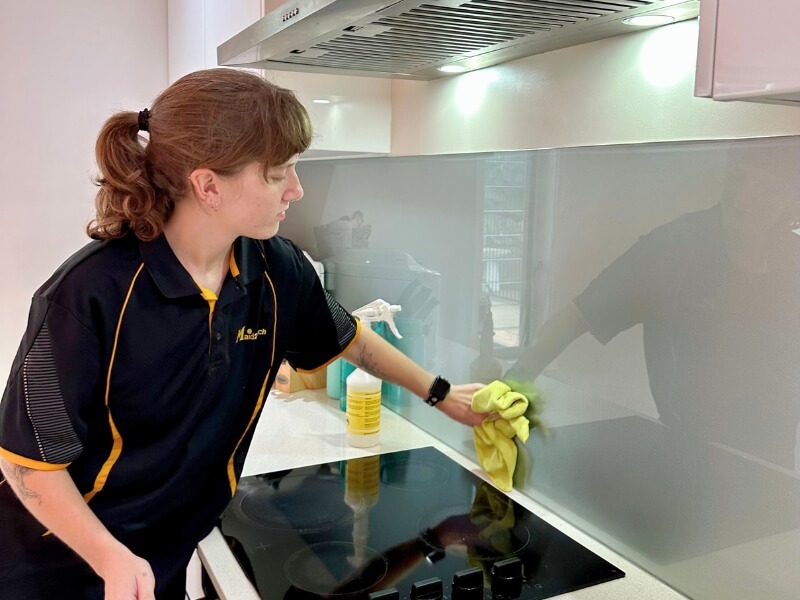 Wiping splatters immediately after cooking prevents them from setting into paint
Credit: www.maid2match.com.au
Wiping splatters immediately after cooking prevents them from setting into paint
Credit: www.maid2match.com.au
When to Call a Professional Cleaning Service
Most minor oil stains can be removed with DIY methods, but certain situations require expert tools and expertise to avoid permanent damage to your walls.
Signs You Need Expert Cleaning
Call a professional if:
- Stains cover more than 10 square feet of wall space, or have spread across multiple walls
- Grease has caused paint to peel, bubble, or crack around the stain
- You notice musty odors or discoloration that indicates mold growth behind the paint, often caused by excess moisture from repeated wet cleaning attempts
- You have historic plaster walls that can’t withstand harsh scrubbing or commercial cleaners
- DIY cleaning attempts have made the stain darker or more visible
What to Expect From Professional Wall Cleaning
Professional kitchen wall cleaners use industrial-grade, pH-balanced degreasers and low-pressure steam cleaning tools that lift grease without saturating drywall or damaging paint. For stains that can’t be fully removed, many services offer spot-priming and touch-up painting as an add-on. Spot cleaning for a small, isolated stain typically costs $75-$150, while full kitchen wall cleaning for heavily greased spaces runs $200-$400. This is often more cost-effective than repeated DIY attempts that risk permanent wall damage, or full kitchen repainting that can cost $1,000 or more.
 Proper cleaning and spot-priming can restore stained walls without full repainting
Credit: www.burgoscleaning.com
Proper cleaning and spot-priming can restore stained walls without full repainting
Credit: www.burgoscleaning.com
Frequently Asked Questions
How can I remove fresh oil stains from kitchen walls?
Act as quickly as possible: first blot the stain with a paper towel to absorb excess oil, then mix 1 tsp mild dish soap with 2 cups warm water, dip a microfiber cloth in the solution, and blot the stain gently. Rinse with a clean, damp cloth, then dry immediately. Fresh stains usually lift completely with this method if addressed within 24 hours.
What household items effectively clean oil stains on walls?
The most effective natural supplies are baking soda, white distilled vinegar, and mild dish soap. Dish soap breaks down fresh grease, baking soda lifts set-in grime with mild abrasion, and vinegar cuts through the sticky bond between grease and paint. Avoid using undiluted vinegar on old or unsealed paint, as it can cause discoloration over time.
Can I use commercial cleaners on kitchen wall stains?
Yes, but only use products labeled “safe for painted surfaces” or “kitchen grease remover” for painted drywall. Avoid heavy-duty solvent-based degreasers, as they can dissolve paint finishes. Always test the cleaner on a hidden spot first, and follow the product’s recommended dwell time to avoid damage.
How often should I clean kitchen walls to prevent oil stains?
Wipe down the area within 2 feet of your stovetop with a damp microfiber cloth after every cooking session to catch fresh splatters. Do a deeper clean with a vinegar-water solution (1 part vinegar, 4 parts water) once a week to remove any settled grease before it bonds to the paint. For heavily used kitchens, deep clean all kitchen walls monthly with a mild degreaser.
Will oil stains damage my kitchen walls permanently?
If left unaddressed for months, oil grease can seep into paint and drywall, causing discoloration, peeling, and even mold growth from trapped moisture. Most minor to moderate stains can be fully removed with cleaning, but set-in stains that have damaged the paint will require spot-priming and touch-up painting to restore the finish.
Final Tips for Spotless Kitchen Walls
Oil stains on kitchen walls are an inevitable part of home cooking, but they don’t have to leave your kitchen looking dull or grimy. The key to easy, effective stain removal is acting quickly on fresh splatters, using gentle cleaners matched to your wall’s finish, and building small preventive habits to stop stains from forming in the first place. For set-in stains that won’t lift with cleaning, a simple spot-priming and touch-up job can restore your wall’s look in under an hour, no professional help needed.
For a full kitchen deep clean, our guide to accessing hard-to-reach kitchen wall areas makes cleaning behind mounted fixtures simple during your update.