How to Clean Kitchen Wall Stains: Easy Tips for a Spotless Look
Pesky kitchen wall stains—from grease splatters after Sunday dinner to tomato sauce dots from spaghetti night and mysterious water rings near the sink—can make even the tidiest kitchen feel unkempt. Many homeowners make the mistake of scrubbing aggressively with harsh abrasives, which etches paint, removes finish, and leaves permanent marks that are harder to fix than the original stain. This guide breaks down stain-specific, wall-type-safe cleaning methods, natural and commercial solution options, prevention tricks to stop stains before they set, and clear signs it’s time to call a professional. You’ll learn exactly how to tackle every common kitchen wall stain without damaging your surfaces, for a bright, spotless look that lasts.
First: Identify Your Wall Type and Stain Source
Before you reach for a cleaner, confirm two key details to avoid costly damage: your wall’s finish, and what caused the stain. Using the wrong method for your surface can discolor paint, peel wallpaper, or ruin textured finishes, so this step takes 2 minutes and saves hours of rework. For more on this, see our guide on how to regrout kitchen wall tiles easy steps.
Common Wall Finishes in Kitchens
Most kitchen walls fall into one of four categories, each with unique cleaning needs:
- Matte/flat paint: The most common interior kitchen finish, it hides imperfections but absorbs liquids and stains easily. Never use abrasive scrubbers or harsh chemicals, as they will strip the finish and leave shiny spots.
- Satin/semi-gloss paint: A popular choice for kitchens for its moisture resistance and easy wipeability. It holds up to gentle scrubbing and most cleaning solutions, but avoid steel wool which can scratch the surface.
- Tile/ceramic backsplash: Non-porous and highly stain-resistant, these surfaces can handle stronger degreasers and abrasive brushes for set-in grime.
- Washable vinyl wallpaper: Most modern kitchen wallpaper is wipeable, but avoid soaking it with liquid, which can cause peeling at the edges. Test all solutions on a hidden seam first.
Match Your Stain to the Right Cleaning Method
Stains break down differently depending on their composition:
- Grease and oil bind to porous paint surfaces and attract dust, making them darker over time if left unaddressed.
- Food and beverage stains with natural dyes (tomato sauce, curry, coffee) penetrate paint layers if not blotted within 24 hours.
- Water marks leave mineral deposits from hard water that require mild acid to dissolve.
- Mold and mildew thrive in damp, unventilated areas and can spread behind paint if not removed properly.
Common Kitchen Wall Stains and How to Identify Them
Knowing exactly what stain you’re dealing with ensures you pick the most effective cleaner and avoid unnecessary scrubbing. Below are the most frequent kitchen wall stains, their typical locations, and early signs to watch for.
Grease and Oil Spots
These dark, slightly sticky stains appear most often 6–12 inches around stovetops, range hoods, and cooking stations, where frying, sautéing, and searing send fine oil particles into the air. Over time, grease bonds to paint, attracts household dust, and forms a dark, grimy layer that gets harder to remove the longer it sits. A common mistake homeowners make is rubbing fresh grease into the wall with a cloth, which pushes the oil deeper into porous paint. Instead, blot fresh splatters with a paper towel first to absorb excess oil before cleaning. For more on this, see our guide on how to clean kitchen wall grease.
Food and Beverage Splatters
Stains from tomato sauce, curry, soy sauce, coffee, and fruit juices leave bright, pigmented marks that are notoriously hard to remove once dry. They’re most common near prep areas, dining nooks, and around microwaves. Fresh splatters are easy to lift, but dried food dye binds to latex paint, requiring a mild abrasive or acid to break the bond.
Water Marks and Mineral Deposits
Faint white or brown rings and streaks appear near sinks, dishwashers, and under leaky cabinets where hard water splashes onto walls. These marks are caused by dissolved minerals (calcium, magnesium) left behind when water evaporates, and they can etch paint over time if not removed. They’re often accompanied by warped baseboards or peeling paint if the underlying moisture issue isn’t fixed.
Mold and Mildew
Black, green, or fuzzy spots that appear in damp, poorly ventilated corners (behind the fridge, under sinks, near windows) are mold or mildew. These aren’t just unsightly: mold spores can trigger allergies and respiratory issues, especially for sensitive households. Mildew is a surface-level fungus that’s easy to remove, while more pervasive black mold may require professional remediation if it has spread behind walls.
Smoke and Candle Residue
If you cook with high heat often or burn candles regularly, a thin, yellowish film can build up on upper walls and ceilings. This residue combines grease, soot, and wax, and leaves walls looking dull and discolored even after regular cleaning.
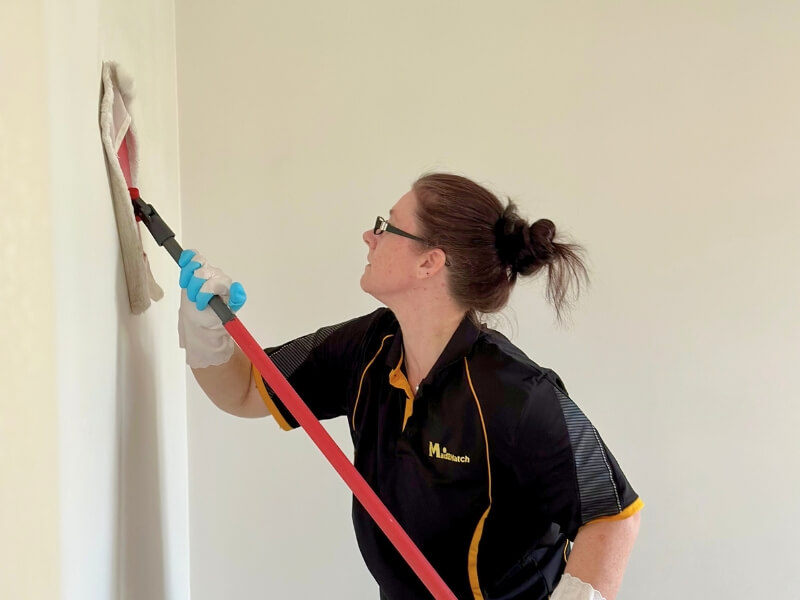 Flat microfiber mops lift dust without scratching painted kitchen walls
Image source: www.maid2match.com.au
Flat microfiber mops lift dust without scratching painted kitchen walls
Image source: www.maid2match.com.au
Essential Cleaning Supplies for Every Stain Type
Using the right supplies prevents wall damage and cuts down on scrubbing time. Avoid all-purpose cleaners with ammonia or bleach unless your walls are specifically rated for them, as these can discolor paint and irritate skin and lungs.
Gentle Cleaners for Painted and Wallpapered Walls
For most everyday stains, these safe, low-impact options work well:
- Mild dish soap (degreas-ing formula) mixed with warm water: Safe for all painted and washable wallpapered surfaces, effective on fresh grease and food splatters.
- White distilled vinegar mixed 1:1 with water: A mild acid that dissolves mineral deposits from water marks and breaks down mild grease. Always test on a hidden spot first, as vinegar can dull matte paint if left on too long.
- Castile soap: A plant-based, non-toxic option for households with kids and pets, effective on light food and water stains.
- Baking soda: A gentle abrasive that lifts set-in stains without scratching paint, ideal for textured walls.
Heavy-Duty Solutions for Tough Stains
For set-in grease, mold, or deep food stains, you may need stronger options:
- Commercial kitchen degreaser: Look for formulas labeled safe for painted surfaces; these cut through bonded grease faster than homemade solutions. Avoid oven cleaners, as their harsh chemicals will damage wall paint.
- Hydrogen peroxide (3% solution): A safe, non-toxic alternative to bleach for mold and mildew, it kills spores without discoloring most paint colors.
- EPA-approved mold and mildew remover: For severe mold growth, follow all label instructions for ventilation and safety.
Tools That Won’t Damage Your Walls
- Soft microfiber cloths and sponges: Lifts dirt without scratching; avoid abrasive scrubbers, steel wool, or rough paper towels.
- Soft-bristle brush: Ideal for textured walls or grout lines, it reaches into grooves without damaging paint.
- Spray bottle: Applies cleaning solution evenly without over-saturating the wall, which can cause water damage.
- Step ladder or sturdy stool: Reaches high walls safely without overextending.
Safety Gear for Harsh Cleaners
Wear rubber gloves to protect skin from irritants in degreasers and mold removers. If you’re working with bleach, hydrogen peroxide, or mold-infested areas, wear an N95 mask and safety goggles to avoid inhaling spores or fumes. Work in a well-ventilated area, opening windows and running exhaust fans to reduce fume buildup. To avoid etching or discoloring paint, follow University of Minnesota Extension's interior paint care guidelines when testing cleaning solutions on hidden spots.
Step-by-Step Stain Removal by Type
Follow these targeted steps for each common stain, and always test your chosen cleaner on a hidden spot (like behind a cabinet) first to confirm it won’t discolor your paint.
Removing Grease and Oil Stains
- Blot fresh grease with a paper towel to absorb excess oil; do not rub, as this pushes grease deeper into paint.
- Mix 1 cup warm water with 1 teaspoon degreasing dish soap. Dampen a microfiber cloth with the solution (wring out excess liquid so the cloth is damp, not soaking).
- Gently rub the stain in circular motions, working from the outside in to avoid spreading the grease.
- For set-in grease, make a paste of 2 parts baking soda and 1 part water. Apply to the stain, let sit for 5 minutes, then gently scrub with a soft cloth.
- Wipe the area with a clean damp cloth to remove residue, then dry with a towel. If the stain remains after two attempts, avoid repeated scrubbing, which can damage paint; refer to the troubleshooting section below.
Tackling Food and Beverage Marks
- Blot fresh splatters immediately with a dry cloth to absorb as much liquid as possible.
- Spray a 1:1 mix of white vinegar and water onto the stain, or dab with a cloth dipped in the solution. Let sit for 2–3 minutes to break down food dyes.
- Wipe gently with a microfiber cloth. For stubborn tomato or curry stains, dab a small amount of non-gel toothpaste onto a damp cloth and rub lightly; the mild abrasive will lift the pigment without scratching paint.
- Wipe clean with a damp cloth and dry. Note: Magic erasers work well for tough stains, but test first on a hidden spot, as their mild abrasiveness can remove matte paint finish with heavy scrubbing.
Erasing Water Marks and Mineral Deposits
- Mix 1 teaspoon mild dish soap with 1 cup warm water. Dampen a cloth with the solution and blot the water mark.
- For persistent mineral deposits, dab a cloth soaked in undiluted white vinegar onto the stain, let sit for 3–5 minutes, then wipe clean.
- If the mark is still visible, make a paste of baking soda and water, apply to the stain, let sit for 5 minutes, then gently rub with a soft cloth.
- Wipe the area with a clean damp cloth and dry thoroughly to prevent new water marks from forming.
Removing Mold and Mildew
- Put on rubber gloves, an N95 mask, and safety goggles. Open windows and run your exhaust fan to ventilate the area.
- For surface mildew, spray a 1:1 mix of white vinegar and water onto the stain, let sit for 10 minutes, then scrub with a soft-bristle brush and wipe clean.
- For more severe mold, spray a solution of 1 part 3% hydrogen peroxide to 2 parts water onto the stain, let sit for 10 minutes, then scrub and rinse. For bleach-safe surfaces (only white or solid-color non-painted tile), you can use a 1:3 bleach-to-water solution, but never use bleach on painted walls, as it will cause discoloration.
- Dry the area completely with a towel, and run your exhaust fan for 30 minutes after cleaning to remove excess moisture. For black mold or mold covering more than 10 square feet, refer to EPA guidance on safe residential mold cleanup to avoid exposure to harmful spores.
Lifting Smoke and Candle Residue
- Mix 1 cup warm water with 1 teaspoon dish soap and 1 teaspoon white vinegar.
- Dampen a microfiber cloth with the solution and wipe the affected area, working from top to bottom to avoid streaks.
- For stubborn soot, use a soft-bristle brush to gently scrub the residue, then wipe clean with a damp cloth and dry.
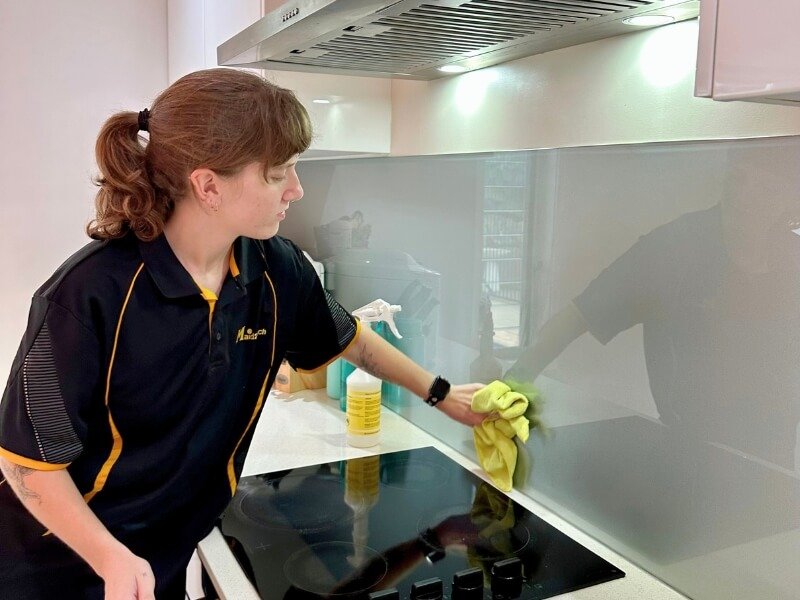
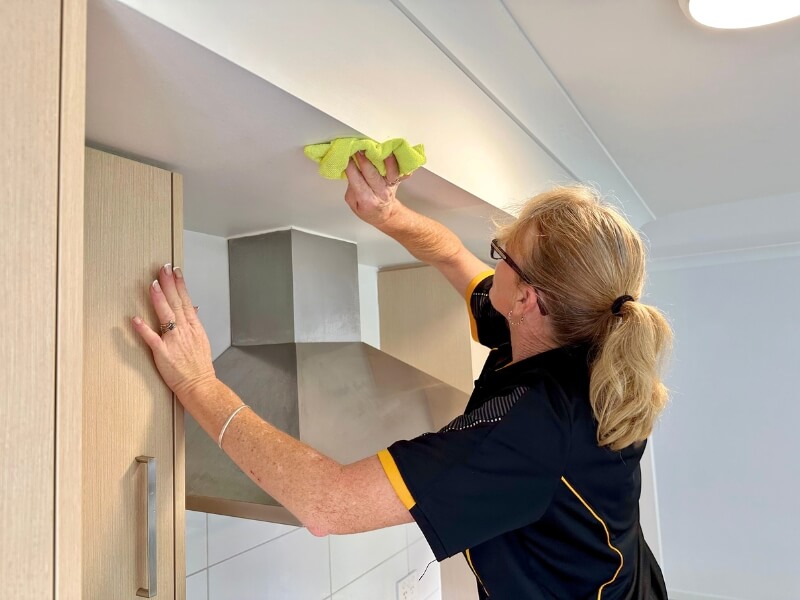 Cleaning behind the range hood regularly prevents stubborn grease buildup on adjacent walls
Image source: www.maid2match.com.au
Cleaning behind the range hood regularly prevents stubborn grease buildup on adjacent walls
Image source: www.maid2match.com.au
Natural Cleaning Alternatives for Low-Impact Stain Removal
If you prefer to avoid harsh chemicals, these household staples are safe for most wall surfaces and effective on most kitchen stains. They’re also low-cost and non-toxic for households with kids, pets, or respiratory sensitivities.
White Vinegar Solutions
The mild acidity of white vinegar dissolves mineral deposits, breaks down grease, and kills mild mildew without harsh fumes. Mix equal parts vinegar and water in a spray bottle, apply to the stain, let sit for 2–3 minutes, then wipe clean. Avoid using vinegar on marble or stone tile, as the acid can etch the surface.
Baking Soda Paste
Baking soda’s mild abrasiveness lifts set-in stains without scratching paint or tile. Mix 2 parts baking soda with 1 part water to form a thick paste, apply to the stain, let sit for 5 minutes, then gently rub with a soft cloth and wipe clean. It also deodorizes walls, making it a great choice for kitchens with lingering cooking smells.
Lemon Juice Applications
The citric acid in fresh lemon juice breaks down grease and brightens discolored spots. Apply lemon juice directly to a cloth, dab onto the stain, let sit for 3 minutes, then wipe clean. For extra power on tough grease, mix lemon juice with 1 teaspoon of salt to create a gentle scrub. Avoid using lemon on dark paint, as the acid can cause lightening over time.
Pros and Cons of Natural vs. Commercial Cleaners
Natural cleaners are safer for everyday use and low-toxicity households, but they take longer to work on set-in stains. Commercial degreasers and mold removers work faster on severe grime, but require more safety precautions and ventilation. For most everyday kitchen stains, natural options are more than sufficient; reserve heavy-duty commercial cleaners for deep bi-annual cleans or severe mold growth.
How to Prevent Future Kitchen Wall Stains
Preventing stains is far easier than removing set-in grime. Small habit changes and low-cost upgrades can cut down on wall cleaning time significantly.
Routine Maintenance Habits
- Wipe splatters and spills immediately with a damp microfiber cloth as they happen, before they have time to set. Grease and food stains are 90% easier to remove if addressed within 1 hour of occurring.
- Wipe down walls near the stove and sink once a week with a mild soap and water solution to remove light grease and water spots before they build up.
- Avoid splashing water when washing dishes or prepping food; use a splash guard at the sink if you frequently have water overflow.
Protective Upgrades for High-Risk Areas
- Install a washable, heat-resistant backsplash behind your stove and sink. Tile, beadboard, and vinyl backsplashes are non-porous and can be wiped clean in seconds, protecting your painted walls from splatters.
- Apply a clear, matte sealant to painted walls in high-grease areas (around the stove, range hood) to create a barrier that repels oil and makes cleaning easier. Reapply the sealant every 2–3 years for maximum effectiveness.
- Use a splatter guard when frying or sautéing to catch grease particles before they hit your walls.
Ventilation Best Practices
Poor ventilation is the top cause of grease buildup, water marks, and mold growth on kitchen walls. Run your range hood exhaust fan for 10–15 minutes after every cooking session to pull grease, steam, and smoke out of the room. If you don’t have a range hood, open a window while cooking to improve airflow. Clean your exhaust fan filters monthly to ensure they’re working efficiently; clogged filters can’t remove grease particles from the air, leading to more wall buildup.
Troubleshooting Persistent Stains That Won’t Budge
If you’ve followed the steps above and the stain remains, don’t scrub harder—this will only damage your paint. First, confirm the stain is a surface mark, not paint discoloration or underlying damage:
- Run your finger over the stain: if it’s smooth and level with the rest of the wall, it’s a surface stain that may need a stronger cleaner or repeat treatment.
- If the area feels rough, bubbled, or peeling, the stain has penetrated the paint or drywall. You’ll need to spot-prime the area with a stain-blocking primer, then repaint with a matching finish to cover the discoloration.
- If you notice a musty smell or the stain is spreading, it’s likely mold behind the wall. Do not attempt to clean this yourself; cut out the affected drywall section and replace it to prevent mold from spreading to other areas of your kitchen.
When to Call a Professional Cleaning Service
While most kitchen wall stains are easy to tackle with DIY methods, some situations require expert help to avoid costly damage or health risks:
- Severe mold growth: If mold covers more than 10 square feet, or you suspect it has spread behind walls, hire a certified mold remediation specialist. Improper removal can spread spores throughout your home and cause long-term health issues.
- Stains that have penetrated paint or drywall: If scrubbing doesn’t lift the stain and the paint is peeling or bubbling, a professional can assess the damage, repair the drywall, and repaint the area to match your existing finish.
- Delicate surfaces: If you have hand-painted wallpaper, textured plaster, or custom tile, professional cleaners have the specialized tools and solutions to clean these surfaces without damage.
- Time constraints: If you don’t have time to prep, clean, and dry multiple walls, a professional service can complete the job in a fraction of the time, with long-lasting results.
Frequently Asked Questions
What is the fastest way to remove fresh kitchen wall stains?
Blot the stain immediately with a dry paper towel to absorb excess liquid, then wipe with a damp microfiber cloth and mild dish soap. Addressing stains within 1 hour of occurrence prevents them from setting, eliminating the need for heavy scrubbing.
Can I use bleach to clean kitchen walls?
Bleach can discolor painted walls and damage wallpaper, so it’s only safe for use on white, non-porous tile or grout. For mold removal on painted surfaces, use 3% hydrogen peroxide or vinegar instead, which are safer for paint and less irritating to lungs.
Will magic erasers damage kitchen wall paint?
Magic erasers have a mild abrasive texture that can remove matte paint finish with heavy scrubbing. Test on a hidden spot first, and use light, gentle strokes rather than pressing hard. They are safe for use on semi-gloss, glossy paint, tile, and glass surfaces.
How can I hide wall stains without repainting?
For minor, set-in stains that won’t lift with cleaning, use a stain-blocking primer to spot-treat the area, then repaint only that section with a matching finish. If you’re not ready to repaint, hang a small decorative wall hanging, shelf, or magnet over the stain to cover it temporarily.
Are kitchen wall stains a sign of poor ventilation?
Frequent grease buildup, water marks, and mold growth often point to inadequate ventilation. If you notice these stains recurring even after regular cleaning, upgrade your range hood or add a window to improve airflow and reduce moisture buildup on walls.
Final Tips for a Spotless Kitchen
Cleaning kitchen wall stains doesn’t have to be a chore. The key is to act fast on fresh spills, use the right cleaner for your wall type, and avoid harsh scrubbing that damages paint. Routine weekly wiping of high-risk areas (around the stove, sink, and dining nook) will prevent most stains from setting in the first place, cutting down on deep cleaning time significantly. If you’re tackling a full kitchen refresh after banishing wall stains, our guides to coordinating wall palettes for green kitchen cabinets and coordinating wall palettes for brown kitchen cabinets can help you pick a durable, stain-resistant finish that looks great for years. For homeowners dealing with recurring water marks from leaky fixtures, our guide to replacing an old leaky faucet can help you fix the issue at the source to prevent future wall damage.