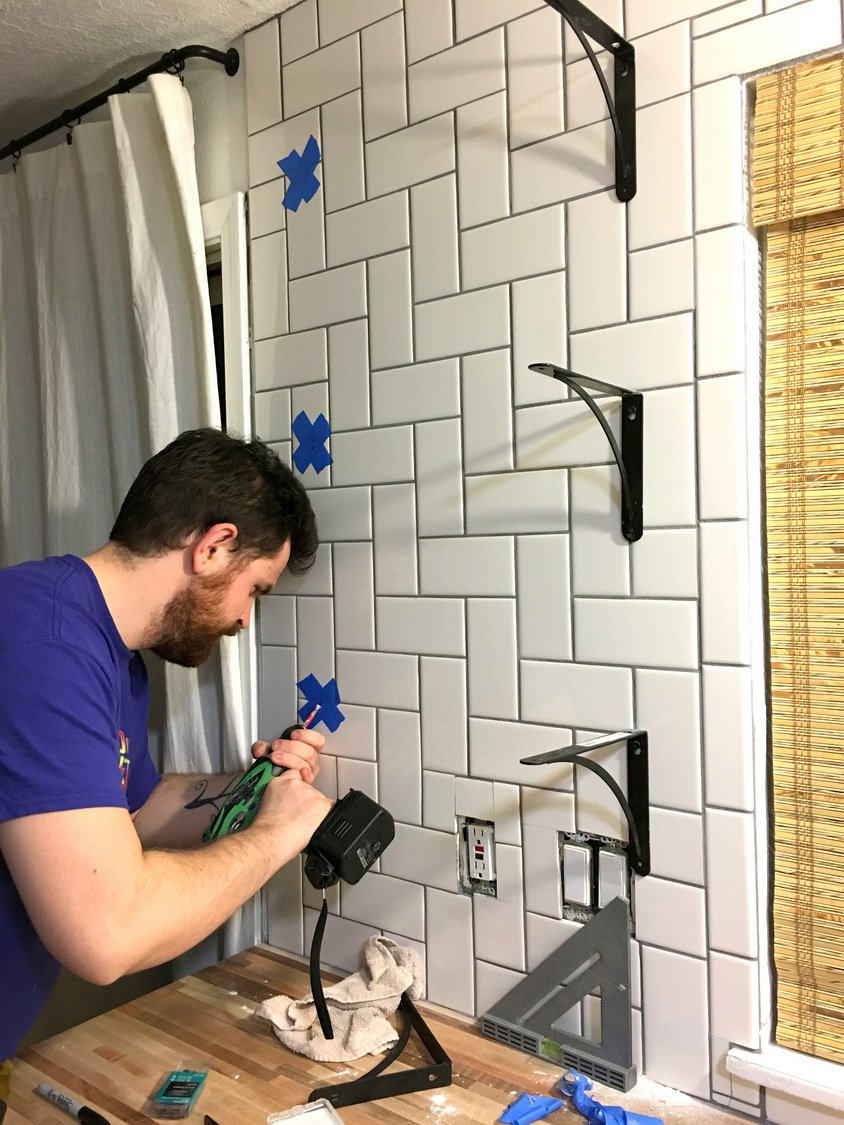
How to Install Ceramic Tile on Wall in Kitchen: Easy Step-by-Step Guide
Installing ceramic tile on your kitchen wall is one of the most high-impact, budget-friendly DIY upgrades you can tackle. A well-installed ceramic backsplash or feature wall resists grease, moisture, and stains, boosts your home’s resale value, and lets you customize your kitchen to match your style. While the process may feel intimidating at first, following industry best practices and avoiding common DIY pitfalls (like skipping wall prep or rushing curing times) will help you achieve a professional, long-lasting finish even if you’ve never laid tile before. For context, a standard 30-square-foot kitchen backsplash takes most skilled DIYers 2–3 days total to complete, including curing time.
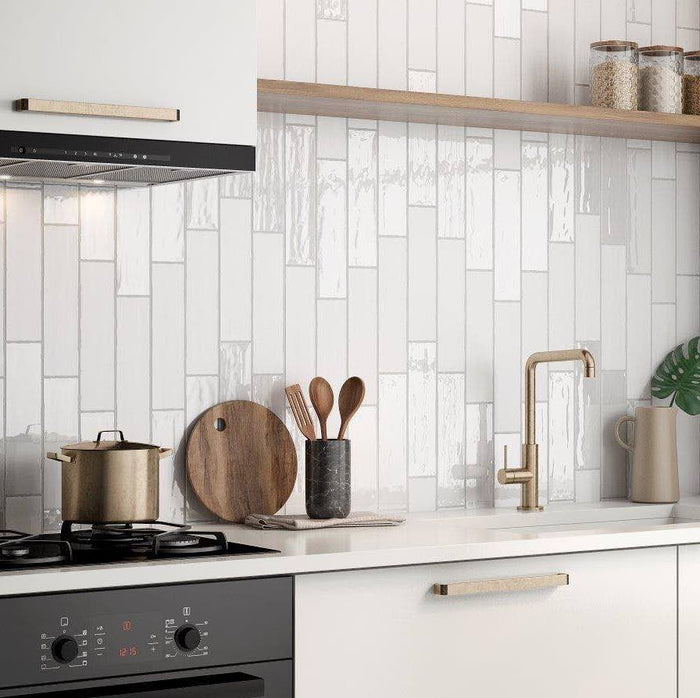 Credit: www.mineraltiles.com
A DIYer aligning glossy white ceramic subway tiles for a kitchen backsplash, using spacers to maintain even grout lines.
Credit: www.mineraltiles.com
A DIYer aligning glossy white ceramic subway tiles for a kitchen backsplash, using spacers to maintain even grout lines.
Safety Gear and Prep Essentials
Skipping safety precautions is one of the most common mistakes new DIY tilers make. Before you buy any materials, pick up these essential items:
- ANSI-rated safety glasses to protect your eyes from sharp ceramic shards when cutting tile
- An N95 dust mask to avoid inhaling thinset dust and fine tile particles during cutting
- Cut-resistant gloves for handling sharp tile edges
- Knee pads for comfort when working near the floor or a low ladder
- Non-slip shoes to avoid falls on wet thinset
Most importantly, turn off power to all outlets and switches in your work area at your breaker panel before starting to eliminate the risk of electric shock. If you plan to use a wet saw for cuts, add ear protection to your gear list to guard against prolonged noise exposure. For more on this, see our guide on how to install ceramic tile in kitchen wall.
Choosing the Right Materials for Your Kitchen Wall
Using the correct materials for your kitchen’s specific conditions is the difference between a tile wall that lasts 20 years and one that starts peeling or cracking after 2. We break down what to buy below:
Tile Selection
For kitchen walls, glazed ceramic tile is the standard choice: its non-porous surface resists grease, food splatters, and moisture, and it comes in endless sizes, finishes, and colors. Glossy finishes are the easiest to clean, making them ideal for backsplashes behind stoves and sinks. Matte finishes reduce glare for kitchens with lots of natural light, while textured tiles add slip resistance for areas near wet zones.
- For first-time DIYers, 3×6 subway tile or 4×4 square tile in small formats is easiest to cut and align. Large format tile (over 12 inches) looks sleek and modern but requires extra precision to level, and needs a larger notched trowel for adhesion.
- If you’re installing tile directly behind a stovetop, choose tile rated for high heat to avoid cracking from radiant heat exposure.
Substrate and Backing
The surface you’re tiling over (your substrate) is just as important as the tile itself. For new construction or full kitchen remodels, cement backer board (such as HardieBacker) is the best option for kitchen walls, especially near sinks, dishwashers, or stoves: it’s 100% moisture-resistant, won’t warp if exposed to water, and provides a stable, even base that prevents tiles from cracking over time. If you’re installing over existing drywall, confirm it’s not water-damaged or peeling. You can install over drywall for low-moisture areas far from water sources, but you must use polymer-modified thinset for extra adhesion, and sand and prime the painted drywall surface first to prevent peeling.
Adhesives and Grout
Thinset mortar is the standard adhesive for ceramic wall tile. Unmodified thinset works for most installations over cement backer board, but polymer-modified thinset is required for installation over painted drywall or in high-moisture zones, as it has stronger bonding power and water resistance. For industry-standard thinset mixing ratios, curing times, and application guidelines, refer to industry-standard thinset guidelines from the Tile Council of North America, the leading industry body for ceramic tile installation standards, to ensure maximum adhesion and longevity. For grout, sanded grout is best for joints 1/8 inch or wider, as the sand prevents cracking. Unsanded grout works for narrow joints under 1/8 inch, as sand can scratch soft ceramic tile finishes. Epoxy grout is a premium, beginner-friendly option for busy kitchens: it’s impervious to stains, mold, and water, and never needs sealing, though it has a shorter working time (20–30 minutes) than cement-based grout. Grout color can be matched to tile for a seamless look, or contrasted for a defined, modern aesthetic.
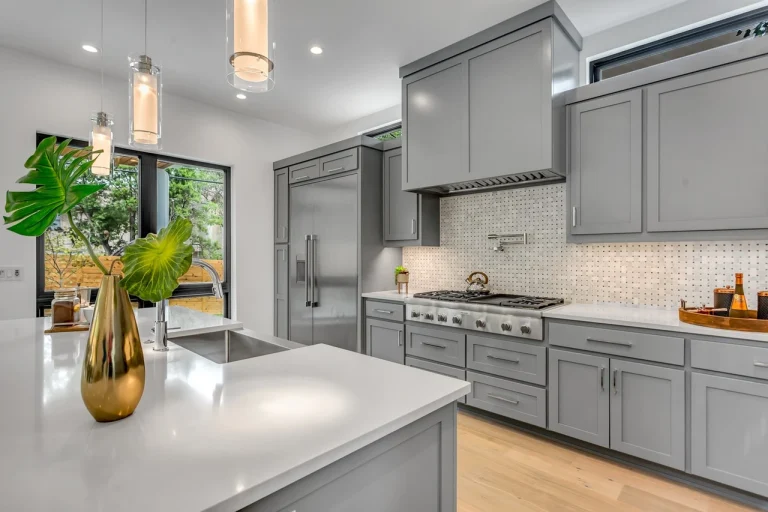
Ceramic tile comes in every color and finish imaginable, so you can easily match it to your kitchen’s existing aesthetic. If you’re working with deep green cabinets, cool-toned glazed ceramic tiles create a balanced, fresh contrast that pops without overwhelming the space; coordinating tile with green cabinetry offers full pairing guidance for this look. For warmer, traditional kitchens with wood tones, matching tile to brown cabinetry offers curated color and finish recommendations to tie your space together seamlessly.
 Credit: www.create-enjoy.com
Close-up of hand-set mosaic ceramic tiles, showing tight joint spacing for a seamless finish.
Credit: www.create-enjoy.com
Close-up of hand-set mosaic ceramic tiles, showing tight joint spacing for a seamless finish.
Preparing Your Wall for Tile Installation
Proper wall prep is the single most important step to avoid tiles loosening or falling off over time. Skipping this stage is the top cause of failed DIY tile installations.
Clean, Repair, and Level the Surface
Start by removing all grease, dust, and dirt from the wall: kitchen walls often have built-up oil splatters, so scrub with a mild detergent and warm water, then wipe dry. Avoid harsh chemical cleaners, as they can leave residues that interfere with thinset adhesion. Next, check for cracks, holes, or uneven spots. Fill small holes and cracks with a water-resistant filler (not regular spackling, which can degrade with moisture) and sand smooth once dry. Use a 4-foot level to check the entire wall for high or low spots: if the wall is more than 1/4 inch out of level over a 4-foot span, apply a self-leveling underlayment to create an even base, otherwise your tiles will sit crooked and grout lines will be uneven.
Prime the Substrate
Applying primer seals porous surfaces and improves thinset adhesion. Use a primer rated for your specific substrate: a latex-based primer for cement backer board to reduce suction and prevent thinset from drying too fast, or a universal primer for drywall and plaster. Apply a thin, even coat with a roller, and let it dry completely (1–2 hours for most products) before moving on.
Mark Your Layout Lines
Measure the width and height of your tiling area, then mark the exact midpoint of each wall. Use a level to draw vertical and horizontal center lines that cross at the center of the space. To ensure your corners are square, use the 3-4-5 rule: measure 3 feet along the bottom edge from the corner, 4 feet up the adjacent side edge, then measure the diagonal between those two points. If the diagonal is exactly 5 feet, the corner is square; if not, adjust your layout lines so cuts are even on both sides, avoiding thin, uneven slivers of tile at the edges. Also mark the exact locations of all outlets, switches, and pipes so you know where to make cuts later.
Planning Your Tile Layout for a Pro Finish
Skipping layout planning leads to uneven cuts, wasted tile, and a lopsided final look. Spend 30–60 minutes on this step to save hours of frustration later.
Dry-Fit Your Tiles
Lay your tiles out on the floor first, following your center lines, to test the pattern. If you’re using a patterned tile (such as encaustic or geometric designs), confirm the pattern aligns correctly across the entire wall. For offset patterns (like standard subway tile laid with a 1/2 offset), adjust your center point so the cuts at each edge are equal width, avoiding uneven half-tiles on one side and thin slivers on the other. Use tile spacers during the dry fit to account for grout lines, so you can spot any gaps or alignment issues before applying adhesive.
Plan for Cuts and Fixtures
Before you start cutting tiles around openings, turn off power to the relevant circuit at your breaker panel to avoid electric shock. If you have a wall-mounted kitchen faucet in your work area, follow our guide to removing a wall-mounted kitchen faucet safely before marking your cuts to avoid damaging plumbing. Plan to make cuts so the finished edge of the tile faces outward, hiding the rough cut edge against the wall or fixture box for a clean, professional look.
How to Apply Adhesive and Set Ceramic Tiles
This is the step where your project starts to take shape, and attention to detail here will pay off in a straight, even finished wall.
Mix Thinset Correctly
Follow the manufacturer’s mixing instructions exactly: most thinset requires 1 part water to 4 parts powder, but ratios vary by product. Use a clean 5-gallon bucket and a mixing drill with a paddle attachment to mix until the consistency is smooth, like peanut butter, with no lumps. Let the mix slake (rest) for 5–10 minutes, then remix before use. This step ensures the thinset cures properly and has maximum adhesion. A common mistake is adding extra water to thinset that’s starting to skin over, which weakens the bond and causes tiles to loosen later. Only mix as much thinset as you can use in 30 minutes, as it begins to set quickly once mixed.
Spread Adhesive and Set Tiles
Use a 1/4×1/4 inch notched trowel for most standard ceramic tile (use a 1/2×1/2 inch trowel for tiles larger than 12 inches). Hold the trowel at a 45-degree angle and spread thinset on a 2×2 foot section of wall, combing the ridges in a vertical direction. Press each tile firmly into the thinset, twisting slightly to ensure full contact, and place it perpendicular to the comb lines for maximum grip. Use tile spacers between each tile to maintain even grout lines, and check alignment with a level every 3–4 tiles to catch crookedness early. If a tile is sitting too low, add more thinset underneath; if it’s too high, remove it and scrape off excess thinset before resetting. Work in small sections to prevent thinset from skinning over before you set tiles.
Cutting Tiles to Fit Outlets, Corners, and Edges
Precise cuts are what separate a professional-looking installation from a DIY mess. Always measure twice and cut once to avoid wasting tile.
Measuring and Cutting Straight Edges
For straight cuts along the edge of a wall or cabinet, use a manual tile scorer for thin ceramic tile (under 3/8 inch thick): score the tile firmly along your marked line once, then press down on the tile to snap it cleanly along the score. For thicker or larger format tile, a wet saw delivers cleaner, more accurate cuts with less chipping. Always wear safety glasses when cutting tile, as sharp shards can fly at high speed.
Cutting Notches for Outlets and Pipes
For L-shaped notches around outlets or pipes, first score the outline of the notch with a tile scorer, then use tile nippers to carefully bite away small pieces until the notch fits perfectly around the fixture. For faster, cleaner cuts, an oscillating multi-tool with a diamond blade works well for notching. Practice cuts on a spare tile first to get a feel for the tools before cutting your final tiles.
Grouting Your Kitchen Wall Tiles
Grout fills the gaps between tiles, locks them in place, and creates a watertight seal that prevents moisture from seeping behind your tile and damaging the wall.
Choose and Mix Grout
For most DIYers, pre-mixed sanded grout is the easiest option, with a long working time that lets you work at a comfortable pace. For high-traffic kitchens or areas near sinks, epoxy grout is worth the extra cost: it’s impervious to stains, mold, and water, and never needs sealing, though it has a shorter working time (20–30 minutes) and is more difficult to apply for beginners. Mix grout according to package instructions, adding water gradually until it reaches a smooth, peanut butter consistency. Let it slake for 10 minutes, then remix before use to ensure even curing.
Apply and Clean Grout
Use a rubber grout float held at a 45-degree angle to push grout into the joints, working diagonally across the tiles to avoid pulling grout out of the gaps. Press firmly to ensure joints are completely filled, then hold the float at a 90-degree angle and scrape off excess grout from the tile surface. Wait 10–15 minutes for the grout to firm up slightly, then use a damp (not soaking) sponge to wipe the tile surface in a circular motion, rinsing the sponge frequently to avoid spreading grout haze. Avoid scrubbing too hard, as this can pull grout out of the joints. After the final wipe, use a soft cloth to buff away any remaining grout haze.
 Credit: www.tilemountain.co.uk
Matte teal metro tiles paired with light grout for a modern kitchen accent wall.
Credit: www.tilemountain.co.uk
Matte teal metro tiles paired with light grout for a modern kitchen accent wall.
Sealing, Curing, and Final Finishing Touches
The final steps of your installation will determine how long your tile wall lasts and how good it looks for years to come.
Cure and Seal Grout
Let thinset cure for at least 24 hours before applying grout, even if the surface feels dry to the touch — rushing this step is a common cause of tile loosening. Let grout cure for 24–72 hours (check your product’s instructions for exact timing) before applying sealant. Apply a penetrating grout sealant with a small brush or applicator bottle, coating the grout lines evenly but avoiding getting sealant on the tile surface, as it can leave a permanent, hard-to-remove haze. If you’re installing a backsplash behind a stovetop, leave a 1/8 inch gap between the top of the tile and the stove, and fill it with a heat-resistant silicone caulk instead of grout, to account for expansion from radiant heat.
Reinstall Fixtures and Clean Up
Once sealant is fully cured (usually 24 hours), reinstall outlet covers, switch plates, and any removed fixtures. Clean the tile surface with a mild dish soap and warm water, avoiding abrasive cleaners or steel wool that can scratch glazed ceramic. For stubborn grout haze, use a grout haze remover specifically designed for ceramic tile, following all safety instructions on the product label.
Maintaining Your Ceramic Kitchen Tile Wall
With proper care, a ceramic tile wall will look like new for decades with minimal effort.
Routine Cleaning
Wipe down the tile surface weekly with a mild dish soap and warm water to remove grease and food splatters, especially near the cooking area. For glossy tiles, a 1:1 vinegar and water solution works well for removing soap scum and hard water spots, but test it on a small hidden area first to ensure it doesn’t dull the finish.
Long-Term Care
Inspect grout lines every 6 months for cracks or discoloration. Touch up grout with a small amount of matching grout as needed, and reapply grout sealant every 1–2 years to maintain stain and mold resistance. Avoid using harsh abrasive cleaners on tile, as they can scratch the glaze over time. For unglazed ceramic tile, use a pH-neutral cleaner specifically formulated for natural tile to avoid discoloration.
Frequently Asked Questions
How do I prepare the kitchen wall for ceramic tile?
Clean the wall thoroughly to remove all grease and dirt, repair any cracks or uneven spots with water-resistant filler, sand smooth, apply a primer rated for your substrate, and mark level layout lines to guide tile placement.
What tools are needed to install ceramic tiles?
You’ll need a tile cutter or wet saw, notched trowel, 4-foot level, rubber grout float, tile spacers, tape measure, pencil, sponge, safety glasses, dust mask, and knee pads.
How long does ceramic tile installation take in a kitchen?
A standard 30-square-foot backsplash takes 1–2 days for installation, plus 24–72 hours of curing time for thinset and grout before sealing, for a total of 3–5 days from start to finish.
Can I install ceramic tiles over painted kitchen walls?
Yes, as long as the paint is fully cured (at least 2 weeks old) and firmly adhered. Lightly sand the surface with 120-grit sandpaper to create a rough texture for the thinset to grip, clean away all dust, and apply a bonding primer rated for painted surfaces before tiling.
Do I need cement backer board for kitchen wall tile?
Cement backer board is highly recommended for areas near sinks, stoves, or dishwashers, as it’s moisture-resistant and provides a more stable base than drywall, reducing the risk of tiles cracking or falling off over time. For low-moisture areas far from water sources, you can install over existing drywall with polymer-modified thinset, as long as the drywall is in good condition.
What size grout lines should I use for kitchen ceramic tile?
For most standard ceramic tile (1×2 subway, 4×4, 6×6), 1/8 inch grout lines are standard. For larger format tiles (over 12 inches), 1/4 inch grout lines are better to account for slight size variations in the tile and prevent cracking.
Can I install ceramic tile over painted kitchen walls?
Yes, as long as the paint is fully cured (at least 2 weeks old) and firmly adhered. Lightly sand the painted surface with 120-grit sandpaper to create a rough texture for the thinset to grip, then clean away all dust before applying a bonding primer rated for painted surfaces.
Conclusion
Installing ceramic tile on your kitchen wall is a achievable, high-reward DIY project that transforms your space without the cost of a contractor. The key to success is prioritizing wall prep, using the right materials for your kitchen’s conditions, taking time to plan your layout, and following recommended curing times to avoid common issues like peeling tiles or grout cracking. With patience and attention to detail, you’ll have a durable, easy-to-clean tile wall that elevates your kitchen’s style for years to come. If you’re refreshing your entire kitchen aesthetic alongside your tile project, matching tile to brown cabinetry helps you pull together a cohesive, timeless look for your space.