How to Maintain Outdoor Tableware: Keep It Like New
Outdoor tableware maintenance starts with knowing what your furniture is made of and following the right routine for each material. Whether you have teak, aluminum, resin wicker, or glass, a few simple steps each month keep your pieces looking sharp for years. This guide walks you through exactly how to clean, protect, and store your outdoor dining set no matter what weather comes your way.
Different materials age differently under sun, rain, and temperature swings. Understanding those differences upfront saves you from costly damage down the line. Let's start with the foundation: identifying your furniture's material and picking the right approach.
Quick Answer
How to maintain outdoor tableware depends on the material. Clean with mild soap and water monthly. Oil teak annually.
Treat aluminum oxidation promptly. Dry metal and wood completely after rain. Cover or store furniture in winter to extend its life.
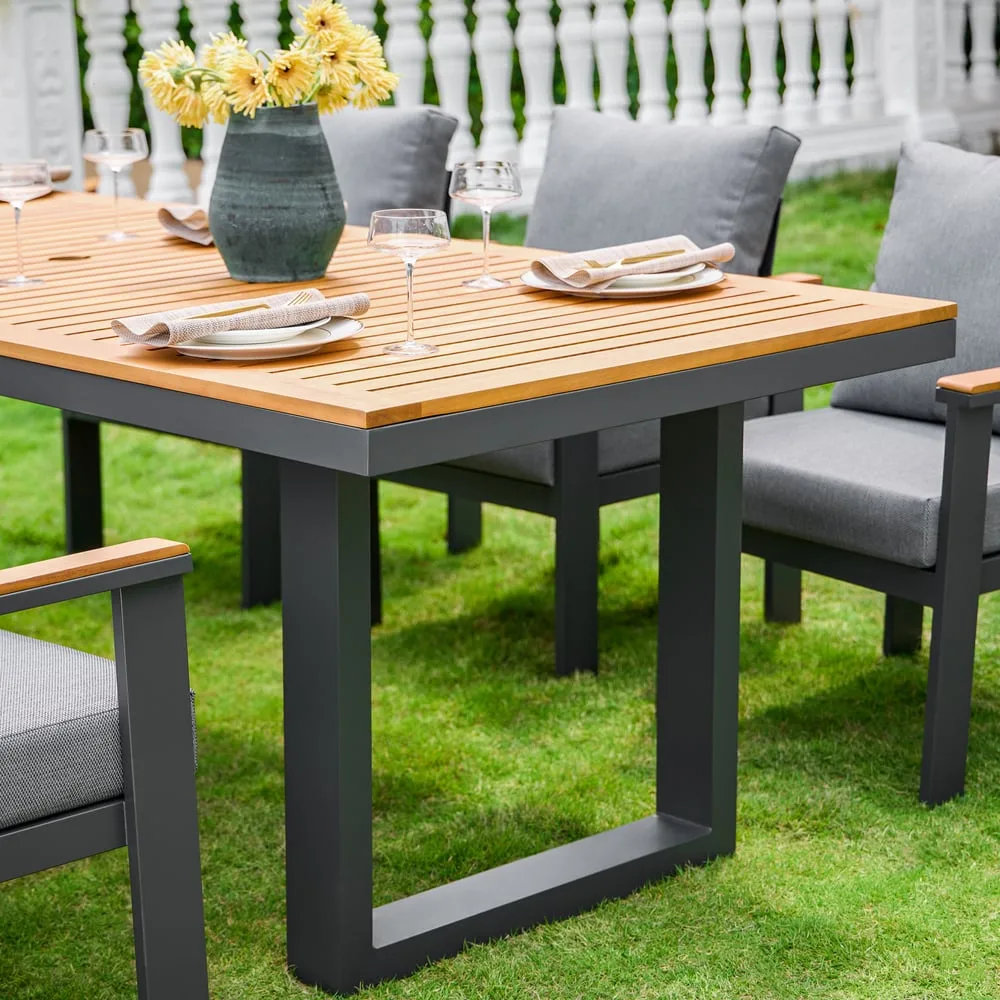
Image source: Web (Bing) / homary.com (Web image (fair-use with source credit))
Identify What You've Got Before You Clean a Thing
Outdoor tableware spans several distinct material families, and the care method changes completely depending on what you're working with. Teak handles rain and sun without any treatment thanks to its natural oils. Aluminum won't rust but shows oxidation over time.
Wrought iron stays strong but needs constant rust protection. Resin wicker is durable yet traps dirt deep in its weave. Glass tops look clean but reveal every smudge and water spot.
Running the wrong cleaner on the wrong surface can damage finishes permanently. That's why the single most important step is identifying your furniture type before reaching for any products.
How to tell your furniture material fast
You can usually figure out your material in thirty seconds with a visual inspection and one quick test. Look for the telltale signs first. Teak has a rich golden-brown color with a visible grain pattern and feels slightly smooth and warm to the touch.
Aluminum typically has a painted or powder-coated finish and feels noticeably lighter than iron. Wrought iron features decorative scrollwork and heavy, thick framing. Cast aluminum often mimics wrought iron designs but weighs considerably less.
Resin wicker looks like woven natural rattan but has a uniform synthetic texture without real plant fibers. Plastic furniture shows molded seams and a less refined edge detail. Glass tables are instantly recognizable.
The magnet test settles any doubts about metal furniture. Hold a refrigerator magnet against the frame. If it sticks firmly, you're dealing with steel or wrought iron, both of which need rust prevention strategies.
If the magnet doesn't stick at all, the piece is likely aluminum, resin, or wood. Checking manufacturer tags or product documentation when available eliminates guesswork entirely. Most quality outdoor brands print material composition information on the frame or include it in care guides.
Once you know your material, you can follow the specific maintenance path outlined below instead of guessing with the wrong approach.
The Care Routine for Wood Outdoor Tables and Chairs
Wood outdoor furniture brings natural warmth and elegance to any patio setting. But wood also reacts to weather in ways that metal and synthetic materials do not. Moisture absorption, UV exposure, and temperature fluctuations all affect wood differently depending on the species and finish.
Getting the routine right prevents warping, cracking, and premature aging.
Teak: oiled vs. naturally silver-gray paths
Teak sits at the top of the outdoor wood hierarchy because of its dense grain and high natural oil content. These built-in defenses make teak resistant to rot, insects, and moisture damage without requiring chemical preservatives. Owners face one key decision: preserve the original honey-gold color or embrace the weathered silver-gray patina that develops over time.
Both paths are valid. The choice depends on your aesthetic preference and how much maintenance you want to do each year.
The silver-gray route requires absolutely zero ongoing effort. Rain, wind, and sunlight do all the work. The wood fades gradually and evenly across the surface.
No oil, no sealant, no seasonal chores beyond basic cleaning. Many homeowners prefer this low-effort approach for its natural, relaxed look that blends seamlessly with garden landscapes.
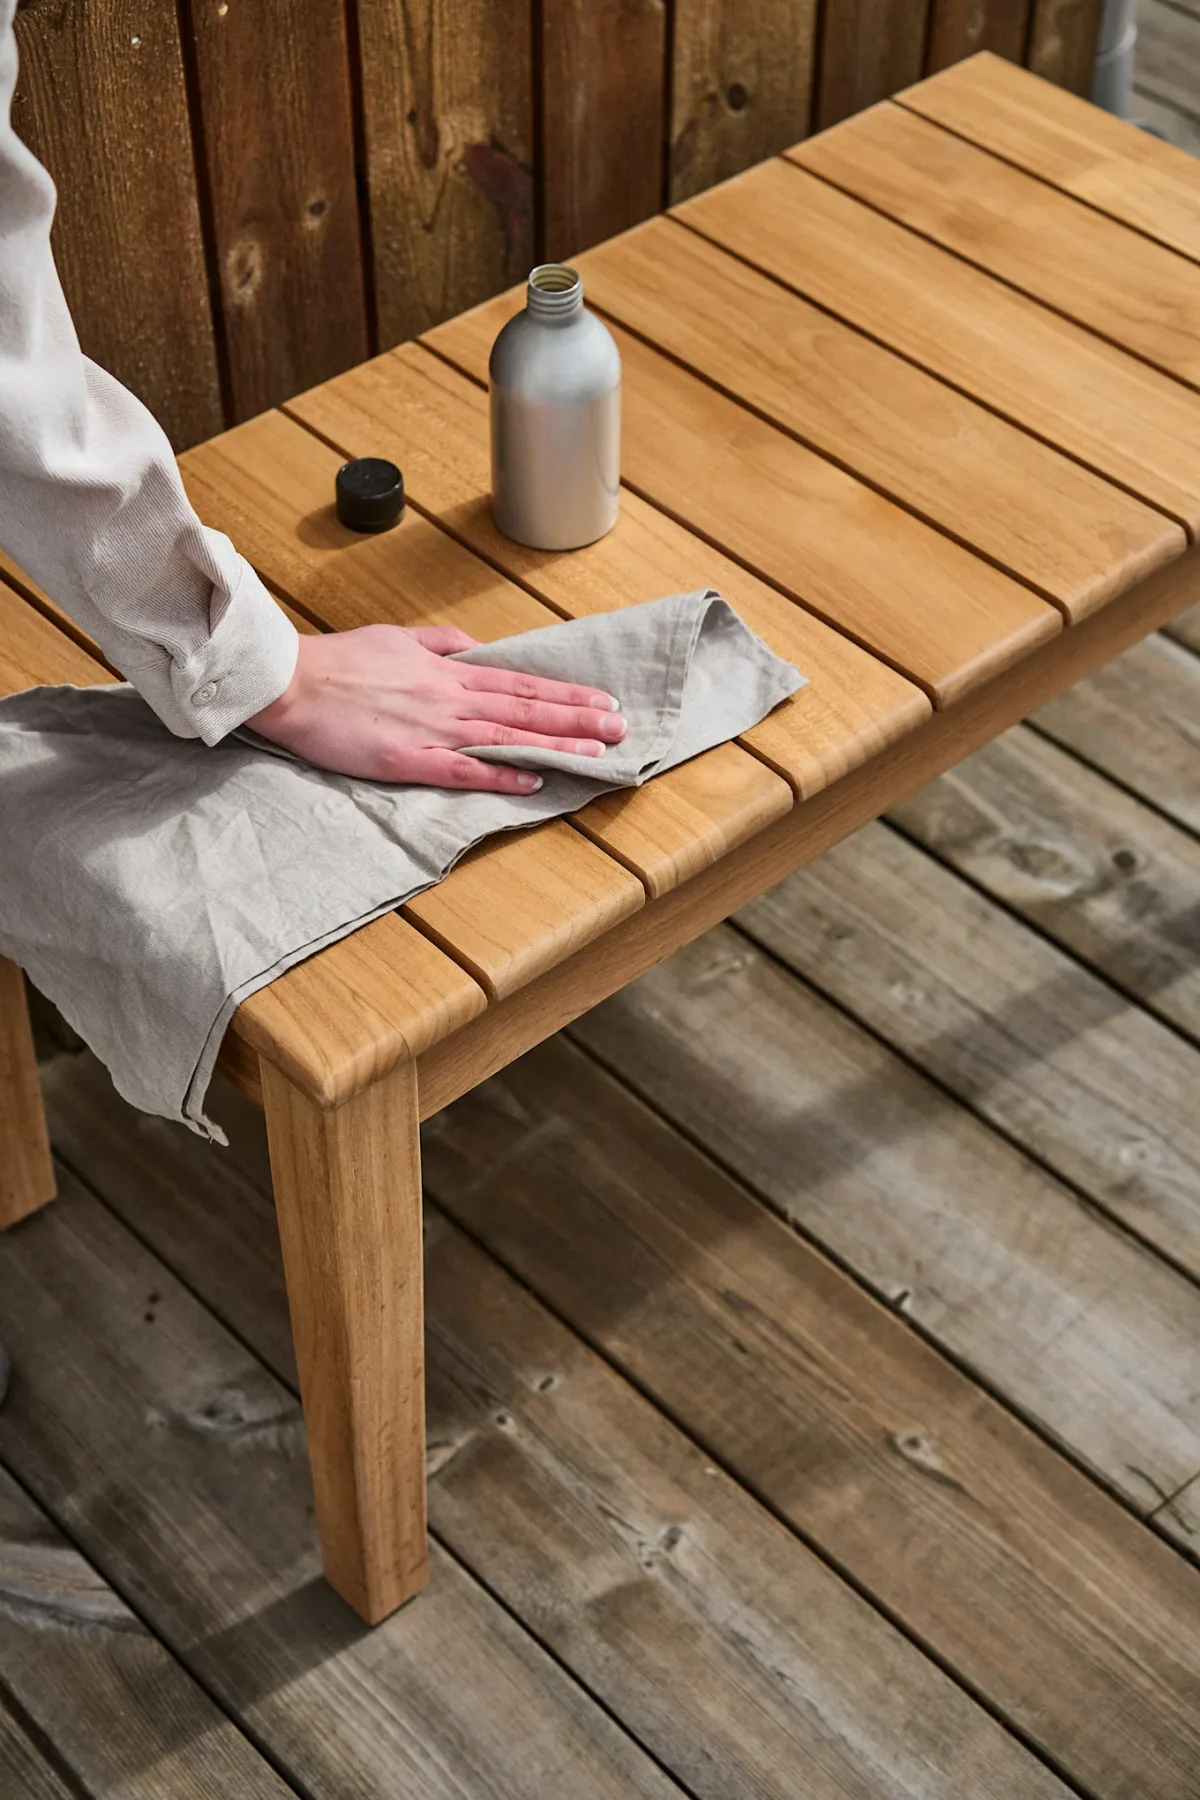
Image source: Web (Bing) / nordicnest.com (Web image (fair-use with source credit))
Choosing to maintain the golden color means committing to annual teak oil application. Start by cleaning the surface thoroughly with a dedicated teak cleaner or a mixture of warm water and mild dish soap. Rinse completely and let the wood dry for at least twenty-four hours in direct sunlight.
Any trapped moisture blocks oil absorption and causes uneven staining. Apply the oil with a soft lint-free cloth or a natural bristle brush, working along the grain in long smooth strokes. Let the oil penetrate for fifteen to twenty minutes, then wipe away any excess with a clean cloth.
Allow the piece to cure for another full day before placing cushions or loading it with dishes. Most quality teak oils cost between fifteen and forty dollars per bottle and cover multiple applications over a season.
Other hardwoods and treated wood care
Not all outdoor wood matches teak's natural resilience. Eucalyptus and acacia are popular alternatives that perform well outdoors but still benefit from an annual protective coat. These woods have moderate natural oil content, so a penetrating sealant or exterior-grade oil applied once per year keeps them from drying out and splitting.
Always clean first and allow complete drying before sealing.
Pine and cedar represent softer outdoor wood options that demand more attention. These species absorb water readily and can warp, swell, or crack if left untreated. A quality water-repellent sealant applied at installation and reapplied every twelve to eighteen months provides essential protection.
Look for sealants labeled for exterior use with UV inhibitors to slow sun damage.
Every wood piece shares the same basic cleaning rhythm regardless of species. Sweep or brush away loose dirt and debris. Mix warm water with a few drops of gentle dish soap.
Wash the surface with a soft brush following the grain direction. Rinse thoroughly with clean water. Let the wood dry completely in sun and airflow before applying any oil or sealant.
Rushing this drying step traps moisture and undermines whatever protection you're adding.
Metal Furniture Maintenance: Aluminum, Wrought Iron, and Steel
Metal outdoor furniture delivers strength and longevity when maintained correctly. But the maintenance path diverges sharply between aluminum and iron-based metals. Aluminum resists rust entirely but develops a chalky oxide layer.
Wrought iron and steel offer incredible strength but corrode quickly if left exposed to moisture. Knowing which metal you own determines your entire care strategy going forward.
Preventing and treating rust before it wins
Rust is the fastest way to destroy wrought iron and steel outdoor furniture. The corrosion process starts microscopic and becomes irreversible once it penetrates deep into the metal. Catching surface rust early is the only reliable defense.
Inspect your iron or steel furniture at least twice a year for orange or brown discoloration, especially at joints, weld points, and areas where the paint or finish may have chipped.
When you find early surface rust, act immediately. Remove the rust gently with fine steel wool or a brass wire brush. Work in the direction of the grain on textured finishes to avoid scratches.
Wipe away all dust particles with a clean dry cloth. Apply a rust converter product according to the manufacturer's directions. These chemical treatments stabilize remaining rust and create a paint-ready surface.
Once treated, prime the exposed area with an exterior metal primer and touch up with matching outdoor paint. This seals the metal and stops corrosion from returning.
For heavily rusted pieces where structural integrity is compromised, restoration becomes more involved. Complete sandblasting or aggressive wire brushing down to bare metal followed by a full repaint with epoxy primer and urethane topcoat can save severely damaged furniture. However, deeply corroded frames that have lost thickness may not be worth restoring and should be replaced for safety reasons.
Coastal environments accelerate rust formation dramatically due to salt in the air and wind. If you live near the ocean, inspect iron furniture every three months and touch up chips immediately. Keeping furniture covered or stored when not in regular use adds significant protection against salt spray and humidity.
Keeping aluminum looking bright year-round
Aluminum solves the rust problem entirely. It forms a thin invisible oxide layer that protects the underlying metal from further corrosion. But that same oxidation process creates the white chalky film many aluminum owners find unsightly on their furniture frames.
This surface oxidation doesn't weaken the metal, but it dulls the appearance significantly over time.
Remove aluminum oxidation with a dedicated aluminum cleaner or a simple homemade solution of equal parts white vinegar and warm water. Apply the solution with a soft cloth or non-abrasive sponge. Gently rub the affected areas in circular motions.
Rinse thoroughly with clean water and dry immediately with a microfiber towel to prevent water spots. This routine restores the original luster without damaging the underlying metal.
Powder-coated aluminum furniture requires gentler handling. The baked-on finish is extremely durable and resists chipping and fading better than standard paint. Clean powder-coated pieces with the same soap-and-water solution used for general outdoor furniture.
Avoid abrasive pads, steel wool, or harsh chemical cleaners that can scratch or degrade the coating over time. Inspect the finish periodically for any chips or scratches and touch them up promptly with matching exterior-grade paint to prevent underlying aluminum exposure.
Applying a layer of automotive-grade paste wax to aluminum frames once or twice a year adds a protective barrier against oxidation and makes future cleaning easier. The wax beads water and repels dirt. Buff gently with a clean cloth after application.
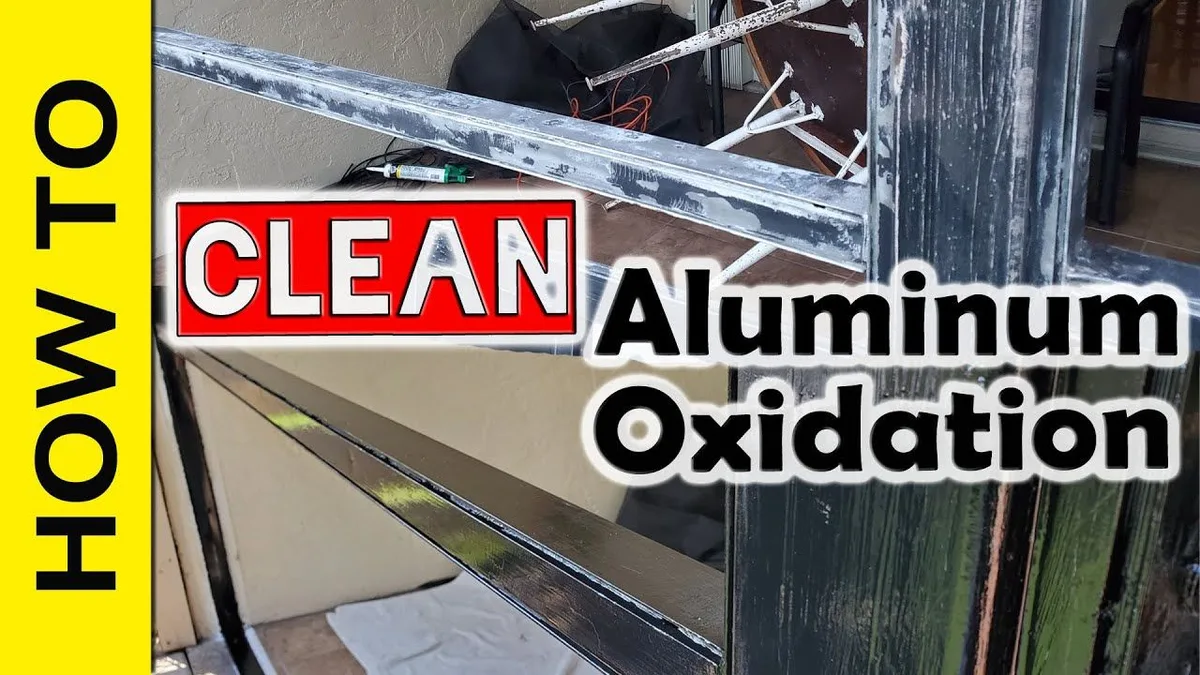
Image source: Web (Bing) / storage.googleapis.com (Web image (fair-use with source credit))
Cleaning Resin Wicker, Plastic, and Glass Surfaces
Resin wicker, plastic, and glass each present unique cleaning challenges that generic advice rarely addresses properly. Resin wicker traps dirt in its intricate weave. Plastic picks up scuff marks and embedded grime.
Glass tops show every fingerprint, water drop, and food splash. The right technique for each material preserves appearance and prevents accelerated wear.
Gently clearing woven textures without fraying them
Resin wicker furniture delivers the classic woven look without the fragility of natural materials. That synthetic advantage comes with a cleanliness drawback. Dirt, pollen, pet dander, and spider webs settle deep into the weaving and are nearly impossible to reach with a regular cloth.
Regular vacuuming alone won't solve the problem either.
The most effective cleaning method combines a soft-bristle brush with a mild soap solution. Fill a bucket with warm water and add a squirt of gentle dish detergent. Dip a soft-bristle nylon brush, an old toothbrush, or a dedicated weaving tool into the soapy water.
Work the brush gently into the weave following the direction of the strands. Use the toothbrush for tighter sections and corners where the larger brush can't reach. Let the soapy water sit for a few minutes to loosen embedded dirt, then scrub again.
Rinsing requires care. Use a garden hose on a gentle spray setting or a bucket of clean water poured slowly over the surface. Never use a pressure washer on resin wicker under any circumstances.
The intense water stream forces fibers apart, frays the weave, and can separate glued joints. Low-pressure rinsing lifts away soap and loosened dirt without damaging the structure.
Allow the furniture to dry completely in direct sunlight before replacing cushions or using the pieces. Trapped moisture inside the weave encourages mold growth that ruins both the wicker and cushion padding underneath. A handheld fan can speed drying in shaded areas or humid climates.
Stain and scratch strategies for glass tops
Glass tabletops are beautiful but honest. They reveal every imperfection immediately. Water spots from sprinklers, mineral deposits from hard water, ring stains from wet glasses, and sticky residues from spilled drinks all demand prompt attention to prevent permanent etching or cloudiness.
For daily cleanup, a simple spray of glass cleaner and a microfiber cloth handles fingerprints and light spills. Always wipe in one direction rather than circular motions to avoid streak patterns that catch the eye. Replace paper towels with microfiber cloths for glass cleaning.
Paper towels leave lint and scratch microscopic scores into the surface over time that accumulate into a hazy finish.
Hard water stains and mineral deposits require a different approach. Mix equal parts white distilled vinegar and warm water in a spray bottle. Apply generously to the stained area and let it sit for three to five minutes.
The acid breaks down the mineral bonds without scratching. Wipe clean with a microfiber cloth and buff dry with a second clean cloth. For stubborn deposits, repeat the process or apply undiluted vinegar directly to the stain.
Avoid abrasive cleaners, scouring powders, and razor blades on tempered glass surfaces. Even tempered glass scratches easily, and those micro-scratches scatter light and create a perpetually cloudy appearance that no cleaning product can fix. Place felt coasters and placemats under all drinkware and hot dishes to prevent ring stains and thermal shock damage.
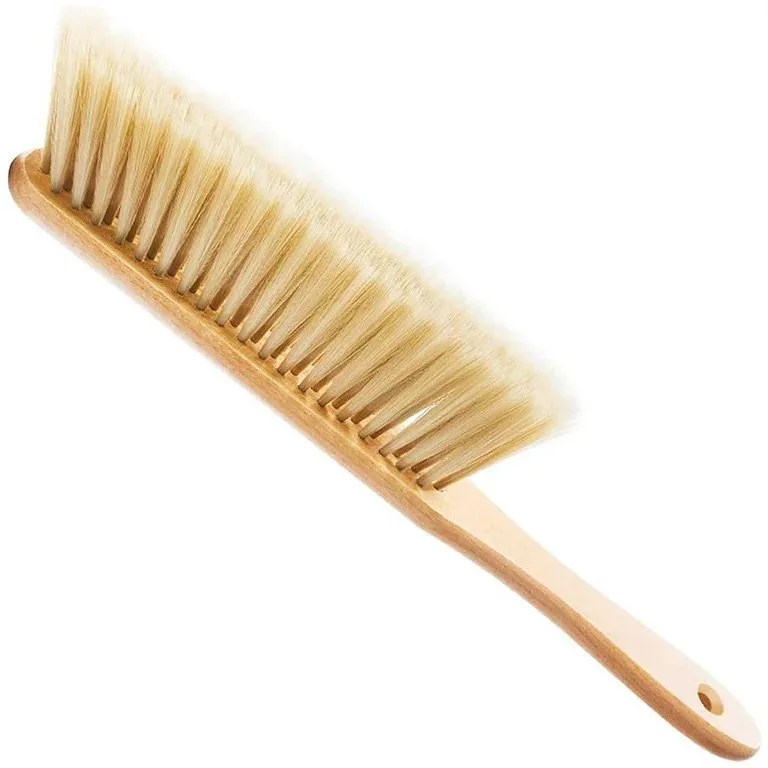
Image source: Bing (Web (fair-use with source credit))
Mistakes That Ruin Outdoor Tableware (And How to Avoid Them)
Many outdoor furniture owners accidentally damage their investment through well-intentioned but incorrect cleaning habits. The damage often doesn't appear immediately. It accumulates over months and years until the furniture looks permanently worn, discolored, or structurally weakened.
Learning what not to do saves as much time and money as learning the right techniques.
Pressure washers, harsh chemicals, and wrong drying
Pressure washers represent the single most destructive cleaning tool homeowners bring to outdoor furniture. The concentrated water stream operates at pressures far exceeding what any outdoor material is designed to withstand. On wood, it splinters fibers, raises the grain, and forces water deep into cracks where it traps moisture and promotes rot from the inside out.
On resin wicker, it separates weave strands, frays edges, and blows out glued joints. On painted or powder-coated metal, it strips finish down to bare metal, exposing everything underneath to immediate corrosion.
If you feel compelled to use a pressure washer despite the risks, keep the nozzle at least twelve inches from the surface, use the lowest pressure setting available, and angle the spray parallel to wood grain rather than directly into it. Even following these precautions, hand washing remains the safer choice every time.
Harsh household cleaners like bleach kill mold effectively but also bleach colors, weaken wood fibers over repeated use, and damage plant life beneath the furniture if runoff isn't controlled. Chlorine-based pool sanitizers are equally destructive on contact with outdoor surfaces. Opt instead for vinegar solutions, baking soda pastes, and mild dish soap, which handle most outdoor cleaning jobs without risking surface damage.
Leaving cleaned furniture wet overnight invites mold, mildew, and corrosion before you even sleep. Water sitting on wood swells fibers. Moisture trapped under cushions breeds bacteria and unpleasant odors.
Damp metal joints corrode incrementally with each wet-dry cycle. After every cleaning session or rainstorm, ensure all surfaces are bone dry before covering or reusing the furniture. Sunlight accelerates drying and adds natural UV sanitization in the process.
Storing wet cushions and leaving metal damp overnight
Cushion damage from improper storage accounts for a huge portion of outdoor furniture replacement costs. Manufacturers design outdoor cushions with water-resistant fabrics, but the foam inserts inside are not waterproof. When cushions stay damp during storage, mold spores activate and multiply rapidly in the dark enclosed space.
The resulting musty odor permeates the foam permanently. Surface cleaning removes visible mold but cannot salvage degraded interior foam.
Always allow cushions to dry completely in direct sunlight before packing them away. Lay them flat with both sides exposed to airflow. Flip them halfway through the drying process.
Store only in breathable canvas bags, never sealed plastic bins that trap residual moisture. Add silica gel packets to storage containers to absorb ambient humidity during long-term off-season storage.
Metal furniture suffers similarly from overnight moisture exposure. Rain collecting in table bases, chair crevices, and joint cavities initiates rust on ferrous metals and oxidation on aluminum within hours. Wipe down all metal surfaces with a dry microfiber cloth after any rainfall or cleaning session.
Position furniture on raised feet or coasters to promote airflow underneath and prevent standing water from pooling against the frame.
Seasonal Maintenance Rhythm for Lasting Appearance
A consistent seasonal maintenance schedule transforms outdoor furniture care from reactive emergency repairs into predictable routine upkeep. The effort required scales with the seasons. Summer calls for frequent light cleaning.
Spring demands thorough inspection and restoration. Fall requires deep cleaning and protective preparation. Winter protection depends on your climate severity and storage options.
Establishing this rhythm early prevents the cumulative damage that catches owners by surprise.
Weekly upkeep during outdoor season
Dedicate ten minutes each week during active outdoor season to basic furniture maintenance. This small time investment prevents minor issues from compounding into major problems that require expensive intervention later.
Begin each weekly session by brushing or sweeping away loose debris from all surfaces. Leaves, pollen, bird droppings, and dirt accumulate constantly and hold moisture against furniture materials. A soft-bristle broom or handheld brush moves debris efficiently without scratching finishes.
Check for insect nests in wicker weave and remove them before they build larger structures.
Wipe down table tops and seating surfaces with a damp microfiber cloth to remove fingerprints, dust films, and light spills before they set. Inspect joints, screws, and hardware for looseness. Tighten any fasteners that have backed out from normal vibration and temperature expansion.
Loose joints stress connected pieces unevenly and accelerate wear on surrounding materials.
Turn cushion inserts every few days during heavy use so they wear evenly and maintain their shape longer. Rotate round table settings weekly to distribute sun exposure uniformly and prevent one side from fading faster than another. These small rotations cost nothing and extend furniture appearance significantly.
Spring prep and fall winterization checklist
Spring maintenance marks the transition from storage to active use and requires the most thorough attention of the entire year. Inspect every piece for winter damage including cracked wood, loose joints, chipped finish, and cushion fabric tears. Clean all furniture completely using the appropriate methods for each material.
Apply fresh coats of teak oil, metal sealant, or wood protectant as needed based on your inspection findings. Tighten all hardware and replace any fasteners showing corrosion. Reinstall or replace cushion covers washed in hot water with a gentle detergent and dried completely in sunlight.
Test stability by gently rocking each chair and table before hosting guests.
Fall winterization protects your investment during months of neglect. Deep clean all pieces before storage using the material-specific methods covered in previous sections. Allow everything to dry completely, which may take one to two full sunny days depending on humidity.
Remove all cushions and store them indoors in a cool dry place. Apply protective covers to frames if indoor storage isn't available. Choose breathable canvas covers rather than vinyl or plastic to prevent condensation buildup underneath.
If you live in an area with hard freezes, snow accumulation, or icy winds, moving furniture into a garage, shed, or covered porch provides substantially better protection than any cover alone.
FAQs
How often should I oil teak?
Apply teak oil every six to twelve months depending on your local climate. Hot sunny environments break down oil faster and require annual or biannual reapplication. Cooler shaded patios allow oil to last closer to twelve months.
The wood visually signals when it needs oil by appearing dry, pale, or lacking its rich golden saturation. A few drops of water beading on the surface indicates sufficient oil protection. Water absorbing quickly means it's time to reapply.
Can I use bleach on outdoor furniture?
Bleach removes persistent mold and mildew stains but damages most outdoor materials with repeated use. If you must use bleach for severe organic staining, dilute one part household bleach with three parts warm water and apply only to the affected area. Rinse thoroughly within ten minutes and neutralize any residue with a baking soda and water solution.
Never apply bleach to colored fabrics, sealed wood, or painted metal surfaces without testing a hidden spot first. Vinegar solutions work safely for most organic stains without risking material degradation.
What's the best way to store patio sets in winter?
Clean all pieces thoroughly and allow them to dry completely before storage. Remove cushions and store them indoors in a cool dry container with desiccant packs. Cover furniture frames with breathable canvas covers that block precipitation while allowing airflow.
Place covers over furniture secured with bungee cords rather than tying them tightly, which traps moisture underneath. Ideally move furniture into a garage, shed, or covered porch for maximum protection during extended cold weather periods.
How do I get hard water stains off a glass table?
Mix equal parts white distilled vinegar and warm water in a spray bottle. Apply the solution generously to the stained glass surface and let it sit for three to five minutes. The acetic acid breaks down calcium and mineral deposits without scratching.
Wipe clean with a fresh microfiber cloth and buff dry with a second clean cloth. Repeat on severe deposits. Never use abrasive scouring pads or razor blades on tempered glass.
They create permanent micro-scratches that scatter light and produce a permanently hazy appearance.

Sophia Martinez is a culinary lifestyle writer and product reviewer for DiningGadgets.com. Passionate about blending style with functionality, she explores the latest dining essentials, kitchen décor, and cleaning hacks that transform everyday cooking spaces. With a background in home organization and design, Sophia brings readers expert advice on creating beautiful, practical kitchens that truly feel like the heart of the home.