Camping Coffee Maker Problems & Easy Fixes
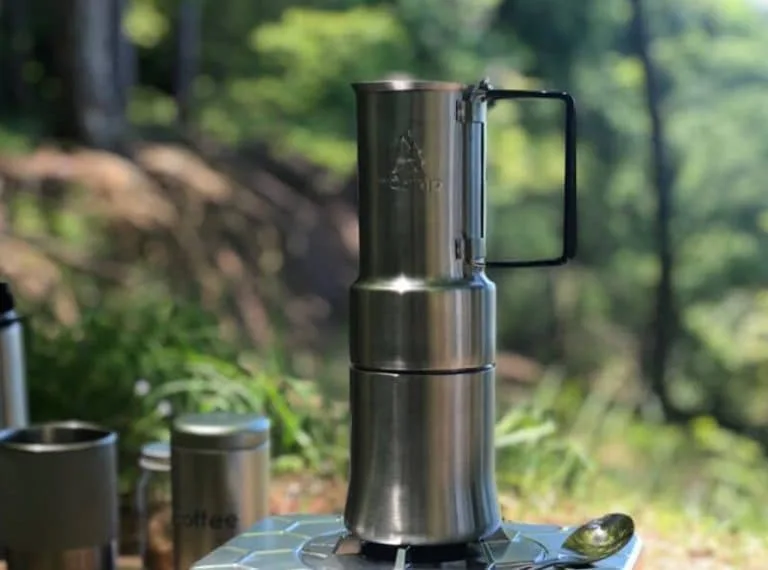
Image source: Bing (Web (fair-use with source credit))
Your camping coffee tastes bitter, watery, or muddy more often than it deserves to. Most of those failures come from four culprits: wrong water temperature, stale or improperly ground beans, incorrect brew time, and leftover oil buildup on filters. Fix those variables and your trail cup improves immediately.
Water temperature matters more than most campers realize. The Specialty Coffee Association recommends brewing between 195 and 205 °F for optimal extraction. Pour boiling water straight from a camp stove over grounds and you pull harsh, scorched compounds out of the bean.
The result tastes burnt even when your beans are fresh. Let the kettle sit for 30 to 60 seconds off heat before pouring.
Grind size controls how fast water moves through your coffee bed. Too fine in a French press and you get sludge in every sip. Too coarse in an AeroPress and your cup comes out thin and sour.
A medium-fine grind suits most camp brewers. Adjust up or down by one notch whenever taste runs extreme.
Old coffee turns rancid quickly once the roast breaks open. Oxygen hits exposed surface area within minutes and stales the remaining oils. Pre-ground bags sitting in your gear box for weeks guarantee flat morning coffee.
Grind fresh before brewing whenever possible and store whole beans in an airtight container away from heat and light.
Filter maintenance is the silent problem most people ignore until coffee tastes chalky or metallic. Permanent mesh screens trap coffee oils every cycle. Those oils polymerize into a waxy film that changes flavor and restricts flow.
A quick wash with hot water and a drop of dish soap after each trip keeps mesh screens working cleanly.
Quick Answer
Camping coffee maker problems and solutions come down to water temperature, grind size, brew time, and cleaning habits. Brew at 195 to 205 °F rather than rolling boil. Match grind coarseness to your device and watch steep time.
Clean mesh filters after every trip to remove bitter oils. Replace worn seals before they leak in your pack.
Diagnose By Symptom — Pick Your Branch
Most camping coffee complaints fall into three buckets. Taste issues include bitterness, sourness, and flat or dull flavor. Texture problems show up as sediment, grit, or an oily slick on top.
Equipment frustrations involve slow flow, boil-over, leaks, or a brewer that refuses to clean properly.
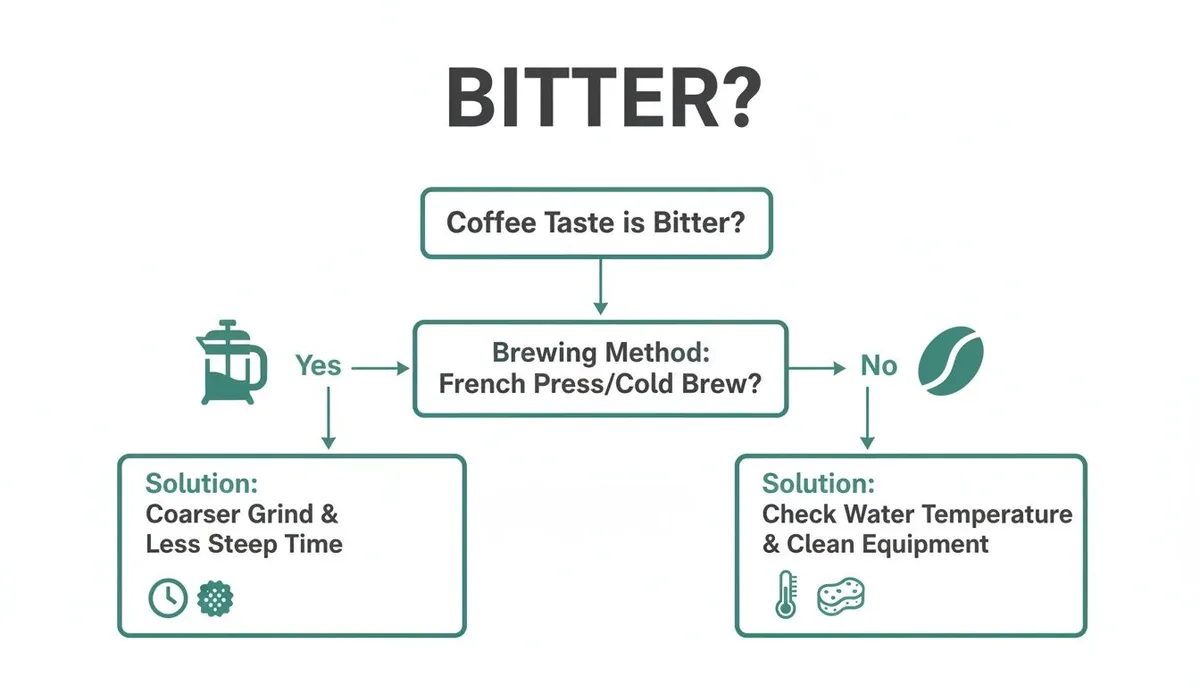
Bitterness usually means over-extraction. That happens when water stays in contact with grounds too long or runs too hot. Under-extraction tastes sour or weak because water passes through the coffee bed without pulling enough soluble material.
Burnt flavor points to direct flame contact or overheated grounds on the stovetop. Flat coffee often signals stale beans or water that never reached proper brewing temperature.
Sediment and grit come from damaged mesh screens or paper filters that split under pressure. An oil film on the surface typically means unmaintained permanent filters or reused grounds that have already surrendered their good flavors. Flow problems usually trace back to a clogged filter from fine grounds or mineral scale buildup inside the chamber.
Heat and fuel challenges create their own subset of issues. Wind blows heat away from small camp stoves and extends boil time. Cold ambient temperatures cool water faster during the bloom stage.
High altitude lowers the boiling point of water, which slows extraction unless you adjust grind or steep time. The Specialty Coffee Association offers altitude adjustment guidance worth consulting before your trip.
| Symptom | Likely Cause | Fast Fix |
|---|---|---|
| Bitter or harsh | Water too hot or steep too long | Let water cool 30 to 60 seconds off boil; shorten steep time |
| Sour or weak | Grind too coarse or contact too short | Finer grind; extend brew time one minute |
| Sediment in cup | Damaged mesh or split paper filter | Switch filters; inspect screen before each use |
| Burnt taste | Direct flame contact or overheated grounds | Remove from heat earlier; use a heat diffuser |
| Slow or stuck flow | Fine grounds or mineral scale | Coarsen grind; descale monthly in hard-water areas |
| Flat or dull flavor | Stale beans or low brew temperature | Grind fresh; verify water reaches 195 to 205 °F |
Step-by-Step Decision Tree For The Four Most Popular Camp Brewers
Each brewing method has its own sweet spot and its own failure mode. Knowing where yours trips up saves time in the dark at camp. Below is a practical diagnostic path for the four devices most campers carry.
French Press Path
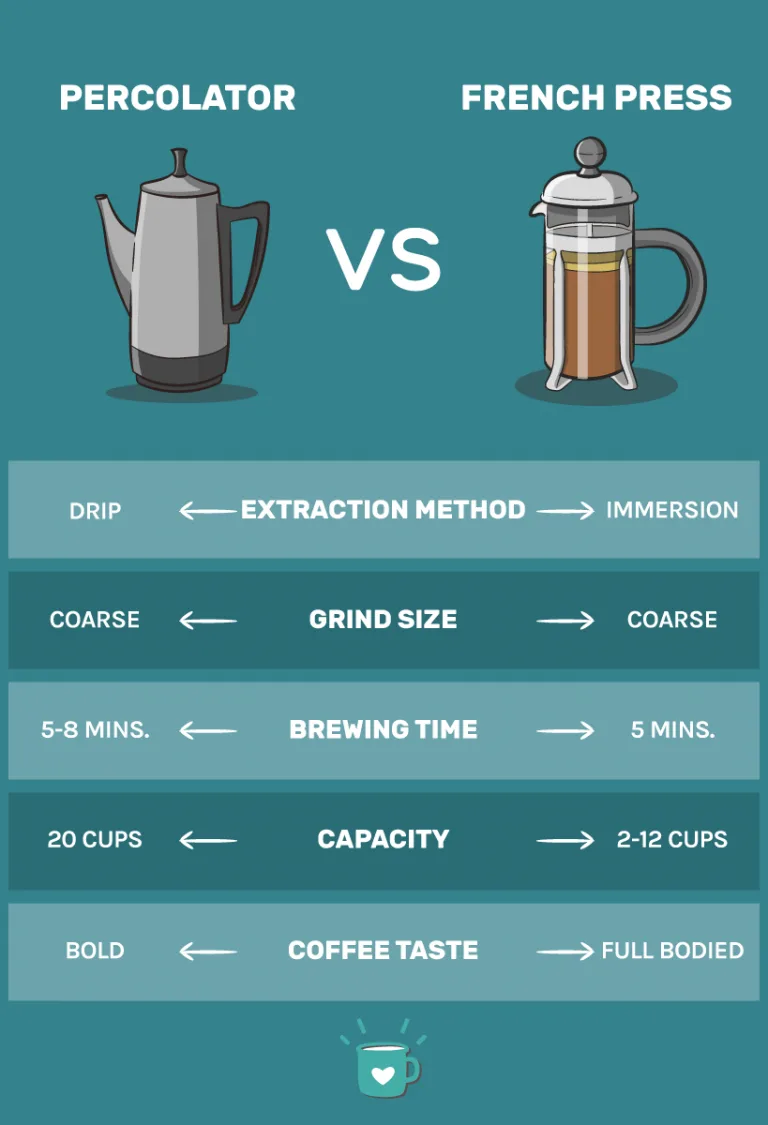
The French press thrives on immersion and a relatively coarse grind. Over-steeping past five minutes pulls bitter compounds from the grounds. A mesh plunger with a worn or misaligned screen lets sediment slip through into your cup.
Let coffee rest for four minutes, then plunge slowly and steadily. If your press delivers gritty coffee, inspect the O-ring and screen for gaps before your next trip.
AeroPress Path
The AeroPress is forgiving but demands attention to two variables: inversion method and filter type. Using paper filters eliminates nearly all sediment and produces a cleaner cup. Metal filters let more oils through and give a heavier body.
Inverted brewing prevents premature dripping but adds a cleanup step. Keep total brew time between one and two minutes and you will rarely go wrong.
Stovetop Percolator Path
Percolators cycle boiling water repeatedly through the coffee bed. That continuous recirculation easily overshoots into bitter territory if you leave it on heat too long. The fix is simple.
Bring the brew to a gentle cycle, then reduce heat to the lowest setting that maintains a soft percolation. Seven minutes max on low heat keeps flavor in check without scorching.
Pour-Over Cone Path
Pour-over relies on controlled flow and a proper bloom phase. Skipping the bloom traps CO2 under dry grounds and causes channeling. Channeling creates uneven extraction and muddy flavor.
Pour slowly in concentric circles and aim for a total contact time of three to four minutes. A dripper paired with a thermal carafe keeps your brew hot without further heating.
Maintenance, Cleaning, And Long-Term Fixes That Actually Stick
A dirty camping coffee maker ruins good beans faster than any equipment flaw ever could. Coffee oils oxidize and turn rancid on contact with air. That rancid film coats every surface inside your brewer and flavors every subsequent cup with stale bitterness.
A basic rinse after each use prevents most problems. A thorough cleaning between trips prevents everything else.
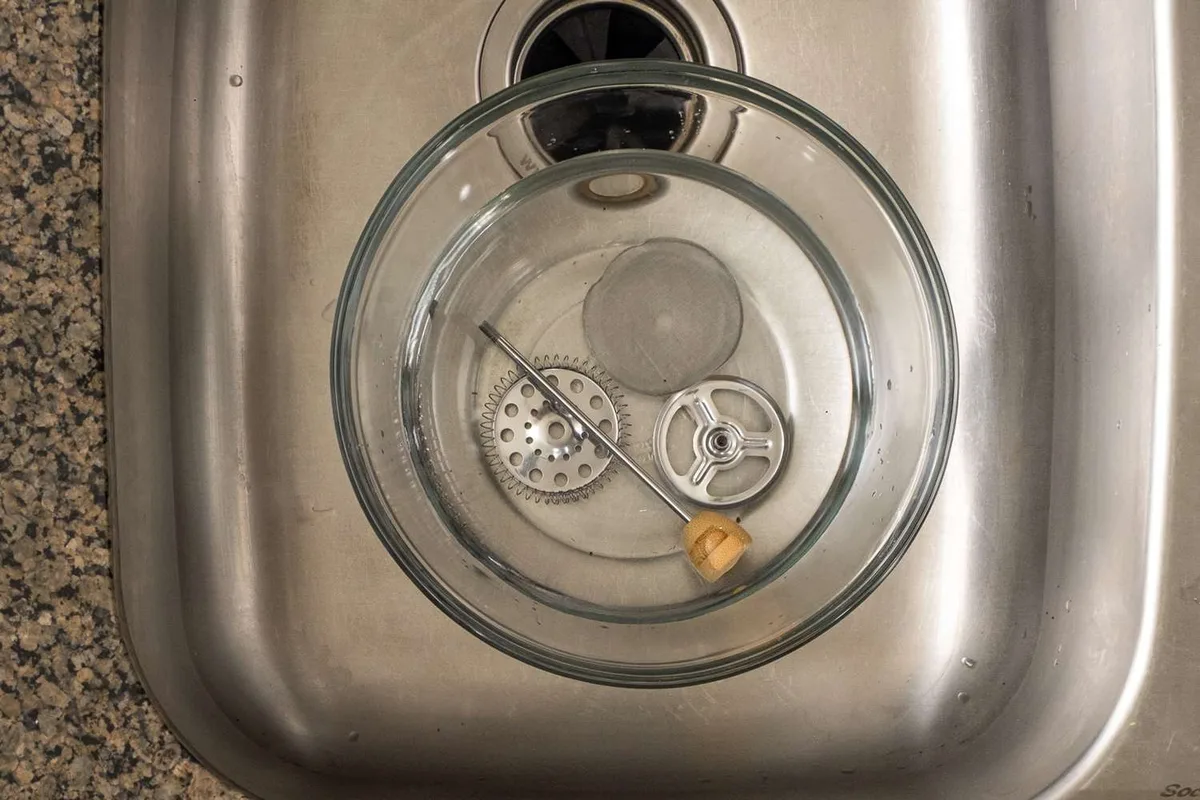
Trail rinsing takes two minutes. Dump spent grounds into a waste bag. Rinse the chamber with hot water.
Swirl a single drop of biodegradable soap through the mesh screen. Rinse until the water runs clear. Air dry completely before packing.
Never seal a damp brewer closed because trapped moisture invites mold and mildew.
Deep cleaning happens at home between trips and takes about ten minutes. Disassemble every removable part. Soak mesh screens and silicone seals in warm water mixed with a small amount of dish detergent.
Use a soft brush to work soap into the screen mesh and along seal grooves. Rinse thoroughly and let all parts air dry before reassembly. Replace any cracked or brittle seals before they leak mid-trip.
Hard water leaves calcium scale inside chambers and on screens. Scale insulates heating surfaces and slows flow through filter pores. Descale monthly during heavy use with a food-safe descaling solution or a diluted white vinegar soak.
Follow manufacturer instructions for dwell time, then rinse several times until no vinegar smell remains.
Paper filters need no cleaning but cost money and create waste. Metal mesh filters need regular maintenance but pay for themselves quickly. Permanent nylon filters sit somewhere in between.
Choose based on whether you value convenience or reduced trash output on longer trips.
Mistakes That Sabotage Your Camp Coffee Routine
Some errors repeat across every type of camping brewer. Recognizing them early prevents most bad cups in the field. The simplest fixes usually involve timing, temperature, or habit changes rather than new gear.
Boiling water straight from the stove is the most common mistake. Rolling boil water deposits over-extracted tannins into every cup. Let water rest off heat for at least 30 seconds before pouring.
A simple delay makes a noticeable difference in taste.
Grinding beans too fine for a French press or percolator guarantees sediment and bitter flavor. A burr grinder set to medium-coarse produces consistent results. Blade grinders chop unevenly and create both dust and boulders in the same batch.
Uneven particles extract at different rates and ruin balance.
Skipping the bloom stage wastes aroma and causes channeling in pour-over setups. Pour just enough hot water to saturate the grounds. Wait 30 seconds for gas to escape.
Then continue your pour as normal. That small pause unlocks better flavor without adding any time.
Leaving wet grounds sitting in the brewer overnight accelerates staling and oil buildup. Even a short overnight contact period dulls the next morning's taste. Empty and rinse your brewer before breaking camp whenever possible.
If you must store wet grounds, rinse and dry completely before packing.
Packing a glass French press without protection risks shattering in your pack. Wrap the press in a clothing layer or use a dedicated insulated sleeve. Silicone sleeves are widely available and absorb impact well.
Glass presses simply cannot survive a drop onto rock or packed gear.
Ignoring scaling until flow slows or taste turns chalky forces a rushed deep clean mid-trip. Build monthly descaling into your pre-trip routine instead. Five minutes at home prevents an hour of troubleshooting in the field.
Pro Tips For Consistent, Cafe-Quality Camp Coffee
Small adjustments compound into big improvements over multiple trips. These techniques come from tested brewing standards and widespread user feedback across backcountry communities. None of them require expensive gear.
Altitude changes water behavior noticeably above 5,000 feet. Boiling point drops roughly one degree Fahrenheit for every 500-foot gain. That lower temperature slows extraction unless you compensate with finer grind or longer steep time.
Adjust one variable at a time and note what works at your elevation.
Pre-measured coffee packs save decision fatigue at dawn. Portion beans into small airtight sachets equaling one serving each. Label them with grind size and target brewer.
Grab one packet and go without measuring spoons or a scale. That habit alone eliminates ratio mistakes.
Carrying a cheap instant-read thermometer removes guesswork from water temperature. Most camping thermometers cost under fifteen dollars and survive years of trail use. Knowing your water hits 200 °F instead of guessing builds consistency trip after trip.
A lightweight travel grinder transforms stale pre-ground coffee into something worth drinking. Burr grinders designed for camping weigh under six ounces and fit in a jacket pocket. Fresh ground beans taste dramatically better than anything pre-ground sitting in a jar.
Keep a small scrub brush and a single drop soap sheet in your gear kit. Those two items handle most cleaning situations without adding bulk. Biodegradable soap sheets dissolve instantly in warm water and leave no residue behind.
Use a thermal carafe or insulated mug to hold brewed coffee away from the heat source. Reheating over a stove scorches the remaining liquid and destroys any balance you achieved during brewing. Brew what you will drink within fifteen minutes and top off with fresh batches afterward.
Frequently Asked Questions
How do I stop my French press from tasting bitter while camping?
Bitter French press coffee usually results from over-extraction. Keep water below 205 °F and limit steep time to four minutes. Use a coarse grind and press slowly after brewing.
If bitterness persists, your mesh screen may be trapping fine particles that continue extracting after you pour.
Is an AeroPress worth the hassle on backcountry trips?
Yes for solo or duo camping. The AeroPress weighs under eight ounces, brews in under two minutes, and uses paper filters that eliminate nearly all sediment. It survives drops better than glass presses and cleans with a single push of the plunger.
The only downside is carrying spare filters on longer trips.
Can I use paper filters with a percolator to reduce sediment?
You can improvise a paper filter cone and rest it inside the percolator basket. This traps most grounds but slows flow and requires careful monitoring to avoid overflow. A dedicated drip-style camp brewer achieves the same result more reliably without risking boil-over on the stove.
What's the fastest way to clean a camp coffee maker with no sink?
Rinse with hot water immediately after pouring your cup. Use a small brush to scrub the mesh screen. A single drop of biodegradable soap works if you rinse thoroughly afterward.
Pack used grounds in a sealed bag rather than scattering them at the site.
Does hard water really ruin camping coffee, and how do I fix it?
Hard water deposits calcium and magnesium minerals that insulate heat and slow extraction. Scale buildup also changes flavor toward a chalky taste. Pre-boil water to precipitate some minerals, or carry a portable water filter.
Descale your brewer monthly with food-safe citric acid or diluted white vinegar.
Which brewer is least likely to break in a backpack?
AeroPress and stainless steel percolators survive rough packing best. Avoid glass French presses unless you wrap them in insulated sleeves. Silicone-cased brewers add impact protection at the cost of slightly more weight.
Check seals and lids before every trip to catch wear early.

Sophia Martinez is a culinary lifestyle writer and product reviewer for DiningGadgets.com. Passionate about blending style with functionality, she explores the latest dining essentials, kitchen décor, and cleaning hacks that transform everyday cooking spaces. With a background in home organization and design, Sophia brings readers expert advice on creating beautiful, practical kitchens that truly feel like the heart of the home.