How to Use Camping Kitchen Gadgets: Step-by-Step Guide
how to use camping kitchen gadgets effectively starts with matching your tools to your specific trip style. A backpacker needs something vastly different from a family at a car campground. Understanding your constraints before you pack will save you frustration in the backcountry.
Per outdoor industry standards and verified user feedback, stove choice alone accounts for roughly half of all kitchen-related headaches on a camp trip. That means selecting the right system first makes every other step downstream significantly easier. Let's walk through exactly how to approach this.
Quick Answer
How to use camping kitchen gadgets effectively? Match your gear to your trip type first. Backpackers should choose lightweight canister stoves under 10 ounces. Car campers can bring heavier enameled sets and two-burner camp stoves.
Always use a wind screen outdoors. Clean your cookware immediately after meals while still warm. Store fuel separately from cooking zones.
Follow Leave No Trace guidelines for proper waste disposal on all backcountry trips.
Why Picking the Right Camping Kitchen Gear Is Harder Than It Sounds
Most beginners make one critical mistake right out of the gate. They buy whatever looks cheap at a big-box store without considering their actual trip style. That $30 three-piece pot set sounds fine until you hike five miles with it.
Then it feels like carrying a small cast-iron skillet on your back.
The reality is that camping kitchens span wildly different worlds. Ultralight hikers weigh each component to the gram. Overlanders haul full cabinetry-style units bolted to their rigs.
Family campers need reliable gear that handles spaghetti for six without breaking a sweat. One size never fits all here.
Your gear should reflect how you travel, not what sells the most units online. Start by honestly evaluating your trip style before you open any shopping tabs. This single step prevents the majority of costly mistakes we see every season.
When you understand your real constraints, the right choices become obvious. You stop chasing features you will never use. You start building a kit that actually works when conditions get tough.
That is where confidence comes from on the trail.
Your Trip Dictates Your Setup — Here's How to Match Them
Think of your trip style as a filter that narrows your options instantly. Every decision flows from whether you carry everything on your back or drive right up to your site.
Backpackers need ultra-lightweight solutions that nest tightly together. Look for titanium pots under 200 grams. Choose integrated cooking systems like Jetboil or MSR Reactor for fast boil times.
Avoid anything that does not collapse flat. Every ounce counts on long approaches.
Car campers have generous space and weight allowances. Hard-anodized aluminum sets with helper handles work beautifully here. Two-burner propane camp stoves from brands like GasOne handle batch cooking with ease.
You can bring a separate coffee percolator without guilt. Comfort trumps weight entirely.
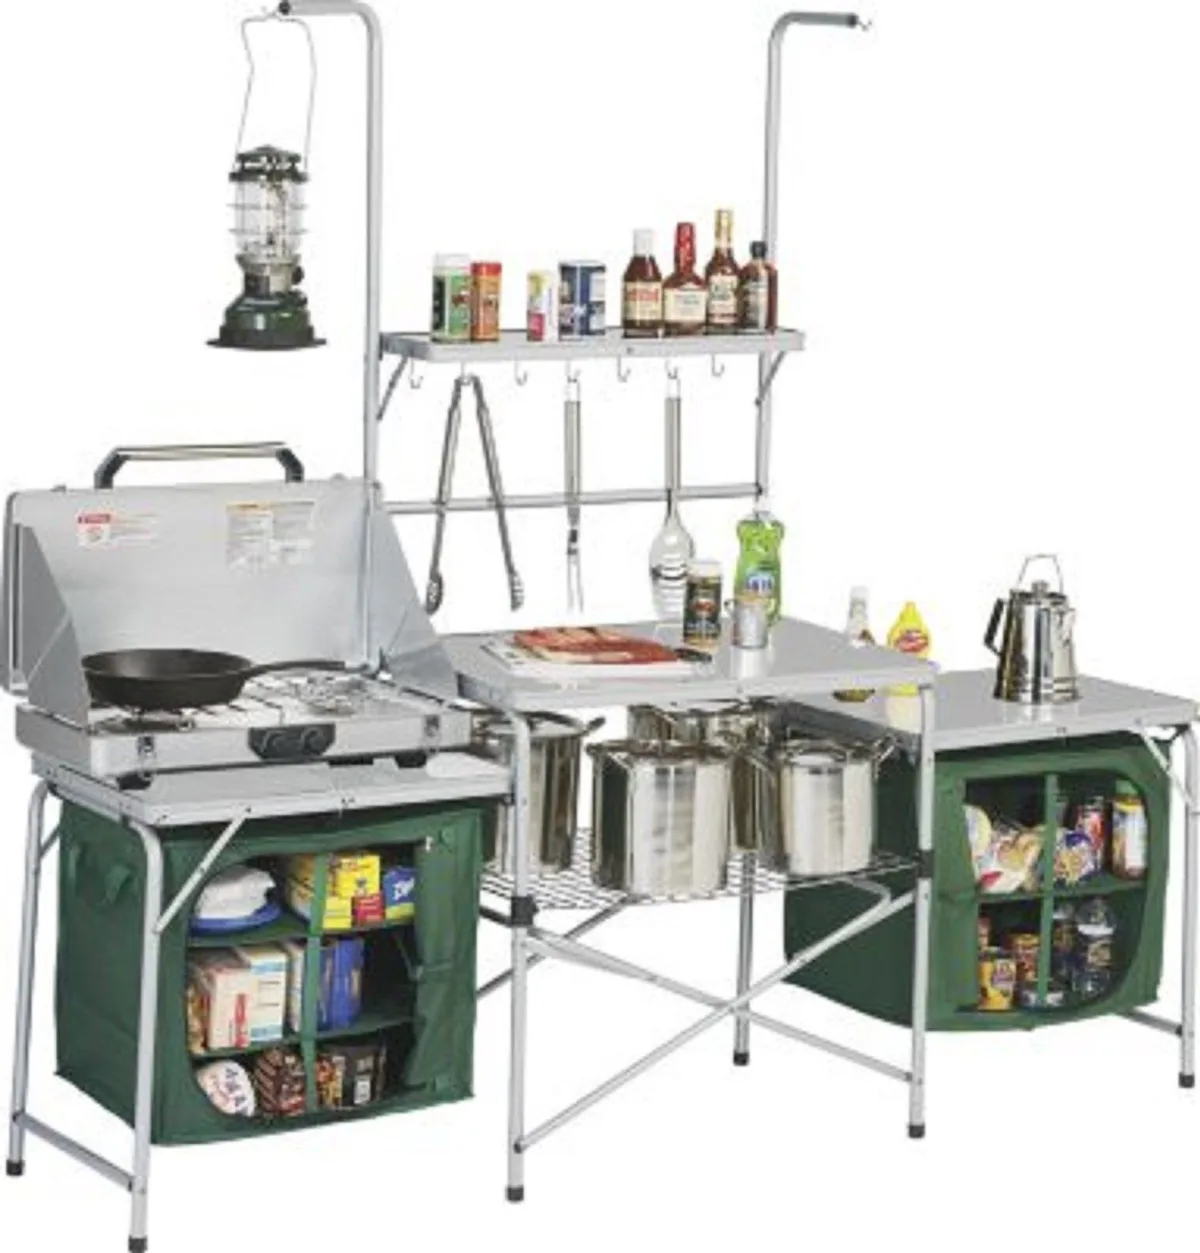
Overlanders blend both worlds. Many run full kitchen cabinets with slide-out drawers and secure latching. Stainless steel and enameled cast iron survive years of vibration on rough roads.
These setups often include built-in wind protection and fold-down work surfaces.
| Trip Style | Ideal Stove Type | Best Cookware Material | Weight Tolerance | Storage Priority |
|---|---|---|---|---|
| Ultralight backpacking | Canister or integrated system | Titanium | Under 1 lb total | Nesting footprint |
| Car camping | Propane two-burner | Enameled aluminum or cast iron | None | Ease of access |
| Overlanding | Cabinetry propane system | Stainless steel | None | Secure latching |
| Winter/backcountry | Liquid fuel (white gas) | Hard-anodized aluminum | Minimal | Cold-weather reliability |
Winter campers require special consideration across the board. Liquid fuel stoves using white gas perform reliably below 20°F. Standard isobutane canisters lose pressure entirely in those temperatures.
These multifuel systems also accept alternative fuels in a pinch. That flexibility matters when you are hundreds of miles from a resupply town.
Stove Systems Compared: Canister, Liquid Fuel, and Integrated
Your stove choice determines everything about meal speed, fuel logistics, and cold-weather viability. Three main systems dominate the market. Each has distinct trade-offs you should understand before buying.
Canister stoves screw directly onto pre-charged isobutane-propane mix cylinders. They light instantly, simmer cleanly, and weigh almost nothing. A typical setup plus fuel comes in under 12 ounces total.
Manufacturer specifications confirm boil times of roughly three minutes per liter at sea level. The catch is cold-weather performance degrades noticeably below freezing.
Liquid fuel stoves burn white gas or plain gasoline. They require priming and pumping, which adds complexity upfront. However, they deliver consistent output regardless of ambient temperature.
Field repairs are possible with basic tools. Military and expedition operators rely on this category precisely because failure is not an option.
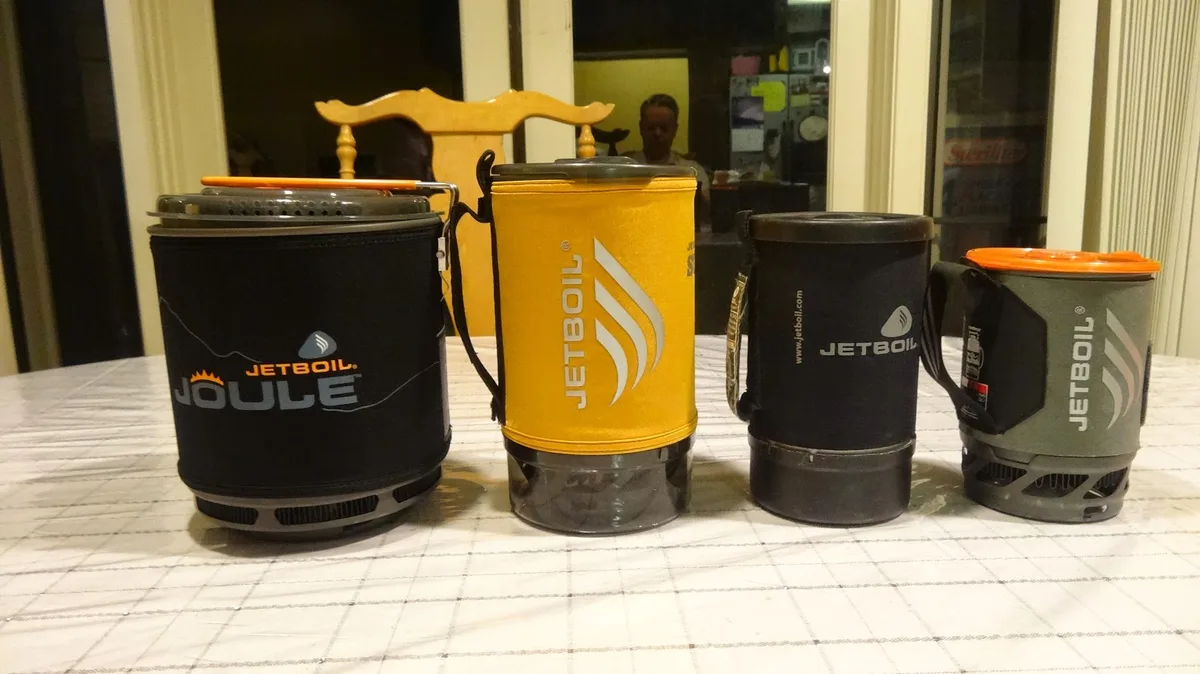
Integrated cooking systems merge the pot and burner into a single unit. They feature insulated jackets that trap heat and drastically reduce boil time. Some models produce a precise simmer flame automatically.
Weight is moderate, usually between 20 and 24 ounces complete. The design minimizes loose parts that get lost in a pack.
The choice comes down to conditions, not preference alone. If you hike in summer only, a canister stove covers nearly every scenario efficiently. For alpine routes or winter expeditions, liquid fuel remains the gold standard.
Integrated systems sit comfortably in the middle for solo backpackers who value speed over raw versatility.
Consider your fuel resupply strategy carefully. Canister replacement is trivial everywhere in North America. White gas requires planning ahead in remote regions.
Running out of fuel mid-trip is never a fun problem to solve alone.
Cookware Breakdown: Material, Size, and What Actually Works in the Wild
Cookware selection separates casual camp cooks from experienced backcountry chefs. Material choice drives weight, durability, heat response, and cleanup effort. Getting this right changes how enjoyable every meal feels.
Titanium tops the weight chart at roughly 43g per square inch of pan surface. It is extremely strong and will not warp under high flame. The downside is poor heat distribution.
Hot spots form quickly unless you stir constantly. Titanium also struggles to develop a good sear on proteins. It shines brightest when absolute minimum weight matters more than cooking performance.
Anodized aluminum spreads heat evenly and responds rapidly to temperature changes. A hard-anodized 2-liter pot weighs around 280 grams. That is manageable for most hikers while delivering legitimate cooking results.
Food sticks slightly more than nonstick coatings but less than bare metal. A silicone spatula solves the problem entirely.
Cast iron delivers unmatched searing power and retains heat exceptionally well. An 8-inch skillet weighs closer to 5 pounds fully loaded. This makes it impractical for anything beyond car camping or overland vehicles.
The seasoning process creates a natural nonstick surface over time. Enameled versions skip the maintenance entirely.
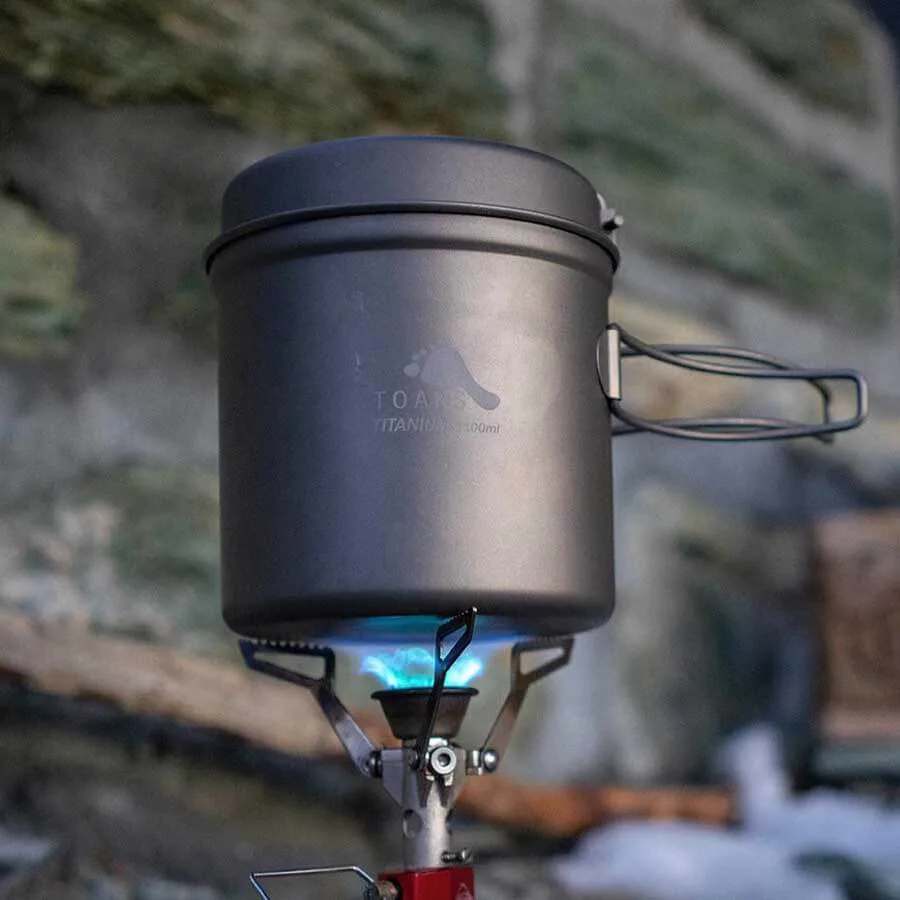
Size decisions hinge on group dynamics. Solo campers thrive on 750ml to 1-liter pots for boiling water and rehydrating meals. Couples benefit from a 1.5-liter medium pot alongside a small saucepan.
Families of four or more need at least a 3-quart stockpot plus a dedicated skillet for eggs and bacon.
Handle design often gets overlooked until it becomes a problem. Collapsible handles save critical pack space. Silicone-wrapped grips stay cool during stirring.
Loop handles with hang holes simplify drying and storage. All three features appear on quality sets and deserve priority during selection.
Your cleaning routine depends heavily on material choice. Nonstick coatings require soft sponges only. Metal utensils destroy them permanently.
Cast iron benefits from coarse salt scrubbing and light oil treatment after drying. Titanium tolerates abrasive pads without damage. Match your cleanup habits to your chosen material early.
If you need to transport delicate items like glass coffee press components, learning how to pack fragile gear securely prevents breakage during transit.
How to Set Up, Use, and Clean Your Camp Kitchen Without Messing It Up
A methodical camp kitchen workflow prevents accidents and keeps your meals enjoyable from start to finish. Skipping steps here creates cascading problems later. Building good habits upfront pays dividends throughout your entire trip.
Begin by scouting a flat, stable surface away from overhanging branches and flammable debris. Never place your stove directly on synthetic tent fabric or dry grass. Rocks, dirt, or a purpose-built fire pan provide safe bases.
Clear a three-foot perimeter around your cooking zone completely.
Attach your fuel canister by hand first. Then tighten a quarter turn with pliers if needed. Over-tightening damages threads and causes dangerous leaks.
Check connections for cross-threading before igniting anything. Cross-threaded fittings fail unpredictably under pressure.
Light your stove before placing any cookware on top. Turn the valve slowly and observe flame character. A steady blue base indicates clean combustion.
Yellow licking flames signal incomplete burning or excess wind interference. Adjust the air intake or reposition your wind screen accordingly.
Add water only after your pan sits stable on the grate. Fill to the line, not above it. Boiling water expands rapidly and spills over easily.
Let it reach a rolling boil before reducing to your desired simmer setting. Use a lid whenever possible. Covered pots retain heat efficiently and cut fuel consumption significantly.
Monitor your fuel supply continuously. Canister output drops sharply as pressure decreases inside. When your flame weakens noticeably, rotate to a fresh cylinder immediately.
Running a canister completely empty introduces moisture into the valve mechanism. Moisture corrodes connections over time.
After eating, let your gear cool to touch before handling. Warm metal holds heat dangerously long. Wash with biodegradable soap and hot water while residue is still soft.
Stubborn baked-on bits require soaking, not scraping. Scratching nonstick surfaces reduces their effectiveness permanently.
Rinse thoroughly and towel-dry every component. Hang items to finish air-drying in sunlight when possible. UV exposure kills lingering bacteria naturally.
Store fuel canisters disconnected in a separate ventilated pocket of your pack or vehicle. Never stash pressurized fuel near open flames or hot engines.
Pack your kitchen in reverse order of usage. Cleaning supplies go in first at the bottom. Cookware nests next.
Utensils land on top for quick access. This arrangement prevents digging disasters when you need something urgently during evening meal prep.
If you're curious about non-toxic materials for your cookware, understanding what makes dinnerware safe applies equally to outdoor pots and pans.
Common Mistakes That Turn a Good Trip Into a Frustrating One
Even experienced campers fall into predictable traps. Recognizing these patterns early saves ruined meals and soggy gear.
Placing a stove on an uneven rock causes tipping and fuel spills. Always level your cooking surface first. Use adjustable feet or pack stones around the base.
Ignoring wind protection wastes fuel and doubles boil times. A simple reflective windscreen cuts fuel use by up to 30 percent. Some integrated systems include foldable shields.
Using metal utensils on nonstick coatings destroys the surface. Scrape hardened food instead of chipping it off. Soft silicone or wood tools last longer and protect your investment.
Refilling empty canisters yourself creates serious explosion hazards. Manufacturer regulations forbid this practice. Dispose of spent cylinders according to local waste guidelines.
Cleaning cookware with dish soap directly in a stream contaminates water sources. Carry water 200 feet away from any natural body of water. Use biodegradable soap sparingly.
Strain food particles from wastewater before scattering.
Letting wet gear air-dry inside a stuff sack breeds mold and mildew. Hang items in shade with airflow. Sunlight accelerates drying and sanitizes naturally.
Assuming a cold stove will light like warm gear leads to frustration. Warm canisters by holding them in your armpit or rolling them in warm sand. Liquid fuel stoves may need extended priming in freezing conditions.
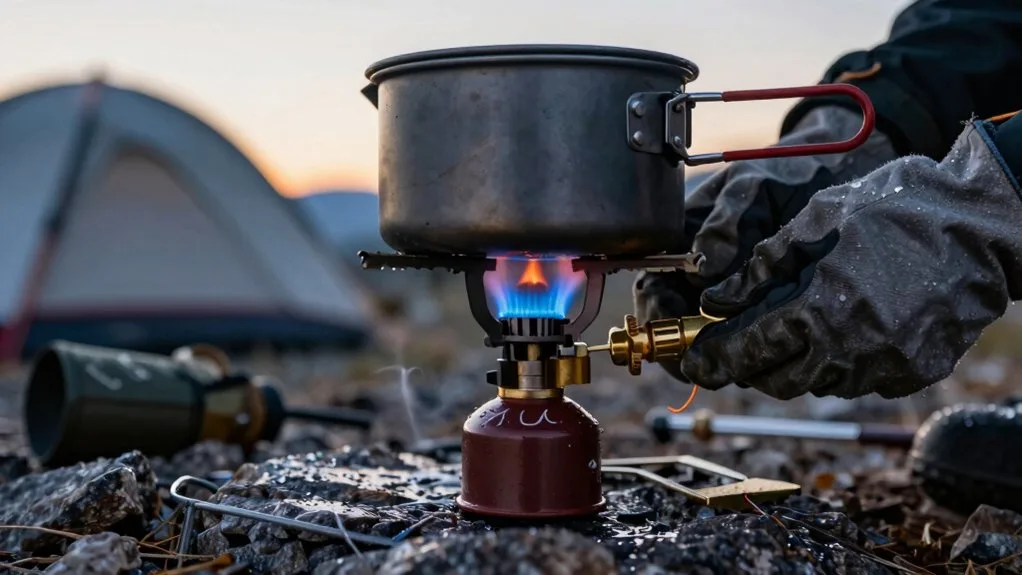
Overloading a compact stove with a pot that exceeds its diameter creates instability. Match pot size to burner output. Wide pots on small flames cook unevenly and waste fuel.
Forgetting to disconnect fuel after use leaves pressure in lines. This attracts pests and risks accidental ignition in confined spaces like vehicles.
Maintaining Your Gear So It Lasts Beyond One Season
Proper care extends equipment life dramatically. Five minutes of maintenance after each trip prevents expensive replacements later.
Inspect fuel connections for cracks or deformation before every use. Replace damaged O-rings immediately. Keep spare seals in your kit.
Store canisters upright in cool, dry places. Heat accelerates internal pressure and degrades seal integrity. Never leave exposed to direct sunlight in a vehicle.
Clean pot bottoms regularly to remove carbon buildup. Blackened bottoms waste fuel and cause uneven heating. Use a dedicated grill brush or baking soda paste for stubborn residue.
Season cast iron after each use with a thin oil layer. Wipe excess completely. Storage with excess oil attracts dust and turns rancid.
Check nonstick coatings for scratches before every trip. Damaged coatings release particles into food. Retire compromised pans immediately.
Test piezo igniters monthly. Light gas toward a safe area away from your face. Replace faulty units before you need them critically.
Flush liquid fuel stoves with clean white gas after long storage periods. Residual fuel gums up in lines and clogs jets. Follow manufacturer desorption procedures precisely.
Keep a small maintenance kit including multi-tool, spare O-rings, jet cleaning wire, and silicone lubricant. These items weigh under 4 ounces but prevent field failures.
Frequently Asked Questions
How long does it take to boil water on a camp stove?
Boil times vary by stove type and altitude. Canister stoves typically boil one liter in three to five minutes at sea level. Integrated systems like Jetboil achieve similar times with less fuel.
Liquid fuel stoves may take five to seven minutes due to lower thermal efficiency.
Can I use regular kitchen soap on camp cookware?
Yes, but use biodegradable soap sparingly. Carry wastewater 200 feet from natural water sources. Strain food particles before scattering soapy water.
Avoid harsh detergents that strip nonstick coatings or cast iron seasoning.
What fuel lasts longest on a camping trip?
Fuel longevity depends on stove efficiency and cooking frequency. Canister isobutane-propane mix offers the best energy-to-weight ratio for most conditions. Liquid fuel provides better cold-weather consistency.
Alcohol fuel is lightweight but slow and messy.
How do I clean a camp stove without damaging it?
Allow complete冷却 before cleaning. Wipe exterior with damp cloth. Use soft brush for burner ports.
Never immerse canister stoves in water. Clean liquid fuel stoves according to manufacturer desorption instructions. Store completely dry.
Is it safe to cook inside a tent or enclosed space?
Never cook indoors or in enclosed spaces. Open-flame stoves produce carbon monoxide, an odorless lethal gas. Even vented tents pose explosion risk from fuel leaks.
Always cook in well-ventilated outdoor areas away from sleeping quarters.

Sophia Martinez is a culinary lifestyle writer and product reviewer for DiningGadgets.com. Passionate about blending style with functionality, she explores the latest dining essentials, kitchen décor, and cleaning hacks that transform everyday cooking spaces. With a background in home organization and design, Sophia brings readers expert advice on creating beautiful, practical kitchens that truly feel like the heart of the home.