How to Install Kitchen Cabinets on a Brick Wall: Easy Step-by-Step Guide
Installing kitchen cabinets on a brick wall can feel intimidating at first: the dense, unforgiving surface seems like it would crack under drilling, and misaligned cabinets can throw off the entire look of your kitchen. But with the right preparation, tools, and techniques, this is a fully manageable DIY project that will save you thousands of dollars in professional installation costs, while giving you complete control over your kitchen’s layout and finish. This guide walks you through every step of the process, from pre-install planning and safety preparation to hanging cabinets and finishing touches, with actionable tips to avoid common mistakes like cracked brick, misaligned doors, and loose anchors that plague first-time installers. Whether you’re renovating a rustic loft kitchen or updating a traditional home, you’ll have a secure, professional-looking cabinet installation by the end of the weekend.
Why Brick Walls Require Special Cabinet Installation
Brick is far denser and more brittle than drywall or plaster, so standard cabinet mounting methods like drywall anchors or screws driven directly into the wall will not hold the weight of loaded cabinets. Brick also has an uneven surface, so extra steps are needed to ensure cabinets are level and aligned correctly. Unlike drywall, you cannot easily fill drill holes if you make a mistake, so careful planning and the right tools are critical to a successful install. For more on this, see our guide on how to install kitchen cabinets on brick wall.
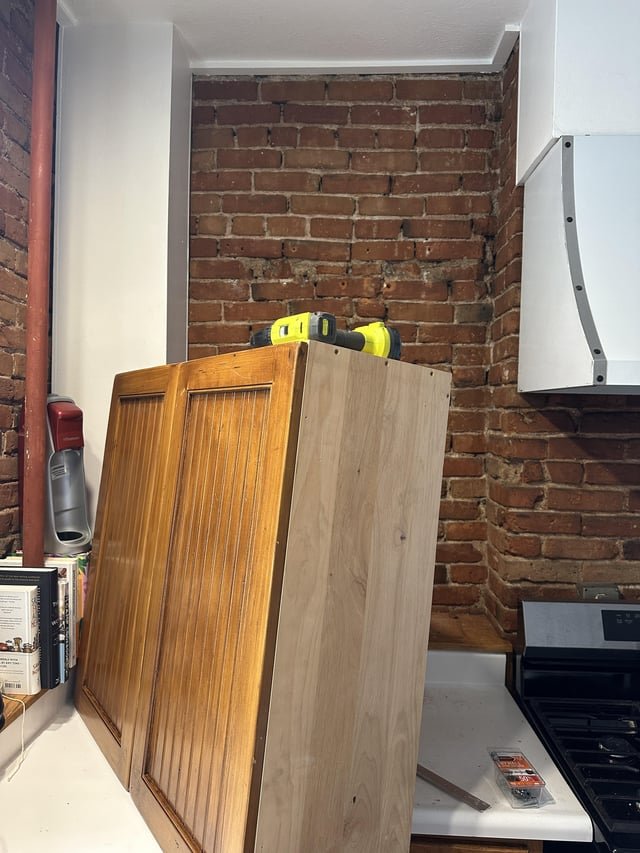
 Exposed brick walls add rustic charm to kitchen renovations, but require specialized mounting techniques for secure cabinetry.
Credit: www.reddit.com
Exposed brick walls add rustic charm to kitchen renovations, but require specialized mounting techniques for secure cabinetry.
Credit: www.reddit.com
Pre-Install Planning: Avoid Costly Mistakes Before You Drill
Skipping pre-install checks is the most common cause of failed brick cabinet installations, and can lead to cracked walls, wobbly cabinets, or costly repairs down the line. Spend 30 minutes on these checks before you buy any tools or materials:
- Assess wall condition: Inspect the brick for loose or cracked bricks, crumbling mortar, or water damage. If more than 10% of the bricks in your installation area are cracked, consult a mason first, as compromised brick will not hold anchors securely. If the brick is painted, confirm the paint is not peeling, as loose paint can cause anchors to slip.
- Verify cabinet weight: Check your cabinet manufacturer’s specs for load capacity; fully loaded upper cabinets can weigh 50–150 lbs per linear foot, so choose anchors rated for at least 1.5x that weight for a safety margin.
- Plan your layout: Use a cardboard template of your cabinet layout to mark positions on the wall, and confirm there are no conflicts with electrical outlets, light switches, or plumbing lines running through the brick. Use a masonry-compatible stud finder to detect hidden wires and pipes before drilling to avoid costly or dangerous accidents.
Essential Safety Precautions for Masonry Work
Drilling into brick creates sharp flying debris and respirable crystalline silica dust, which can cause long-term lung damage with repeated exposure. Follow these safety rules to protect yourself on the job:
- Wear safety glasses with side shields to protect your eyes from flying brick chips, an N95-rated dust mask to avoid inhaling silica, and thick work gloves to protect your hands from sharp brick edges.
- Never force a drill bit; if you hit a particularly hard spot, back the bit out periodically to clear dust and prevent overheating, which can dull the carbide tip and cause the bit to break.
- Upper cabinets weigh 30+ lbs even when empty, so always use a two-person lift and cabinet lifting straps to avoid strain or injury. Never try to hold a cabinet overhead with one hand while driving screws with the other.
- Turn off power to all outlets and switches in the work area before drilling to avoid accidental electrical shock. For full, official safety guidance for masonry work, refer to OSHA's construction safety standards for masonry.
Tools and Materials You’ll Need
Having all tools and materials on hand before you start will save you time and reduce frustration mid-project. We’ve listed the specific specs to look for to ensure your installation is secure:
Essential Tools
- Corded hammer drill: A corded model is preferable to battery-powered for dense brick, as it maintains consistent torque without stalling. Look for a model with at least 6.5 amps of power to drive ¼-inch masonry bits through standard brick.
- Masonry drill bits: Carbide-tipped bits designed for brick and concrete will stay sharp far longer than standard bits. You will need 3/16-inch and 5/16-inch bits for standard ¼-inch and 3/8-inch anchors, respectively.
- Long spirit level (24-inch minimum): A longer level is more accurate for checking horizontal alignment across long cabinet runs. A torpedo level is useful for checking individual cabinet alignment.
- Deep-scan stud finder: This will detect wood or metal furring strips behind brick, as well as hidden wires and pipes.
- Impact driver or cordless drill: For driving screws quickly and consistently without stripping screw heads.
- Caulk smoothing tool: For a clean, professional finish when sealing gaps between cabinets and brick.
Recommended Materials
- Masonry anchors: For standard 24-inch deep upper cabinets, use ¼-inch diameter sleeve anchors rated for at least 75 lbs each; you will need 2–3 anchors per cabinet, spaced 12–16 inches apart. For heavy lower cabinets or pantry units, opt for 3/8-inch wedge anchors rated for 150+ lbs each.
- Hot-dipped galvanized mounting rails: Steel rails resist rust from kitchen humidity and distribute cabinet weight evenly across the wall. Choose rails sized to match your cabinet depth (usually 12, 15, or 24 inches).
- Wooden or plastic shims: For leveling rails and cabinets on uneven brick surfaces.
- 2-inch galvanized wood screws: For fastening cabinets to mounting rails; use 3-inch screws when anchoring directly to brick for lower cabinets.
- Color-matched silicone caulk: Flexible silicone resists cracking from temperature and humidity changes, unlike painter's caulk. For official guidance on cabinet load limits and installation best practices, consult the National Kitchen and Bath Association's installation guidelines. For more on this, see our guide on how to install ikea kitchen cabinets on wall.
Preparing the Brick Wall for Installation
A clean, properly marked wall is the foundation of a secure, level cabinet installation. Skip this step, and you risk loose anchors, cracked brick, or cabinets that hang crooked.
Clean the Wall Surface
Start by removing all dust, dirt, loose mortar, and peeling paint from the brick surface using a stiff wire brush and a vacuum with a brush attachment. If the wall has grease or oil stains, wipe it down with a solution of warm water and trisodium phosphate (TSP), then let it dry completely for at least 2 hours. Any residue left on the wall will weaken anchor grip, so pay special attention to the areas where you will be drilling.
Mark Cabinet Positions Accurately
Snap a straight chalk line across the entire installation area at the height you want the top of your upper cabinets to sit — this is your primary reference line for the entire project. Use a tape measure and level to mark the bottom edge of each cabinet, as well as the positions of each mounting anchor, spacing them 12–16 inches apart along the rail. Double-check all measurements before drilling: it is far easier to adjust a pencil mark than to fill and re-drill a misplaced hole in brick.
Locate Studs and Choose the Right Anchors
While solid brick walls do not have traditional wooden studs, many interior brick walls have a 1×3 or 1×4 wood furring strip mounted to the masonry with concrete nails, used to create a flat surface for drywall or paneling. These strips offer much stronger holding power than masonry anchors alone, so detecting them is a top priority.
Detect Hidden Framing in Brick Walls
Run a deep-scan stud finder across the wall to locate furring strips, which will show up as consistent 1.5-inch wide signals. You can also tap the wall gently and listen for a solid, high-pitched sound (indicating a strip behind the brick) versus a hollow sound (indicating empty space). Mark the center of each furring strip with a pencil; these are ideal anchor points for your mounting rails. If no furring strips are present, you will anchor directly into the brick or mortar joints. Mortar is often stronger than brittle older brick, so don’t worry if your anchor hole lands in a mortar joint — just use a longer anchor to ensure it penetrates at least 1.5 inches into the joint for a secure hold.
Select Anchors for Your Cabinet Weight
In practice, many DIYers make the mistake of using plastic drywall anchors for brick, which will shear under the weight of loaded cabinets within months. Stick to metal masonry anchors for all cabinet installations:
- Sleeve anchors: The best all-around choice for most DIYers, they expand inside the drilled hole for a tight grip in both brick and mortar, and are easy to install with a drill or wrench.
- Wedge anchors: Offer 20–30% higher pull-out strength than sleeve anchors, making them ideal for heavy lower cabinets or pantry units mounted to solid, uncracked brick.
- Never use plastic anchors for cabinet installation, as they are only rated for 10–15 lbs in masonry, far below the weight of even an empty upper cabinet.
Drill Into Brick Safely and Accurately
Drilling into brick is far easier than it seems if you use the right technique and tools. The key is to avoid applying too much pressure, which can crack the brick or break the drill bit.
Choose the Correct Masonry Drill Bit
Carbide-tipped masonry bits are designed specifically for hard surfaces like brick and concrete, and will stay sharp through dozens of holes. For standard ¼-inch sleeve anchors, use a 3/16-inch drill bit; for 3/8-inch wedge anchors, use a 5/16-inch bit. Drilling a slightly smaller hole than the anchor diameter ensures the anchor expands tightly against the brick for maximum grip.
Drilling Technique to Avoid Cracking Brick
Start drilling at a low speed to create a small guide hole, then increase to medium speed while applying firm, steady pressure. Avoid forcing the drill, as this is the most common cause of cracked brick. If you hit a particularly hard spot, back the bit out every few seconds to clear dust and prevent overheating. Use a piece of tape wrapped around the drill bit to mark your drilling depth (usually 1–2 inches deeper than the anchor length) to avoid drilling too far into the wall. Clear dust from the hole with a compressed air can or small brush before inserting the anchor, as dust can prevent the anchor from expanding fully.
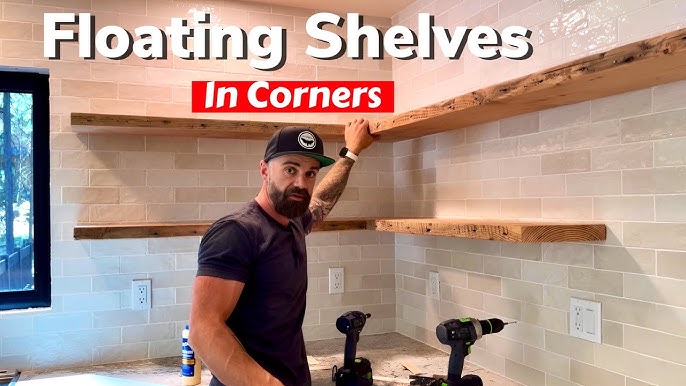 Video guides can help visualize drilling and alignment steps for first-time DIYers.
Credit: m.youtube.com
Video guides can help visualize drilling and alignment steps for first-time DIYers.
Credit: m.youtube.com
Install Mounting Rails for Perfect Alignment
Mounting rails (also called cabinet hanging rails) are the most reliable way to install a full run of cabinets on brick, as they allow you to level the entire run before attaching individual cabinets, eliminating small alignment errors that add up across multiple units.
Attach Rails Securely to Brick
Choose hot-dipped galvanized steel rails to resist rust from kitchen humidity, and size them to match your cabinet depth (12, 15, or 24 inches are standard). Hold the rail up to the chalk line you snapped earlier, and use a level to check both horizontal and vertical alignment. Drill holes through the rail into the brick at your marked anchor points, insert the anchors, and secure the rail with 3-inch masonry screws, spacing screws 12–16 inches apart along the rail. If your brick wall is uneven, place thin shims behind the rail at the anchor points to level it before tightening the screws.
Level Rails for a Flawless Cabinet Run
Use a 4-foot spirit level to check the rail’s horizontal alignment across its entire length; even a 1-degree tilt across a 10-foot run will cause cabinet doors to swing open or not close properly. Double-check the level at both ends and the middle of the rail before tightening all screws fully. If you prefer not to use mounting rails, you can attach cabinets directly to the wall with anchors, but this requires extremely precise leveling of each individual cabinet, which is far more time-consuming for a full kitchen run.
 Properly secured mounting rails distribute cabinet weight evenly to prevent wall damage over time.
Credit: www.workshop.bunnings.com.au
Properly secured mounting rails distribute cabinet weight evenly to prevent wall damage over time.
Credit: www.workshop.bunnings.com.au
Hang and Secure Your Cabinets
Once your mounting rails are level and secure, hanging the cabinets is a straightforward process — but proper lifting and alignment are critical to a professional finish.
Lift and Position Cabinets Correctly
Upper cabinets weigh 30+ lbs even when empty, so always use a two-person lift and cabinet lifting straps to avoid injury or damage to the cabinets. Hold the cabinet level against the wall, aligning its bottom edge with your marked layout line. Use a spirit level to check the cabinet’s horizontal alignment before securing it to the rail.
Fasten Cabinets to Mounting Rails
Start by driving 2-inch galvanized wood screws through the cabinet’s top hanging bracket into the mounting rail — this supports the cabinet’s full weight, making it easier to align the bottom of the cabinet. Once the top is secured, drive screws through the bottom hanging bracket into the rail, spacing screws 8–12 inches apart. Use a level to double-check the cabinet’s alignment before fully tightening all screws. Repeat this process for each cabinet in your run, leaving a 1/8-inch gap between adjacent cabinets to allow for expansion and contraction from temperature changes. For lower base cabinets, you can skip the mounting rail and anchor directly to the brick through the cabinet back, using 3-inch masonry screws spaced 12–16 inches apart along the top and bottom of the cabinet.
Troubleshooting Common Installation Issues
Even with careful preparation, small issues can pop up during installation. Here’s how to fix the most common problems quickly:
Cracked or Chipped Brick
If a brick cracks while drilling, stop immediately and move the anchor hole 1–2 inches away to avoid compromising the brick’s structural integrity. For small chips around the drill hole, fill the gap with a fast-setting masonry epoxy before inserting the anchor to restore grip and prevent the anchor from slipping over time.
Misaligned Cabinets
If you notice a cabinet is out of level after installation, loosen the mounting screws slightly, tap the cabinet with a rubber mallet to adjust its position, then re-tighten the screws. For small gaps between the cabinet and brick, insert thin wooden shims behind the cabinet back at the anchor points to adjust alignment before re-tightening the screws.
Loose or Failing Anchors
If a cabinet wobbles after installation, remove the screw from the loose anchor, apply a small amount of construction adhesive to the anchor hole, reinsert the anchor, and let it cure for 24 hours before re-driving the screw. For severely loose anchors, remove the old anchor, fill the hole with masonry epoxy, drill a new hole 1 inch away from the original, and insert a new anchor rated for your cabinet’s weight.
Final Adjustments and Finishing Touches
The final steps of your installation will ensure your cabinets look professional and function perfectly for years to come.
Verify Level and Stability
Use a 4-foot spirit level to check the horizontal alignment of every cabinet in your run, and adjust as needed using the shimming techniques outlined in the troubleshooting section. Test stability by pushing firmly on each cabinet; if you notice any wobbling, tighten the mounting screws or add extra shims at the anchor points. Attach cabinet doors and drawer fronts according to the manufacturer’s instructions, adjusting hinge placement as needed to ensure even 1/8-inch gaps between doors for a clean, uniform look.
Seal Gaps and Complete the Finish
Brick walls are rarely perfectly smooth, so small gaps between the cabinet and wall are normal. Use color-matched silicone caulk to fill these gaps, smoothing it with a wet finger or caulk smoothing tool for a seamless finish. Avoid painter's caulk, as it will crack and peel over time due to kitchen humidity and temperature changes. If you have exposed brick between cabinets, apply a breathable masonry sealer to prevent moisture damage and make cleaning easier.
Post-Install Care for Long-Lasting Results
With proper maintenance, your brick-mounted cabinets will last for decades. Follow these simple tips to keep them in top condition:
- Avoid hanging heavy items (over 20 lbs) directly from cabinet doors, as this puts extra stress on the wall anchors and can cause misalignment over time.
- Clean the brick backsplash between cabinets regularly with a soft brush and mild detergent to remove dust and grease, which can degrade caulk and cause it to fail prematurely.
- Inspect the anchors and caulk annually for signs of loosening or cracking; re-caulk any gaps as needed to prevent moisture from seeping behind the cabinets and causing mold or mortar erosion.
- If you notice any cabinet wobble, tighten the mounting screws immediately to avoid further damage to the wall or cabinetry. Once your cabinets are installed, you can refresh the rest of your kitchen space by exploring perfect pairings for green cabinetry or ideal wall tones for brown cabinets to complement your new cabinetry. If you’re also updating your kitchen fixtures, you can follow our guide to remove an old wall-mounted faucet before installing a new one.
Frequently Asked Questions
How do you secure cabinets to a brick wall?
Use masonry sleeve or wedge anchors drilled directly into the brick or a furring strip behind the wall, spaced 12–16 inches apart along a mounting rail. Pre-drill holes with a masonry bit, insert anchors flush with the wall, and drive screws through the cabinet’s hanging brackets into the anchors or rail for a secure, level fit.
What tools are needed to install kitchen cabinets on brick?
You will need a corded hammer drill, carbide-tipped masonry drill bits, a 24-inch spirit level, a deep-scan stud finder, an impact driver, safety gear (safety glasses, N95 mask, work gloves), masonry anchors, a galvanized mounting rail, wood screws, shims, and silicone caulk.
Can I install kitchen cabinets on brick without studs?
Yes, solid brick walls do not require studs for cabinet installation. Use heavy-duty masonry anchors rated for your cabinet’s weight, drilled directly into the brick or mortar, to secure the cabinets safely. If your wall has a furring strip behind the brick, anchor into the strip for even stronger holding power.
How do you align cabinets on an uneven brick wall?
Use a chalk line to snap a straight horizontal reference line across the entire installation area, and shim behind the mounting rail or cabinet back at anchor points to level it. Check alignment with a spirit level at every step to ensure cabinets are perfectly horizontal.
Can I install cabinets on a brick wall with just mortar, no anchors?
No, mortar is not designed to bear the weight of cabinetry, even for light loads. Mortar will crumble over time when subjected to the constant weight of cabinets, leading to loose, dangerous installations. Always use anchors drilled into solid brick or a furring strip.
Will installing cabinets on brick damage the wall?
When installed correctly, cabinets will not damage brick walls. Use the correct drill bit size for your anchors to avoid cracking bricks, and seal gaps with flexible silicone caulk to prevent moisture damage. If you need to remove the cabinets in the future, carefully unscrew the anchors, fill the small holes with matching mortar, and the wall will be nearly indistinguishable from its original state.
Conclusion
Installing kitchen cabinets on a brick wall is a rewarding DIY project that delivers professional results without the professional price tag. By prioritizing pre-install planning, using the right anchors and tools, and taking your time with alignment, you can avoid common pitfalls like cracked brick, wobbly cabinets, and misaligned doors. Remember to always follow safety guidelines when drilling masonry, and choose anchors rated for at least 1.5x your cabinet’s loaded weight for long-term security. Once your installation is complete, you can turn your attention to the rest of your kitchen renovation with confidence. For more step-by-step DIY guides to help you tackle every part of your project, explore our full library of home improvement resources.