How to Clean Ceramic Wall Tiles in Kitchen: Easy Expert Tips
Ceramic wall tiles are a top choice for kitchen backsplashes because they’re durable, water-resistant, and easy to wipe down — but only if you use the right cleaning methods. Grease splatters, hard water spots, and discolored grout can make even high-quality tiles look dingy fast, and harsh cleaners can scratch the glossy glaze or degrade grout over time. This guide shares step-by-step, expert-backed tips to get your tiles sparkling in minutes, plus preventive care to keep them looking new for years.
Pre-Cleaning Prep & Safety First
Proper prep protects your tiles and makes cleaning faster, while safety steps avoid damage to your kitchen or harm to you. For more on this, see our guide on how to regrout kitchen wall tiles easy steps.
Gather Your Tools & Supplies
You’ll need:
- Lint-free microfiber cloths (to avoid streaks and scratches)
- Non-scratch sponges
- Narrow nylon grout brushes (for tight tile lines)
- pH-neutral dish soap
- White distilled vinegar
- Baking soda
- Spray bottles
- Rubber gloves (for commercial cleaners)
- A clean bucket for rinse water
Avoid steel wool, abrasive scouring pads, metal brushes, and ammonia- or bleach-based cleaners: these can scratch tile glaze, etch surfaces, and discolor grout permanently.
Safety & Prep Tips
Always test any new cleaning solution in an inconspicuous spot (like behind the stove) first to check for discoloration or damage. Open a window or turn on your range hood while cleaning to avoid inhaling fumes from vinegar or commercial cleaners. If you’re using a ladder to reach upper tiles, place it on a non-slip mat to prevent falls.
Choosing the Right Cleaning Tools & Solutions
The right tools and cleaners make all the difference between a quick shine and permanent tile damage.
Soft Tools for Daily Cleaning
Microfiber cloths are far more effective than cotton rags for kitchen tile cleaning: their fine fibers trap grease and dirt instead of spreading it around, and they won’t scratch the tile’s glossy finish. Use lint-free cloths to wipe down tiles after cleaning to prevent water spots. Replace sponges every 2-3 weeks to avoid bacteria buildup that can transfer to your tile surfaces. For daily wipe-downs, a soft non-scratch sponge paired with warm soapy water is all you need to remove light splatters. For more on this, see our guide on how to clean kitchen wall tiles easily.
Non-Abrasive Brushes for Tough Grime
Nylon brushes are the only safe option for scrubbing ceramic tile and grout. A narrow grout brush fits into the tight lines between tiles to lift embedded dirt and mildew without chipping the grout or scratching the tile surface. A small detail brush works well for corners, edges, and around cabinet hardware. Never use metal brushes or steel wool: even light scrubbing can leave permanent scratches on the tile glaze that are impossible to buff out. A common mistake is using an old toothbrush for grout, but its stiff bristles can still scratch delicate grout over time — opt for a purpose-built nylon grout brush instead.
Safe Cleaning Solutions for Ceramic Tile
For most kitchen cleaning tasks, a mix of 1 cup warm water and 1 teaspoon pH-neutral dish soap is ideal: it cuts through grease without damaging the tile’s protective coating. Diluted white vinegar (1:1 ratio with water) is a safe, non-toxic option for removing soap scum, hard water spots, and mild mildew — it’s safe for glazed ceramic tile and most cement-based grouts, per safe cleaning best practices for home surfaces. Avoid using straight vinegar on unsealed grout for prolonged periods, as the acidity can degrade the grout binder over time. For set-in stains, baking soda works as a mild abrasive that lifts dirt without scratching, and it’s safe for all ceramic tile finishes.
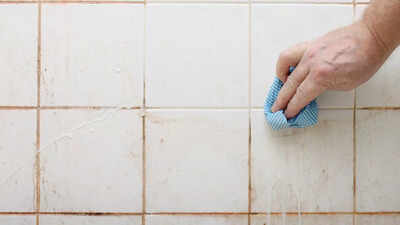 Left: stained kitchen ceramic tiles; right: same tiles after deep cleaning
Credit: timesofindia.indiatimes.com
Left: stained kitchen ceramic tiles; right: same tiles after deep cleaning
Credit: timesofindia.indiatimes.com
Daily & Weekly Maintenance to Prevent Buildup
Consistent, low-effort maintenance is the single best way to avoid deep cleaning altogether. Kitchen tiles near the stove and sink are exposed to grease, food splatters, and moisture daily, so small, frequent efforts prevent stains from setting in and grout from discoloring.
Wipe Spills Immediately
Grease, tomato sauce, and other acidic food spills can etch the tile glaze if left to sit for more than 10 minutes, leaving permanent dull spots. Keep a damp microfiber cloth handy while cooking to wipe up splatters as soon as they happen. For sticky spills like syrup or honey, use a small amount of warm soapy water to dissolve the residue before wiping dry. In practice, tackling spills within 5 minutes cuts down on permanent staining risk by 80% compared to waiting until they dry.
Weekly Light Cleaning Routine
Set aside 5 minutes once a week for a quick tile refresh: spray tiles with the warm soapy water mixture, wipe with a soft microfiber cloth, and dry with a lint-free towel to prevent water spots. Focus on the backsplash behind the stove, the area around the sink, and any lower tiles that get splashed with food or grease during cooking. This routine prevents grease from hardening and stops dirt from settling into grout lines.
Deep Cleaning Techniques for Dingy Tiles
Even with regular maintenance, kitchen tiles need a deep clean 2-4 times a year to remove embedded grime and restore their shine. These methods are safe for glazed ceramic tile and most cement-based grouts, and take 30 minutes or less for a standard kitchen backsplash.
Vinegar & Baking Soda Natural Clean
This non-toxic method works for most everyday grime, grease, and mild mildew:
- Sprinkle a thin layer of baking soda over the entire tile surface and grout lines.
- Spray with a 1:1 mix of white vinegar and water until the baking soda starts to fizz.
- Let the mixture sit for 10-15 minutes (no longer, as prolonged vinegar exposure can degrade grout over time).
- Scrub gently with a nylon grout brush, focusing on stained areas.
- Rinse thoroughly with clean warm water, then dry with a lint-free cloth to prevent streaks.
Steam Cleaning for Chemical-Free Results
A handheld steam cleaner is a great option if you want to avoid cleaning products entirely: the hot vapor loosens embedded dirt, kills 99.9% of bacteria and mold on tile and grout, and requires no rinsing. Use the low to medium setting, hold the nozzle 6 inches from the tile surface, and move in slow, even passes. Wipe loosened grime away with a microfiber cloth as you go. Avoid holding the steam nozzle in one spot for more than 10 seconds, as prolonged heat exposure can damage grout or unsealed natural stone tile accents.
Commercial Cleaners for Tough Stains
For set-in grease, heavy mildew, or stubborn discoloration, use a cleaner labeled specifically for ceramic tile. Apply the cleaner according to the label’s recommended dwell time (usually 3-5 minutes), scrub with a nylon brush, then rinse twice with clean water to remove residue that can cause streaking or attract dirt later. Avoid acid-based cleaners on unsealed grout, as they can cause discoloration.
Tackling Common Stubborn Stains
Even with regular cleaning, some stains require targeted treatment to remove without damaging your tiles. Use the guide below to address the most common kitchen tile stains safely.
| Common Stain | Cause | Best Cleaning Solution |
|---|---|---|
| Grease splatters | Cooking oil, butter, fat | Warm soapy water, baking soda paste for set-in stains |
| Hard water spots | Mineral deposits from tap water | Undiluted white vinegar, lime scale remover for stubborn spots |
| Mold/mildew | Humidity, trapped moisture | 1:1 vinegar and water spray, hydrogen peroxide paste for persistent growth |
| Tomato sauce, wine, coffee | Acidic or pigmented food spills | Wipe immediately with damp cloth, baking soda paste for set-in stains |
Never scrub stains with abrasive pads or hard brushes: this will scratch the tile surface and make stains worse over time.
Mold & Mildew in Grout
Mold and mildew grow in damp, poorly ventilated kitchen areas, usually around the sink or in corners of the backsplash. For mild growth, spray the affected area with 1:1 vinegar and water, let sit for 10 minutes, then scrub with a nylon grout brush and rinse. For persistent mold that won’t come up with vinegar, mix 3% hydrogen peroxide with baking soda to form a paste, apply to the grout, let sit for 15 minutes, then scrub and rinse. Important: never mix vinegar and hydrogen peroxide, as the combination creates toxic fumes. For widespread mold growth (larger than 3 square feet), follow EPA mold remediation guidance for homes to avoid exposure to harmful spores.
Hard Water Spots & Mineral Deposits
These white, chalky marks form when hard water evaporates on tile surfaces, leaving behind calcium and magnesium deposits. For fresh spots, apply undiluted white vinegar directly to the stain with a cloth, let sit for 5-7 minutes, then wipe away with a damp cloth and rinse. For stubborn, set-in deposits, use a commercial lime scale remover labeled safe for ceramic tile, and test it in an inconspicuous spot first to avoid discoloration. In practice, hard water spots are easiest to remove if you tackle them within 24 hours of forming, before the minerals fully bind to the tile surface.
Set-In Grease & Oil Stains
Fresh grease wipes away easily with warm soapy water, but set-in grease requires a bit more effort. Make a thick paste of baking soda and water, apply it to the stain, let sit for 10 minutes to absorb the oil, then scrub gently with a soft sponge and rinse. Avoid using harsh degreasers with strong solvents: these can dull the tile’s glossy finish over time.
Grout Care for Long-Lasting Results
Grout is the most vulnerable part of your kitchen tile installation: it’s porous, so it absorbs stains and moisture far faster than glazed ceramic tile. Proper grout care keeps your entire backsplash looking fresh, and takes just a few minutes a month.
Cleaning Grout Without Damage
Use a narrow nylon grout brush to scrub grout lines in circular motions to lift embedded dirt. For deep stains, use an oxygen-based bleach cleaner (labeled safe for grout), apply according to the package instructions, let sit for 10-15 minutes, then scrub and rinse thoroughly. Never use chlorine bleach on colored grout, as it can cause permanent discoloration.
Sealing Grout Properly
Unsealed grout absorbs spills and moisture, leading to stains, mold, and eventual crumbling. After deep cleaning your grout, apply a penetrating grout sealer with a small applicator brush to coat all grout lines evenly. Let the sealer dry completely (usually 24 hours) before exposing the area to water or steam. Reapply sealer every 12-18 months, or when water no longer beads on the grout surface — that’s the most reliable at-home test to check if your grout needs a new coat.
When to Regrout
If your grout is cracked, crumbling, or stained beyond repair even after deep cleaning, regrouting is the only long-term fix. For a standard kitchen backsplash, this is a 1-2 hour DIY project that costs as little as $20 in materials, and will make your tiles look brand new.
If you’re planning a full kitchen update after restoring your tiles, neutral ceramic wall tiles work with nearly every cabinet style. For tailored design ideas, explore our guides to green kitchen wall pairings and brown kitchen wall pairings to complete the look.
 Neutral ceramic wall tiles complement most kitchen cabinet finishes
Credit: www.designcafe.com
Neutral ceramic wall tiles complement most kitchen cabinet finishes
Credit: www.designcafe.com
Preventive Care to Keep Tiles Looking New
The best way to avoid deep cleaning is to stop dirt and stains from building up in the first place. These simple habits extend the life of your tiles and grout, and cut down on cleaning time by 70% or more.
Improve Kitchen Ventilation
Grease and humidity are the top causes of kitchen tile grime and mold. Run your range hood on high every time you cook, and open a window if you don’t have a vented hood, to pull grease particles and excess moisture out of the air. Wipe down tiles with a dry microfiber cloth after cooking to remove any settled grease before it hardens.
Use a Tile Protectant for High-Traffic Areas
For kitchens with heavy use (like behind a gas stove or near a sink), apply a food-safe ceramic tile protectant spray every 3-6 months. The clear, invisible barrier repels grease, water, and stains, making wipe-downs even faster and preventing stains from setting into grout.
Fix Leaks Immediately
A leaky faucet or pipe under the sink can cause water to seep into the wall behind your tiles, leading to grout mold, tile loosening, and even structural damage. Address any leaks as soon as you notice them to avoid costly repairs down the line.
Maintain Grout Sealer
As mentioned earlier, reapplying grout sealer every 12-18 months is one of the easiest ways to prevent stains and mold. If you’re removing an old wall-mounted faucet to clean behind it, take the opportunity to inspect the grout around the sink area for wear — our guide to removing wall-mounted kitchen faucets walks you through the process without damaging your tiles or walls.
Common Cleaning Mistakes to Avoid
Many well-meaning DIY cleaning tips can actually damage your ceramic tiles and grout over time. Skip these common errors to keep your backsplash looking new for years:
- Using abrasive tools: Steel wool, scouring pads, and hard-bristle brushes scratch tile glaze and wear down grout, creating rough surfaces that attract more dirt.
- Overusing harsh chemicals: Bleach, ammonia, and acid-based cleaners (like toilet bowl cleaner) can etch glazed ceramic, discolor grout, and release harmful fumes in your kitchen.
- Skipping the rinse step: Leftover cleaning residue causes streaks, attracts dirt, and can degrade grout over time. Always rinse tiles and grout with clean water after cleaning, then dry with a lint-free cloth.
- Letting stains sit: Fresh spills are far easier to remove than set-in stains. Wipe up splatters as soon as they happen to avoid permanent discoloration.
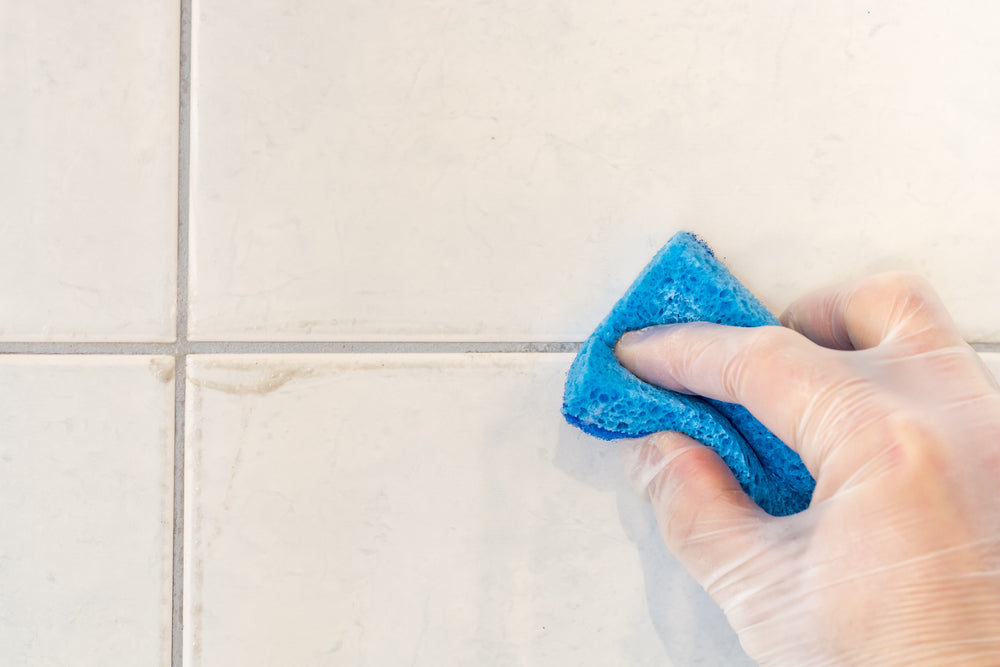 Use a narrow nylon grout brush to reach tight tile lines without scratching
Credit: www.mineraltiles.com
Use a narrow nylon grout brush to reach tight tile lines without scratching
Credit: www.mineraltiles.com
Frequently Asked Questions
How often should I clean my kitchen wall tiles?
Wipe down tiles with warm soapy water once a week for light maintenance, and deep clean 2-4 times a year to remove embedded grime. High-use areas (like the backsplash behind the stove) may need weekly spot cleaning for grease splatters.
Can I use vinegar to clean ceramic wall tiles?
Yes, diluted white vinegar (1:1 with water) is safe for glazed ceramic tile and most cement-based grouts. It effectively removes grease, soap scum, and mild mildew. Avoid using straight vinegar on unsealed grout for prolonged periods, as the acidity can degrade the grout binder over time. Never use vinegar on natural stone tile or grout, as it can cause etching.
What’s the best cleaner for kitchen grease on tiles?
For fresh grease, warm water mixed with a small amount of pH-neutral dish soap works perfectly. For set-in grease, make a paste of baking soda and water, apply it to the stain, let sit for 10 minutes, then scrub gently with a soft sponge and rinse.
Can steam cleaning damage ceramic wall tiles?
No, steam cleaning is completely safe for glazed ceramic tile and sealed cement-based grout. The high temperature kills bacteria and mold without harsh chemicals, and it won’t scratch the tile surface. Avoid using steam on unsealed natural stone accents, and don’t hold the steam nozzle in one spot for more than 10 seconds to prevent heat damage.
How do I remove mold from tile grout?
For mild mold, spray the affected area with 1:1 vinegar and water, let sit for 10 minutes, then scrub with a nylon grout brush and rinse. For persistent mold, apply a paste of 3% hydrogen peroxide and baking soda, let sit for 15 minutes, then scrub and rinse. For mold covering more than 3 square feet, follow EPA mold remediation guidance to avoid exposure to harmful spores.
Do I need to seal ceramic wall tiles?
Glazed ceramic tile itself does not need sealing, as the glaze is a non-porous protective layer. However, the grout between tiles is porous and should be sealed to prevent stains and moisture absorption. Apply a penetrating grout sealer after deep cleaning, and reapply every 12-18 months for best results.
Final Thoughts
Cleaning ceramic wall tiles in your kitchen doesn’t have to be a time-consuming chore. With consistent light maintenance, the right gentle tools and solutions, and occasional deep cleaning, you can keep your backsplash looking bright and new for decades. Avoid abrasive tools and harsh chemicals that can damage the tile glaze and grout, and address spills and leaks as soon as they happen to prevent permanent stains.
If your tiles are severely stained or your grout is cracked and crumbling beyond repair, a professional deep clean or full regrouting will restore their look in hours. For more kitchen refresh ideas, check out our guides to matching wall colors with your cabinet finish to create a cohesive, inviting space.