How to Clean and Maintain Your Travel Mug Like a Pro
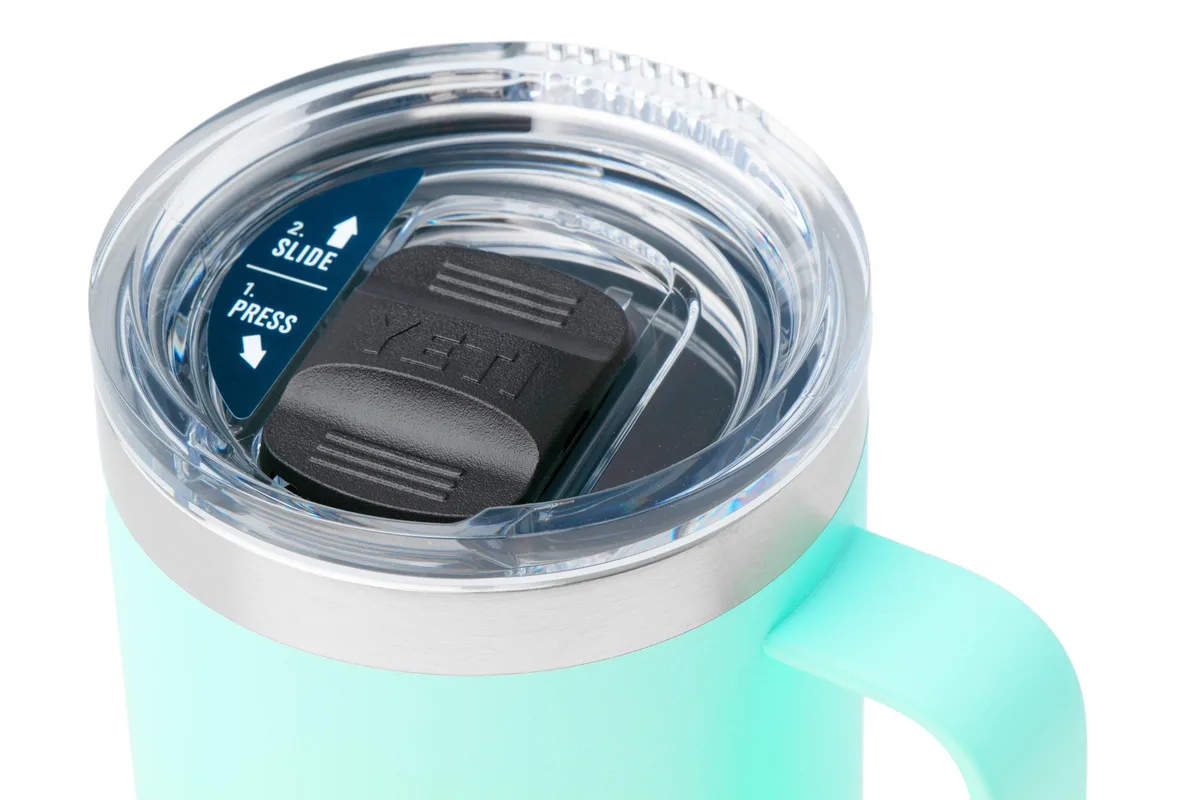
You want to know how to maintain travel mug without spending hours scrubbing? The truth is, your routine depends entirely on what your mug is made of and what problem you're tackling right now. A double-walled stainless steel vessel needs very different care than a plastic one with a complex silicone lid, and leaving either one unwashed overnight guarantees smelly surprises later.
Research from major beverage container brands shows improper cleaning can cut a mug's lifespan by half, especially when people toss everything into a hot dishwasher. We'll walk through exactly what to do for each situation, so you keep your drink tasting fresh and your gear lasting years. Let's get started on protecting your investment.
Quick Answer
How to maintain travel mug? Follow these core steps: wash components daily with warm soapy water, disassemble lids fully, dry everything completely before reassembly, and tackle odors or stains weekly with baking soda or vinegar soaks.
Check your manufacturer's label first. If it says "hand wash only," trust that. Most durable insulated mugs handle top-rack dishwashing, but delicate silicone seals and copper linings often do not.
Clean after every use if you've had dairy, protein shakes, or sweet drinks. Black coffee and water are more forgiving but still require daily rinsing to stop biofilm buildup.
Step-by-Step Maintenance Workflows
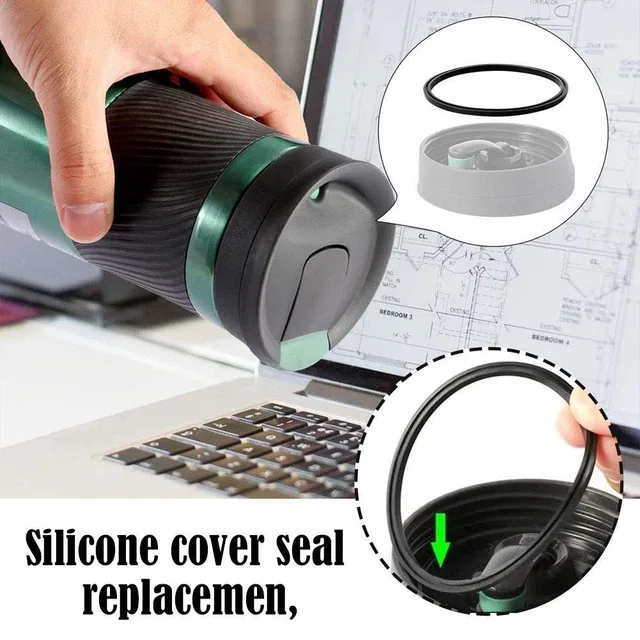
Image source: Web (Bing) / picclick.co.uk (Web image (fair-use with source credit))
Your maintenance schedule shifts based on what you drink and how quickly problems appear. Think of this as a branching path instead of a single routine. We'll break it into daily actions, weekly deep-cleans, and monthly upkeep so you always know what to tackle next.
Daily Quick-Rinse Routine (3 minutes)
Do this after every single use, even if you just drank water. The goal is stopping residue from hardening or souring overnight.
- Empty any leftovers immediately. Don't let coffee sit in a warm, sealed space.
- Rinse with lukewarm water. Hot water can set dairy proteins and make stains stick faster.
- Add a drop of dish soap if you had anything besides plain water or black coffee.
- Use a standard sponge or your fingers to wipe the interior. You don't need to scrub hard at this stage.
- Rinse thoroughly until no soap remains. Soap left behind tastes awful in your morning brew.
Let the mug air dry upside down on a rack with the lid off. Moisture trapped inside is exactly what breeds musty smells and mould spores. If you're rushing out the door, pat the inside with a clean paper towel to speed things up.
Weekly Deep-Clean (10–15 minutes)
Once a week, especially if you drink tea, smoothies, or milk-based coffees, give your travel mug a proper soak and scrub. This removes the invisible film bacteria love to build on.
| Material | Safe Soak Option | Soak Time | Tools Needed |
|---|---|---|---|
| Stainless steel | Baking soda + warm water | Overnight or 2+ hours | Bottle brush, cloth |
| Stainless steel | White vinegar + warm water | 1–2 hours | Bottle brush, cloth |
| Plastic / Tritan | Denture cleaning tablets | 30 minutes to overnight | Tablets, small bowl |
| Silicone seals | Baking soda paste or vinegar soak | 1 hour | Cotton swab, toothpick |
| Copper-lined | Lemon juice + warm water | 30 minutes | Soft cloth only |
Mix your chosen solution in the mug, cap it loosely, and let it sit. For heavy coffee stains, the overnight baking soda soak works wonders. For mineral cloudiness from hard water, vinegar does the trick.
After soaking, scrub everything. Pay special attention to threads inside the lid where gunk hides. A cotton swab or old toothbrush reaches places your fingers can't.
Rinse everything thoroughly and air dry completely.
Monthly Descale & Deodorize (15 minutes)
If you live in a hard-water area or notice your mug holding temperature less effectively, descaling is your move. Limescale builds up inside double-wall seams and blocks heat transfer.
Fill your mug halfway with equal parts white vinegar and warm water. Top the rest with plain water. Let it sit for at least two hours, preferably overnight.
The acid eats through calcium deposits without scratching your interior.
Rinse the solution, then run a second cycle with plain water and a teaspoon of baking soda to neutralize any lingering vinegar taste. Rinse well and dry. This should happen once a month in hard-water regions, every three months elsewhere.
For stubborn odors that survive weekly cleans, try this: fill the mug with hot water, add one tablespoon of baking soda and one tablespoon of salt, shake vigorously, then let it sit for several hours. The salt acts as a mild abrasive while the baking soda neutralizes acid smells.
Cleaning Tools: What Works & What to Avoid
Picking the right tools makes cleaning faster and protects your mug's finish. Some everyday items actually cause more harm than good over time. Let's separate the helpers from the hardware destroyers.
Must-Have Tool Kit
Every travel mug owner should own these basics. They cost very little and last for years.
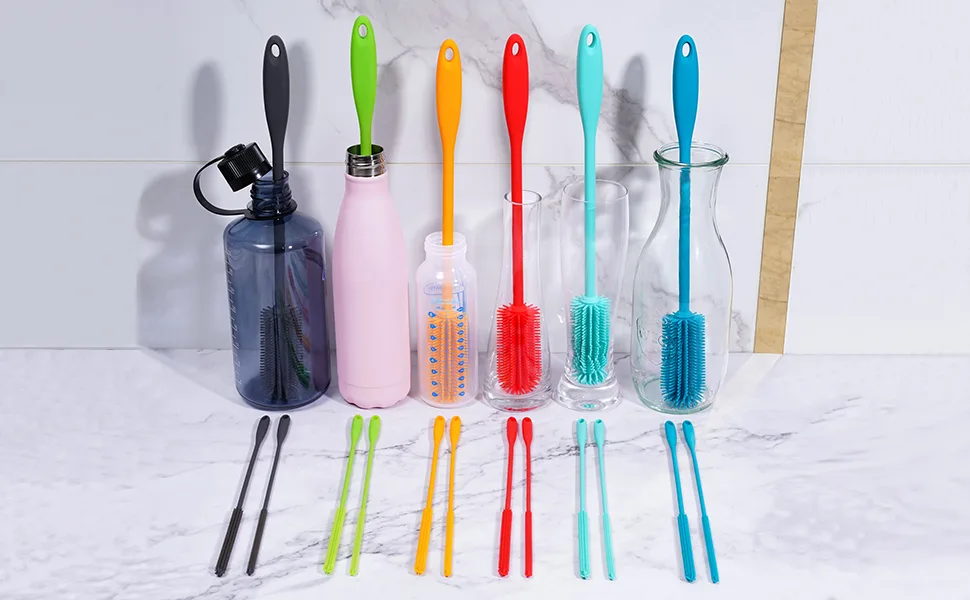
- Bottle brush with soft bristles: A flexible neck reaches the bottom of tall mugs. Choose nylon bristles, not wire, to avoid scratching stainless steel.
- Silicone scrubbers: These fit curved interiors perfectly and won't leave metal fragments behind. Look for ones designed specifically for wide-mouth containers.
- Pipe cleaner or straw brush: Narrow openings and integrated straws trap residue. A thin, bendable brush gets into channels standard brushes miss.
- Microfiber cloths: Use these for drying lids, seals, and exteriors. They absorb moisture better than paper towels and shed fewer fibers.
- Small bowls for soaking: Keep a dedicated set for mixing cleaning solutions. This prevents cross-contamination between food prep and cleaning chemicals.
Safe Cleaning Agents
Stick to food-safe, non-toxic options whenever possible. Your mug touches your mouth constantly, and harsh chemicals linger.
- Dish soap: Standard brands work fine. A single drop goes a long way in concentrated amounts.
- Baking soda: Great for scrubbing pastes and odor absorption. It's mildly abrasive but safe for all interiors.
- White vinegar: Removes mineral deposits and kills most bacteria. Never mix with bleach, ever. That creates toxic chlorine gas.
- Hydrogen peroxide (3%): Excellent for killing mould spores on silicone. Soak affected areas for 10 minutes before scrubbing.
- Denture tablets: Fizzing action loosens grime in hard-to-reach spots. Perfect for plastic lids and complex mechanisms.
Dangerous Items to Skip
Some popular cleaners and tools wreck your mug's lining, seals, or insulation. Avoid these completely.
- Steel wool or scouring pads: These scratch stainless steel and destroy powder-coated exteriors. Scratches become bacterial hideouts.
- Bleach: Too harsh for regular use and dangerous if not rinsed perfectly. Reserve only for extreme mould emergencies and follow with extensive rinsing.
- Abrasive cleansers like Comet or Bar Keepers Friend: Fine for sinks but too gritty for drinkware interiors. They create microscopic scratches that harbour germs.
- Oven cleaner: Never use automotive or oven degreasers inside anything that touches food. Residual fumes and chemicals will poison your drinks.
- Boiling water in double-walled mugs: Extreme thermal shock can collapse vacuum seals. Stick to warm or hot tap water for cleaning.
When in doubt, check your manufacturer's guidelines. Most brands like Yeti, Hydro Flask, and Stanley publish care sheets online. Some materials, like copper linings or glass inserts, have very specific restrictions.
Following those instructions protects your warranty and keeps your mug performing like new.
Troubleshooting: When Cleaning Isn't Enough
Even with perfect routines, problems pop up. Sometimes the fix isn't another scrub, but knowing when to repair, replace, or toss. Let's walk through the stubborn issues and how to handle each one.
Lingering Odors After Every Clean
That sour or musty smell usually means biofilm is entrenched in silicone seals or threaded joints. Surface cleaning misses these pockets entirely.
Remove every detachable part. Soak silicone rings and gaskets separately in a mixture of one part white vinegar to three parts warm water for at least one hour. Use a toothpick to gently lift trapped particles from grooves.
For the mug body itself, try the baking soda and salt trick. Fill with hot water, add one tablespoon each, shake, and let sit overnight. In the morning, scrub with a bottle brush and rinse until water runs completely clear and odorless.
If smells persist after two thorough attempts, consider replacing the silicone seal kit. Many brands sell them cheaply. Old, porous rubber holds onto bacteria no amount of cleaning removes.
Brown Stains and Cloudiness
Coffee tannins and tea polyphenols bond to stainless steel over time. Hard water leaves cloudy mineral films. Both look ugly but aren't harmful.
For coffee stains, make a paste of baking soda and water. Apply inside, let sit 30 minutes, then scrub with a soft bottle brush. Rinse well.
Repeat for set-in stains.
For mineral cloudiness, soak in equal parts white vinegar and warm water for two hours. The acid dissolves calcium deposits. Scrub lightly if needed, then rinse thoroughly.
Finish with a baking soda rinse to neutralize any vinegar taste.
Prevent future buildup by rinsing your mug immediately after use. Don't let coffee cool and settle before washing. Quick action stops stains from bonding deeply.
Mould and Black Spots
Black spots on silicone seals are mould. This happens when dampness stays trapped after washing. Mould grows fast in dark, humid, sealed environments, typically visible within 24 to 48 hours of neglect.
Remove affected seals immediately. Soak them in a solution of one part hydrogen peroxide (3%) to three parts water for 10 minutes. Scrub gently with an old toothbrush.
Rinse extremely well.
If mould has penetrated deep into the rubber matrix, replacement is safer than continuing to use them. Mould roots can trigger allergic reactions or respiratory irritation in sensitive individuals.
Prevent recurrence by ensuring complete drying before storage. Leave lids off and mugs upside down on a drying rack. Store in a well-ventilated area, not a closed cupboard while damp.
Lid Mechanism Failure
Stuck flip tops, leaking seals, or broken closures often stem from debris buildup or worn gaskets rather than true malfunction.
Disassemble completely. Soak all plastic and silicone parts in warm soapy water for an hour to soften gunk. Use a toothpick or brush to clear hinges and channels.
Check silicone O-rings for cracks, flattening, or brittleness. Worn seals cause leaks more often than damaged plastic. Replace them when they lose elasticity.
Most brands sell repair kits for a fraction of a new mug's cost.
Test reassembly by filling with water and shaking gently over a sink. If it leaks, check seal alignment and tighten caps to the manufacturer's recommended snugness, not maximum force.
For more tips on caring for your dining essentials, you might find our guide on selecting the best non-toxic dinnerware sets helpful for maintaining safe food contact surfaces.
FAQs
Can I put my travel mug in the dishwasher?
Most stainless steel mugs handle top-rack dishwashing safely. Check your manufacturer's label first. Plastic lids and silicone seals often warp in high heat, so remove them and hand wash those parts instead.
Place the mug upright on the top rack away from heating elements.
How do I remove coffee stains from my mug?
Soak the interior overnight in a mixture of one tablespoon baking soda per cup of warm water. In the morning, scrub with a bottle brush and rinse thoroughly. For tough stains, make a paste of baking soda and water, apply, let sit 30 minutes, then scrub gently before rinsing.
Why does my travel mug smell even after washing?
Persistent odors usually mean biofilm or mould in silicone seals or thread crevices. Disassemble everything, soak seals in vinegar water, and use a toothpick to clean grooves. Run a baking soda and salt soak in the mug body overnight.
Ensure complete air drying before storing.
How often should I deep clean my travel mug?
Aim for a full disassembly and soak weekly if you drink coffee, tea, or dairy products daily. Monthly descaling helps in hard-water areas. Immediately clean after any spill involving milk, protein powder, or sugary drinks to prevent residue hardening and odor development.
Is it safe to use vinegar in my insulated mug?
Yes, white vinegar is safe for stainless steel interiors and effective against minerals and odors. Dilute it with warm water, soak for up to two hours, then rinse thoroughly. The EPA notes that vinegar solutions are among the safest household disinfectants when used properly, making them ideal for drinkware maintenance.
Avoid boiling vinegar solutions in double-walled mugs, as extreme heat can damage vacuum seals over time.
When should I replace my travel mug versus continue cleaning it?
Replace if the vacuum seal fails (drink no longer stays hot or cold), interior lining is cracked or peeling, or mould persists after multiple deep cleans and seal replacements. Structural damage compromises insulation and hygiene, making a new mug the safer, more economical choice.

Sophia Martinez is a culinary lifestyle writer and product reviewer for DiningGadgets.com. Passionate about blending style with functionality, she explores the latest dining essentials, kitchen décor, and cleaning hacks that transform everyday cooking spaces. With a background in home organization and design, Sophia brings readers expert advice on creating beautiful, practical kitchens that truly feel like the heart of the home.