How to Clean a Portable Grill: Step-by-Step Guide
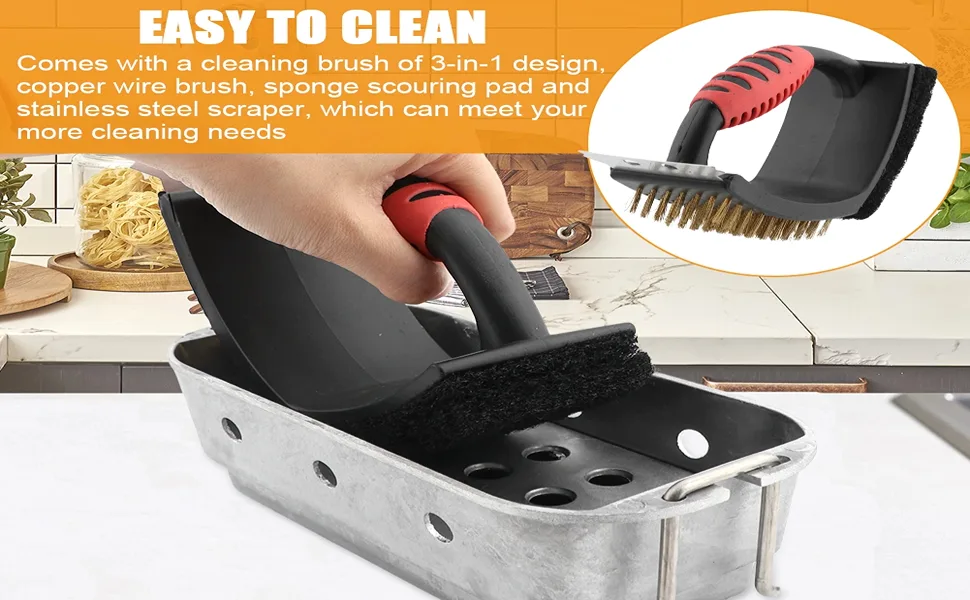
Image source: Bing (Web (fair-use with source credit))
How to Clean a Portable Grill: The Real Guide (That Actually Matches Yours)
You fired up the grill, cooked something awesome, and now you're staring at baked-on grease that's already turning into rust. Cleaning a portable grill doesn't have to be a nightmare, but treating every model the same is how people ruin grates, void warranties, and create food-safety hazards.
The fastest path to a clean grill starts with knowing your unit type. Below is a straightforward guide split by grill category. Find yours and follow the matching workflow.
Quick Answer
To clean a portable grill, first identify your grill type. Then follow the matching workflow below. Ash-based grills need ash removal first.
Gas models require burner port checks and leak tests. Cast iron surfaces demand oiling after drying. Always disconnect fuel before cleaning, fully dry every part, and store the unit in a dry space.
Why One Cleaning Method Doesn't Fit All Portable Grills
You can't clean a portable grill properly without first knowing what kind you actually own. A charcoal model collects fine ash that traps overnight moisture and sets up rust on the firebox floor. A gas grill relies on clear burner tubes, and a blocked port leads to uneven heating or failed ignition.
Pellet grills house an auger system that swells and jams when exposed to humidity. Cast iron camp grills carry a seasoned surface that harsh soap strips right off. Electric portable grills contain wiring and heating elements that water damages permanently.
Match the cleaning method to your grill type, and your equipment lasts years longer. Wrong technique ruins grates, voids warranties, and creates food-safety hazards. Knowing your model before you reach for a brush saves time and prevents costly repairs.
As of 2026, the National Fire Protection Association reports that cooking equipment remains the leading cause of home fires, with unattended grilling and grease buildup ranking among the top factors. That's why cleaning isn't just about appearances. NFPA Fire Exposure confirms that regular maintenance directly reduces fire risk on both fixed and portable cooking appliances.
Identify Your Portable Grill Type First
Most portable grills fall into five categories. Each type carries a distinctly different cleaning path. Look at your grill and match it to the description below.
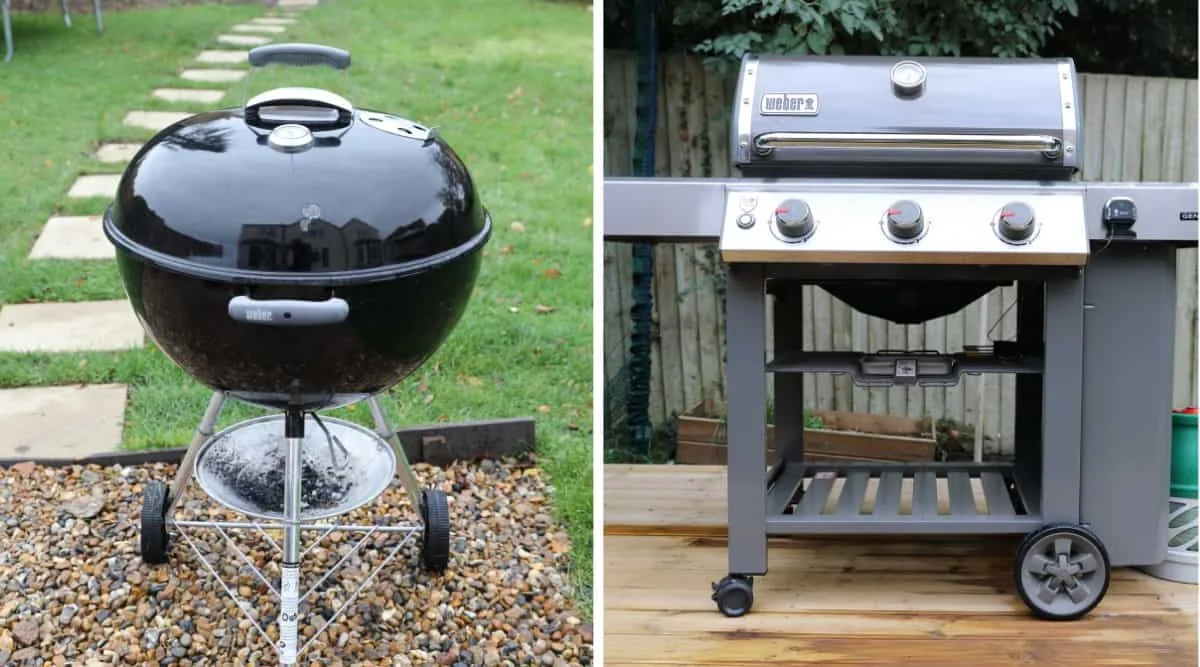
Charcoal portable grill. Round or oval metal bowl with a lid. Air vents adjust airflow. An ash catcher or removable pan sits at the bottom.
You load charcoal, light it, and cook over coals.
Portable gas (propane) grill. Resembles a miniature version of a full-size backyard gas grill. Control knobs sit on a front panel. Burner tubes run beneath the cooking surface.
A drip tray collects excess grease. The propane tank connects via a hose and regulator.
Portable pellet grill. Features a grain-shaped hopper filled with compressed wood pellets. A digital controller sets target temperatures. An auger feeds pellets into the fire pot automatically.
These units blend smoker and grill functions.
Campfire-style cast iron grill. A heavy, often foldable grate mounted on a simple stand. Designed for open flame or hot coals. Minimal parts, maximum durability.
Seasoning does the protective work.
Electric portable grill. Lightweight, cord-powered, and built for patios or balconies. Heating elements sit beneath a non-stick or enameled surface. A drip tray catches runoff.
No charcoal or gas involved.
Once you identify your model, consult the matched workflow in the next section. If you also need a reliable watch spring bar tool for other gear, that knowledge carries into small-detail maintenance tasks like hinge pin care.
Your Cleaning Workflow by Grill Type
Each portable grill demands its own step sequence. Follow the workflow that matches your unit exactly.
Portable Charcoal Grill
Ash is the number-one enemy here. Leftover ash holds moisture against bare metal and accelerates rust faster than almost anything else.
- Wait until the ash cools completely, ideally for several hours or overnight.
- Remove the ash catcher or carefully tip the grill to dump ash into a metal container with a tight lid.
- Scrub the grate while it is still warm, not hot, using a grill brush or damp non-abrasive pad.
- For baked-on residue, soak the grate in warm soapy water for 20 to 30 minutes, scrub gently, and rinse thoroughly.
- Dry the grate completely before returning it to the grill.
- Wipe the exterior body with a damp cloth and mild soap, then dry with a towel.
- Leave the vents slightly open during storage to encourage airflow and prevent condensation.
If your charcoal grill has a cast iron grate, skip dish soap on routine cleanings. A firm scrape and a thin coat of cooking oil after drying maintains the seasoning and keeps food releasing cleanly.
Portable Gas Grill
Gas grills carry two risks above all others: clogged burner ports and undetected fuel leaks. Address both during every cleaning session.
- Shut off the propane tank valve and disconnect the hose before doing anything else.
- Remove the cooking grates and the metal flavorizer bars, then soak them in warm soapy water.
- Scrub the grates with a grill brush while warm. Stubborn spots benefit from a baking soda paste applied for 30 minutes before scrubbing.
- Inspect each burner tube for blocked ports. Clear obstructions with a paperclip or a dedicated burner cleaning tool. Do not spray water into the burner openings.
- Wipe the interior bowl with a damp cloth and mild detergent. Avoid direct spraying.
- Empty and wash the grease tray, then dry it before reinstalling.
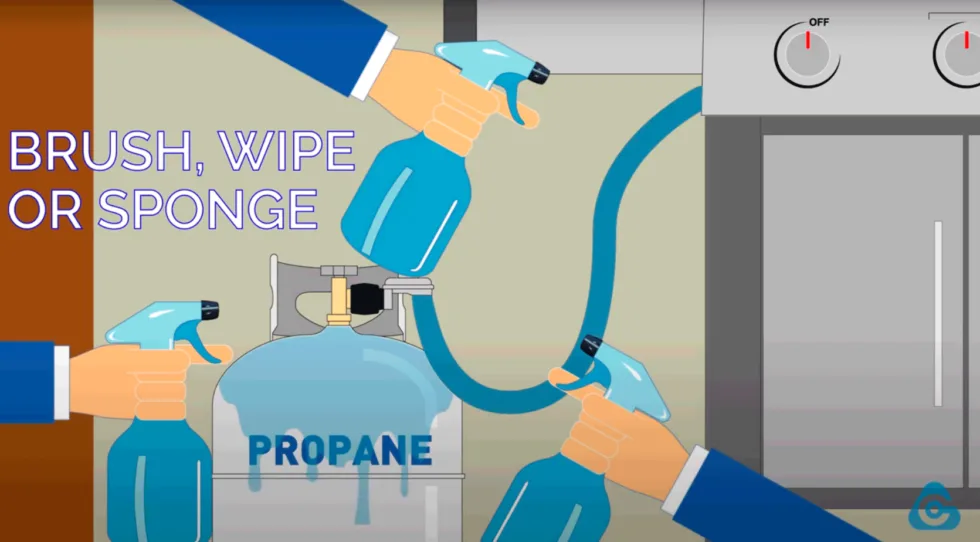
- Reconnect the propane and perform a leak test: brush a 50/50 solution of water and dish soap over every fitting. Bubbles mean gas is escaping. Tighten the connection and test again.
Never leave the propane tank connected during cleaning. Storage regulations emphasize keeping fuel separated when not in active use, which reduces accidental release risk.
Portable Pellet Grill
Moisture destroys pellet grills more often than any other factor. The auger system and hopper must stay dry at all times.
- Turn the unit off and unplug it if it has an electric starter. Allow complete cool-down.
- Vacuum out accumulated ash from the fire pot using a shop vacuum or small hand vacuum. Skip water entirely in this zone.
- Remove the grates and clean them the same way described above. Soak, scrub, rinse, and dry thoroughly.
- Sweep or vacuum the interior walls and floor. Pellet ash is fine and removes easily.
- Wipe the outside housing with a lightly dampened cloth. Some manufacturers approve a thin coat of protectant on the lid exterior.
- Empty and clean the grease tray. Check that the drain path remains clear.
- Store the grill with the lid slightly ajar to allow moisture to escape during idle periods.
Keep your pellet supply sealed in an airtight container when not in use. Humid environments cause pellets to swell and turn into sawdust inside the hopper, which leads to feeding jams and uneven burns.
Campfire Cast Iron Grill
The goal here is protecting the seasoning, not stripping the surface raw. Proper care turns cast iron into a self-repairing non-stick surface over time.
- Scrape the grate with a stiff brush or chainmail scrubber while it is still warm. Heat loosens cooked-on proteins better than cold scrubbing ever will.
- For stubborn bits, pour a handful of coarse kitchen salt onto the warm surface and scrub with a folded cloth or paper towel. Salt acts as a gentle abrasive that lifts carbon without harming seasoning.
- Rinse with hot water only. Avoid soap unless the manufacturer explicitly recommends it for your specific model.
- Dry the grill immediately by placing it back over low heat for a few minutes. Any leftover moisture will trigger flash rust.
- Apply a barely-there layer of cooking oil while warm. Spread it with a paper towel, then wipe off nearly everything. You want a whisper of oil, not a pooled surface.
- Store in a dry location. Add another thin oil coat before long-term storage in damp conditions.
This approach mirrors the same care principles behind maintaining elegant dining table settings, where preserving the original finish matters more than aggressive restoration.
Electric Portable Grill
Water near the heating element or control board turns a routine cleaning into a repair bill. Electrical safety comes first.
- Unplug the grill completely and allow every component to cool.
- Remove any detachable cooking plates or grates and soak them in warm soapy water.
- Wipe the heating element area gently with a damp cloth. Do not spray, pour, or immerse any part near the element housing.
- Empty, wash, and dry the grease drip tray.
- Wipe the exterior housing with a damp cloth and mild soap. Dry with a clean towel.
- Inspect the power cord for cracks, fraying, or exposed wire before plugging the unit back in.
- Coil the cord loosely for storage. Tight wrapping stresses the insulation over time.
Always consult your owner manual before applying any cleaner near electrical components. Manufacturer guidance overrides general recommendations.
Non-Negotiable Safety Rules Before You Start
Certain steps apply to every portable grill type. Skipping them creates real risk.
Disconnect all fuel sources first. Gas grills require the propane tank to be shut off and disconnected before any cleaning begins. Electric grills must be unplugged. Never clean a live fuel connection.
Wait for full cool-down. Do not touch grates, burners, or interior metal until the unit reaches a safe handling temperature. The U.S. Occupational Safety and Health Administration notes that contact with cooking surfaces above 150°C can cause severe burns in under three seconds.
Never use a pressure washer. The force drives water into bearings, joints, electrical compartments, and fuel lines that were never designed to handle that kind of pressure. Hand cleaning with a brush and cloth is safer and more effective for portable units.
Use only food-safe cleaners. Dish soap is appropriate for cooking grates. Oven cleaner, bleach, and heavy-duty degreasers belong nowhere near a surface you cook on unless the manufacturer's instructions explicitly approve them. Residue from harsh chemicals transfers directly to your food.
Dry every component completely before reassembly. Moisture trapped under a closed lid creates the exact conditions rust needs to spread. Air-dry parts in sunlight when possible, then wipe dry with a towel. Store the grill with the lid slightly open to promote continued airflow.
These rules exist for a reason. A four-second oversight during cleaning can lead to gas leaks, electrical shorts, or burned skin. Slow down and follow each step deliberately.
Five Costly Cleaning Mistakes That Ruin Portable Grills
Most portable grill damage comes from avoidable errors, not normal wear. Learn these mistakes once and protect your investment for years.
1. Stripping Cast Iron Seasoning With Harsh Soap
Repeated scrubbing with dish soap removes the polymerized oil layer that makes cast iron naturally non-stick. That layer builds slowly over many cooking sessions. A few aggressive washes can erase months of seasoning work in one minute.
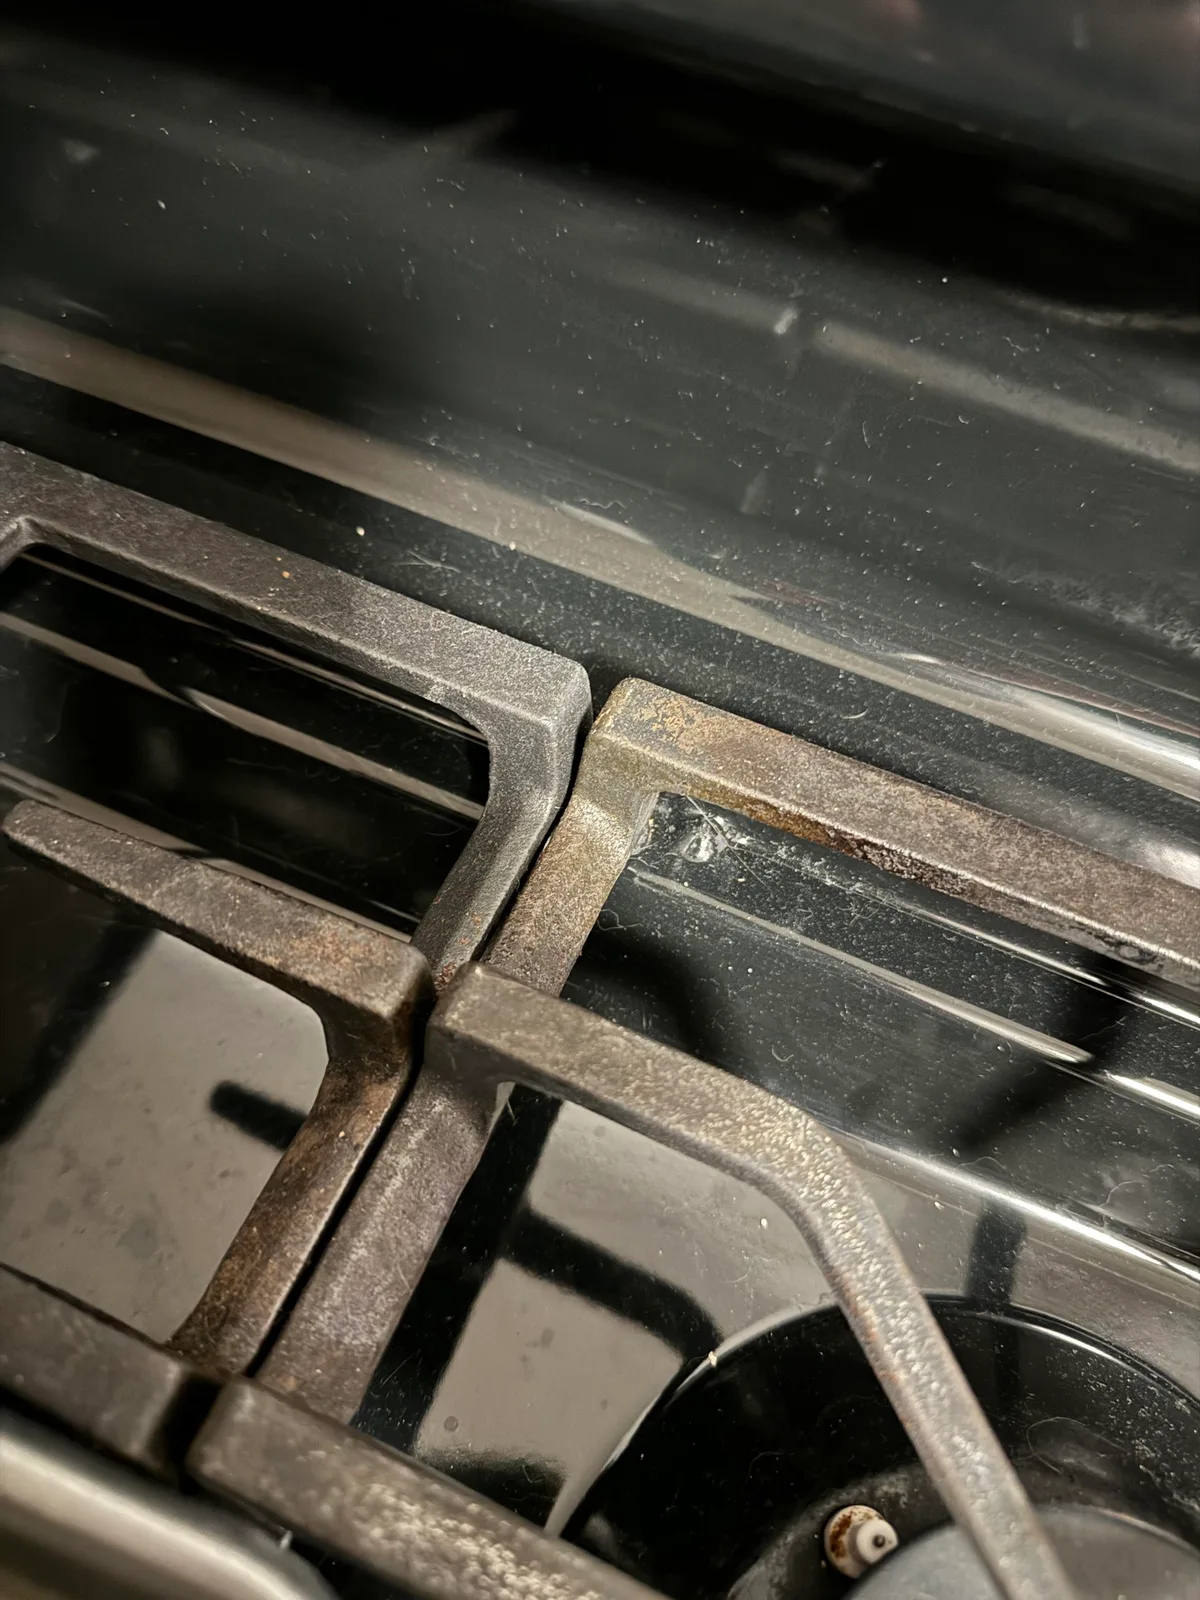
Use warm water and a stiff brush instead. Reserve soap for deeply greasy buildup, and always re-oil the surface immediately afterward to rebuild the protective layer.
2. Leaving Wet Ash Inside the Firebox
Ash acts like a sponge. It pulls moisture from the air and holds it against bare metal. Overnight dampness turns fine ash into a corrosive slurry that eats through firebox bottoms and ash pans faster than almost anything else.
Dump cooled ash after every use. Give the firebox a quick dry wipe before closing the lid. This single habit prevents the majority of bottom-rust complaints reported by portable grill owners.
3. Skipping the Leak Test After Reassembling a Gas Grill
Reconnecting a propane line incorrectly or cross-threading a regulator creates a hidden leak. Gas odor is added to propane specifically so you can detect these failures. Ignoring the leak check gamble is irresponsible.
Brush soapy water over every connection after reassembly. Watch for bubbles. Any bubbling means gas is escaping and the joint needs tightening.
Fix it before lighting the grill. This simple test stops leaks before they become emergencies.
4. Storing the Grill While Components Are Damp
Closing a damp grill lid traps moisture against every interior surface. Condensation forms, rust starts, and mold can appear on fabric grips and wooden handles. Storage conditions matter as much as the cleaning itself.
Dry everything completely before storage. Place the grill in a sheltered location when possible. In humid regions, add a silica gel desiccant pack inside the closed unit to absorb lingering moisture during extended idle periods.
5. Using Wire Brushes on Coated Grates
Stiff bristle brushes scratch porcelain-enamel and non-stick coatings. Once the coating chips, bare metal exposes itself to heat and moisture. Flaked coating particles can land directly in your food.
Switch to nylon brushes, wooden scrapers, or chainmail scrubbers for coated surfaces. Wire brushes remain appropriate only for bare, uncoated cast iron, and even then, inspect bristles regularly for loose strands that could detach during scrubbing.
Portable Grill Cleaning: FAQ
Can I Use Oven Cleaner on My Portable Grill Grates?
No. Oven cleaners contain lye or other caustic chemicals designed for self-cleaning ovens, not for surfaces you cook food on. Residue remains trapped in grate pores and transfers directly into your meals.
Manufacturer specifications universally warn against these products. Stick to dish soap, baking soda paste, or a commercial grill cleaner labeled safe for food-contact surfaces.
How Often Should I Deep Clean My Portable Grill?
Deep clean after every few uses for frequent cooks, or at minimum once per grilling season for occasional use. Light post-cook brushing clears most surface debris between sessions. If your grill has sat unused for months, perform a full teardown cleaning before lighting it again.
Heavy grease buildup increases flare-up risk and alters food flavor noticeably.
Is It Safe to Clean a Warm Grill?
Yes, cleaning while warm is often easier and more effective than waiting for complete cool-down. Heat softens baked-on grease so brushes remove it with less scrubbing. However, never touch bare metal or handle components until they feel comfortable to the touch.
Wear heat-resistant gloves and keep a spray bottle of water nearby for accidental flare-ups during cleaning.
What's the Best Way to Remove Rust From Portable Grill Parts?
Light surface rust responds well to fine steel wool, a wire brush, or a dedicated rust eraser pad. Scrub the affected area until bare metal appears, then immediately apply a thin coat of cooking oil to prevent flash oxidation. For heavier corrosion, soak the part in white vinegar for an hour, scrub again, dry thoroughly, and re-season the surface.
How Do I Store My Portable Grill Long-Term?
Ensure the grill is completely clean, dry, and cool before storage. Cover it with a breathable, weather-resistant grill cover designed for your model. Store in a dry, sheltered location like a garage or shed whenever possible.
For gas models, disconnect and store the propane tank outdoors separately. Open the lid slightly to allow airflow and reduce condensation inside the cooking chamber.
Can I Put a Portable Charcoal Grill in the Rain?
You can, but moisture accelerates rust on unprotected steel and cast iron components. If caught in rain, wipe down wet surfaces with a dry towel afterward and store the unit under a cover when possible. Leaving a charcoal grill uncovered long-term guarantees premature corrosion, especially around the ash pan and firebox floor.
A fitted grill cover protects against both sun and precipitation.

Sophia Martinez is a culinary lifestyle writer and product reviewer for DiningGadgets.com. Passionate about blending style with functionality, she explores the latest dining essentials, kitchen décor, and cleaning hacks that transform everyday cooking spaces. With a background in home organization and design, Sophia brings readers expert advice on creating beautiful, practical kitchens that truly feel like the heart of the home.