How to Clean an Outdoor Pizza Oven (Step-by-Step Guide)
how to clean outdoor pizza oven depends entirely on your oven's interior material. Let the oven cool completely first. Then remove loose ash with a soft brush or vacuum.
Clean cordierite stone floors with a dry brush and plastic scraper only. Wipe stainless steel interiors with a vinegar-water spray and microfiber cloth. For refractory brick, stick to dry brushing whenever possible.
Finally, run the oven empty at 400°F for 20 minutes to burn off residue. Learn about safe outdoor cooking practices from the FDA before you begin.
Source: Web (Bing) / motherearthnews.com (Web image (fair-use with source credit))
Why One-Size-Fits-All Cleaning Advice Breaks Your Oven
Most online guides dump the same cleaning routine on every outdoor pizza oven. That advice falls apart fast once you understand how different interior materials behave under heat and moisture.
The real problem: treating every interior like the same surface
A single "scrape, spray, wipe" routine ignores material science. Cordierite stone, refractory brick, and stainless steel each react completely differently to water, abrasion, and temperature changes.
When you skip the first step, identifying what you're actually working with, you risk cracking stones, stripping seasoned surfaces, and voiding your warranty.
What happens when you ignore the differences
Spraying water on a warm cordierite floor causes instant thermal shock. The stone cracks within seconds. That crack spreads fast under repeated heating cycles.
Scrubbing seasoned steel with abrasive pads or soapy cleaners strips the natural non-stick layer. Your next pizza sticks like crazy.
Pushing ash with a metal brush grinds particles into porous brick surfaces. Those embedded particles become impossible to remove later.
Using generic outdoor cleaners on steel interiors leaves chemical residue. That residue taints food flavor and creates unpleasant smoke during your next cook.
The right approach starts with a simple question
Before you touch any tool, ask yourself what material makes up your cooking floor and interior walls. Once you know, you follow a material-specific path instead of guessing.
Manufacturer specifications confirm that cordierite stone tolerates minimal moisture while stainless steel benefits from periodic degreasing. Refractory brick sits somewhere in between but leans heavily toward dry cleaning methods.
Your oven manual should list the interior material type. If it doesn't, take photos and contact the manufacturer before proceeding. A wrong move now costs far more than a five-minute identification step.
Identify Your Oven Type Before You Touch a Brush
Spending two minutes identifying your oven's interior material saves hours of wrong cleaning and prevents costly repairs down the line.
Three common cooking surface materials and how to tell them apart
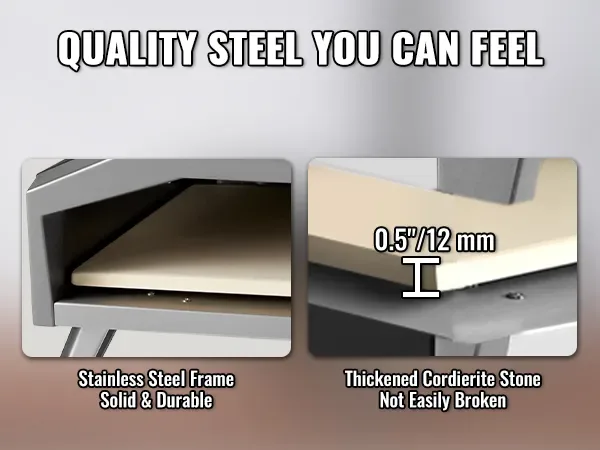
Cordierite stone looks like dense, speckled ceramic. It typically appears light gray or beige and often sells as a removable floor tile. These stones feel matte and slightly textured to the touch.
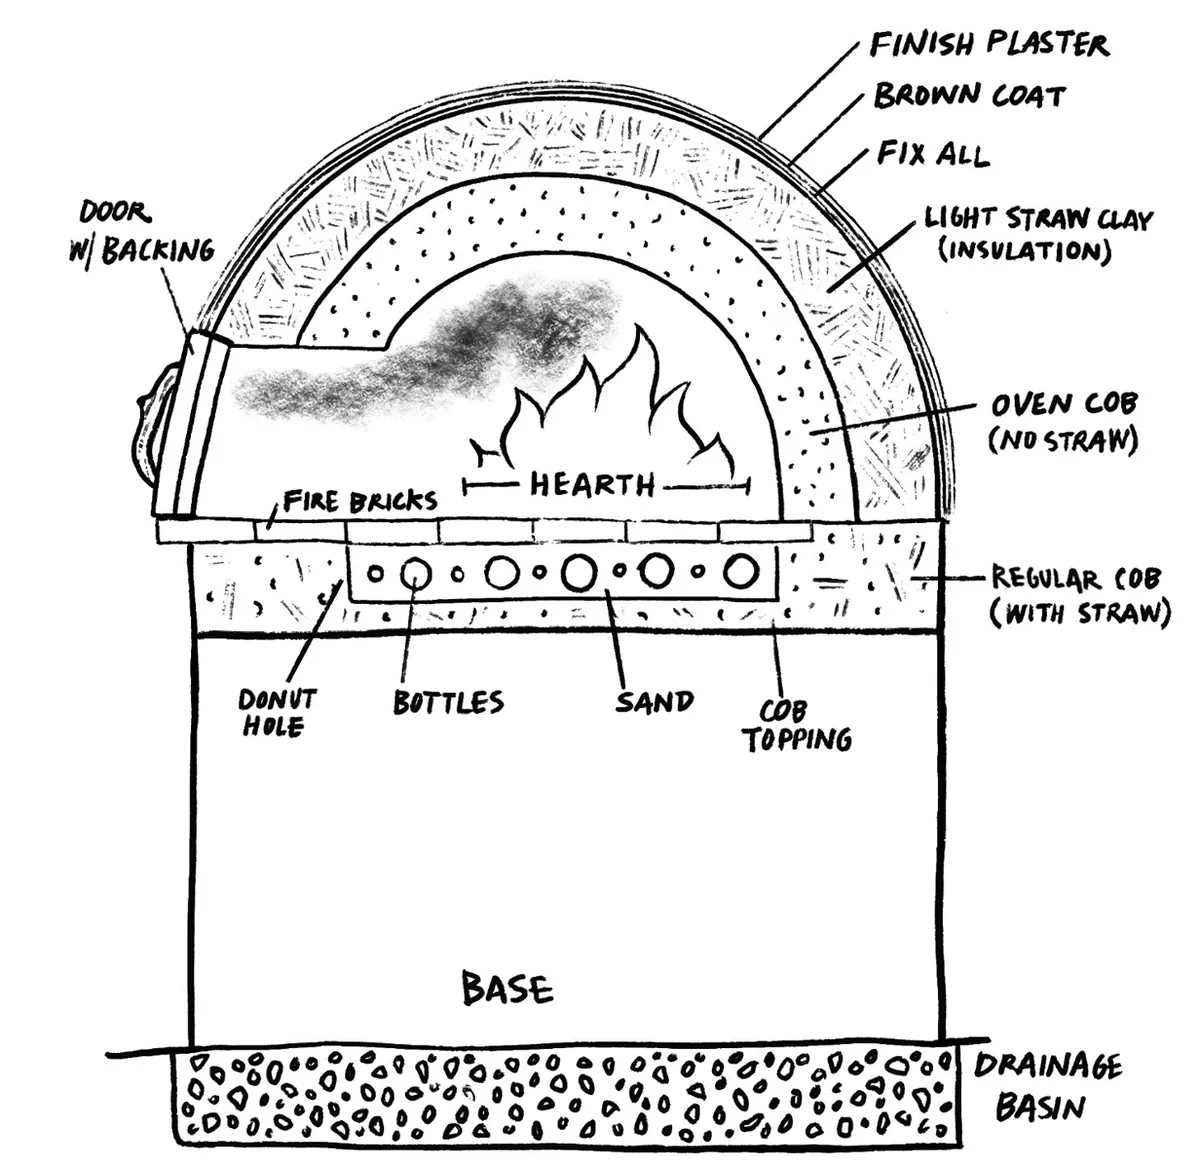
Refractory brick appears as layered, firebrick-style blocks with a rougher texture. These show up most often in traditional wood-fired ovens. The reddish-brown color and visible layering give it away quickly.
Stainless steel interior presents a shiny, metallic surface. You'll find this in most gas and electric pizza ovens. The brushed or polished finish feels smooth and distinctly metallic compared to stone or brick.
Where else to look for clues
Check your owner's manual first. Most manufacturers list interior materials right in the specifications section near the top of the document.
Look for brand-specific terminology on the oven website or original packaging. Terms like "cordierite hearth," "refractory floor," or "stainless steel cooking deck" appear frequently in product descriptions.
Run your fingers across the cool surface. Stone and brick feel matte with slight texture. Steel feels smooth with a metallic coolness that distinguishes it immediately.
Source: Bing (Web (fair-use with source credit))
Quick identification table
| Interior Material | Typical Look | Common Oven Types | Key Risk if Treated Like Another |
|---|---|---|---|
| Cordierite stone | Speckled, matte, light gray or beige | Wood, gas, and electric portable ovens | Cracking from thermal shock or excess moisture |
| Refractory brick | Layered, rough, reddish-brown | Traditional wood-fired ovens | Grinding debris into pores, reducing insulation |
| Stainless steel | Shiny, smooth, metallic | Gas and electric dome ovens | Stripping seasoning, scratching finish |
When you're still unsure
Assume your oven contains stone or brick until proven otherwise. Those materials tolerate far less abuse than steel, and playing it safe protects your investment.
Contact the manufacturer with clear photos and your model number for definitive guidance. Most brands respond within a few business days with material specifications.
Do not test-clean a hidden spot without checking warranty terms first. Some manufacturers consider unauthorized testing a warranty violation even when no damage occurs.
Clean by Your Oven's Material: Branch-Specific Steps

Image source: Bing (Web (fair-use with source credit))
Each oven material has its own safe cleaning routine. Follow the branch that matches your oven and never cross them.
Cordierite stone floors
Always let the oven cool completely before touching the interior. Aim for below 150°F or about 65°C before starting any cleaning work.
Remove loose ash and debris with a dry brush or specialized oven vacuum. Work from the back toward the door to avoid tracking residue across cleaned areas.
For stuck-on residue, gently scrape with a plastic putty knife rather than metal tools. Metal scrapers gouge the stone surface and create nesting spots for future buildup.
If needed, dampen a cloth lightly with water and wipe the surface. Never soak or spray water directly onto cordierite stone. Even small amounts of standing water cause damage over time.
Allow the stone to air-dry fully before closing the oven or applying a cover. Trapped moisture promotes mold growth and weakens the stone structure.
Never use soap, vinegar, or commercial cleaners on cordierite unless the manufacturer explicitly approves it. These substances absorb into porous stone and affect food flavor permanently.
Stainless steel interiors
Cool the oven fully before starting your cleaning session. Warm steel reacts unpredictably to cleaners and liquids.
Wipe down loose ash and flour with a dry microfiber cloth first. Removing dry debris prevents creating mud when liquids enter the chamber.
For grease buildup, use a one-to-one mix of white vinegar and water on a soft cloth. Vinegar cuts grease without damaging the steel surface or leaving harmful residues.
For tougher residue, make a baking soda paste using three parts baking soda to one part water. Apply the paste briefly, then wipe clean with a damp cloth.
Rinse thoroughly with a clean damp cloth and dry immediately to prevent water spots. Leaving moisture on steel invites rust formation over time.
Avoid abrasive scrubbers, steel wool, or bleach-based cleaners at all costs. These scratch the finish and strip any existing seasoning layer.
Optionally apply a thin layer of food-safe mineral oil to maintain seasoning on steel decks between uses. This step preserves the natural non-stick properties built up during cooking.
Refractory brick decks
Cool the oven completely, then sweep out ash with a soft-bristle brush designed for high-heat use.
Use a dry brush to remove surface carbon without grinding particles deeper into the pores. Push debris toward the door opening for easy collection.
For baked-on dough or cheese, scrape gently with a plastic scraper tool. Metal tools scratch brick surfaces and create rough spots where food sticks permanently.
Avoid liquids whenever possible since moisture absorption weakens brick over repeated cycles. Water trapped inside refractory material causes spalling and structural damage.
If washing becomes absolutely necessary, use minimal water and a stiff brush only. Allow extended drying time, ideally 24 hours, before running the oven again.
Never apply sealants, oils, or chemical cleaners to refractory brick unless the manufacturer specifies approval. These products clog porous brick and affect heat distribution.
Safety Steps and Common Mistakes That Cost Ovens
Skipping safety protocols turns routine cleaning into expensive repair bills or complete oven replacement. Understanding what not to do matters as much as knowing what to do.
Non-negotiable safety rules
Never attempt cleaning while the oven remains warm. Beyond burn risks, thermal shock from cleaning liquids on warm surfaces causes immediate cracking in stone and brick materials.
Wear heat-resistant gloves when handling ash or scraping tools near residual warmth. Ash retains heat longer than most people expect, even hours after cooking ends.
Work in a well-ventilated area whenever removing ash or applying any cleaning solution. Enclosed patio spaces concentrate fumes and particulate matter dangerously.
Keep children and pets completely away from the oven during the entire cleaning process. Curious hands reach for hot tools and spilled cleaning solutions without warning.
Dispose of cooled ash in a sealed metal container following local waste guidelines. Ash containers must remain closed until contents reach room temperature to prevent spontaneous combustion.
Do not use pressure washers or hose streams on any oven interior surface. High-pressure water forces itself into seams and creates damage far worse than gentle cleaning methods.

Source: Web (Bing) / amazon.com (Web image (fair-use with source credit))
Five mistakes that break ovens and void warranties
Spraying water on hot stone causes immediate cracking from thermal shock. This single mistake destroys most cordierite floors within one cooking season.
Using steel wool or abrasive pads on steel interiors scratches the surface permanently. Those scratches become nesting spots for grease and char that regular cleaning can't remove.
Applying soap or detergent to unglazed stone or brick absorbs residue into pores. That residue affects food flavor for months and may trigger warranty denial claims.
Scraping with metal tools on any interior surface gouges and creates debris traps. Deep gouges require professional resurfacing or complete floor replacement.
Covering the oven while damp inside traps moisture against sensitive surfaces. This condition promotes rust on steel and accelerates deterioration in stone and brick assemblies.
When to stop and seek professional help
Visible cracks, chips, or spalling on the cooking surface signal immediate failure risk. Stop using the oven and contact the manufacturer before attempting further operation.
Persistent off-odors after thorough cleaning that survive multiple burn-off cycles indicate deep contamination. These odors often require professional restoration services beyond homeowner capabilities.
Rust spots spreading across steel interiors despite proper drying and maintenance suggest material defects or manufacturing issues. Professional assessment determines whether treatment continues or replacement becomes necessary.
Uncertainty about your oven's material identity warrants manufacturer consultation. Sending clear photographs along with your model number usually resolves confusion within days.
How Often to Clean: A Practical Maintenance Schedule
Regular care prevents heavy buildup and extends your oven's lifespan without requiring professional servicing every few months.
After every use
Remove large ash piles and food debris once the oven reaches a safe touching temperature. Even a quick sweep prevents carbon from baking onto surfaces during cooling.
Perform a light dry-brush pass across the cooking surface to remove loose flour and char particles. Ten seconds of brushing prevents hours of scraping later.
Wipe the exterior with a dry cloth to remove fingerprints, dust, and cooking splatter. Exterior buildup attracts moisture and accelerates finish deterioration over time.
Weekly during active seasons
Complete full ash removal from wood-fired ovens at least once each week. Accumulated ash insulates the floor and reduces heat efficiency noticeably.
Inspect the cooking surface for any stuck residue requiring targeted attention. Addressing small spots weekly prevents full deep-cleaning sessions monthly.
Check door gaskets and seals for accumulated debris blocking proper closure. Clean gasket channels with a soft brush and damp cloth.
Clean exterior stainless steel surfaces with appropriate cleaner if the oven sees frequent weekend use. Fingerprints and cooking spray accumulate faster than expected.
Monthly or after heavy use
Conduct detailed scraping and cleaning of the cooking surface following material-specific guidelines from earlier sections. Monthly deep cleans prevent the buildup that causes permanent damage.
Inspect for early signs of wear, cracking, or surface deterioration worth addressing before worsening. Catching problems early saves hundreds in potential repairs.
Verify that ash removal pathways and ventilation ports remain completely clear. Blocked vents force the oven to work harder and burn fuel less efficiently.
Apply optional steel deck seasoning treatment if your manufacturer recommends periodic re-oiling between uses.
Seasonal deep care
Perform a complete interior inspection and thorough cleaning before storing the oven for winter months. Winter storage prep prevents moisture damage during dormant periods.
Ensure all interior surfaces sit bone-dry before applying any cover or storing the unit. Trapped moisture during storage causes rust, mold, and stone degradation far worse than summer neglect.
Store removable components indoors if your manufacturer's documentation recommends this practice. Indoor storage protects expensive parts from weather exposure.
Inspect your oven cover for tears, wear, or poor fit that compromises weather protection. Replace damaged covers immediately rather than risking interior exposure.
FAQs: Fast Answers on Pizza Oven Cleaning
Can I use soap or dish detergent on my pizza oven interior?
Only if the manufacturer explicitly states it's safe. Most stone and brick surfaces absorb soap into their pores. That residue affects food flavor and may void your warranty.
Stick to dry brushing or minimal water instead.
How long should I wait after cooking before cleaning?
Wait until the interior feels cool to the touch. Most ovens need two to four hours depending on size and ambient temperature. Never clean while warm because thermal shock cracks stone instantly.
What's the best tool for removing ash?
Use a soft-bristle brush, ash shovel, or specialized pizza oven vacuum. Metal brooms scratch surfaces and grind ash into porous materials. Keep a dedicated ash brush separate from your other outdoor cleaning supplies.
How do I fix a greasy smell after cleaning?
Run the oven empty at 400°F for twenty to thirty minutes. This burn-off cycle removes any residual cleaner or loosened grease. Make sure all cleaning solutions are fully rinsed and dried first.
Is it normal for ash to turn into paste if it gets wet?
Yes. Wet ash becomes an abrasive slurry that grinds into surface pores. Always keep ash completely dry and remove it before any rain or cleaning moisture contacts the interior.
Trapped moisture weakens both stone and brick over time.
How often should I deep clean a cordierite stone floor?
Perform a deep clean after every few uses during active seasons. Monthly maintenance works if you cook weekly. Light debris removal after each cook keeps things manageable between deeper sessions.
Can I use a pressure washer on the oven exterior?
Only on exterior surfaces if your manufacturer allows it. Never direct pressurized water into interior openings, vents, or seams. Water forced into seams causes hidden damage that leads to costly repairs.
What should I do if I see small cracks in my cooking surface?
Stop using the oven immediately and contact the manufacturer. Small cracks expand rapidly under heat and create serious safety risks. Continuing to use a cracked oven risks sudden failure during a high-heat cook.

Sophia Martinez is a culinary lifestyle writer and product reviewer for DiningGadgets.com. Passionate about blending style with functionality, she explores the latest dining essentials, kitchen décor, and cleaning hacks that transform everyday cooking spaces. With a background in home organization and design, Sophia brings readers expert advice on creating beautiful, practical kitchens that truly feel like the heart of the home.