How to Secure Kitchen Cabinets to Wall: Easy Steps for Lasting Strength
Loose, tilting wall cabinets are more than a nuisance—they’re a serious home safety hazard. The U.S. Consumer Product Safety Commission estimates unsecured falling furniture causes roughly 10,000 emergency room visits each year, and kitchen cabinets are a common culprit, especially when loaded with dishware, small appliances, and pantry staples. Many homeowners assume mounting cabinets requires professional expertise, but with the right tools, precise measurements, and adherence to proven installation standards, you can complete this DIY project safely and ensure your cabinets stay firmly in place for decades. This guide walks you through every step, from selecting the correct hardware to long-term maintenance, with actionable tips to avoid common, costly mistakes.
Why Proper Cabinet Mounting Is Non-Negotiable
It’s not just about preventing cabinets from crashing onto countertops or floors (though that’s a major concern). Poorly mounted cabinets can pull away from the wall over time, damaging drywall, cracking tile backsplashes, and even compromising the structural integrity of your kitchen’s framing if excessive force is applied. Upper cabinets loaded with heavy cast iron cookware or glass can exert 150+ pounds of downward force, so a weak mount will fail eventually, often when you least expect it—like when you’re reaching for a heavy mixing bowl. Beyond safety, secure cabinets keep doors and drawers aligned, preventing sticking and wear that shortens the lifespan of your cabinetry investment. A common mistake DIYers make is relying solely on plastic drywall anchors for upper cabinets, which can fail under the weight of 20+ plates and glassware after just a few years of use. In practice, mounting directly to wall studs eliminates this risk entirely. For more on this, see our guide on how to regrout kitchen wall tiles easy steps.
Tools and Materials You’ll Need
Having all supplies on hand before you start will cut down on frustration and ensure a smooth installation. Use this checklist to avoid mid-project trips to the hardware store:
| Category | Item | Purpose |
|---|---|---|
| Tools | Stud finder (with live wire detection) | Locate wall studs and avoid electrical wiring/plumbing |
| Tools | 4-foot spirit level | Ensure horizontal and vertical alignment of cabinets |
| Tools | Power drill with screwdriver bits and drill bits | Drive screws and pre-drill pilot holes |
| Tools | Tape measure | Take accurate placement and spacing measurements |
| Tools | Pencil | Mark stud locations and layout lines on the wall |
| Tools | Safety glasses | Protect eyes from drywall dust and debris |
| Tools | Cabinet lift or helper | Support heavy cabinet weight during installation |
| Materials | 2.5–3 inch wood screws (or masonry screws for concrete/brick) | Fasten cabinets directly to wall studs |
| Materials | L-brackets or cabinet hanging rails | Extra support for heavy cabinets or uneven walls |
| Materials | Wall anchors (toggle bolts, masonry anchors, or molly bolts) | For areas where you cannot hit a stud |
| Materials | Wood filler and caulk | Repair small holes and seal gaps between cabinet and wall |
Choosing the Right Hardware for Your Setup
Hardware selection depends on two key factors: the weight of your cabinets and the type of wall you’re mounting to. Standard upper wall cabinets hold 100–200 lbs when fully loaded, so your hardware must match that load capacity.
- For drywall/plaster walls with 16-inch on-center studs (standard in homes built after 1950): Use 2.5–3 inch coarse-thread wood screws driven directly into the stud. Skip plastic drywall anchors entirely for upper cabinets, as they can pull out under repeated weight.
- For plaster walls with 24-inch on-center studs (common in homes built 1920–1950): Add a wooden mounting board spanning two adjacent studs, then attach the cabinet to the board for extra support, or use heavy-duty toggle bolts rated for 100+ lbs each if you cannot hit a stud.
- For masonry, brick, or concrete walls: Use masonry anchors and screws designed for stone, with a minimum 2-inch penetration into the masonry.
For extra support, L-brackets reinforce the top corners of cabinets, while hanging rails (ledger strips) run horizontally along the back of the cabinet and rest on a wall-mounted ledger for even weight distribution. Always check a bracket’s weight rating before purchasing, as undersized brackets will fail under heavy loads. If you’re installing cabinets above a countertop, use a ledger strip temporarily to rest the cabinet on while you secure it, which eliminates the need to hold the full weight overhead for long periods.
 Credit: www.cabinetjoint.com
A ledger strip provides extra support for heavy upper cabinets, especially when studs are spaced 24 inches apart.
Credit: www.cabinetjoint.com
A ledger strip provides extra support for heavy upper cabinets, especially when studs are spaced 24 inches apart.
Step-by-Step Cabinet Mounting Process
Follow these steps in order to ensure a secure, level installation that lasts for years.
Step 1: Prep the Wall and Locate Studs
Before drilling, clear the installation area of all obstacles, and use a stud finder with live wire detection to scan for electrical wiring or plumbing behind the wall—this is a critical safety step many DIYers skip. Mark the center of each stud with a pencil, and confirm you’ve hit solid wood by drilling a small test hole: if you feel resistance after 0.5–1 inch of drilling, you’re in the stud. For plaster walls, tap the wall to listen for a solid, low-pitched sound (hollow walls make a high-pitched sound) to cross-check stud locations. If you’re removing an old wall-mounted faucet before installing cabinets, follow our step-by-step removal guide to avoid damaging the wall or plumbing. If your cabinets span multiple studs, mark each one along the horizontal line where the cabinet’s top rail will sit.
Step 2: Mark Precise Placement and Layout Lines
Use a 4-foot spirit level to draw a perfectly horizontal line across all marked studs, at the exact height where the bottom of your cabinet’s top rail will rest. If you’re installing cabinets above existing base cabinets, measure up from the countertop to ensure consistent spacing (standard spacing is 18 inches between countertop and bottom of upper cabinets, per National Kitchen and Bath Association guidelines). For multiple cabinets, mark the exact spacing between each unit on the wall first, then hold each cabinet up to the layout line to confirm alignment before drilling any mounting holes. Double-check all marks with a level to avoid crooked cabinets that will cause doors to swing open or shelves to sit unevenly.
Step 3: Drill Pilot Holes and Prep Mounting Hardware
Pre-drill pilot holes through the cabinet’s hanging rail or top back panel at each marked stud location, using a drill bit slightly smaller than the screw shank. This prevents the wood from splitting and makes driving screws far easier, especially for hardwoods like maple or oak. If you’re using L-brackets, attach them to the back of the cabinet first, aligning the bracket holes with your pre-drilled pilot holes. For extra heavy cabinets, attach a hanging rail to the back of the cabinet per the manufacturer’s instructions, which will rest on a wall-mounted ledger for added support. Wear safety glasses during this step to avoid inhaling drywall dust or getting debris in your eyes.
 Credit: www.create-enjoy.com
Pre-drilling pilot holes prevents splitting the cabinet rail and ensures accurate screw placement.
Credit: www.create-enjoy.com
Pre-drilling pilot holes prevents splitting the cabinet rail and ensures accurate screw placement.
Step 4: Lift, Position, and Secure the Cabinet
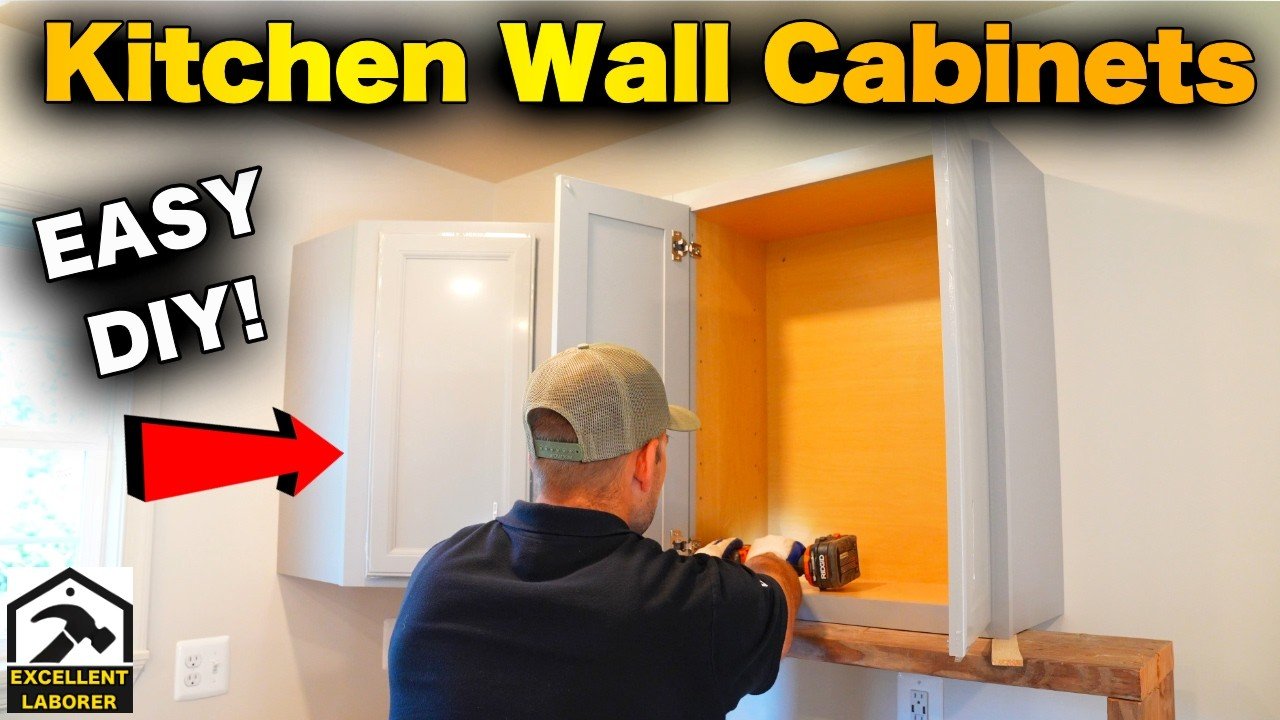
Enlist a helper or use a cabinet lift to support the full weight of the cabinet during installation—upper cabinets can weigh 50+ lbs empty, and adding contents makes them far heavier. Align the cabinet’s pilot holes with the marked stud locations on the wall, then drive the screws through the cabinet into the stud. For wood studs, use 2.5–3 inch coarse-thread screws, which grip wood far better than fine-thread drywall screws. The National Kitchen and Bath Association recommends screws penetrate studs by at least 1.5 inches to support the full weight of loaded cabinets. Drive screws until the cabinet is snug against the wall, but avoid overtightening, which can strip the screw hole in the stud or crack the cabinet’s back panel. Check the cabinet’s level with a 4-foot spirit level after each screw is driven, and make small adjustments as needed before moving to the next screw.
Step 5: Verify Stability and Complete the Installation
Once all screws are driven, push firmly on the front of the cabinet to test for wobble or movement. Open and close all doors and drawers to confirm they align properly, and tighten any loose screws if needed. If there are small gaps between the back of the cabinet and the wall, fill them with paintable caulk to prevent moisture and grease from seeping behind the cabinet, which can cause mold and weaken the mount over time. For multiple cabinets, ensure the front edges are flush with adjacent units, and add small mounting brackets between cabinets to tie them together for extra stability.
 Credit: www.create-enjoy.com
Verify level both horizontally and vertically before tightening all mounting screws to avoid crooked cabinets.
Credit: www.create-enjoy.com
Verify level both horizontally and vertically before tightening all mounting screws to avoid crooked cabinets.
Troubleshooting Common Mounting Issues
Even with careful planning, small issues can pop up during installation. Here are fixes for the most common problems:
- Cabinet won’t sit level: If the floor or wall is uneven, use shims behind the cabinet to adjust the height before tightening screws. Hide shims from view by trimming them flush with a utility knife after installation.
- Screws won’t penetrate the stud: If the screw feels like it’s hitting a metal plate or hard obstruction, move the hole 1–2 inches left or right to find solid wood, or use a heavier-duty toggle bolt rated for the cabinet’s weight.
- Cabinet pulls away from the wall after a few months: This is almost always caused by using undersized screws or anchors that can’t support the load. Remove the cabinet, fill the old screw holes with wood filler, and redrill into a nearby stud or use a mounting board spanning two studs for extra support.
- Doors won’t align after installation: Adjust the cabinet’s position slightly before fully tightening the screws, or use the adjustable hinges on the cabinet doors to realign them once the cabinet is mounted.
Long-Term Maintenance for Lasting Strength
Securing your cabinets is only half the battle—regular maintenance ensures they stay safe for years. Inspect all mounting screws every 6 months, looking for signs of loosening, rust, or wood rot around the screw holes. Tighten any loose screws immediately, and replace rusted or damaged screws with new, matching hardware. Avoid overloading cabinets with excessively heavy items: while upper cabinets are designed to hold dishware and small appliances, stacking 50+ lbs of cast iron cookware on a single shelf puts unnecessary stress on the mounts. If you notice water damage, warping, or mold behind the cabinet, address the moisture issue first, then re-secure the cabinet to avoid further damage to the wall or cabinetry. If you remodel your kitchen or move large appliances, recheck the cabinet mounts to ensure they remain tight and secure.
When to Call a Professional
While mounting wall cabinets is a straightforward DIY project for most homeowners, there are cases where professional help is worth the investment. If you’re working with load-bearing walls, crumbling plaster, or cabinets that weigh more than 200 lbs each, a licensed contractor can assess the wall’s structural integrity and use specialized hardware to ensure a safe mount. If you’re uncomfortable drilling into walls with hidden electrical or plumbing, or if your layout requires custom cuts to fit odd-shaped spaces, hiring a pro will save you time and avoid costly mistakes. For complex kitchen remodels, a professional can also ensure all cabinets are aligned perfectly for a seamless finish.
Frequently Asked Questions
How do I find studs for securing kitchen cabinets?
Use a stud finder with live wire detection to scan the wall, then confirm stud locations by tapping the wall to listen for a solid, low-pitched sound. Mark the center of each stud with a pencil, and drill a small test hole to confirm you’ve hit solid wood before mounting cabinets.
What type of screws are best for kitchen cabinets?
For wood studs, use 2.5–3 inch coarse-thread wood screws, which grip wood securely and support the full weight of loaded upper cabinets. For masonry walls, use masonry screws compatible with concrete or brick anchors, with a minimum 2-inch penetration into the wall material.
Can I secure kitchen cabinets without studs?
Yes, but only for lighter cabinets (under 50 lbs) using heavy-duty toggle bolts or molly bolts rated for the cabinet’s weight. For standard upper cabinets holding dishware and appliances, mounting directly to studs is far safer and more reliable long-term.
Should cabinets be secured at the top or bottom?
Secure cabinets at both the top and bottom hanging rails if possible, to distribute weight evenly and prevent wobbling. If you can only hit one set of studs, prioritize the top rail, as it bears the majority of the cabinet’s weight.
How much weight can wall cabinets hold?
Standard upper wall cabinets are rated to hold 100–200 lbs when evenly distributed across shelves. Overloading cabinets with heavy items like cast iron cookware or bulk pantry goods can put excess stress on the mounts and increase the risk of failure.
Can I mount cabinets on a tiled wall?
Yes, but you’ll need a masonry bit to drill through the tile, and masonry anchors rated for tile and the wall material behind it (usually drywall or concrete). Be sure to drill slowly to avoid cracking the tile, and seal the screw holes with caulk to prevent moisture from seeping behind the tile.
Conclusion
Securing kitchen cabinets to the wall is a simple, low-cost project that protects your family, preserves your cabinetry investment, and prevents costly damage to your home. By taking the time to locate studs, choose the right hardware, and follow precise installation steps, you can ensure your cabinets stay level, stable, and secure for decades. Regular twice-yearly inspections and small maintenance fixes will extend the life of your installation even further. If you’re planning a full kitchen refresh after securing your cabinets, our guide to coordinating wall colors with green cabinetry and wall color pairings for brown kitchen cabinets can help you tie the whole space together for a cohesive, polished look. If you’re tackling other wall-mounted kitchen projects, our step-by-step guide to removing a wall-mounted kitchen faucet walks you through that process safely and efficiently.